4 CNC-Made Shop Helpers

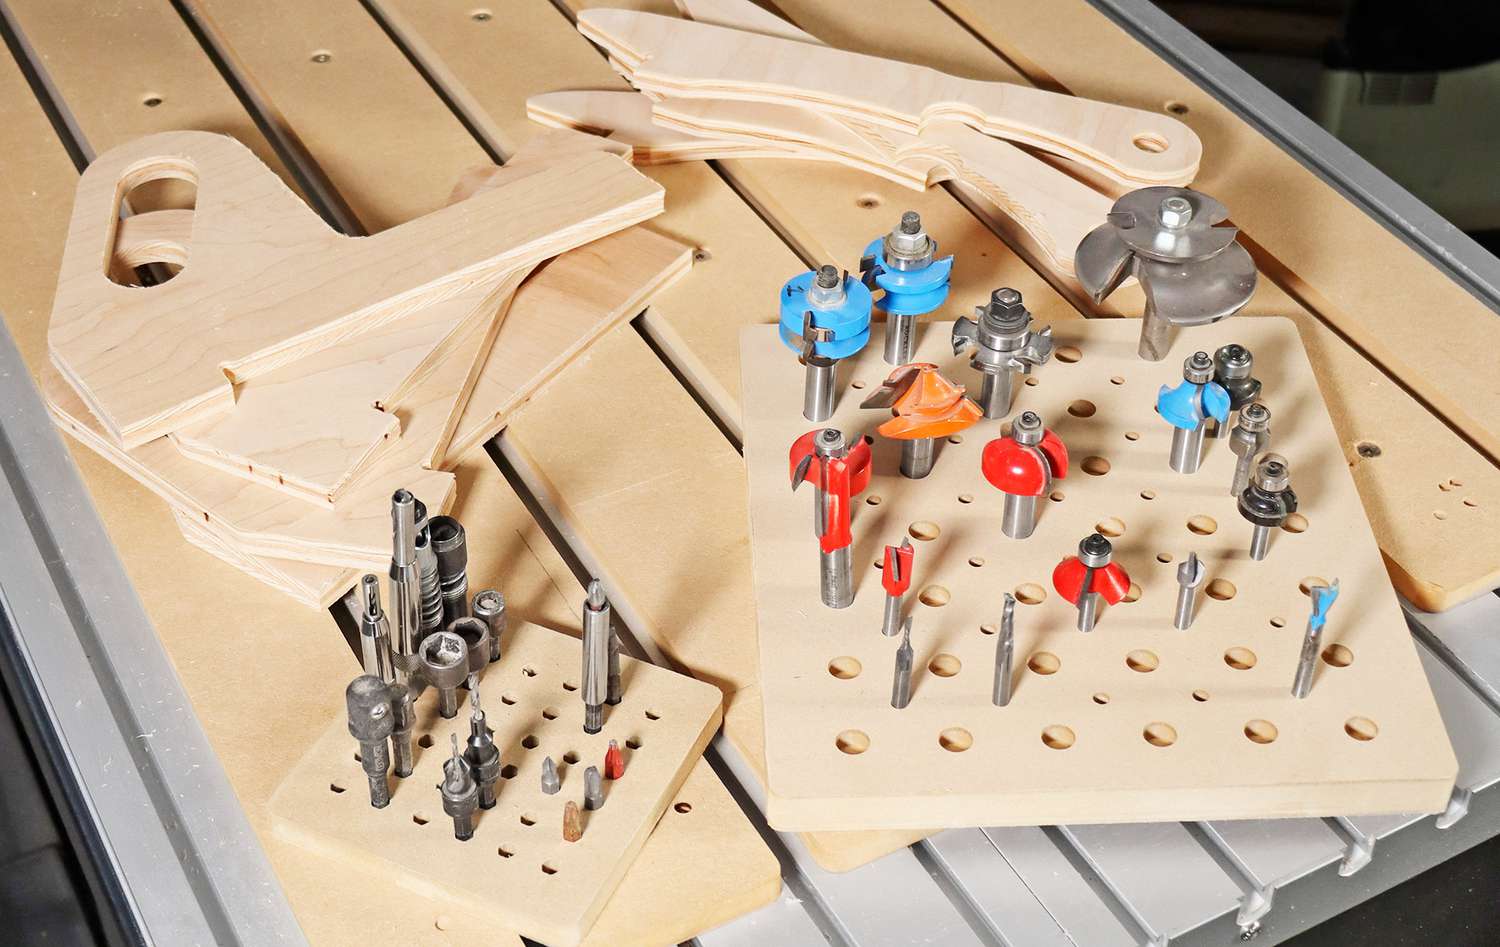

Over the years, I've created a bunch of ways to hold router bits and drill bits, and I've made more than a few pushsticks. My CNC proves the perfect tool for shop helpers like these, because I can easily pull up the saved files and make more any time I want. In addition to making these items for my own shop, I've made and given away a boatload to other woodworkers.
We're providing you with VCarve.crv files (Version 9.5) and DXF files, so you don't have to do any design work. You'll need to make test cuts and possibly tweak the toolpath to get a perfect fit for your router bits and hex drivers. I'll help you with that, and show you how to nest the pushsticks for good yield.
Router-Bit Storage Tray
A great-working router-bit tray features slightly oversized holes so it's easy to get the bits in and out. By slightly, I mean a few thousandths of an inch. That's difficult to do on a drill press, but easy on a CNC. I've found that oversizing the holes for 1/4" shanks by .007" and the holes for 1/2" shanks by .009" works well to provide clearance without slop.
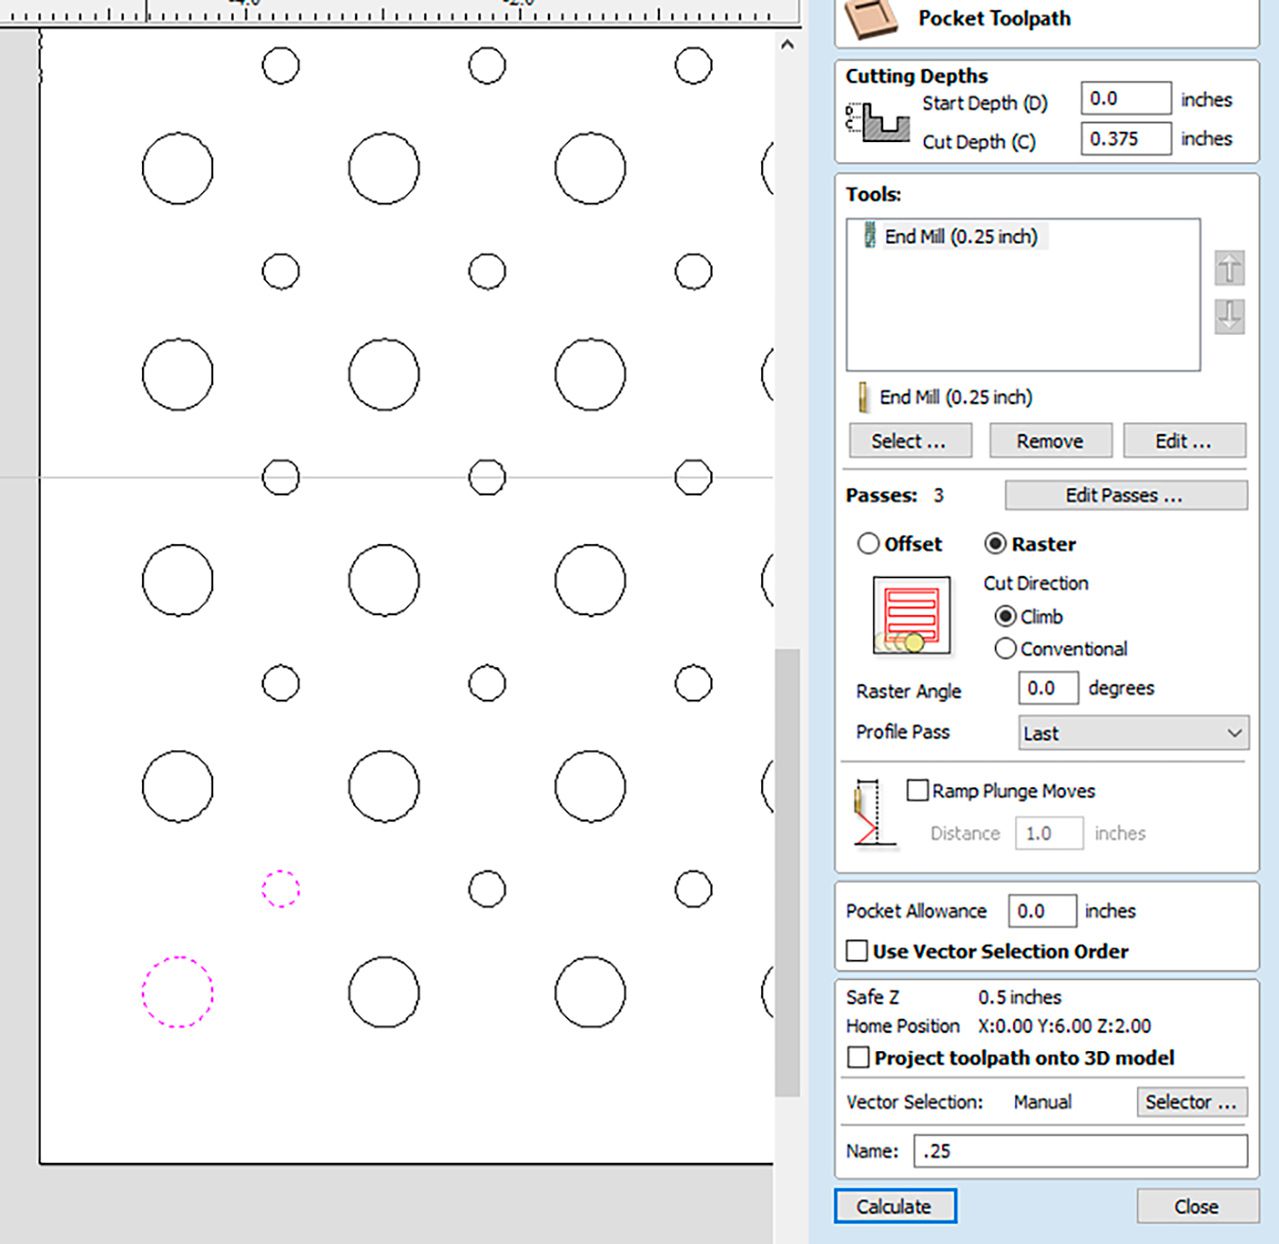
I've provided two sizes of trays. If those sizes aren't what you need, copy and paste holes onto a larger tray, or delete holes for a smaller tray. Load the file, select a hole of each size, and open the Pocket Toolpath, above. Specify a 1/4" upcut spiral router bit and 3/8" depth of cut. Save the toolpath and use your CNC to cut two test holes in scrap.
Check the fit using a router bit of each shank size. If your holes are too big or too small, adjust the size by cheating the software to edit the specs of the bit in your CNC. This is easier than changing the size of every hole on the tray.
To do this, open the Pocket Toolpath, click the Edit button, and change the router-bit diameter. If the holes are too large, make the bit diameter larger. If the holes are too small, make the bit diameter smaller.
Remember that any change you make to bit diameter has twice that effect on the hole size, so be conservative. A few thousandths of an inch can create a significant change in hole size.
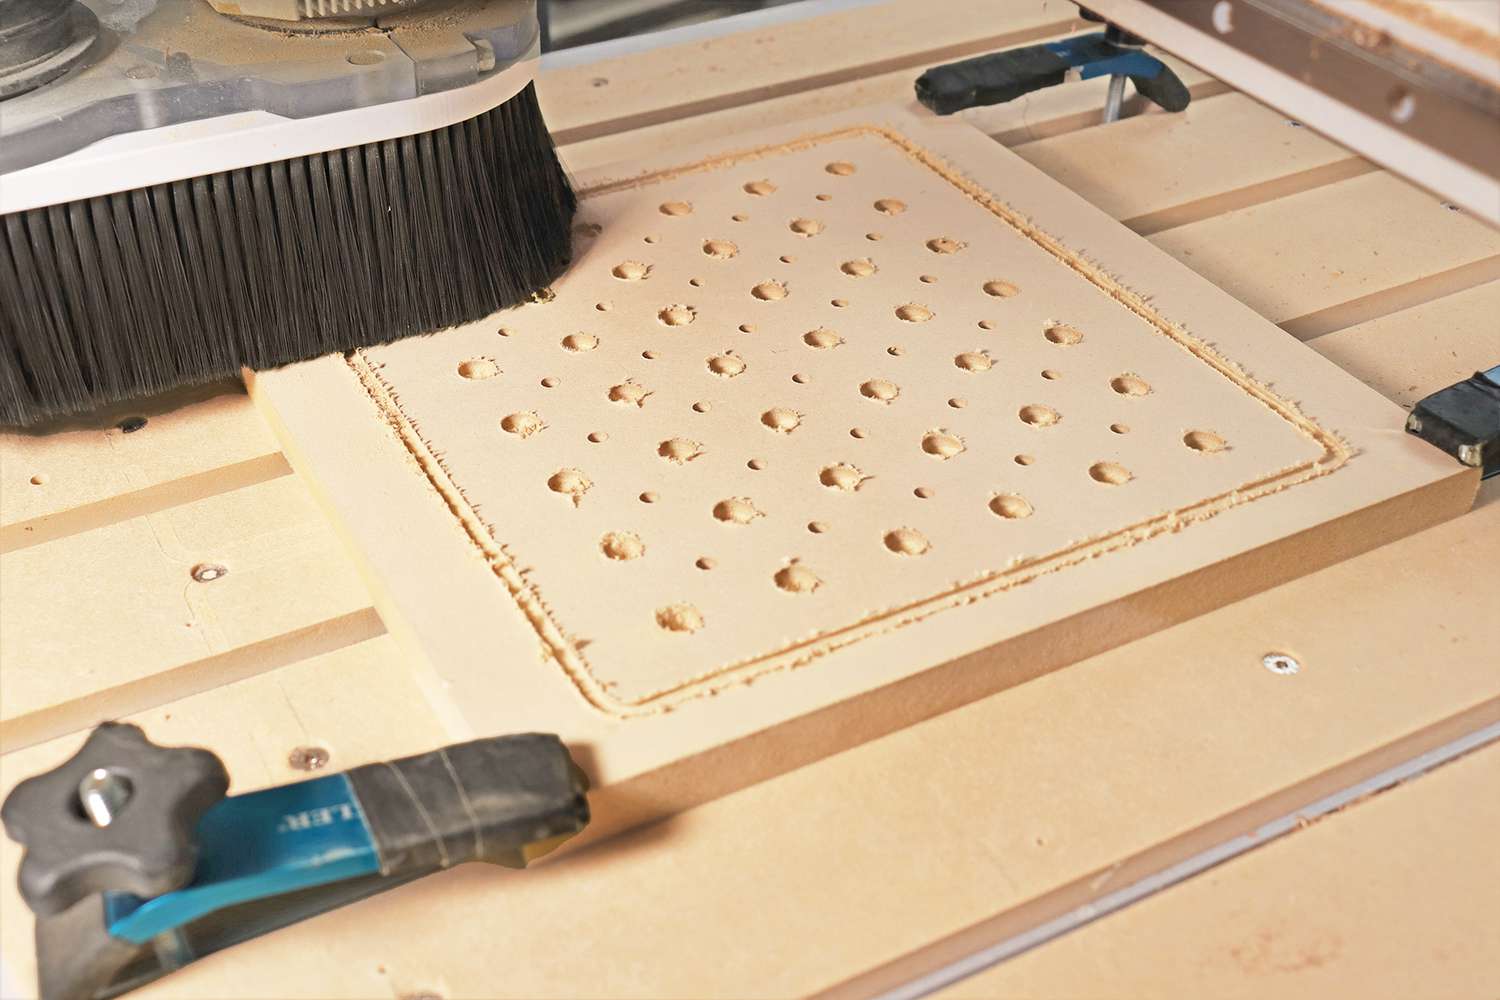
Save the toolpath and make new test cuts. Rinse and repeat until you're happy with the fit. Then create a toolpath for the rest of the holes and outside shape (use a Profile Toolpath for that), and cut your tray, above.
The files I've created for this article have tabs around the outside to hold the tray and waste together on the spoilboard. People often cut the tabs using a jigsaw and then sand, but I have an easier way. See A Panel Trimmer Makes Quick Work of Tabs, below.
Hex-Shank Driver Tray
How many driver tips do you have floating around your shop? Phillips, star, square… Add in nut drivers and all the other stuff you routinely use in your cordless drill and impact driver, and you have a herd of hex drivers happy to hide from you. You need a storage tray with hex-shaped holes to hold them. Try that with a drill press.
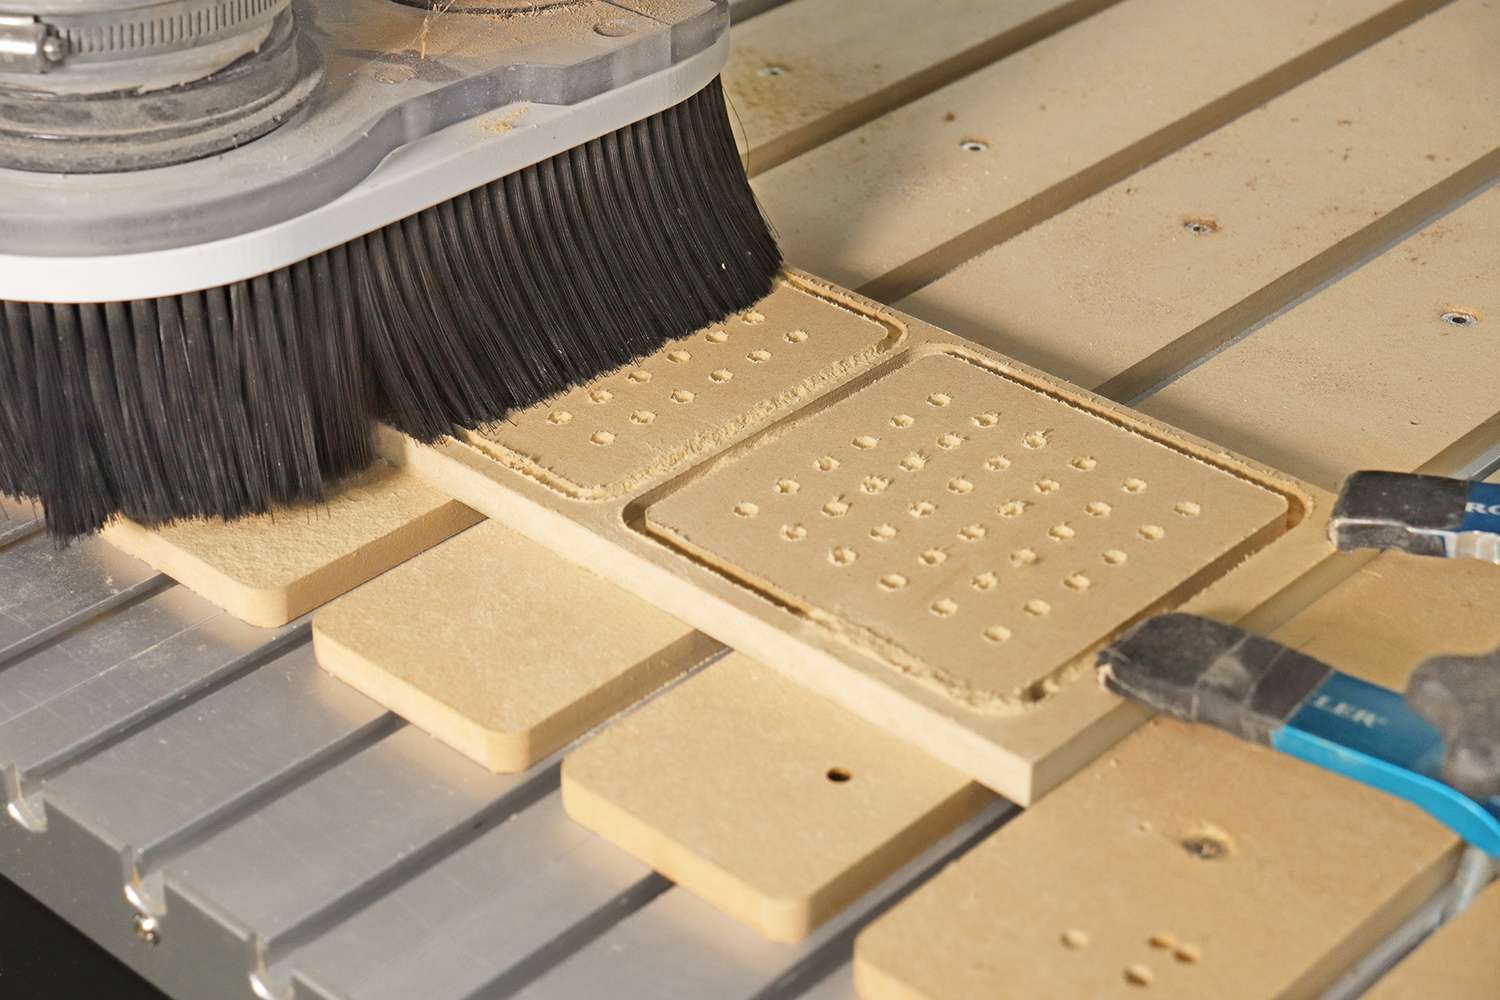
Load the design and follow the same procedure as the router-bit tray. Use the Pocket Toolpath option, a 1/8" upcut spiral router bit and 3/8" depth of cut. Save the toolpath then cut one hex hole in scrap and test the fit. Edit the diameter of the router bit as needed to tweak the fit. With that, you're ready to cut your hex-shank driver tray, above.
A Plethora of Pushsticks
There are plenty of times you need a pushstick in your shop to protect your digits. I have two stick styles for you. The slender one works great for making narrow rip cuts. The larger pushstick has a hand hole and long nose that help you keep consistent pressure during your cuts.
The provided file makes four of each style pushstick from a 24×24" piece of 1/2" plywood. If you're working with a different-size blank, you can easily nest the parts to fit your material.
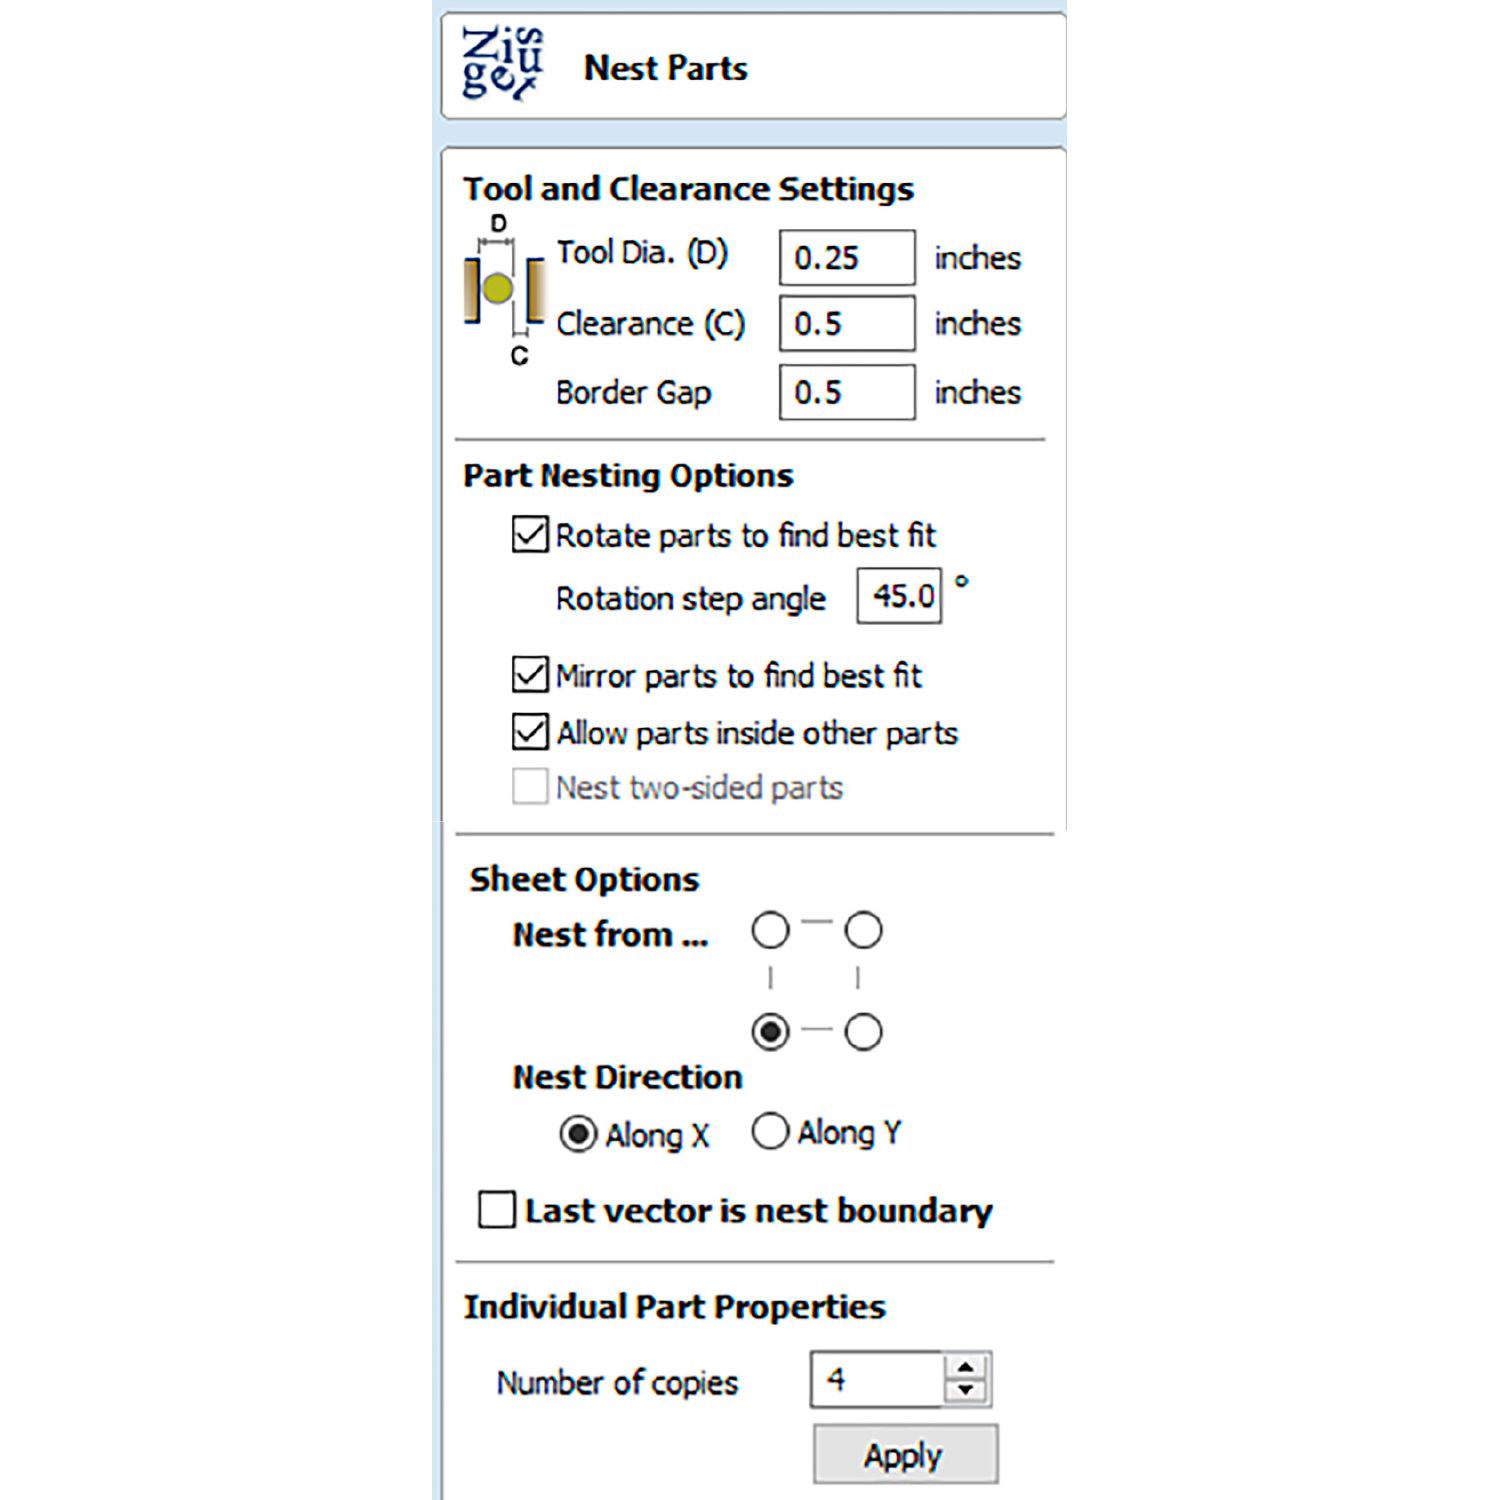
To do that, open the file and enter your material size. Copy and paste one of each pushstick into your file. Select the two pushsticks. In VCarve Pro, click on the Nesting icon. Set the nesting parameters, above. Clearance is the space between parts. Border Gap is the amount of real estate you're leaving around the edges. Allow parts to rotate and mirror to give the software the maximum control over fitting the workpieces. Grain direction isn't critical on plywood pushsticks, so rotating to 45° works fine. Click Preview.
Software like VCarve Pro provides flexibility when nesting. If, the nested parts overflow onto another sheet you can reduce the number of copies you're making, reduce the border gap (leaving enough to accommodate hold-down devices), reduce the clearance, or do all three. Experiment until you get the best combination of fit and material usage.
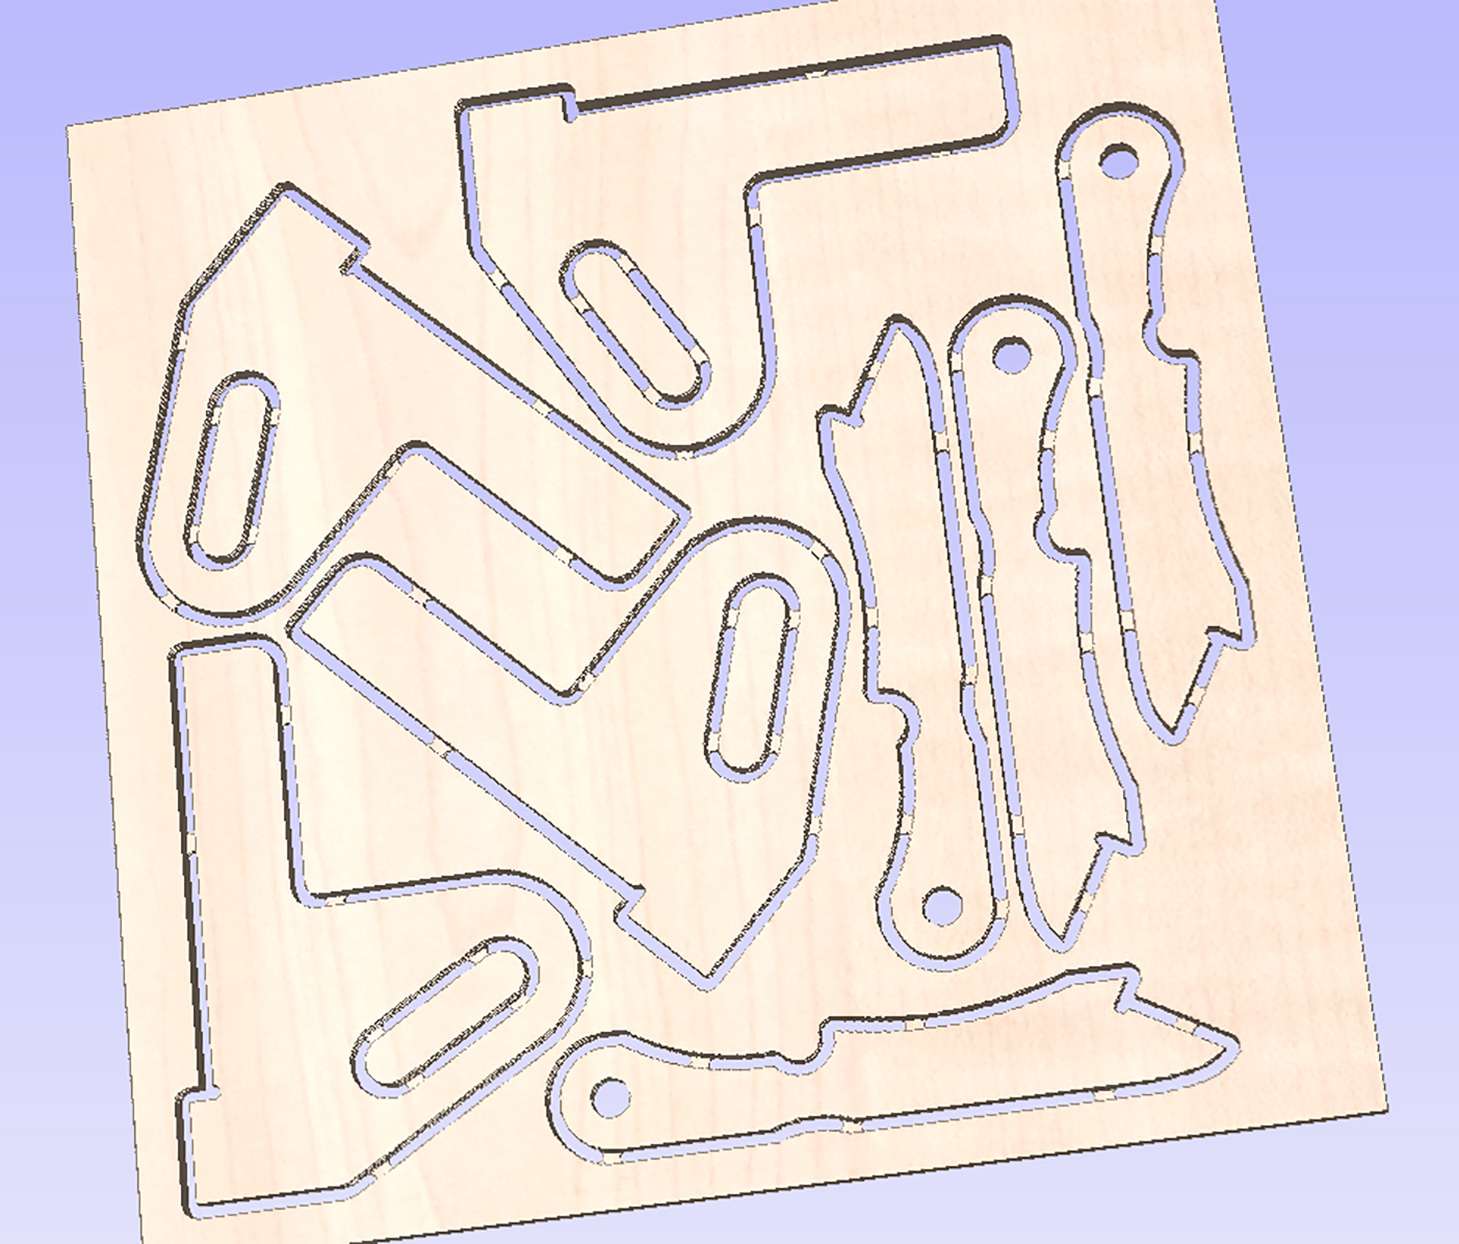
Use Profile and Pocket Toolpaths to create toolpaths for the pushsticks, and then check your work, above.
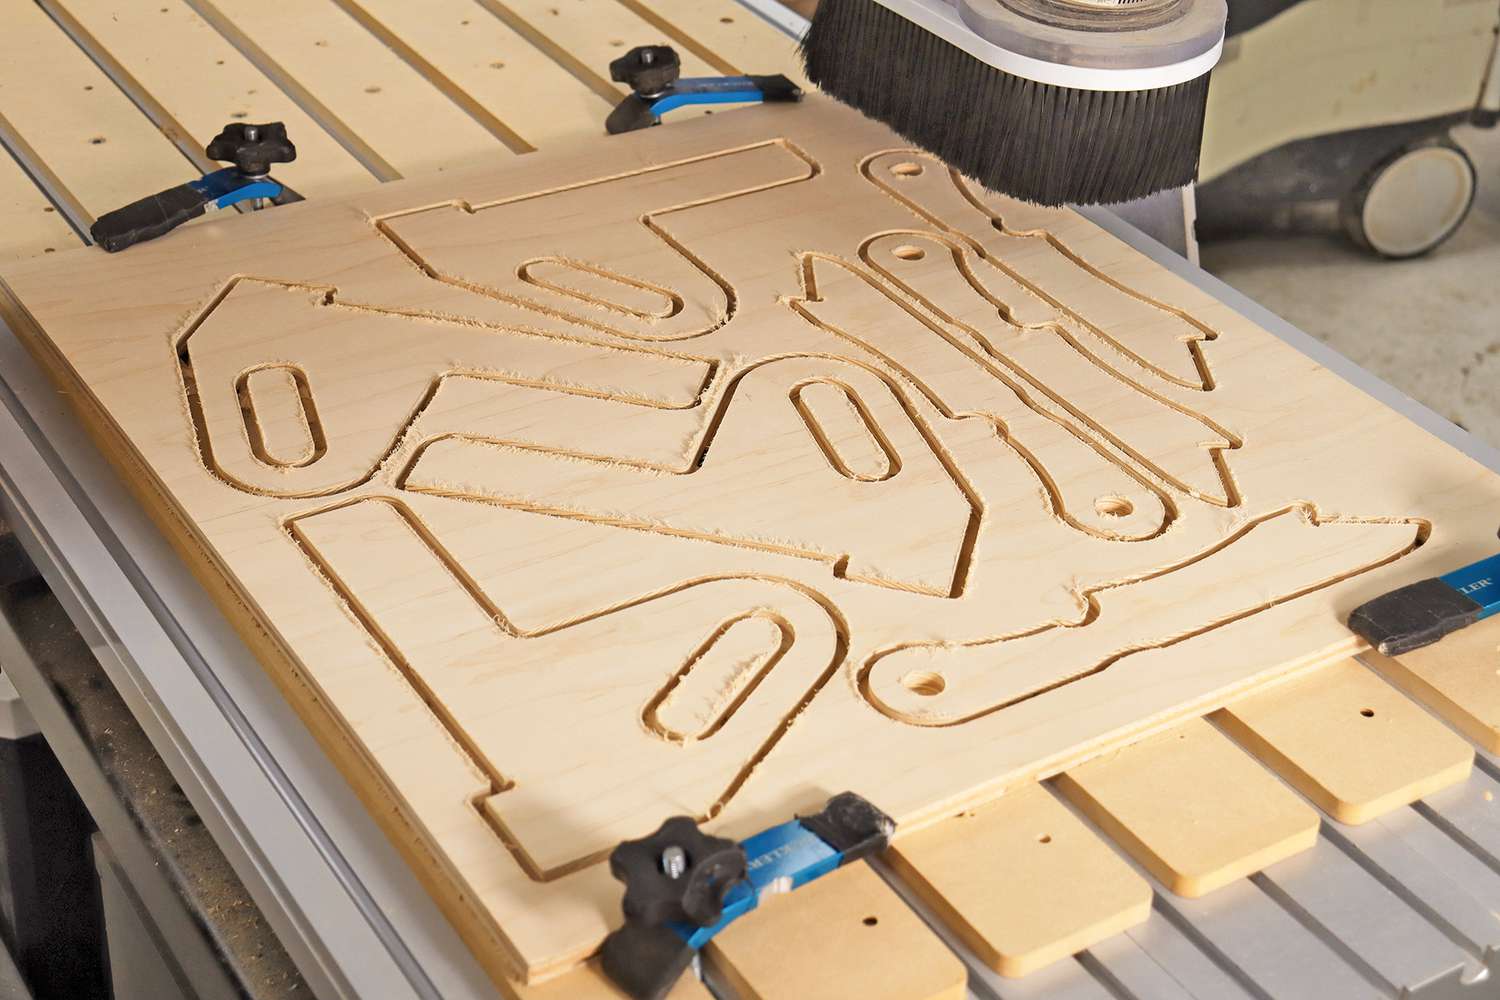
Once satisfied, it's easy to cut your pushsticks, above.
That's the beauty of creating projects like these using a CNC. You know you'll want more bit storage someday. Of course you'll wear out your pushsticks and need more. With the files saved, all you have to do is mount the right bit, add your material, and then run the program to produce more. And you can help out all those friends who will want these shop helpers without a lot of hassle. Of course, they don't have to know how easy it was. I'll never tell.
A Panel Trimmer Makes Quick Work of Tabs.
Tabs are the little bridges that hold the project to the waste wood around it. Tabs provide an easy way to keep your work secure, but later need to be cut away.
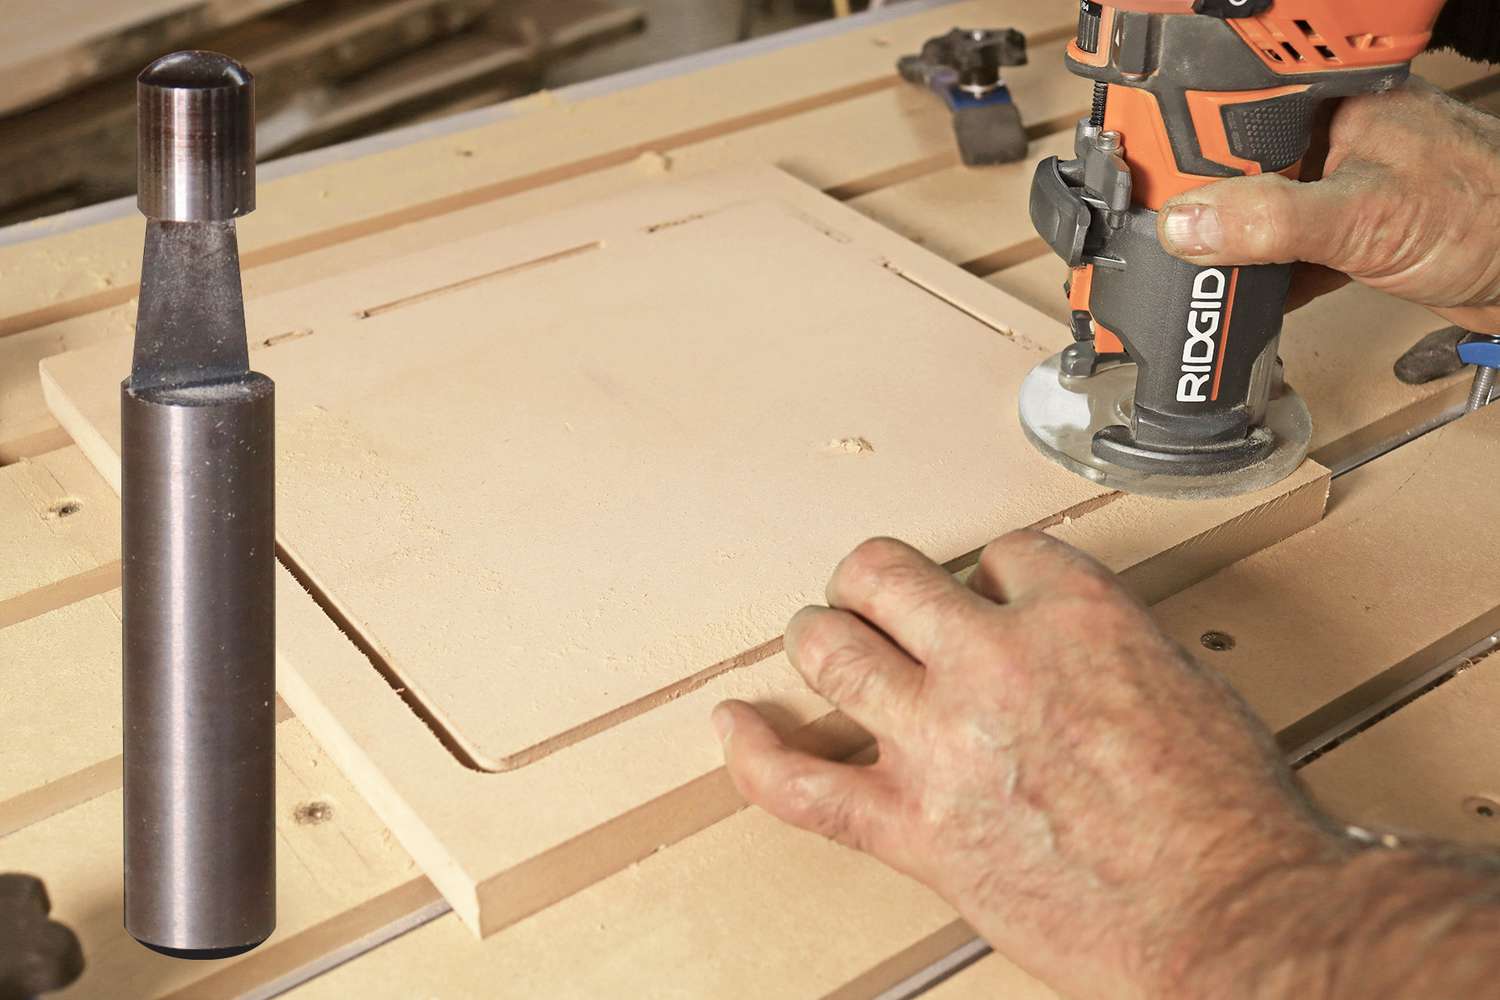
I commonly use 1/4" bits to cut the profile toolpath, so not many flush-trim bits will fit in the resulting groove. But, a panel pilot bevel bit, commonly used to trim plastic laminate, fits fine and works great.
After you remove your workpiece from the spoilboard, just flip the workpiece facedown, mount the bit in your router, and flush trim right through those tabs.