4 Ways to Attach tabletops


When joining parts or assemblies in woodworking, the goal usually is to join the parts so securely that they won't work loose or come undone. But when attaching a tabletop, you're faced with two competing objectives — attaching the top securely, while allowing it to expand and contract with seasonal changes in humidity levels. While this may seem contradictory, there are more ways than one to deal with this conundrum. Here are four methods we commonly use for fastening a solid-wood tabletop. We know one or more will serve you well.
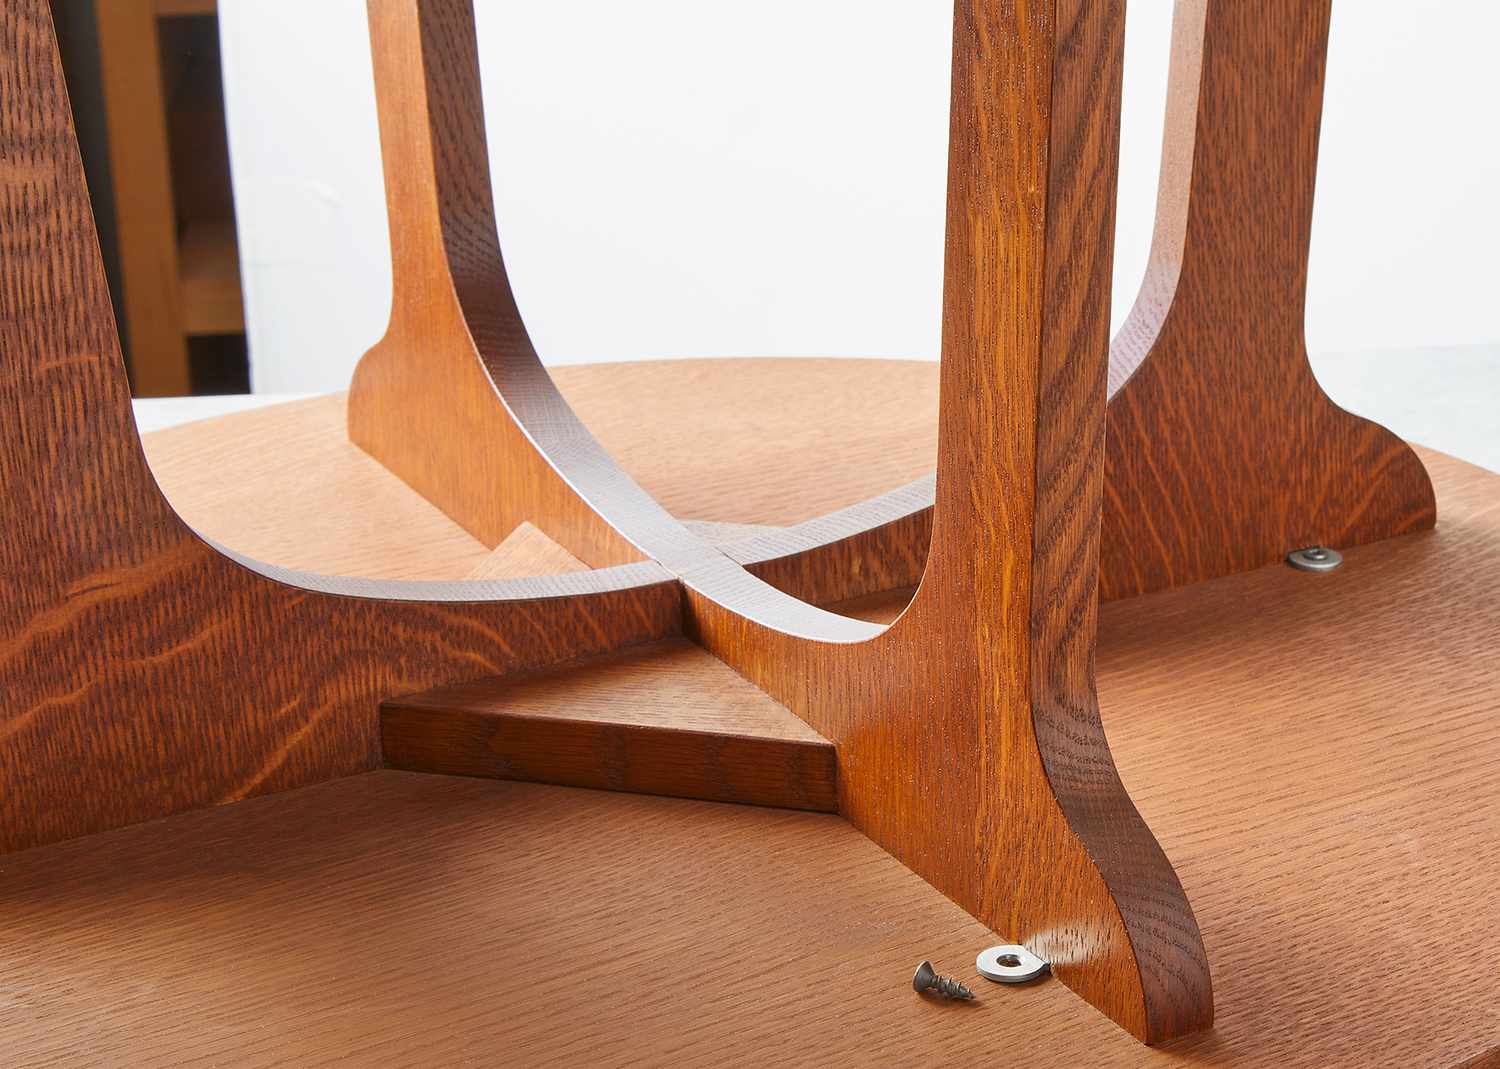
1. Figure-Eight connectors
Figure-eight connectors pivot in shallow, round mortises in the aprons at the ends of the table. As the tabletop expands and contracts, the connectors move with it. Figure-eight connectors are more discrete than wood blocks, below, or Z-shape clips, below, and they don't require apron grooves. They can even be installed facing outward from the aprons, allowing you to attach a top to an enclosed base or cabinet without having to reach inside.
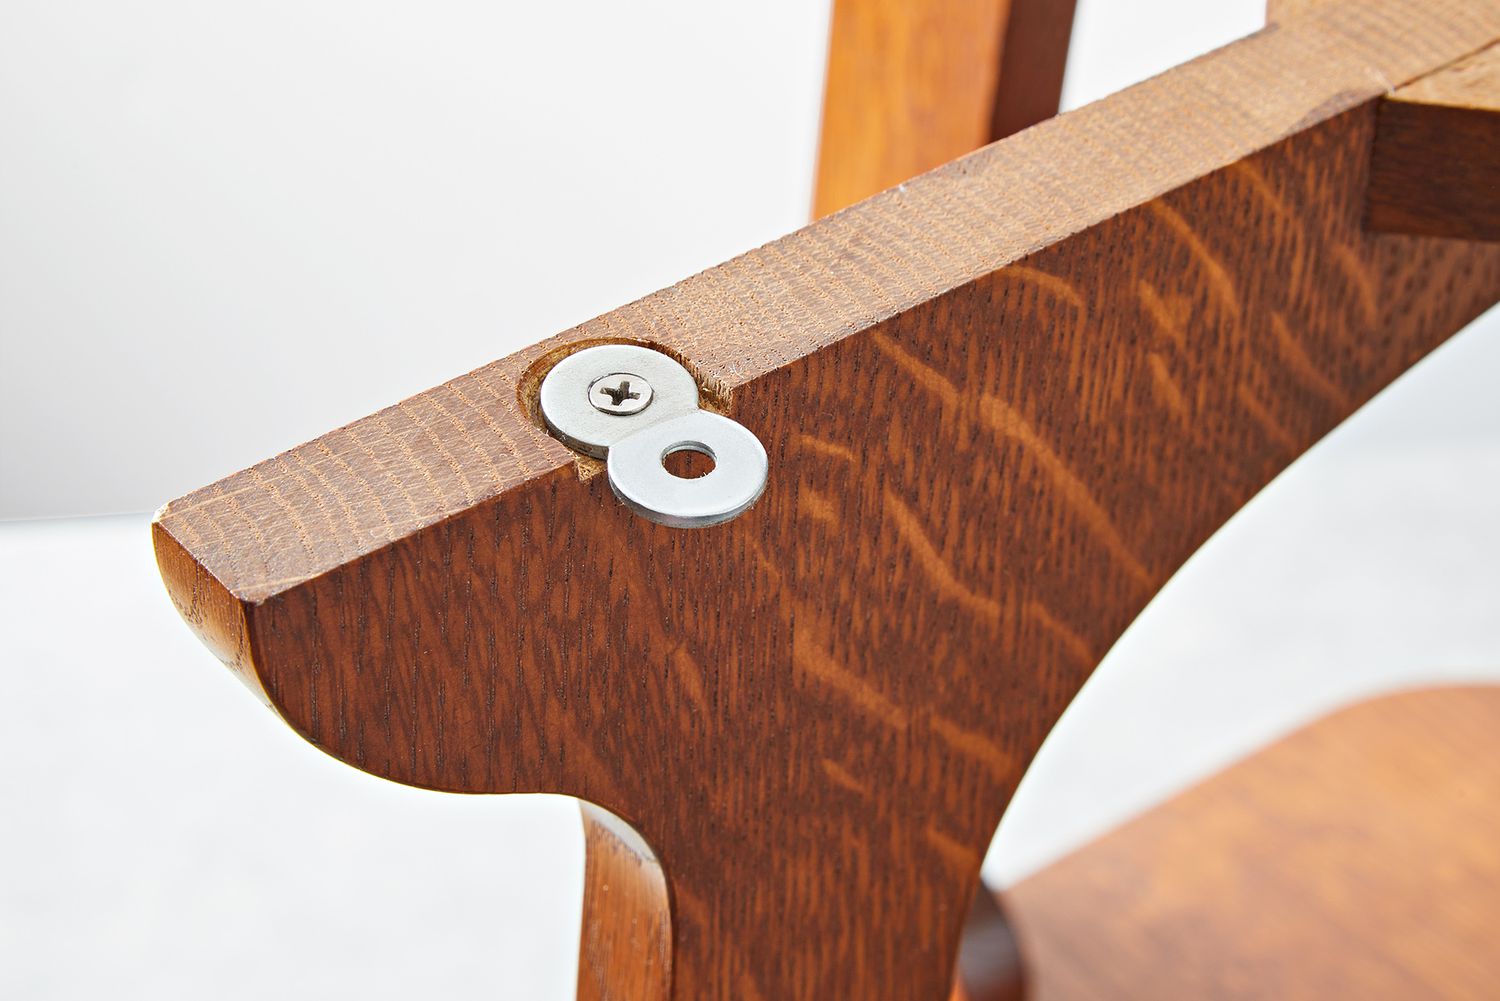
Tip! When attaching figure-eight connectors, drive the screws tight then back them out a quarter turn or so to allow the connectors to move, opening image.
To make the circular mortises for figure-eight connectors, select a Forstner bit slightly larger than the diameter of the connector. Lay out the mortises on the top edge of the aprons, spacing them 12" to 18" apart. Drill the mortises just a hair deeper than the thickness of the connector. Check the fit by placing one of the connectors into the mortise. If it stands proud of the apron, drill the mortise a little deeper until the connector sits flush or slightly below the edge of the apron.
Using the centerpoint left behind by the Forstner bit, drill a pilot hole for the mounting screw. Then open up the inside edge of the mortise, opening image, and attach the connector to the apron.
With the tabletop facedown, center the base on the top and use the holes in the connectors to mark the mounting screw locations. Remove the base and drill pilot holes for the screws, using a depth stop. Then reposition the base and screw the connectors to the underside of the tabletop. (Figure-Eight Connectors, Lee Valley 13K0150, leevalley.com.)
2. Wood Buttons
For a shop-made solution that accommodates tabletop wood movement, use wood buttons. A tongue on the end of the button fits into a groove in the apron of the table. This method has the benefit of being inexpensive—all you need are a few screws and some scrap wood to make the buttons. It's also a more appropriate method to use on period pieces. But it does require more time than using the button's hardware-store counterpart, the Z-shape clip, below.
To make buttons with strong tongues, start by rabbeting the end of a wide board, then crosscutting a blank from the rabbeted end to match the length of the buttons. Repeat this process as many times as needed until you have enough blanks for all the buttons you need. Rip the individual buttons from the blanks, sizing them according to the scale of your project (usually 1-1/2" to 2" wide). Create a slot in each button by drilling overlapping holes using a brad-point bit slightly larger than your mounting screws. Smooth the edges of the slot with a chisel or small file.
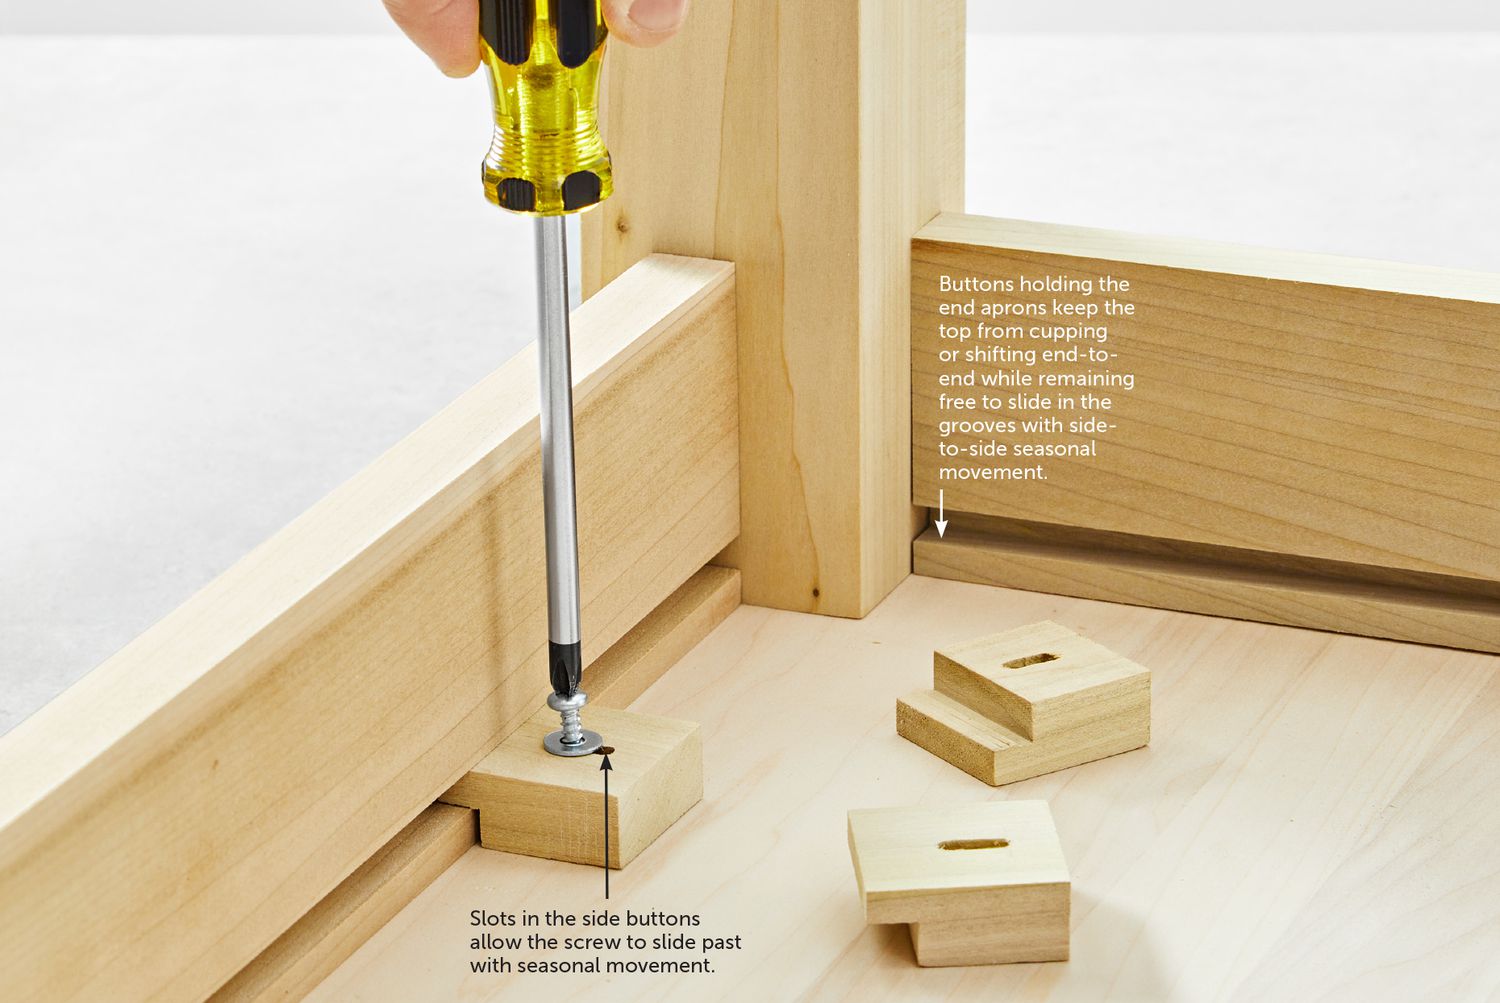
To install the buttons, cut a groove on the inside face of the table aprons sized to match the tongues on the blocks. Lay the tabletop facedown and center the base assembly on the top. Then attach the buttons (above).
3. Slotted Stretchers
Incorporate allowance for wood movement into the design of the table by adding stretchers with expansion slots between the side aprons. Drill a standard hole for a mounting screw in the center of the stretcher and a 1/2"-long expansion slot near each end as we did with the wood buttons, above.
Attach the stretchers to the aprons using biscuits or pocket screws. Center the completed apron/base assembly on the underside of the tabletop and screw the top in place, below.
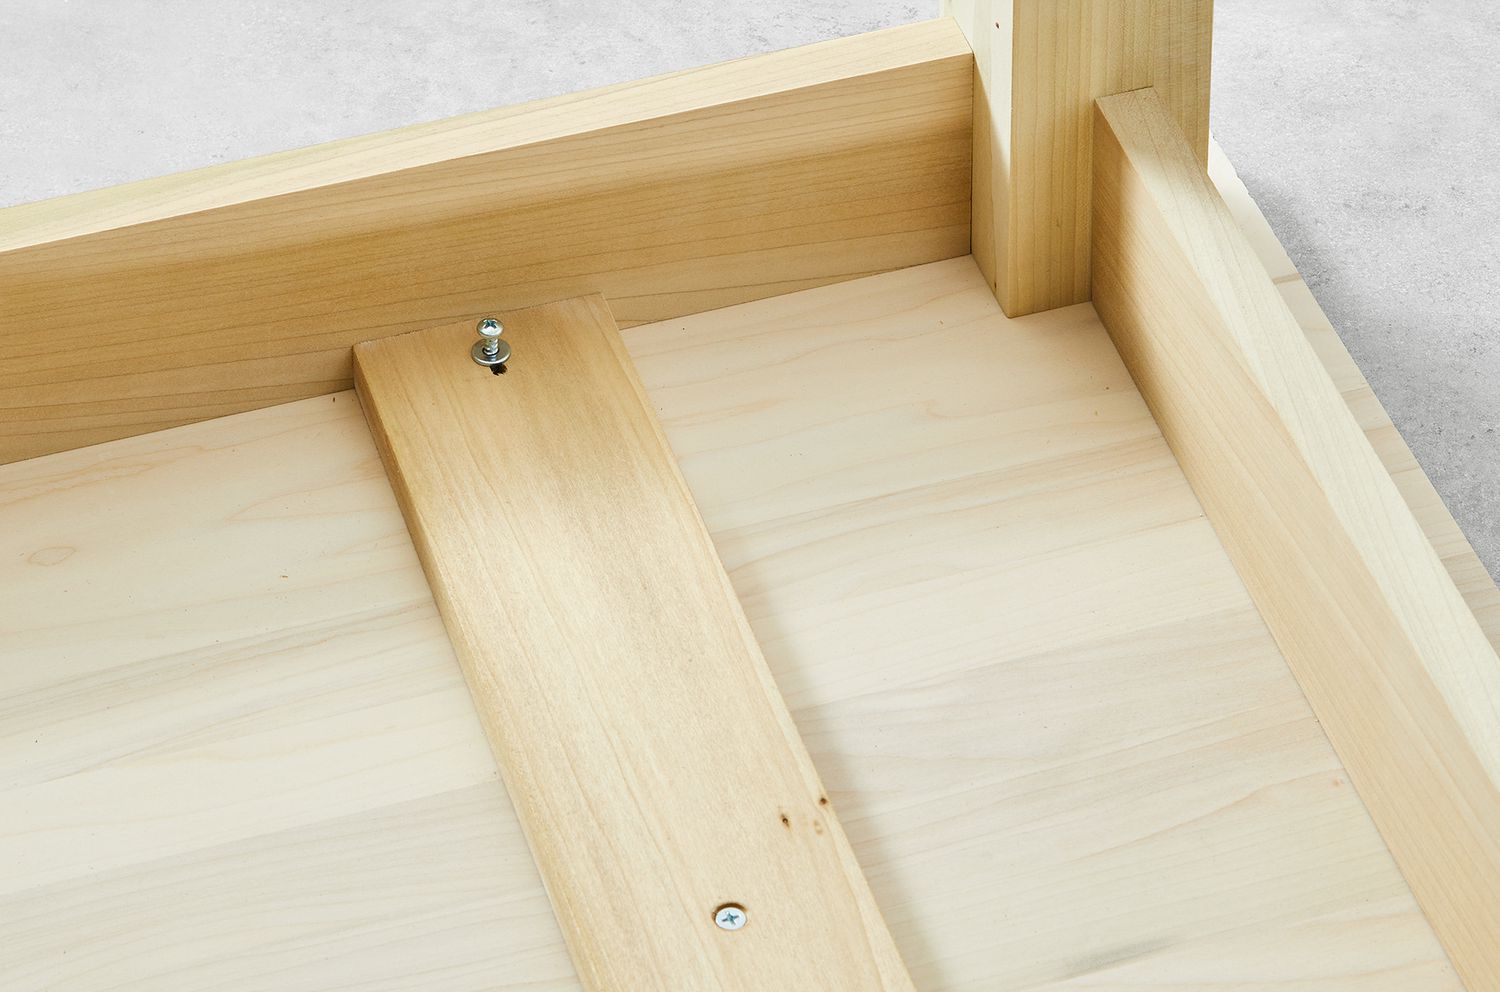
Or, in place of stretchers, attach individual slotted blocks to the long aprons, below.

Tip! As an alternative to stretchers, attach individual blocks to the long aprons. Drill 1/2" slots, and then attach the tabletop using screws centered in the length of the slots, above.
4. Z-shape Clips
In terms of ease, speed, and convenience, nothing beats Z-shape clips for attaching a tabletop. One end of the clip fits into a kerf cut on the inside face of the table aprons and the other end is screwed to the underside of the tabletop.

To use Z-shape clips, measure the height of the clip to determine the location of the kerf on the apron (above). Then, using a tablesaw, router, or biscuit jointer, cut a groove on the inside face of the aprons, at the correct distance from the top edge to match your clips, before assembling the base.
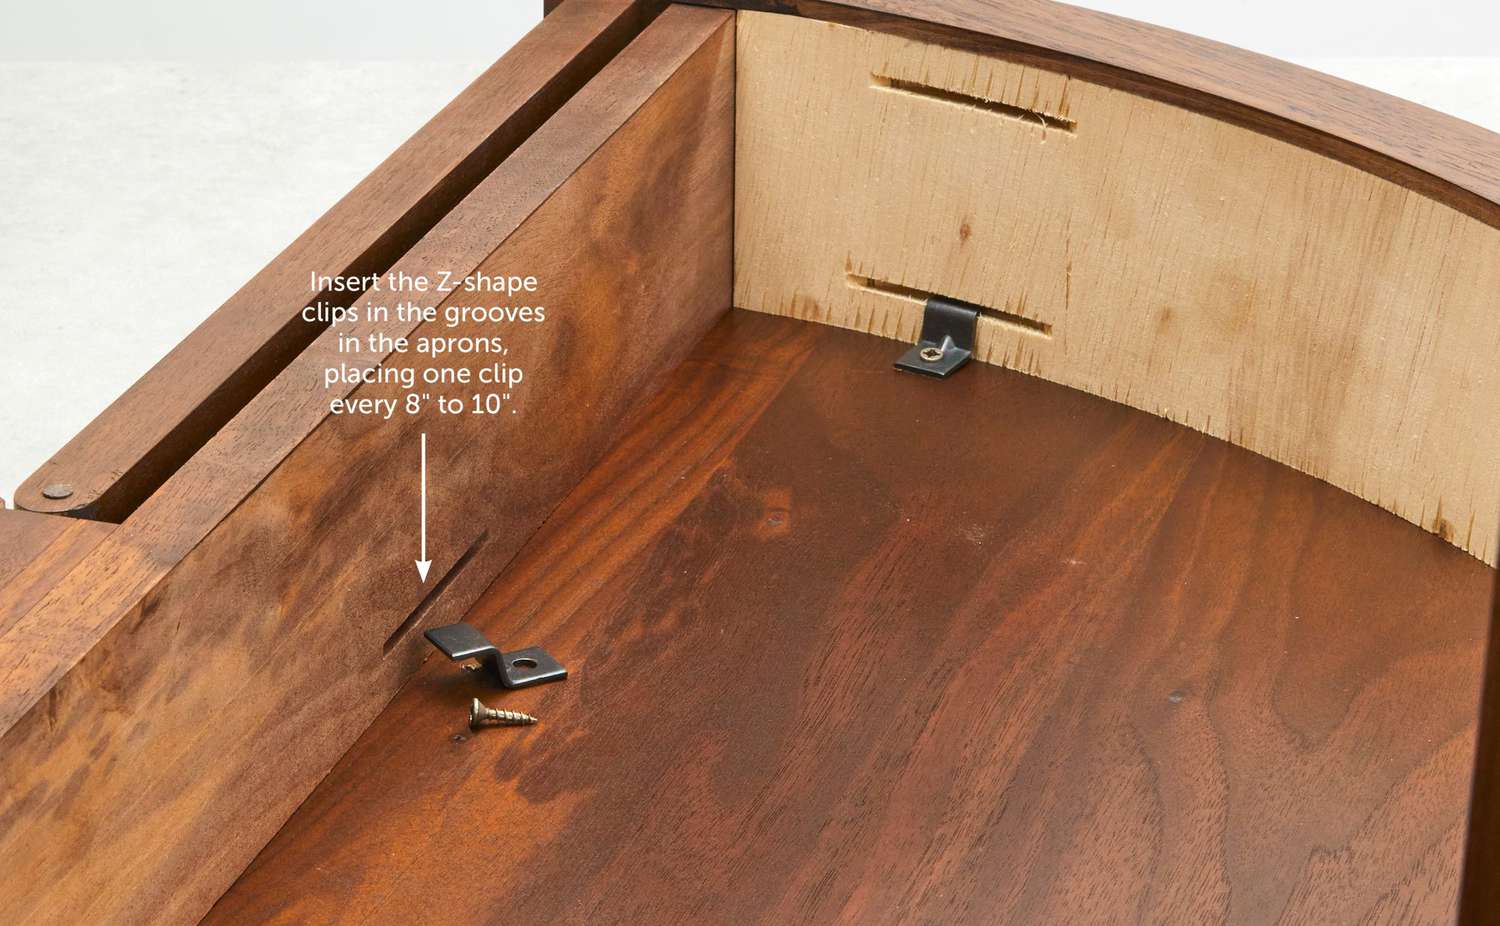
To install the clips, place the tabletop facedown on your bench, then position the assembled base on the top. Mark the location of the screw holes through the clips and drill pilot holes for the screws, using a depth stop to avoid drilling through the tabletop. (Tabletop Fasteners, Rockler 34215, rockler.com)