A Chip off the Old Block
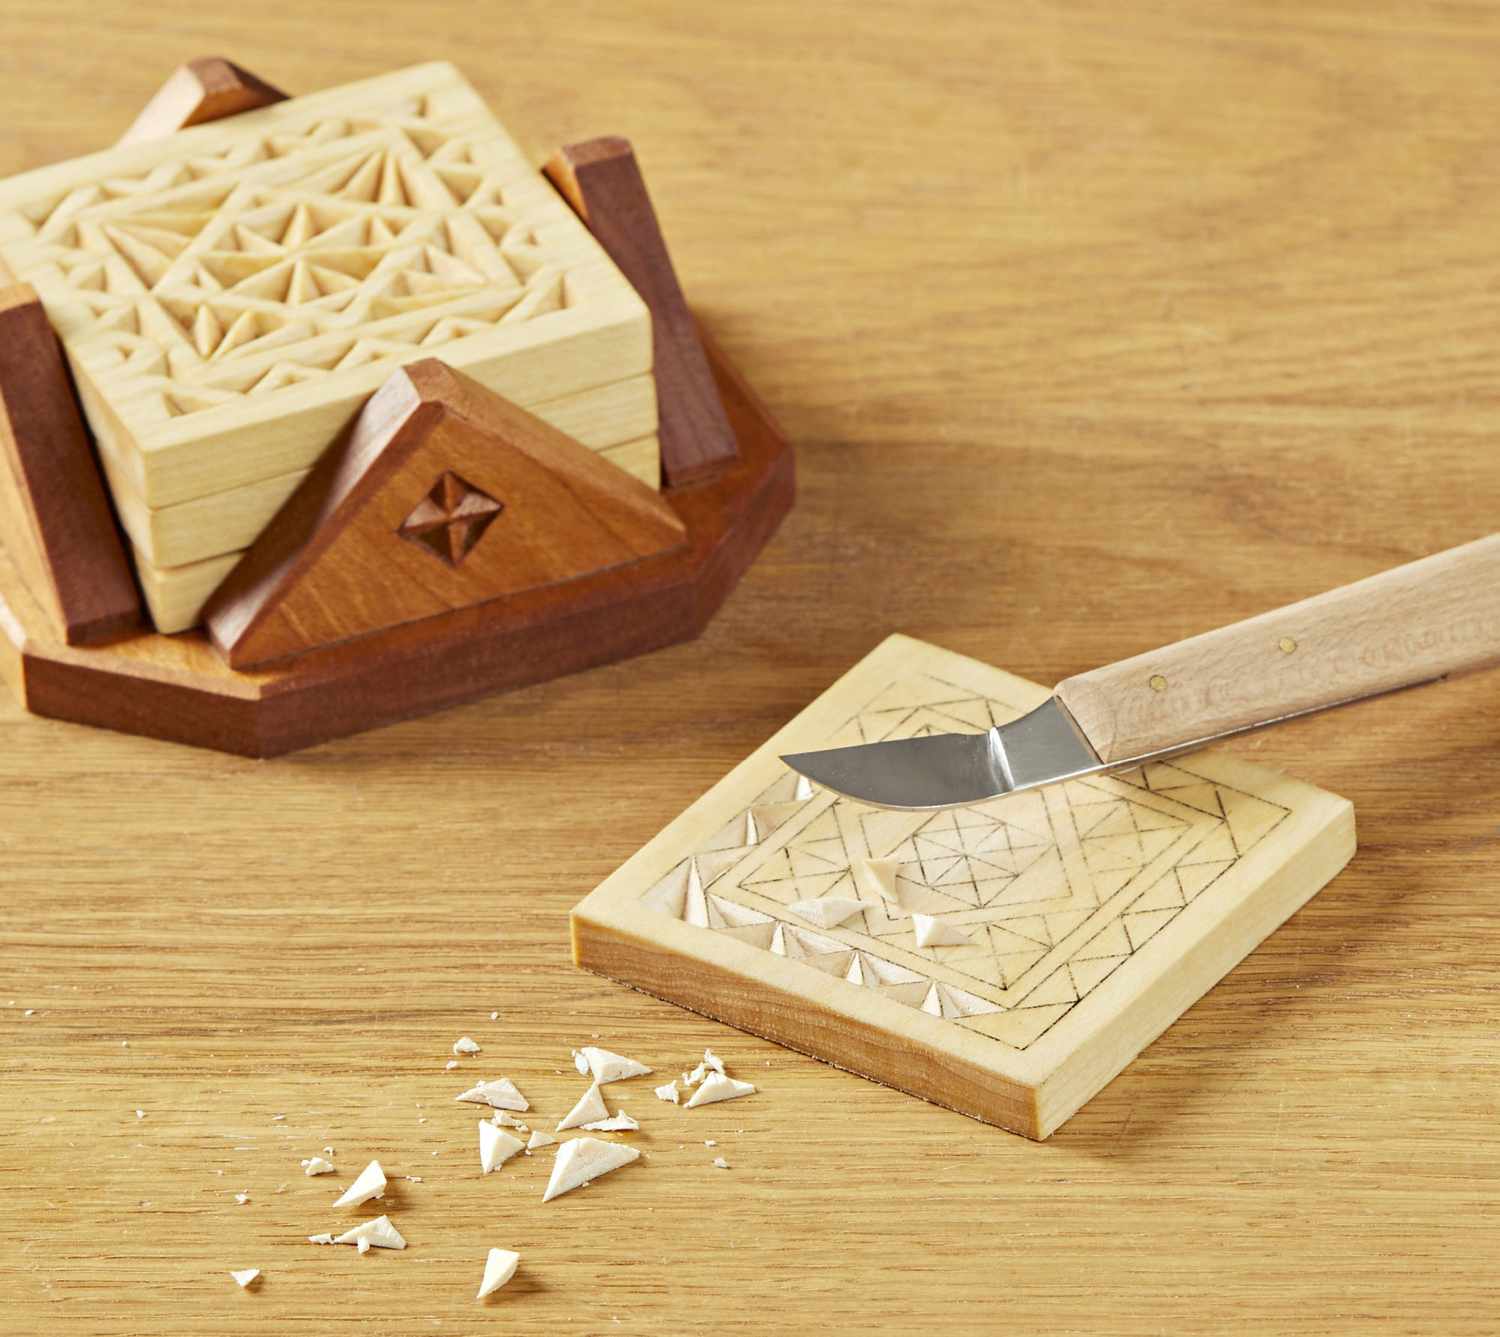

Chip carving provides a great way to learn carving basics. This method employs shallow, angled cuts to remove a wedge-shaped, three-corner chip. This simple style is sometimes called Swiss chip carving. For centuries, chip carvers decorated household items such as small boxes, plates, and spoons, many as gifts. It was a favorite pastime during the cold, harsh winters. With a sharp knife and alittle practice, you'll soon be creating attractive designs sure to earn the admiration of friends and family.
On the cutting edge
Chip carving, in its basic form, utilizes a specialized chip-carving knife. You'll find plenty to choose from. Plan to spend from $20 to $50 for a quality knife.
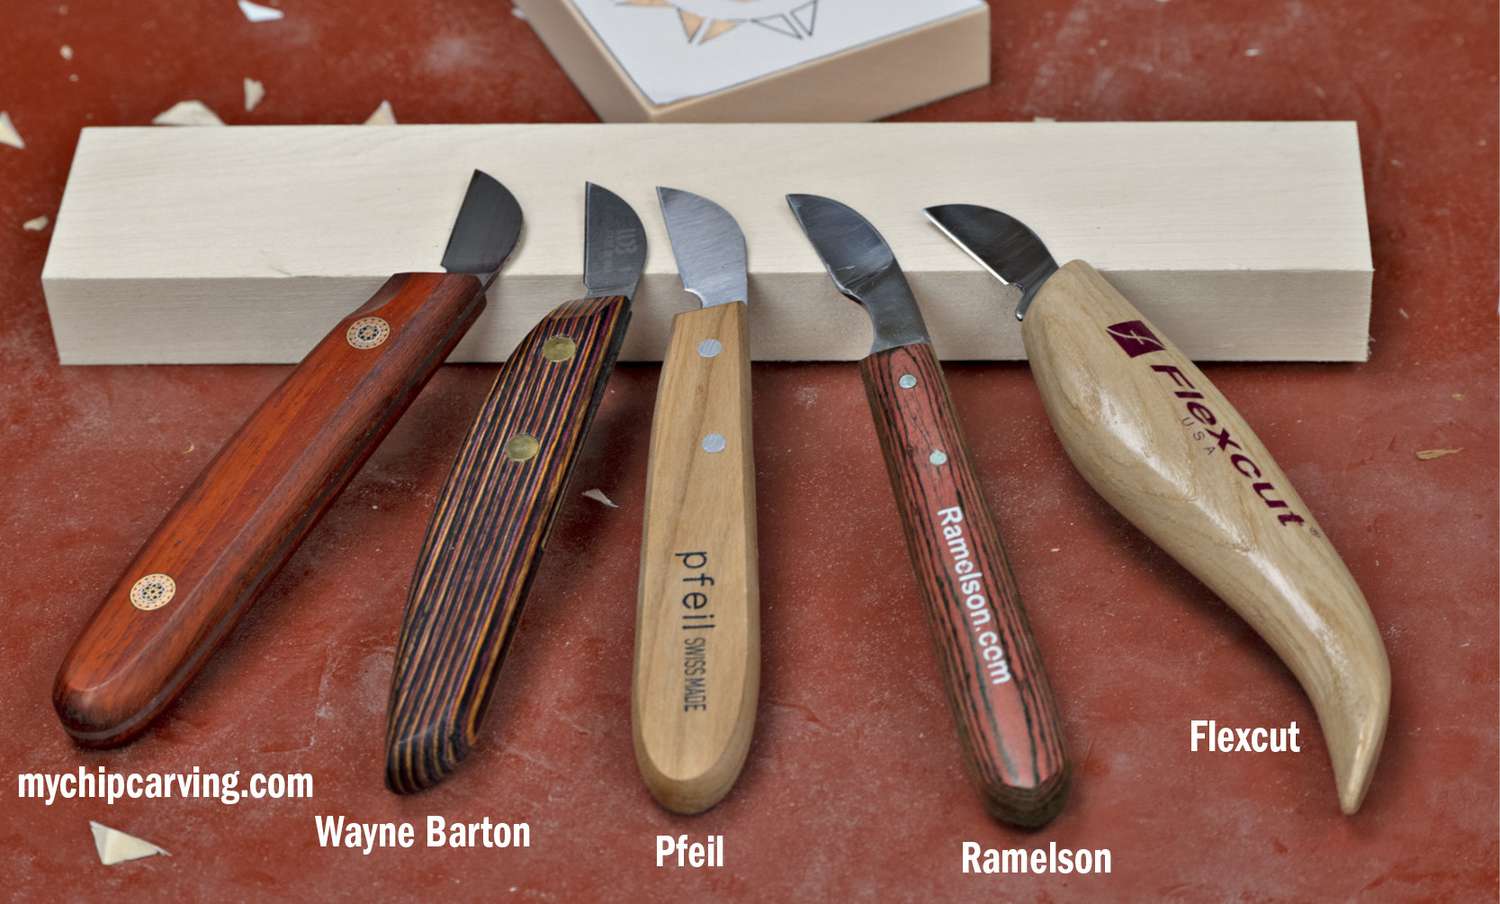

The blades and handles vary in size and shape but all are similar in design (photo, above).

The traditional chip-carving knife features a cutting edge angled downward (photo, above). The blade tapers from the spine to the cutting edge, making it ideal for the slicing and stabbing cuts that define the chip's shape. The shallow, double bevel angle slices wood fibers cleanly. Purchase this style of knife first. It's the knife you'll use most often as you gain experience.
Besides a knife, you need only a few sharpening supplies (see Staying sharp, below), and a thumb guard, available at most woodworking or carving tool resellers.
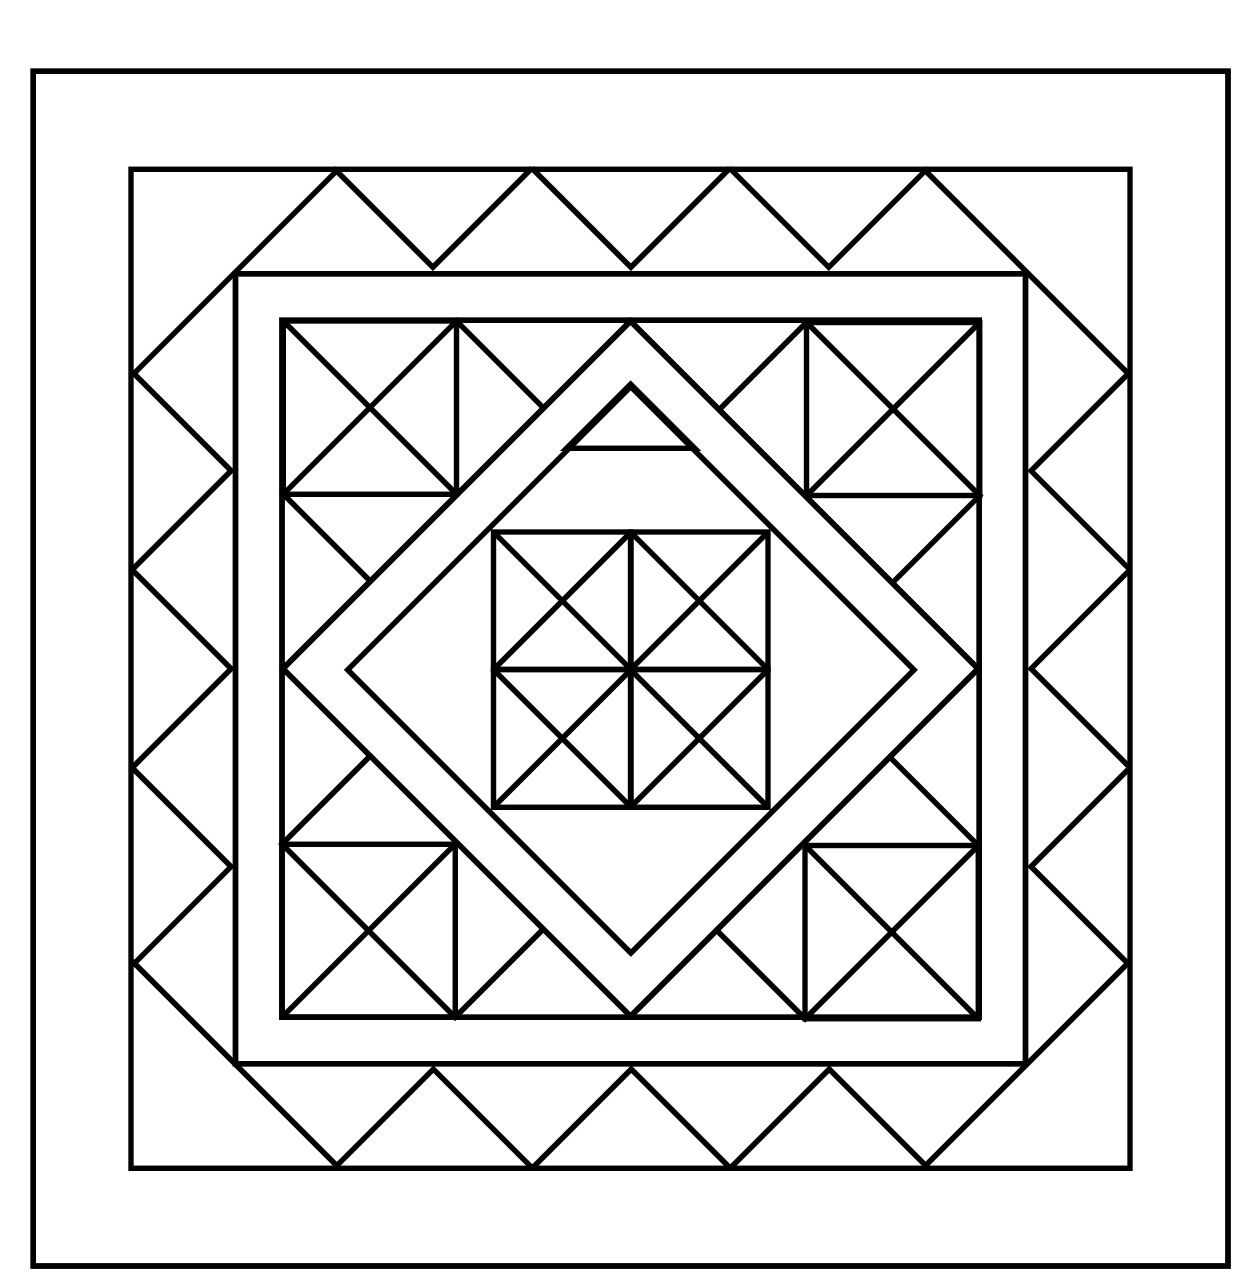
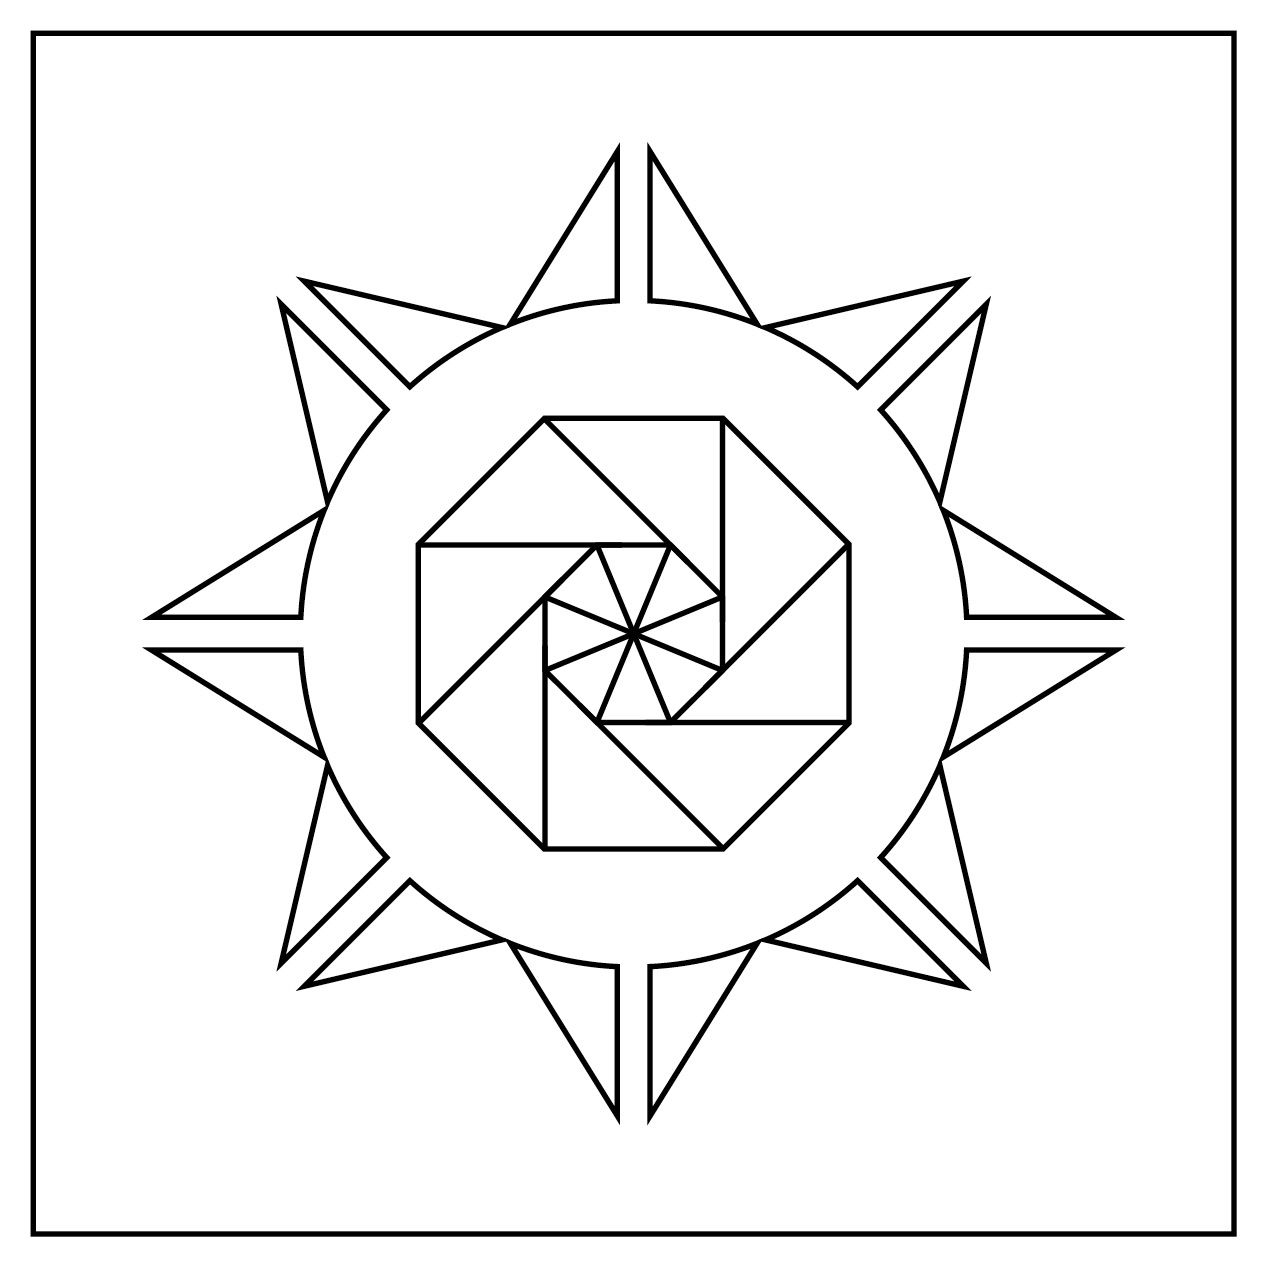
Classic chip carving requires a geometric pattern to define where to make the knife cuts. Find patterns online or in chip-carving books and magazines. Or create your own designs with a pencil, compass, and ruler, or use graphics software on your computer. Find full-size patterns for these coasters below. Try either of these two methods to easily transfer the pattern to the workpiece.
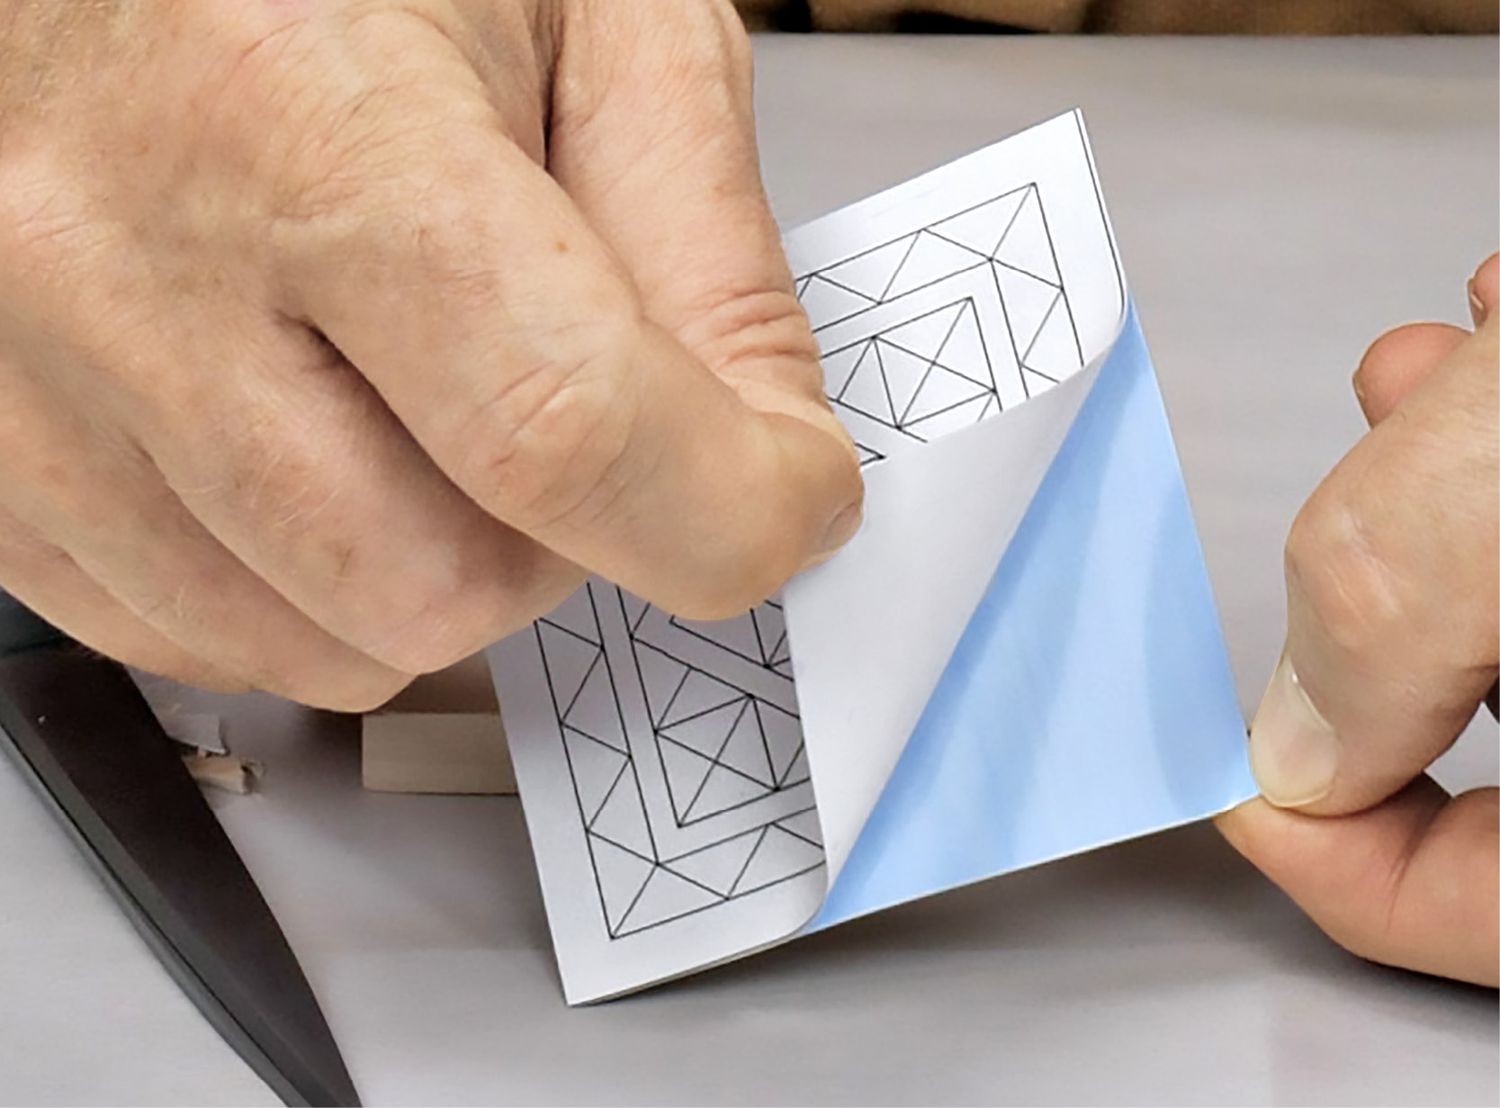
First, attach the pattern to adhesive-backed craft vinyl (photo, above). Purchase Oracal 631 vinyl where craft supplies are sold. Use a light-duty spray adhesive to fasten the pattern to the vinyl. Use scissors to cut away the excess, peel away the liner on the back of the vinyl, then carefully position it over the workpiece. Start at one corner and press the pattern onto your workpiece to eliminate air bubbles. After carving, the vinyl peels away easily. This method works equally well on wood and foam.
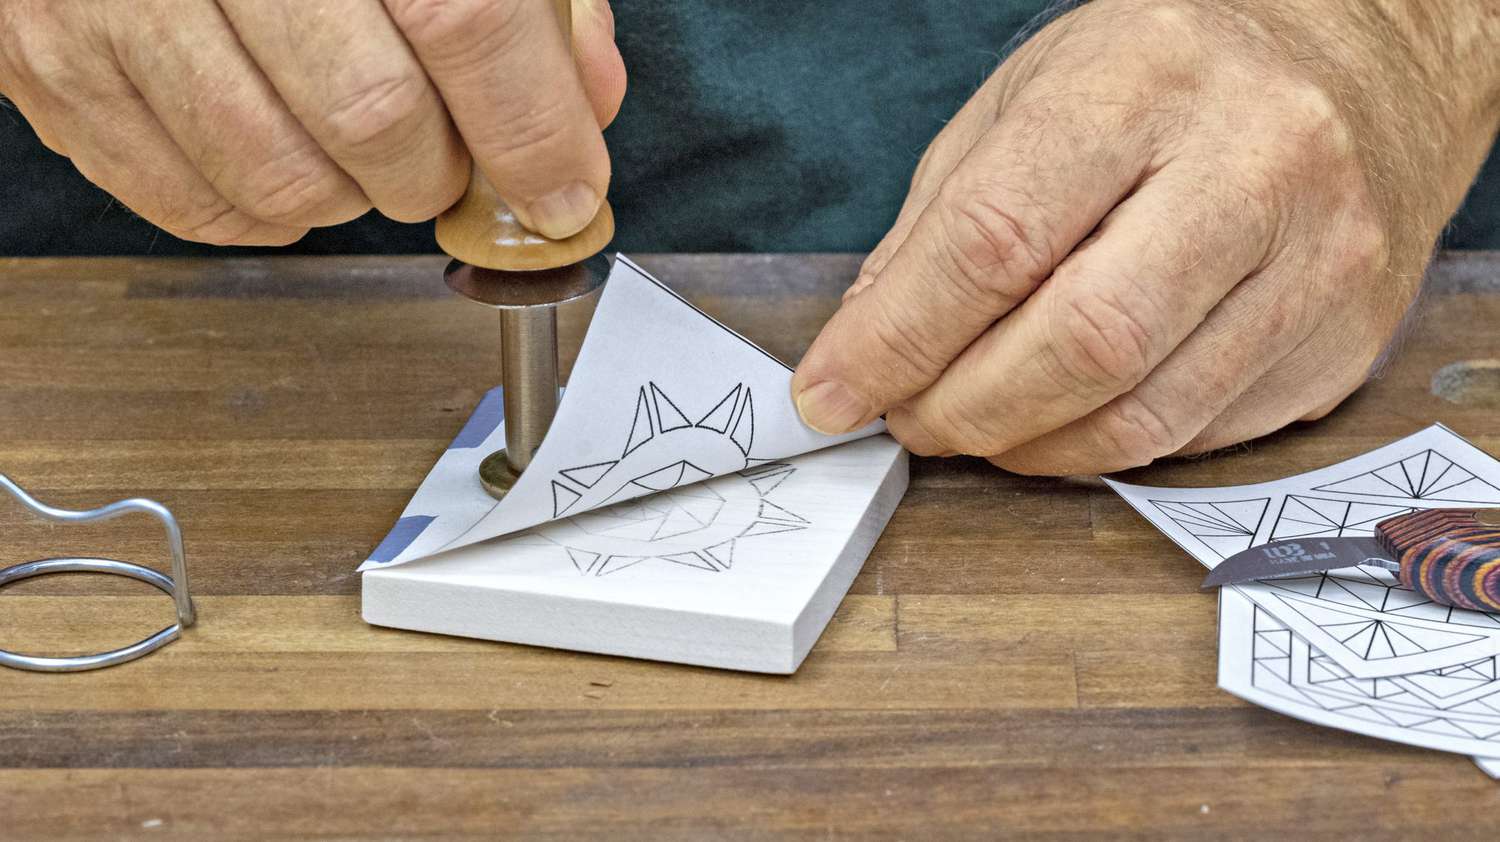
Alternately, for wood, apply the pattern with a heat transfer tool (photo, above). First, print the pattern on a laser printer or duplicate it on a copier—the toner is the key.
Place the pattern facedown on the workpiece and slowly rub the heated tool on the back of the pattern to transfer it to the workpiece. Check your progress until the entire pattern appears on the wood.
Making the cut
Precise knife cuts create the classic look of chip carving. Adjacent faces of the cuts intersect at a straight, clean line from top to bottom with all the cuts meeting at a point at the bottom. These cuts, made with one pass, vary in depth from start to finish. With these techniques and with practice, you'll learn to create perfect chips.
Note: For safety, use a thumb guard while carving.
Many traditional chip carvers work sitting down, with the workpiece in their lap. If this feels awkward, a worksurface at a comfortable height may offer a suitable work environment. A task light helps to highlight pattern lines and knife cuts.
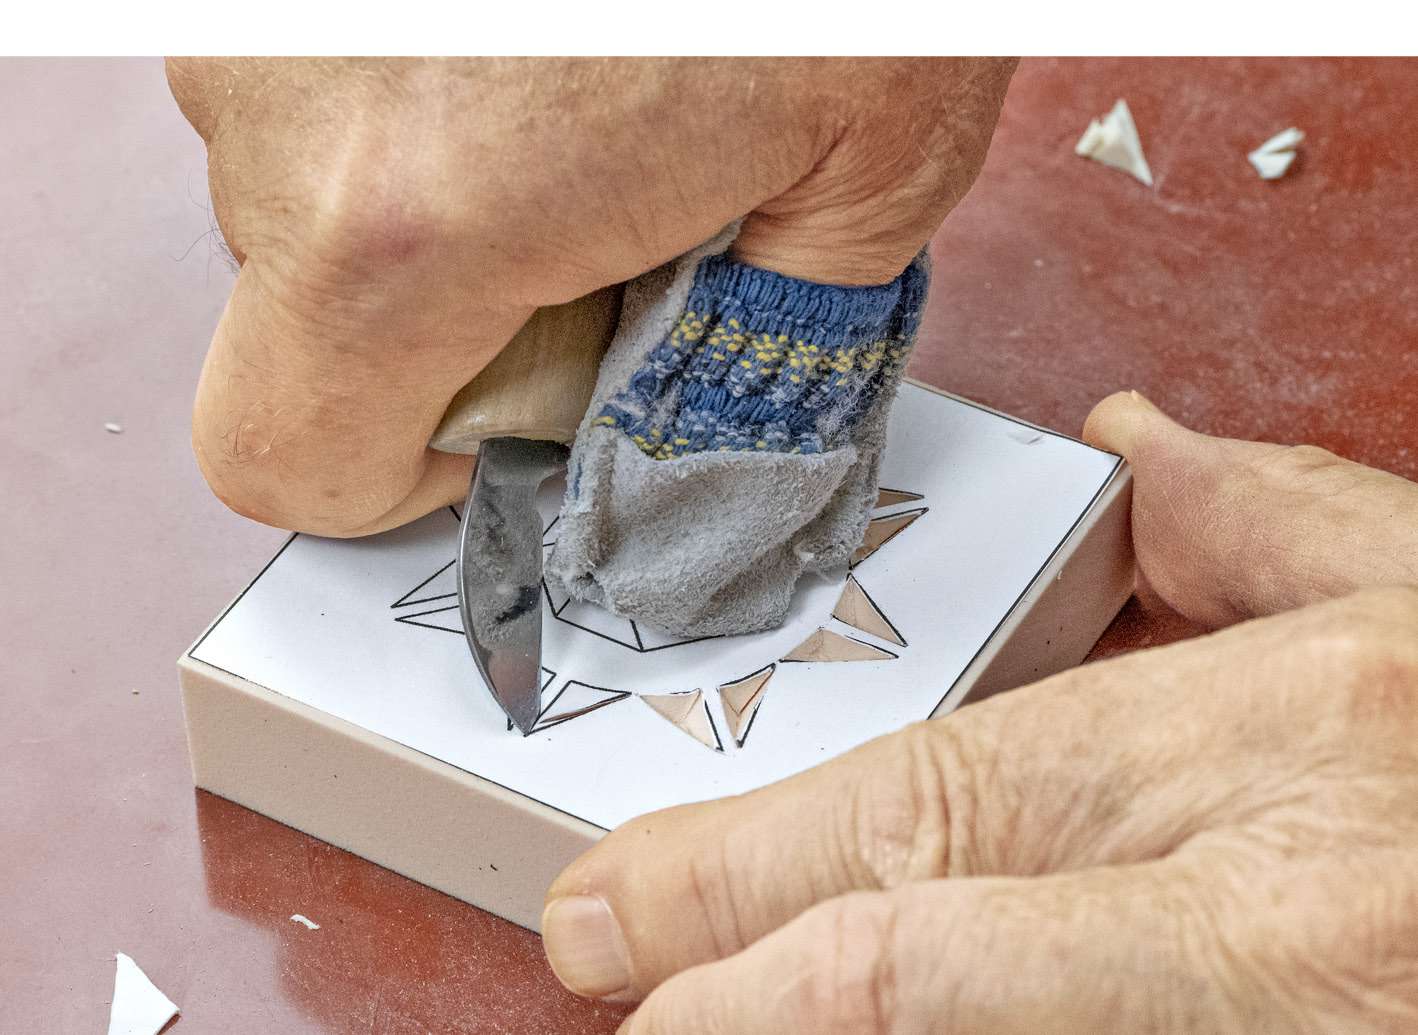
When gripping the knife, use one of two hand positions, depending on the direction of cut. The first position uses the thumb and a knuckle of the index finger as anchor points on the workpiece (photo, above). In this hand position, place the blade at the start of the cut with the thumb and knuckle securely on the workpiece. Move your hand and thumb as one unit to complete the cut.
The second position places the thumb on the top edge of the knife handle (photo, above). This allows you to apply pressure with your thumb when cutting with the blade angled away from your body. If you can easily rotate the workpiece, you won't use the second hand position as often as the first position.
For your first exercise, cut a three-corner chip using the following steps.
1 Place the point of the blade at one corner of the triangle (photo, above).Start at one end with a shallow cut. As you progress toward the midpoint of the cut, slice deeper while trying to visualize the blade tip at the center of the three-dimensional triangle shape. Once you pass the midpoint, start lifting the blade until it exits the cut at the end.
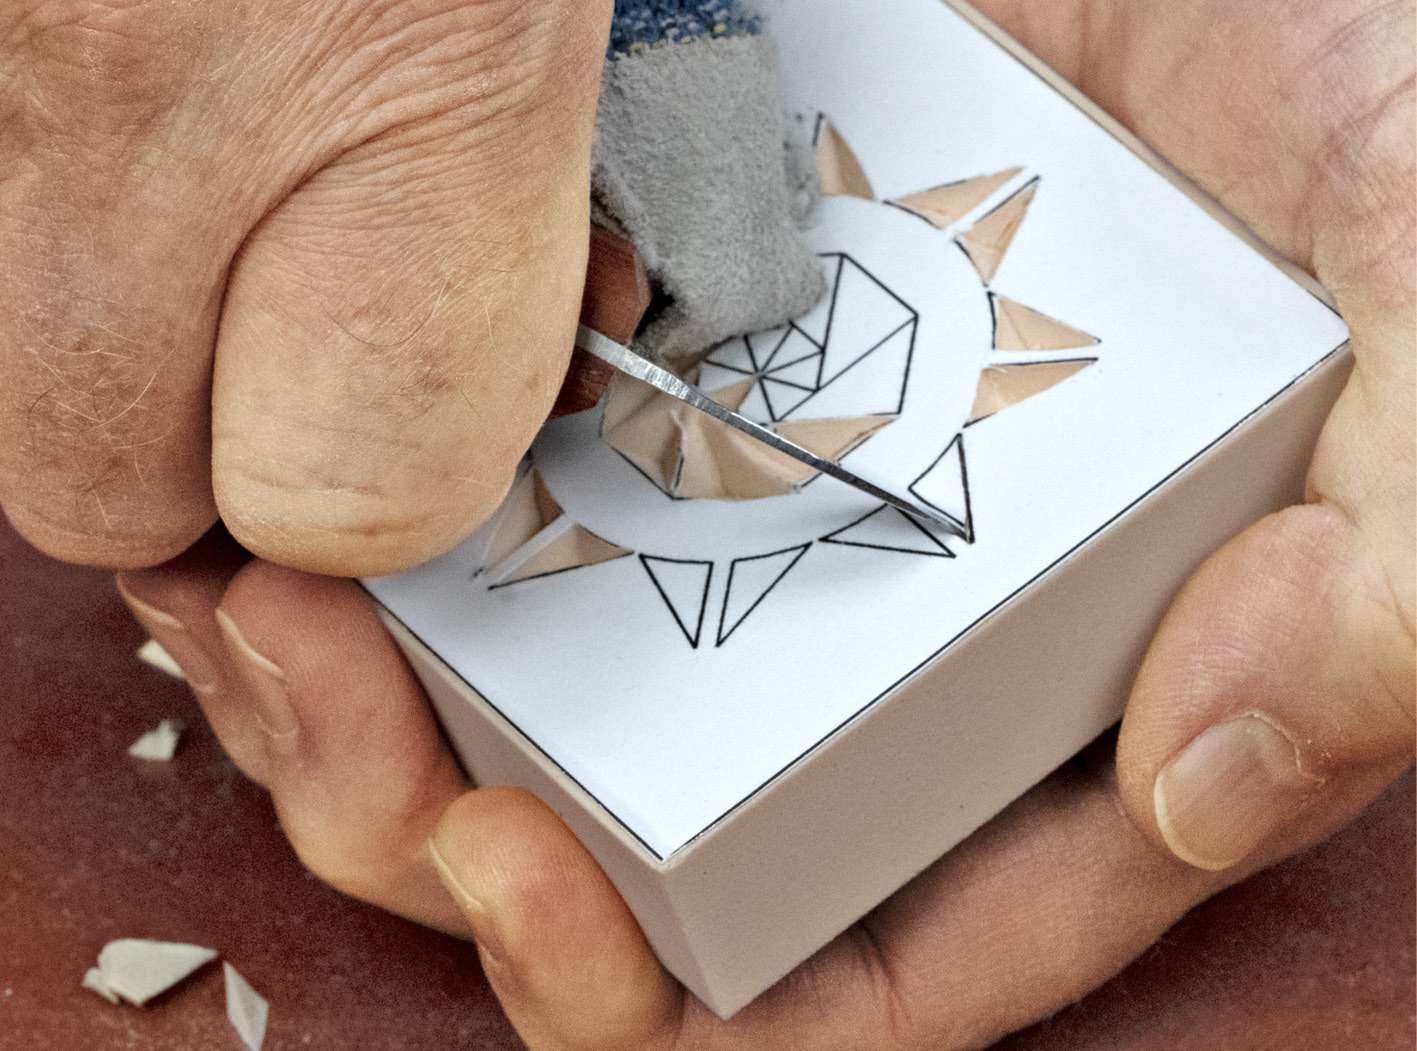
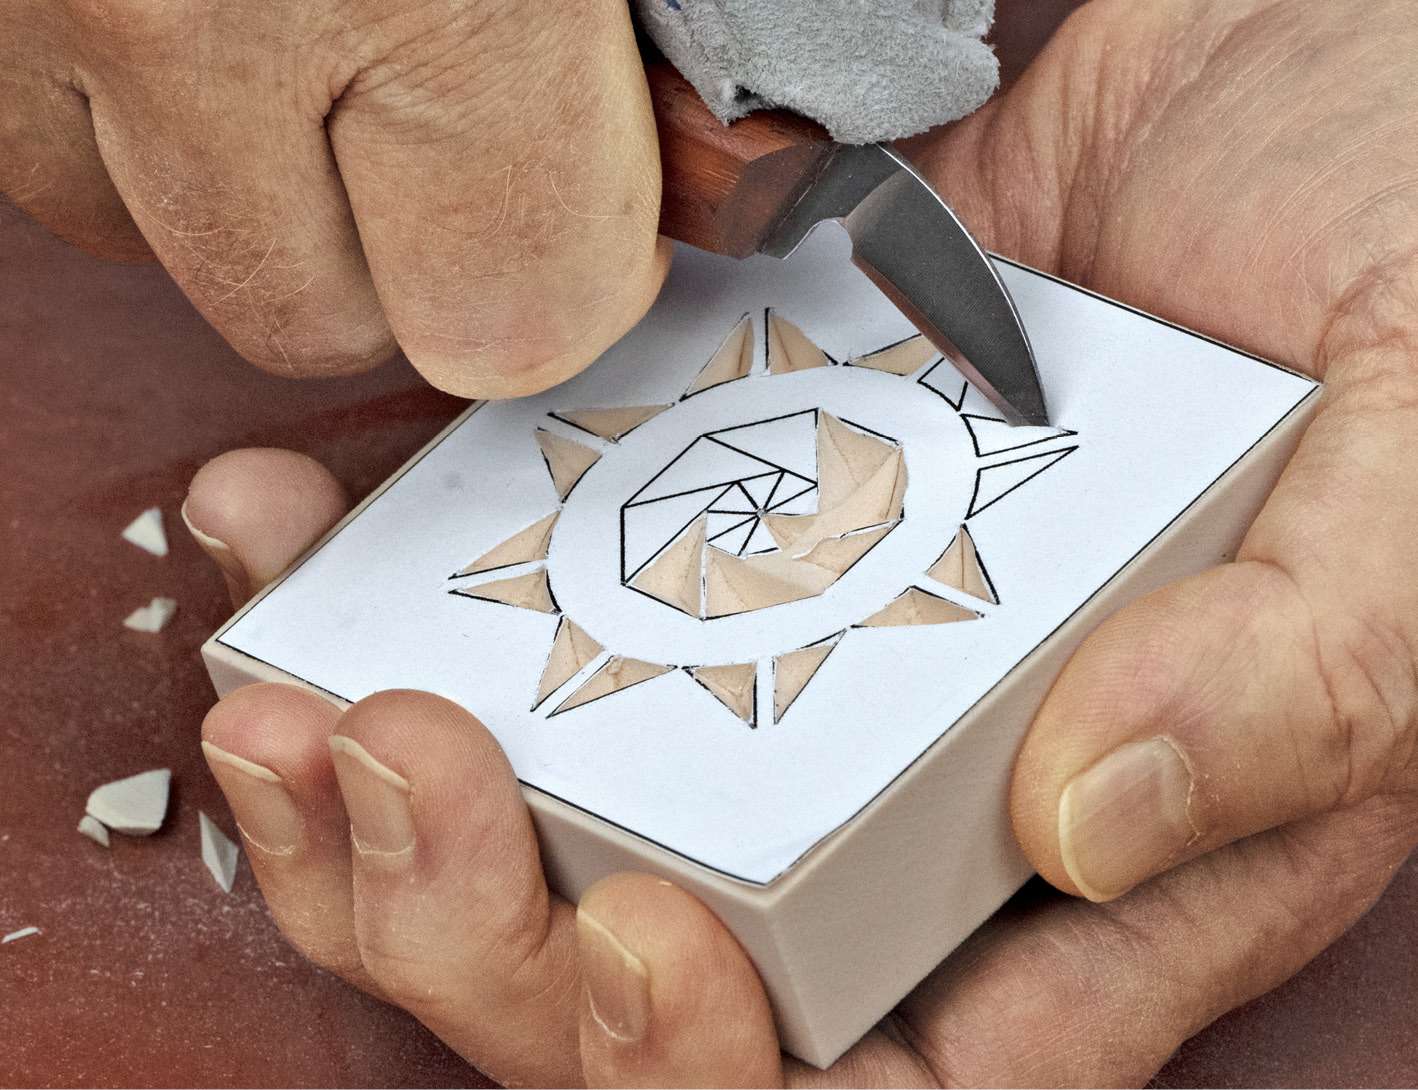
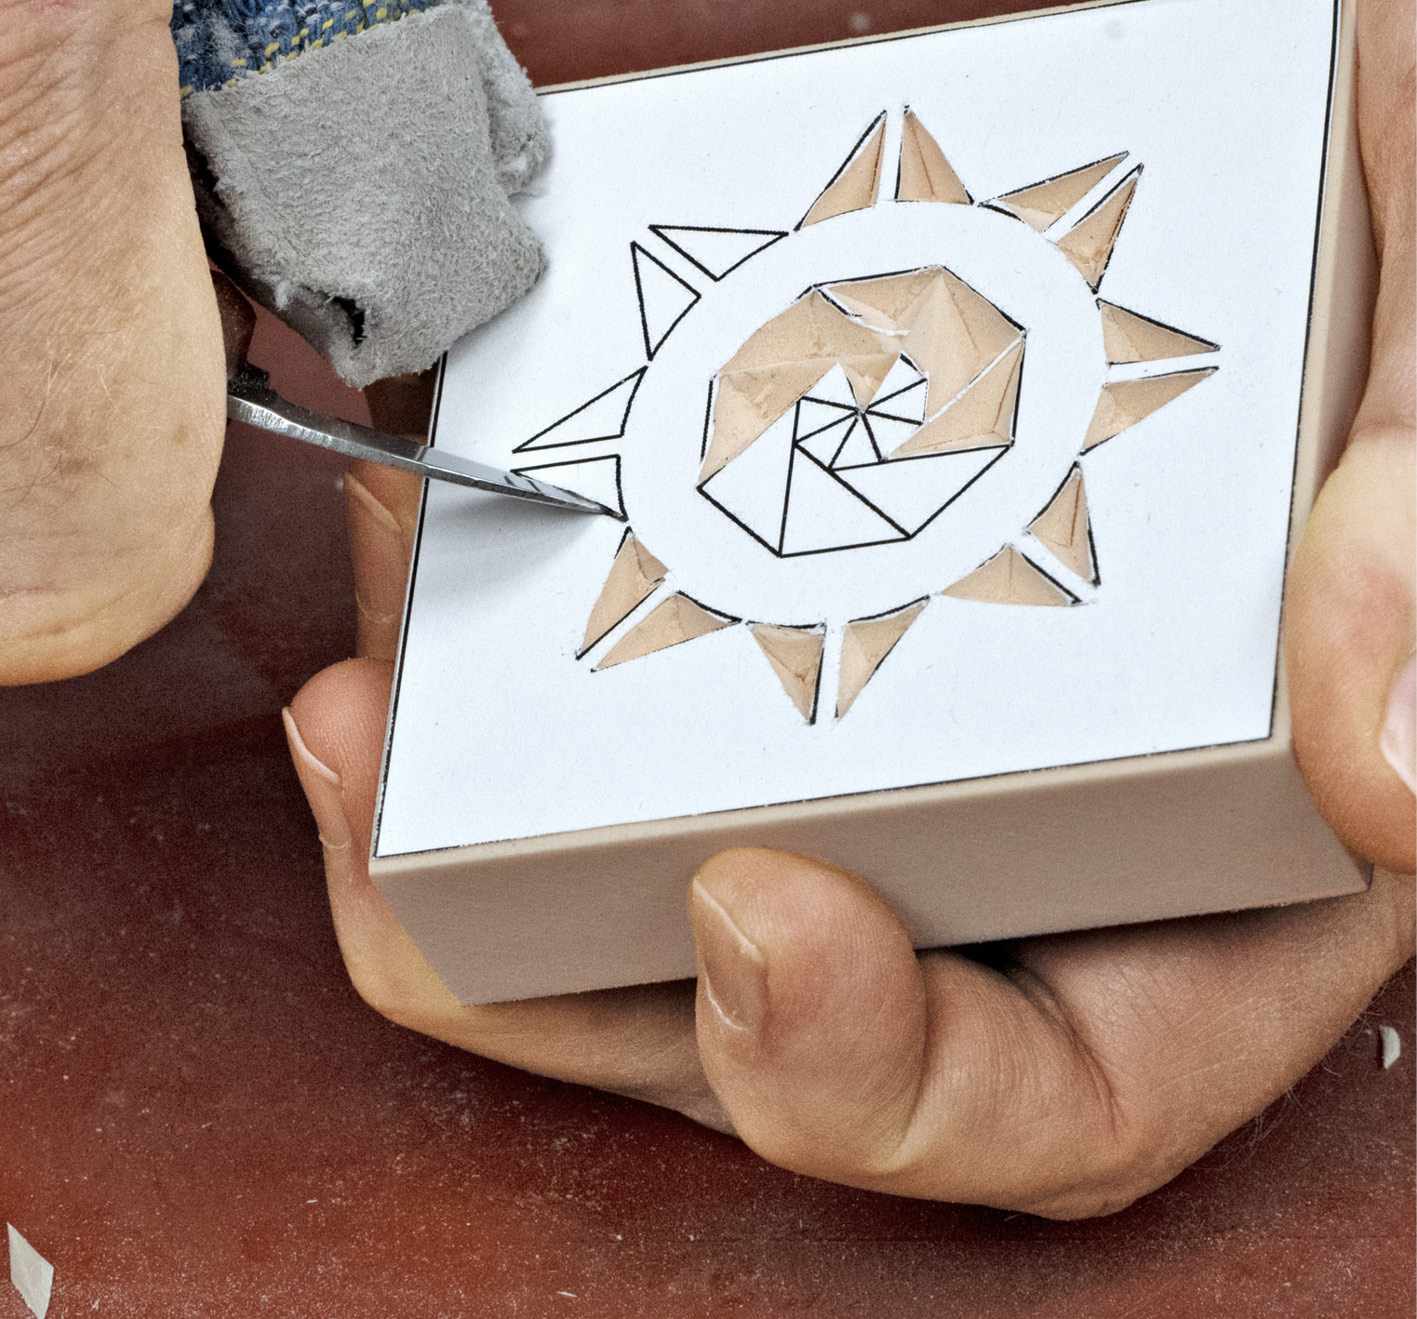
2 Turn the workpiece to make the second cut (photo, above). Cut this side of the triangle the same way as the first.
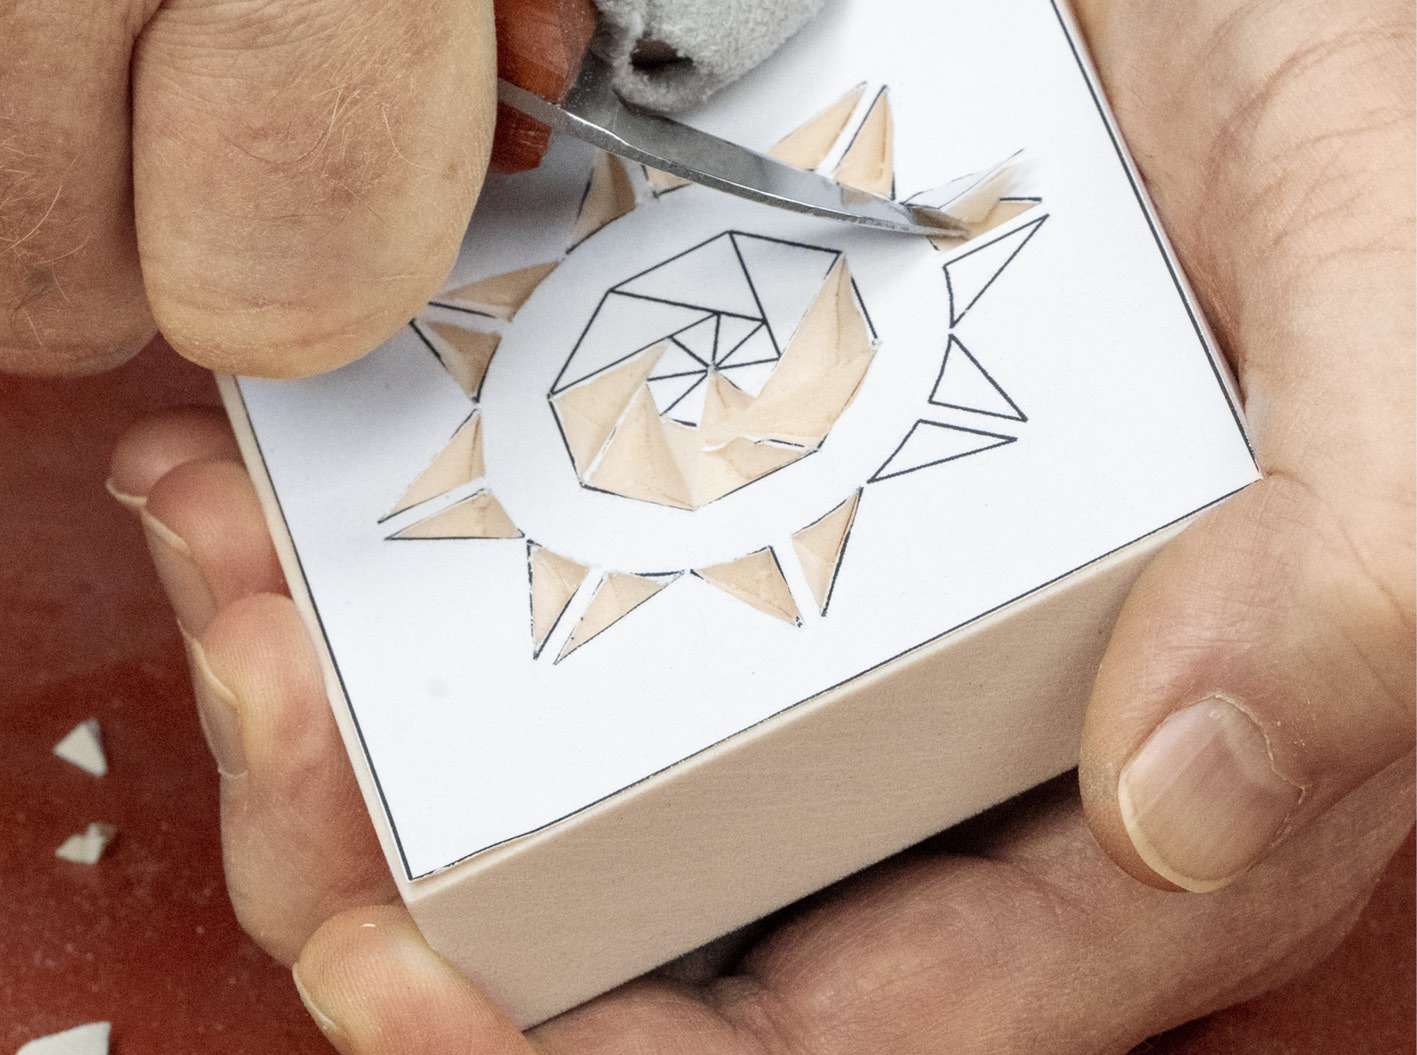
3 Rotate the workpiece to cut the third side. As you complete this cut, you will end up where your first cut began.
Ideally, the chip will pop out freely with a "snap" (photo, above). If it doesn't, repeat the cuts a little deeper, making sure to match the angle of the original cut. It's tempting to use the knife to pry out the chip, but you risk damaging the thin blade.
After the final cut
Remove pattern marks and any remaining adhesive with denatured alcohol. A white plastic eraser also helps with this task. Follow up with a 220-grit sanding block, if necessary, but don't go overboard. A light touch preserves the crisp cut lines and facets you worked so hard to achieve.
After a final, light sanding apply the finish of your choice. Aerosol acrylic or lacquer provide easy, quick finishes on both basswood and foam.
As with any craft, learning the nuances, techniques, and styles of chip carving comes with time and experience. But starting with this basic chip-carving technique, you'll soon be carving attractive designs to dress up your projects.

Staying sharp
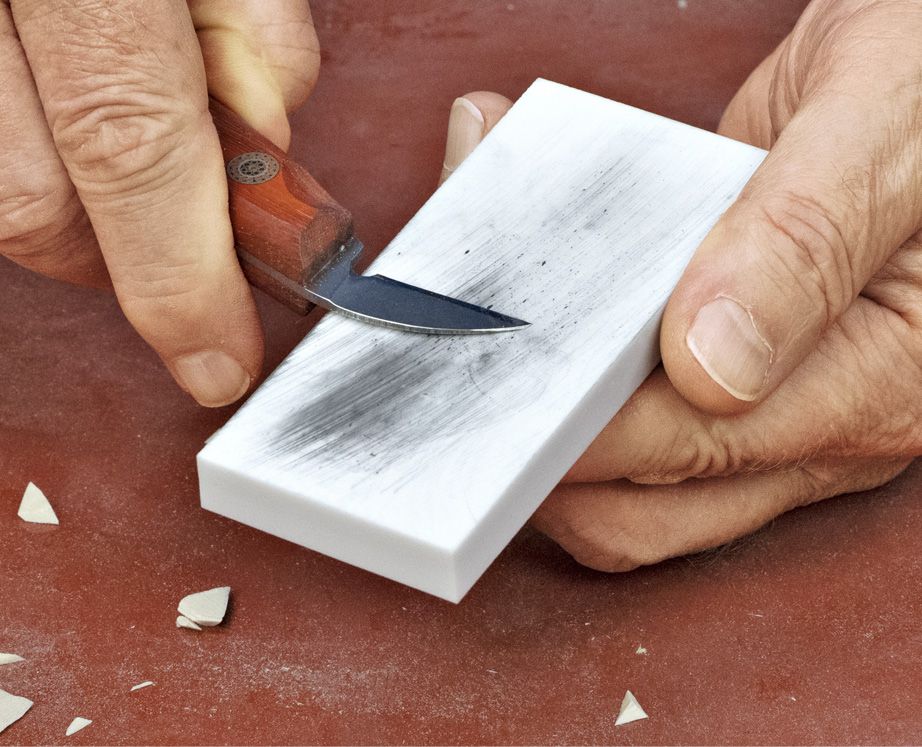
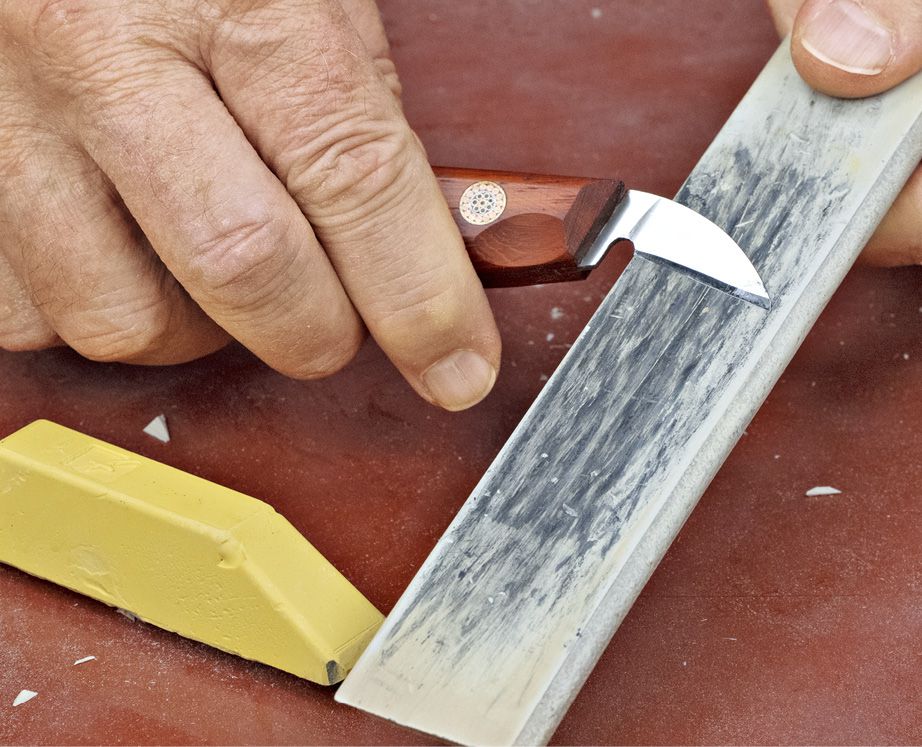
As with any style of wood carving, chip carving requires sharp tools. Hone the knife periodically to keep it razor sharp. Before starting, use a fine ceramic sharpening stone (photo above, top) followed by a few swipes on a leather strop charged with stropping compound, above. As you carve, use the strop often to keep the edge sharp.
Carving media
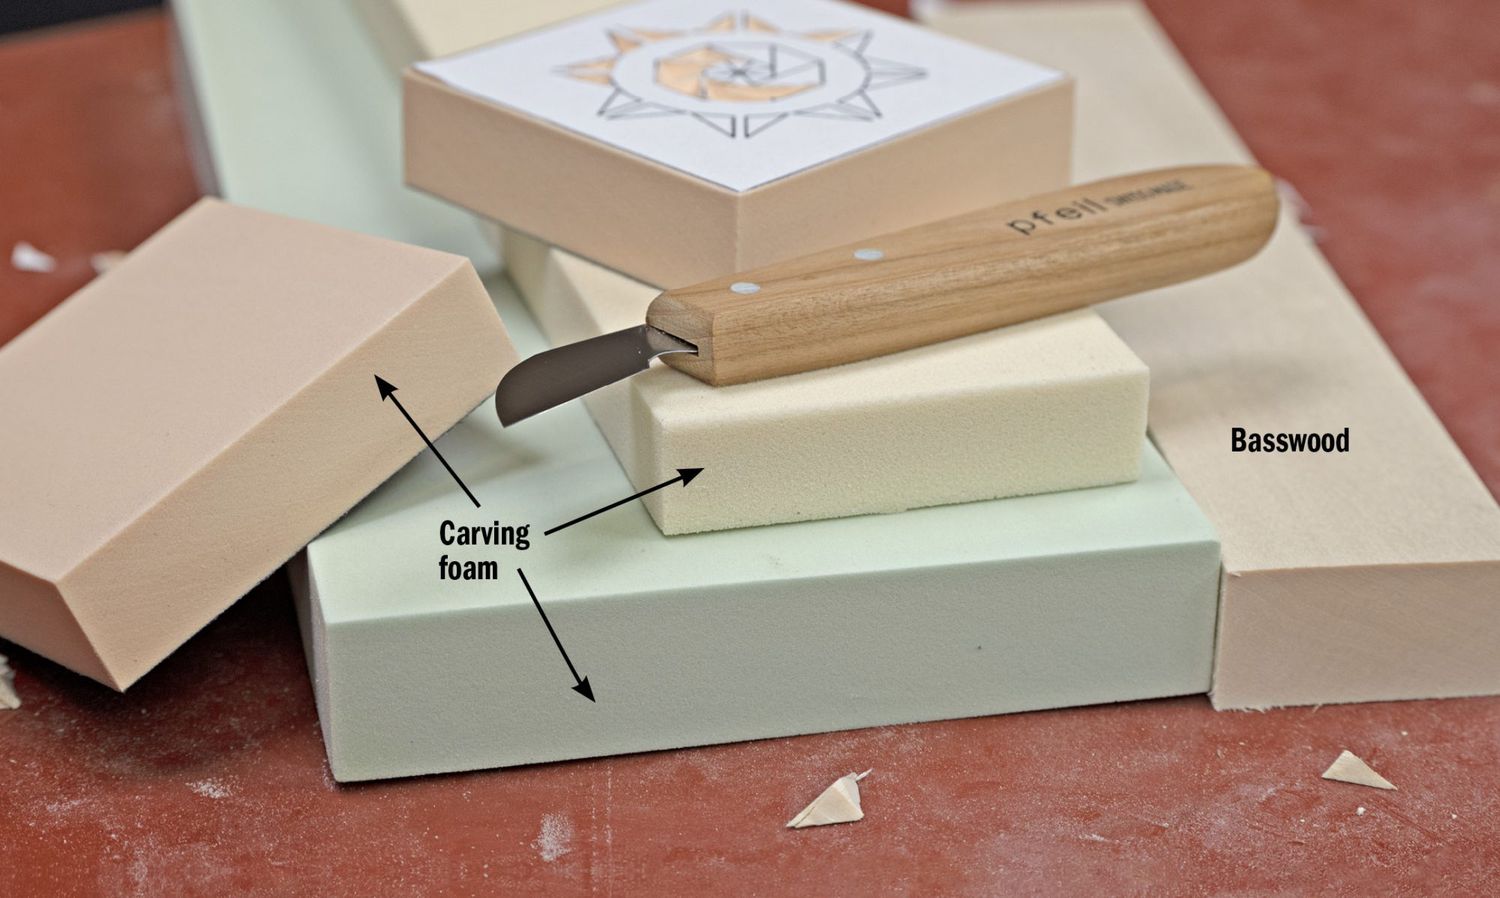
Basswood (also known as linden) posesses creamy color, consistent and nearly invisible grain, and softness that make it ideal for carving. Sharp tools create crisp, smooth cuts in basswood. If you can't find quality basswood locally, look online or seek out a local carving club (see Sources at bottom of page).
Basswood you find at a craft store is likely to be too hard and dry to carve. You'll know as soon as you try to make a chip. Before carving, set the basswood blanks alongside an open container of water inside a lidded plastic storage tote. After a day or two, you'll find the basswood easier to carve.
Another trick: Periodically spray a mist of 50/50 rubbing alcohol and water on the workpiece as you carve. This softens the wood fibers for easier carving.
Often used in making commercial signs, high-density urethane (HDU) foam makes a good alternative to basswood. It's easy to carve, making it ideal for practicing your technique. A foam density of 15 to 20 pounds per cubic foot matches that of most basswood. Signmakers in your area may be able to supply scraps of HDU. Some foam you find online is labeled "sculpture" or "carving" foam used for crafting. Its lighter density makes it easy to carve, and tan foam already resembles the color of wood.
Sources:
Basswood: heineckewood.com
Knives: Premier Chip Carving knives: wayne-barton.square.site
Ramelson knives: ramelson.com
Pfeil and Flexcut knives: woodcraft.com
Diamond Carving knives: mychipcarving.com
Ceramic sharpening stones: wayne-barton.square.site