Airtight joints from your tablesaw


My recent move to a new home halfway across the country was made even more nerve-wracking by relocating a complete woodworking shop to a new basement location with just a single 15-amp outlet. Given the limited power options, top priority went to getting my most versatile and indispensable tool—the tablesaw—up and running. In addition to ripping, crosscutting, beveling, and mitering, it also does a great job cutting a straight edge square to the face of a board, known as jointing. You need to do this when preparing boards for edge-gluing, where the mated surfaces must align precisely.
It's easy to imagine jointing the edge of a 2×4 on a tablesaw because the board already has two fairly straight edges. Guide one edge against the rip fence for the first cut, then flip the board around to joint the opposite edge.
But what about a large slab with irregular edges, or a board with bowed edges (photo below)?

See how to tune your tablesaw for top performance.
Even if you have a jointer, the size and weight of a slab makes it difficult to handle on edge. And removing only 1⁄16 " or less at a time takes many passes to true up a rough or severely bowed edge. In contrast, a tablesaw removes a wide swath in a single cut, while supporting the face of the board. The secret lies in a well-tuned saw, a sharp 40–50-tooth combination blade set precisely at 90°, and a jointing sled.
The simplest of jigs
Tip!
MDF shelving found at big-box stores and lumberyards works perfectly.
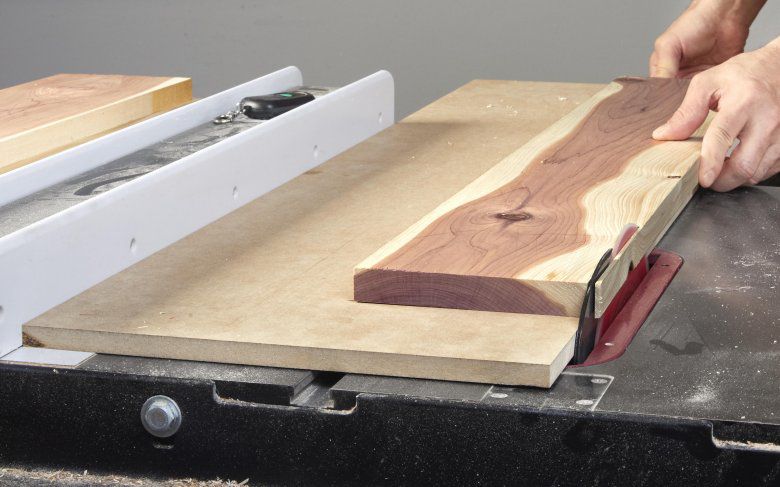
A 12–16" wide medium-density fiberboard (MDF) panel makes a perfect jointing sled. The MDF provides what rough-edge stock lacks: a straight edge to ride against the rip fence. Cut the sled as long as, or slightly longer than, the workpiece.

First, affix the workpiece to the sled (photo above). Hang just enough of the workpiece edge over the sled edge to provide a cut down its full length (photo below). The sled also acts as a backer board, preventing chip-out.
After the first pass, remove the workpiece, and peel off the tape. Joint one edge on any other workpieces you have, then set the sled aside. Finally, run the jointed edge of each board against the fence and rip them to final width. The result: boards with both edges jointed and parallel. You can't do that with just a jointer.
A tablesaw can't take the place of a jointer when it comes to creating flat faces on twisted stock. But, for putting a dead-straight edge on stock of nearly any size and shape, I prefer a jointing sled and tablesaw. Now that I have a place to plug it in, of course.
Straight and true, and tapers, too

Find yourself jointing on your tablesaw more than occasionally? This shop-made jig includes hold-downs to quickly secure a workpiece, and doubles as a taper jig to boot. Get the plan to build it, then watch Jim demonstrate its use.