Bands give plywood an edge

Installing adhesive-backed veneer or polyester edge banding requires only a steam iron for heat and simple trimming tools. Durable, heat-activated edge banding comes in most wood species, as shown below, and in black, gray, almond, and white polyester. Common widths of 13⁄16 ", 1", 11⁄2 ", and 2" cover most plywood and face-veneer panel edges with enough extra to leave a 1⁄16 " overhang on both sides.


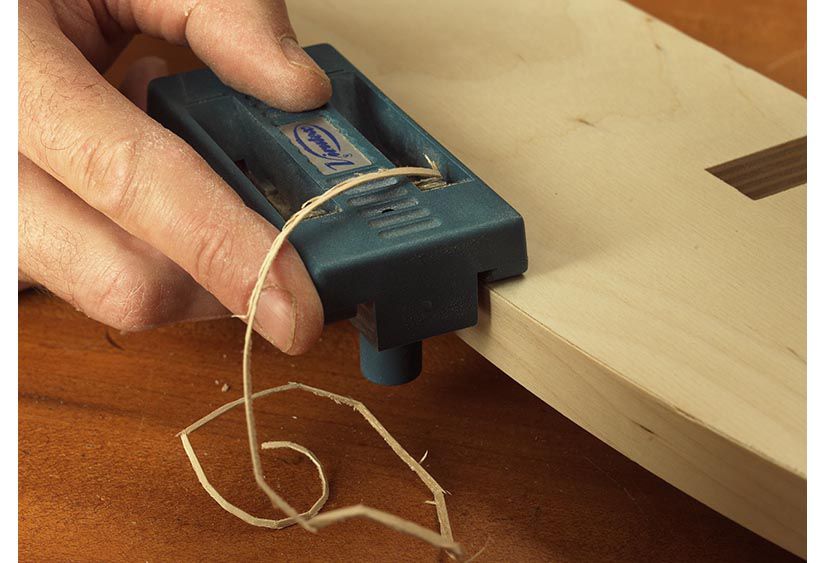
In addition to the steam iron, you'll need a tool to cut the edge banding flush with the plywood faces. A 1"-wide chisel will do, but a $10 edge trimmer, top photo above, speeds up the job. Other tools include a utility knife with a fresh blade, a sanding block, and a screwdriver with a round shaft to use as a burnishing tool. You also can make a burnisher from scrap with rounded edges.
First, iron on the band
Start with smooth, dust-free plywood edges. If you'll cover more than one edge on a workpiece, band the other edges before banding the most conspicuous edge to hide band ends on the adjoining surfaces.
Preheat your iron to the "cotton" setting. While it's heating, use scissors to cut a strip of edge banding at least 1⁄8 " wider and 1" longer than the edge you'll cover. As you measure each strip, check for splices like the one shown below that turn short wood veneer strips into long rolls of edge banding. The splices may disappear if you don't stain the edging, depending on the grain pattern around the joint. However, stain can call attention to splices. In that case, cut edge banding strips to eliminate the splices.

For edging shapes other than circles (we'll explain those later), center the banding on the edge to be covered, leaving a 1⁄2 " overhang on each end. Starting at one end, use the iron to heat the veneer and press it firmly against the plywood edge.
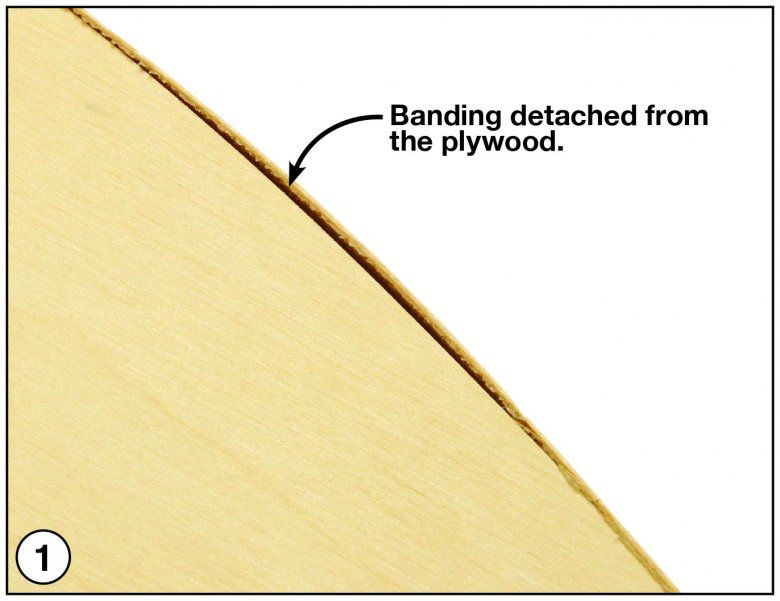
Work slowly enough to evenly melt the glue, but avoid overheating the glue and forcing it out at the edges. Also, watch for spots where the glue wasn't warmed enough to melt. This allows the veneer to pull away from the plywood, as shown 1, below.
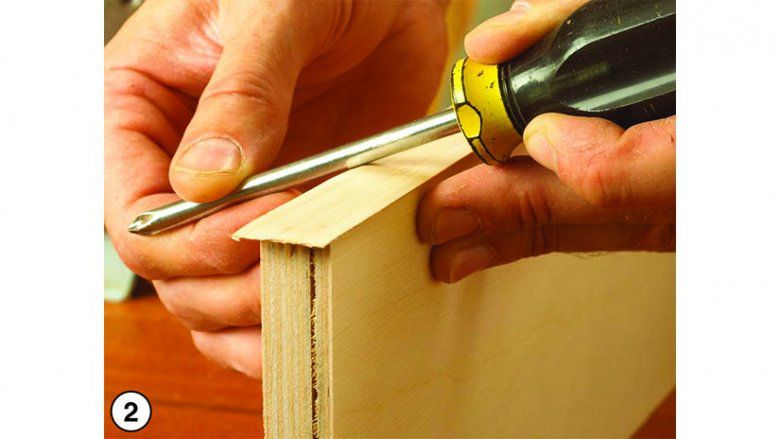
While the glue is warm, use a burnishing tool to gently press down the banding where it meets the face veneer, as shown 2, below. Avoid pressing too hard or you'll split the veneer. Allow about 10 minutes for the surface to cool. Then hold the iron at an angle as shown 3, below, and press the veneer against each edge of the plywood to help it connect with the face veneer. Again, press gently to avoid splitting the banding, and allow the glue to cool and reharden for 10 minutes before trimming away the excess.

Now, trim off the excess
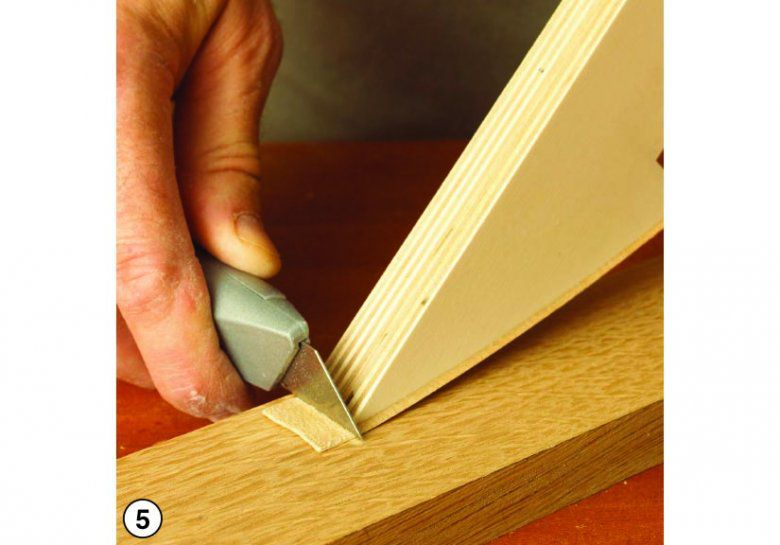
Start by trimming away the surplus banding on both ends of the workpiece. An end trimmer like the one shown 4, below (see Sources) leaves the banding end flush with the end of the plywood on 90° corners. Where edges come together at a different angle, trim off the end using a utility knife, as shown 5, below . This leaves a small lip at the edge that you'll sand off.

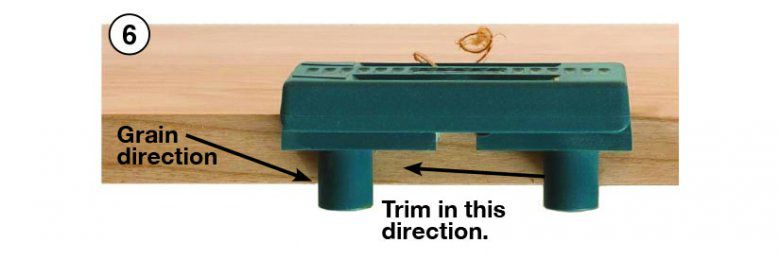
Check the flow of the grain on the edging before you trim it flush with the faces. If the grain veers down, as shown 6, below, trim from right to left. If the grain veers up as you look at the banding from left to right, trim from left to right. Otherwise, you risk splitting the edge banding as the grain pulls the trimmer down onto the plywood face.
Lay the trimmer on the plywood face, and cut one edge at a time. Double-sided trimmers that cut both sides at once can dig into wood edge banding if one side moves against the grain. Save those for polyester banding and use a single trimmer on wood.
With all edges and ends trimmed, carefully hand-sand the plywood faces to remove any edging that stands proud of the faces or edges. While sanding the plywood faces, apply pressure that forces the edging against the plywood rather than pulling it away. Avoid tilting the sanding pad along the edge and cutting through both the edge banding and face veneer to expose the plywood underneath. For odd angles, such as on the shelf notch shown 7, below, use narrow scrap and adhesive-backed sandpaper.

Sources
Wood veneer and polyester heat-set edge banding: Woodcraft, 800/225-1153 or woodcraft.com; Rockler, 800/279-4441 or rockler.com; Woodworker's Supply, 800/645-9292 or woodworker.com.
Banding edge and end trimmers: Band-It Edge Trimmer (no. 129119), $10 from Woodcraft. Single-edge trimmer no. 92023, from Rockler. Double-sided edge trimmer no. 99K40.01 and end trimmer no. 99K40.05, Lee Valley, 800/871-8158 or leevalley.com.
Going in circles with edge bands
To edge-band a circular workpiece, such as a round tabletop, follow the earlier instructions with two exceptions. First cut the banding roughly 2" longer than the circumference of the circle. Then begin heating the glue about 1" from the starting end and stop about the same distance from the other end. Cut both pieces together using a sharp utility knife, as shown below, so the ends mate. Remove the loose cut-offs. Heat both ends and press them tightly together.
