Bandsaw Resawing

Resawing:
Cutting lumber along its grain, parallel to the face
The first time I saw a piece of furniture with book-matched door panels was at a museum exhibit of 17th- and 18th-century woodworking. After looking at those nearly identical panels with mirrored grain, I was hooked. At the time, my small basement shop had an old Craftsman bandsaw. Its "one size fits all" blade provided usable radiused cuts, but was far from ready for the resawing work that I now had planned for it. And frankly, the saw needed more than just a new blade to resaw accurately and consistently.
Why resaw?
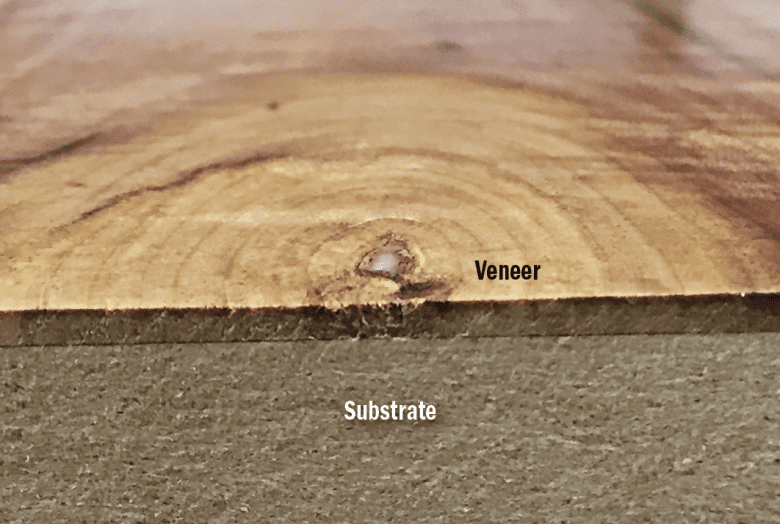
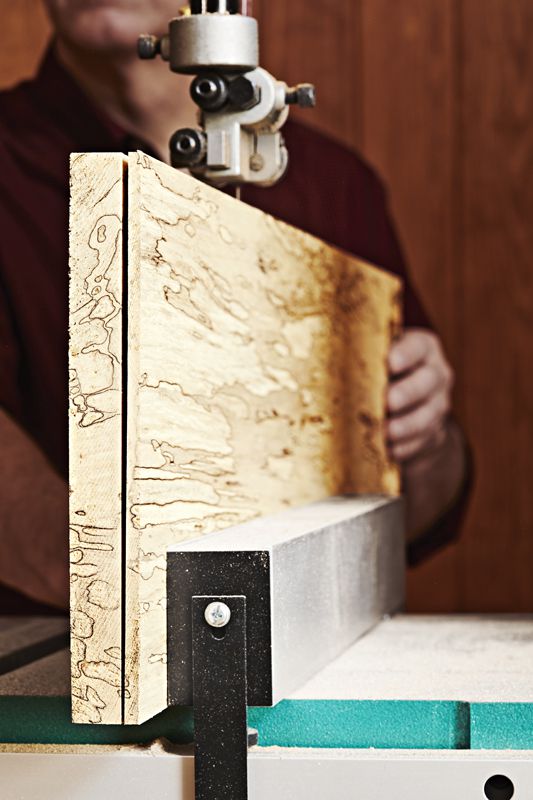
The simple answer is to get more from your stock. For example, rather than planing a 1"-thick board to 3⁄8 ", resawing can net two boards from the same piece. As an additional benefit, each of these boards will have nearly identical grain patterns, resulting in book-matched faces, right. Slicing that same 1"-thick board into 1⁄8 "-thick veneers makes an expensive wood species go even further.

I learned a lot of lessons back then about how to make any bandsaw, and its owner, a can't-miss resawing team. The first step is giving your bandsaw a good tune-up to set the table perpendicular to the blade, get peak performance from the guides, and ensure the blade tracks true.
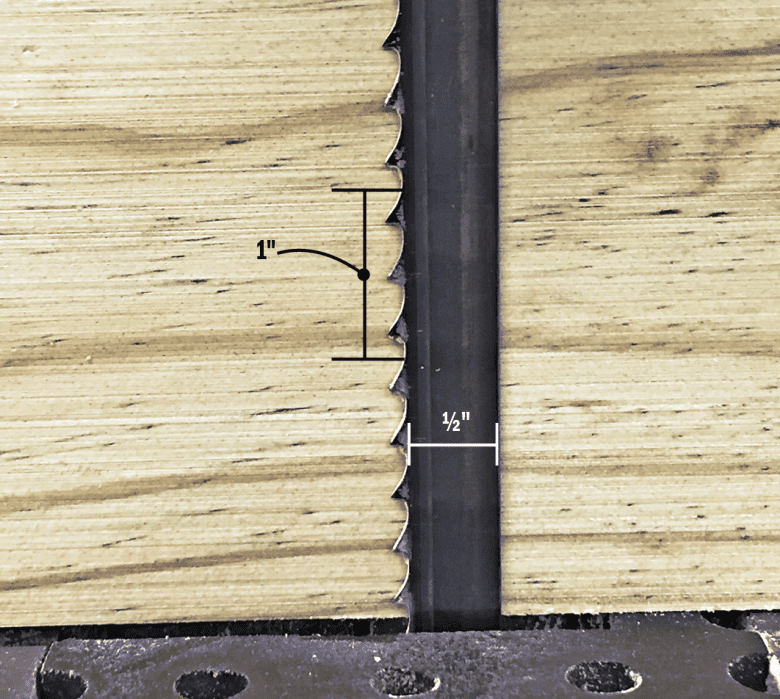
With your saw well-tuned, turn to the blade. Resawing wide boards requires a blade that cuts evenly throughout the stock's thickness while evacuating large amounts of sawdust. The wider the blade, the straighter the cut, so use the widest blade your bandsaw can handle. Most saws accept at least a 1⁄2 "-wide blade, and many even wider. Typically, a wide 3-tooth-per-inch (tpi) blade provides the perfect blend of aggressive yet smooth cut and sawdust evacuation that resawing requires.
There are many types of blades and tooth styles to consider. Find the best one for the job.

Finally, consider the fence on your saw. The workpiece should be no more than twice the height of the fence. For example, a 4"-high fence will accommodate an 8"-wide board. Use an auxiliary shop-made fence when more height is needed.
Ready, set and now, go!
Begin by squaring up your stock and a piece of similarly sized scrap. This will ensure that the stock sits flat on the table and plumb to the fence. Using the scrap piece, test the saw setup. Position your fence for the desired thickness and feed the stock slowly into the blade. The saw motor should run smoothly without bogging. Finish the cut by using a pushstick to move the stock past the blade. Now, check the cut.
Use this sled to resaw small logs into usable lumber.

If the cut piece is thicker at the top or bottom, check that the table is 90° to the blade, and adjust if necessary.
If there is a bow or belly in the cut, the problem could be insufficient blade tension. Many bandsaws' built-in tension gauges are less than accurate. A properly tensioned blade should deflect no more than 1⁄4 " when pressed in the middle, below. A too-rapid feed speed, using a narrow blade with too many teeth, or a dull blade can also cause this bow in the cut.

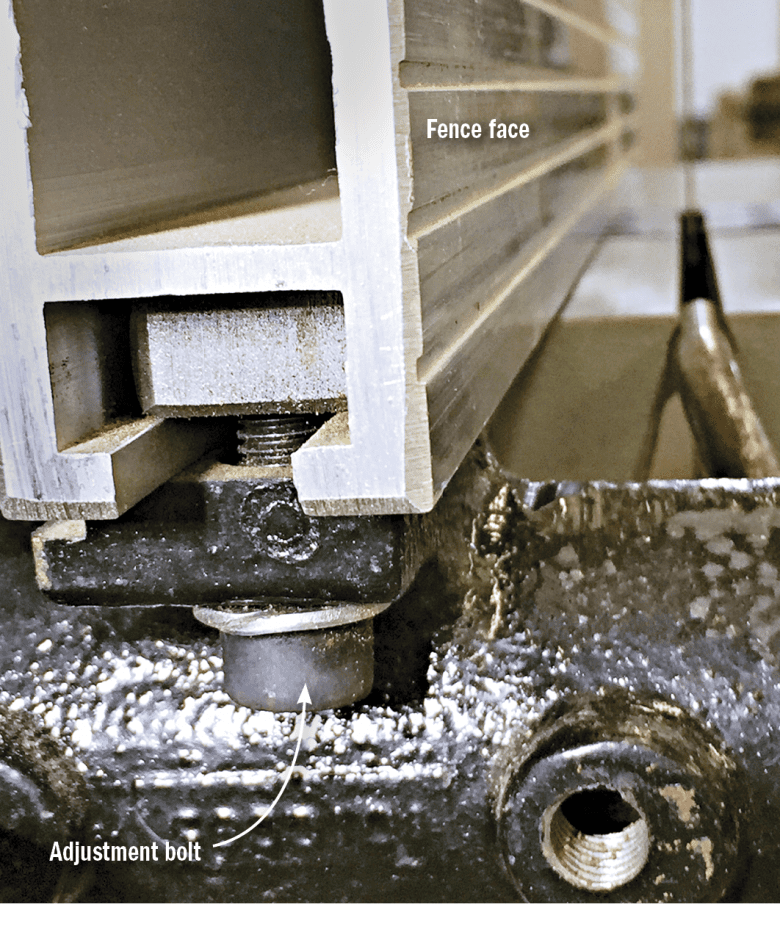
If the workpiece ends up thicker at one end than the other, the problem is drift, meaning the blade drifts out of parallel to the fence. If a sharp blade, well-set guides, and proper feed speed don't fix the problem, adjusting the tilt of the upper wheel so the blade runs on the center (crown) of the wheels may bring relief. If not, adjust the fence to compensate for the drift. Here's how.

Square up a piece of stock similar in thickness and density to your project wood and scribe a pencil line parallel to an edge. Without the fence in place, freehand cut the stock following that pencil line. Before you reach the end of the cut, turn off the saw and, without moving the piece, mark a pencil line along its edge on the bandsaw table. Setting the fence parallel to that line, below, effectively counteracts the effect of the drift. Whenever I change blades, I run through the checks again and make any needed adjustments to the saw setup.
Now for the magic
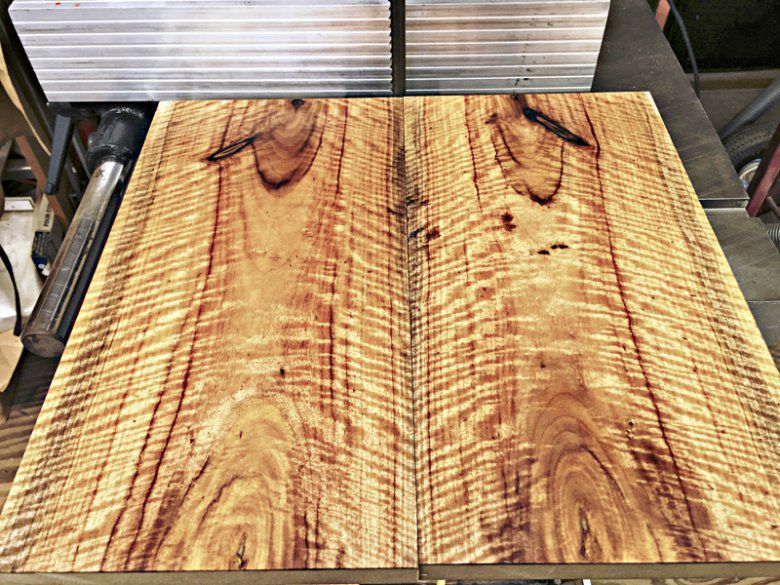
Once the setup tests are complete, it's time to turn your attention to the project pieces. Rummaging through my wood storage bin I found a piece of stock with an interesting grain pattern that I thought would look great as 1⁄4 "-thick book-matched panels on a pair of jewelry-cabinet doors.
I set the fence 5⁄16 " from the blade (1⁄4 " plus 1⁄16 " for subsequent sanding) and began the cut. My feed speed was based on the density of the stock (this was sweet gum or liquid amber) and the width of about 7". A quick check of the first piece indicated that the saw setup was on target, so I cut the second piece. The resulting complementary faces, below, illustrate just how beautiful those resawn boards can be.

These fresh-cut pieces needed to acclimate to the shop's humidity, so they were stickered for a day or two to minimize the chance of warping, below. Following that, I jointed and planed them to the final 1⁄4 " thickness.

If I had decided to use this stock to make my own veneers for a project, the steps would be only slightly different. I would set the fence to produce 1⁄8 "-thick slices, and thickness-plane or sand the blank between each successive cut. This technique provides one flat and smooth side for gluing on each of the veneers, below. And you thought that your bandsaw was just for cutting curves.