Bandsaw Tune-up

Whenever I look at my tablesaw and bandsaw, I think of that old Timex commercial that went, "Takes a licking and keeps on ticking." But even as dependable as that old Timex was, it would still lose a few seconds over time and would have to be reset. Such is the case with my stalwart bandsaw. Fortunately, the tune-up process doesn't take much time and returns the tool to dead-on accuracy.
Get down to the nitty-gritty
Begin by backing off the guides to remove the blade. It's wise to wear a pair of thick work gloves and eye protection when handling these springy blades.
After thoroughly brushing and vacuuming off any embedded sawdust, inspect the upper and lower wheels. The tires on these wheels are made of rubber, neoprene, or urethane, and they should have no obvious tears, cracks, or checking. If they are very worn or have deep grooves, replace them.
In order for the blade to track correctly, the tires should be crowned. This slightly raised center section is where the blade rides during normal operation. If the tire has become flat from wear, re-crowning can be done in a few minutes using a sanding block and 100-grit sandpaper, photo below.

The long and short of it
The wheels should also be checked to ensure they are coplanar. A long straightedge should touch the tops and bottoms of both wheels simultaneously in order for the blade to track on the center of both wheels, photo below left. Make any needed adjustments using the tilt adjustment on the top wheel, photo below right.

Reinstall the blade on the center of the tires and add tension while slowly turning the top wheel by hand. Minute tracking adjustments can be made by using the tilt adjustment until the blade tracks evenly at the center of both tires for a t least two complete revolutions.
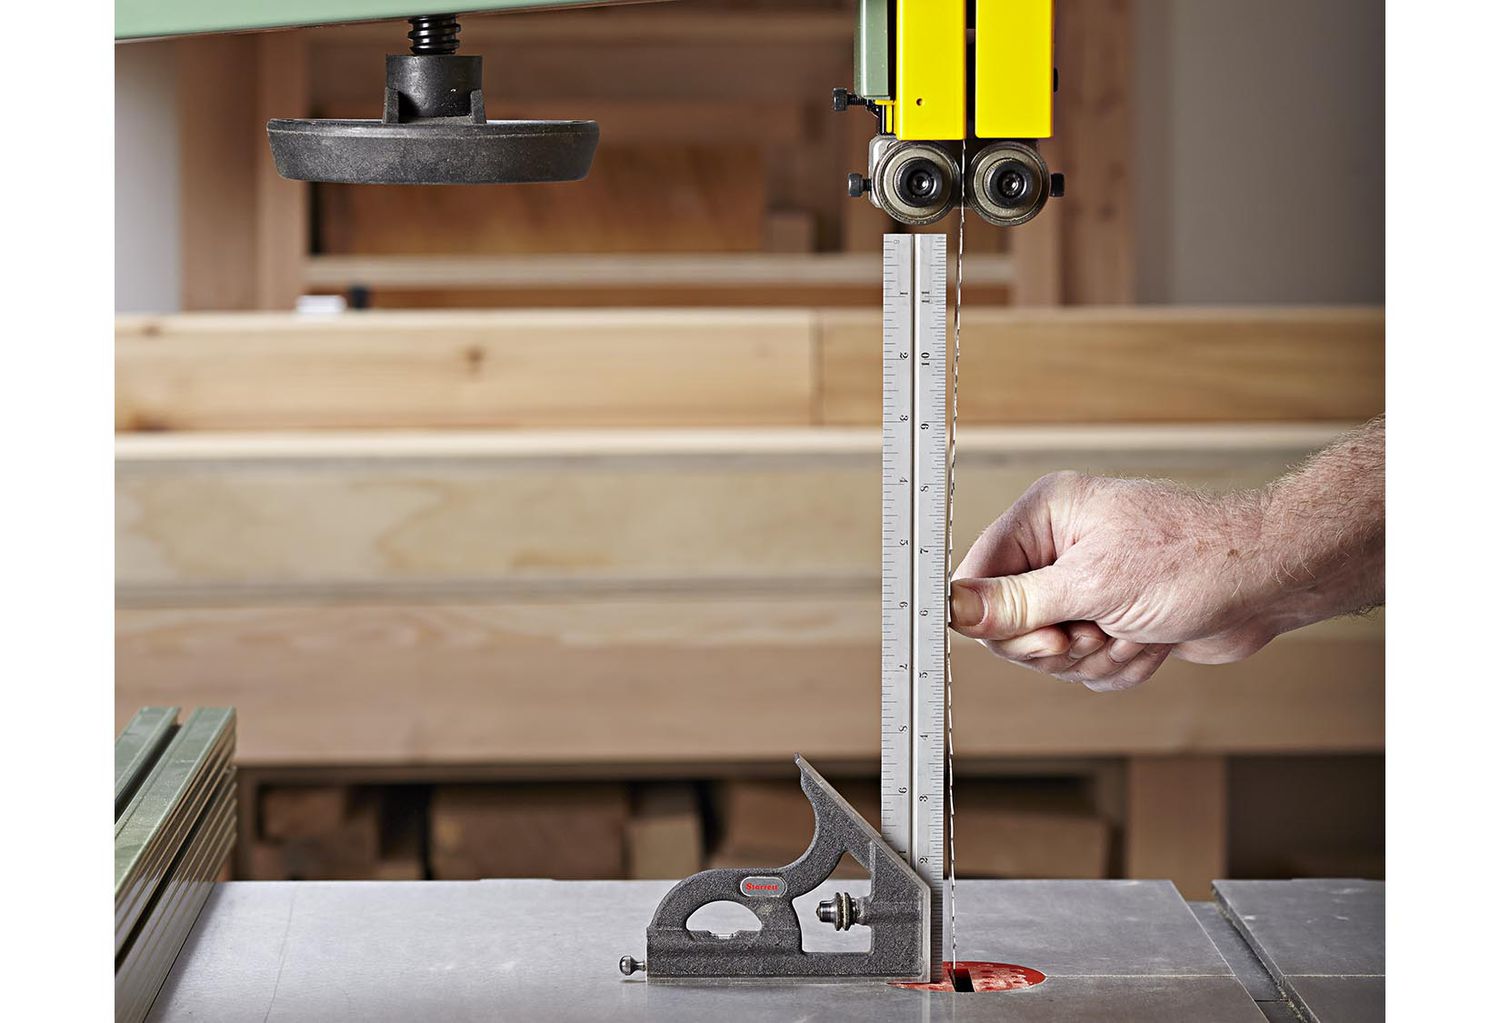
I have faith in my tension gauge. If you don't, raise the blade guard all the way and, using moderate finger pressure, check the blade's side-to-side deflection. It should deflect no more than 1⁄4 " at its center when tensioned correctly, as shown on first slide. When the saw is not in use, remove all tension to preserve the integrity of the wheels and bandsaw frame.
Don't get too close to the teeth
Now, set the blade guides. The side guides keep the blade centered and eliminate twisting. With the blade under tension, adjust the upper guides (those above the table), see photos below.

This bearing has your back
Next, adjust the thrust bearing. It rests behind the blade and stops rearward movement of the blade during cutting, photo below.

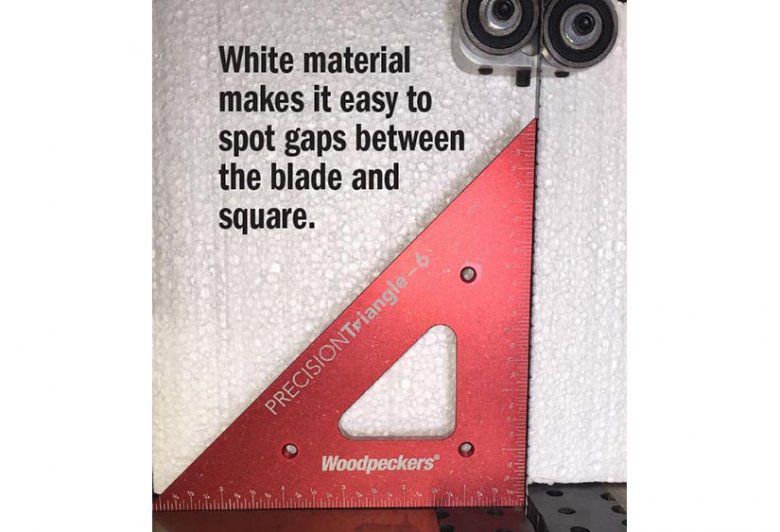
It's good to be square
Repeat these steps when setting the lower blade guides. Hand-spin the wheels to check blade tracking and make any final adjustments before giving the blade a short test with the motor running.
Like the tablesaw, the tabletop must be set 90° to the blade, photo below. Using a square, check if the bandsaw's fence sits perpendicular to the tabletop. To align my fence, I added a thin shim to the underside of my fence where it was bolted to its base. But having done that, I then had two tools that ran just like that old Timex watch.