8 easy steps to installing a riser block

Boost your bandsaw's resawing capacity by 6" when you add this simple-to-install accessory.
Adding resawing capacity
Sometimes an extra 6" of resawing capacity on your bandsaw can make a huge difference. Say you want to cut veneer or book-matched panels from a beautifully figured board that's too wide to fit between your bandsaw table and upper blade guides. Wouldn't it be great to solve the problem with an inexpensive kit and half an hour's work?
What you need is a riser block—a simple extension that fits between the base and arm of a typical cast-iron bandsaw frame. Not all saws accept a riser block, but many popular 14" models do. (Check your owner's manual or ask your dealer to find out if you have the option.) Your riser block kit should also include a longer guide post, connector bolt, blade, and blade guards. Expect to pay your dealer between $60 and $90 for the entire works.
1 of 9
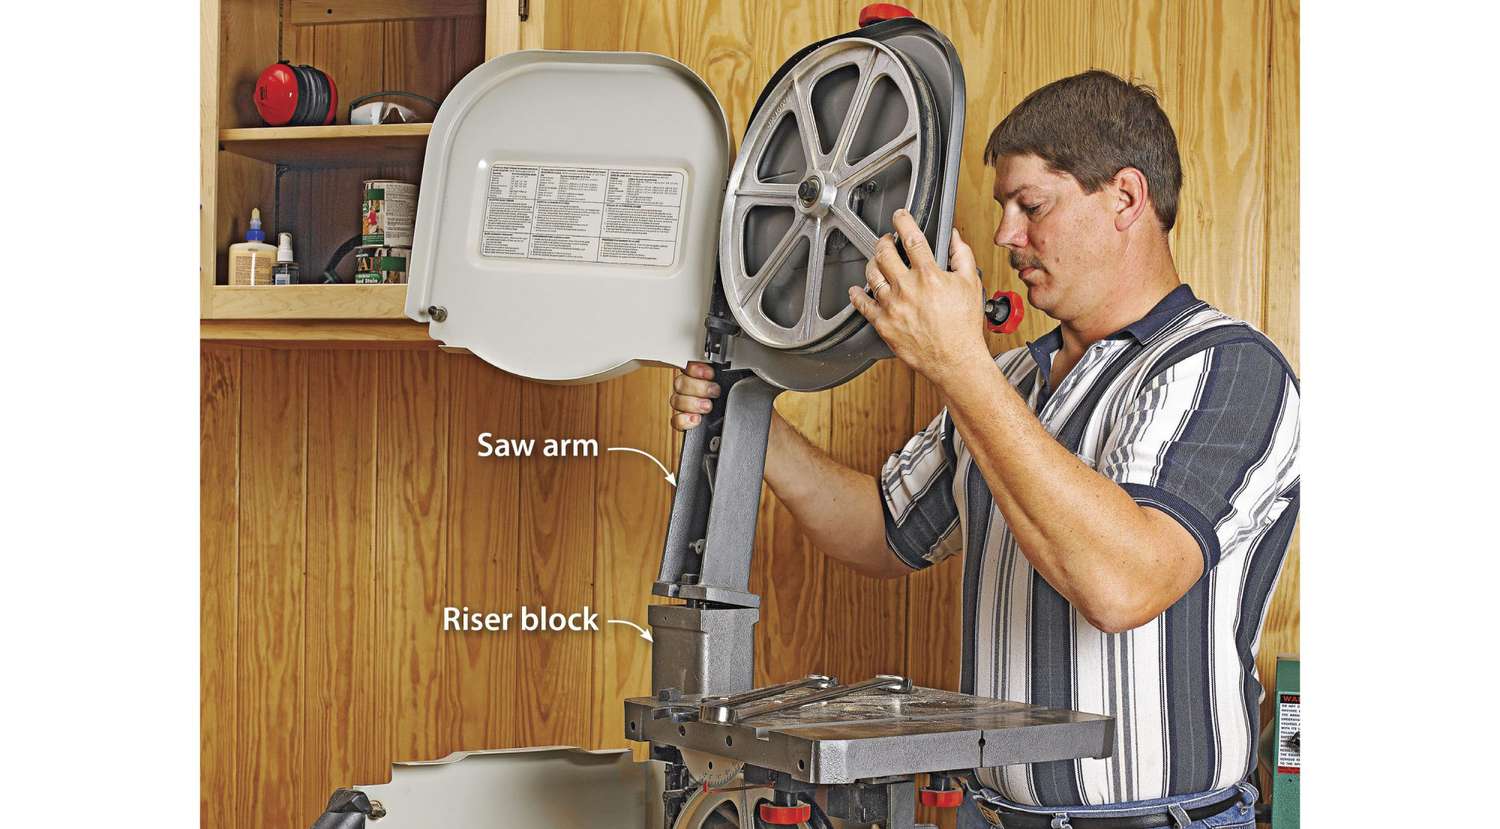
Separate the saw arm from the base

Begin by removing the blade, upper blade guides, guide post, and both blade guards. Store the parts in a labeled box or bag. Next, follow the steps shown here to install the riser block kit. Although you can do it alone, you may want to enlist an assistant to help when you reinstall the saw arm.
Remove the bolt that holds the saw arm to the base. The arm simply lifts off, but be prepared - it's heavy and awkward.
2 of 9
Add and align the riser block


The typical riser block includes indexing holes on the bottom and matching pins on the top, so it's self-aligning. If your riser block has no pins, align the outer edges flush with the base. Reinstall the saw arm, as shown in the top photo.
3 of 9
Add the connector bolt

Place the connector bolt into the slot on the saw arm, and set the saw arm atop the riser block. Access is tight, but you can reach the connector bolt head and nut with box-end or open-end wrenches. (On our bandsaw, the head and the nut take different-size wrenches.) Tighten the bolt securely.
4 of 9
Determining the power-switch location


The power-switch position varies from one bandsaw to another; ours stays at its original height by attaching to threaded screw holes in the riser block. If your switch moves to a higher position, you might have to increase the cord's available length; sometimes that's as simple as removing a wire tie.
5 of 9
Add the blade guards

Now, start to install the other components of the riser-block kit. The longer rear blade guard mounts just like the original one. The guard shown in photo fits over two attachment posts, and two screws secure it in place.
6 of 9
Next come the blade guides

Blade guides come in a variety of styles, but most reattach easily to their new guide post. Simply slide the upper blade guides onto the new post, and then tighten the unit in place. On this model, a single bolt does the job.
7 of 9
You'll need longer blades

Install the longer blade, then finish the job by adding the new front blade guard. Again, it's a one-wrench procedure.
8 of 9
Check for proper alignment

Lay a long straightedge across both wheels, and check to make sure it touches the rims at all four possible contact points. If so, the wheels are in the same plane, or "coplanar." To eliminate any gaps, turn the adjustment knob to tilt the top wheel.