Chisels

Even though the chisel dates back to the dawn of woodworking, it can still do a lot of things for you today.
Tools don't come much simpler than the chisel, as shown in the illustration below. Though the drawing shows one with a wooden handle, many today feature plastic handles. Plastic handles absorb shock and resist deformation at the end when driven by a mallet, making them ideal for general shop use. (The chisels in the WOOD® magazine shop have plastic handles.)


If you buy a wooden-handled chisel and you'll be using a mallet on it, look for one with a leather washer between the bolster and the handle to help absorb shock. A steel hoop around the top of the handle minimizes mushrooming. (Stouter double-hooped handles feature one steel hoop at the top and another in place of the brass ferrule at the bottom.)
Over the centuries names by the hundreds have been heaped upon chisels. You'll hear references to the firmer chisel (an ordinary, general-purpose chisel with a blade 3-5" long), butt chisel (a shorter chisel), framing chisel (a wider, heavier one), mortise chisel (a longer version), paring chisel (one with a long, flexible blade), and more.
But when you're buying chisels, those names don't mean much. You'll do better to pick a chisel by looking at it and assessing how well it fits your needs than by relying on a name. A blade of high-carbon steel and a durable handle are the most important features.
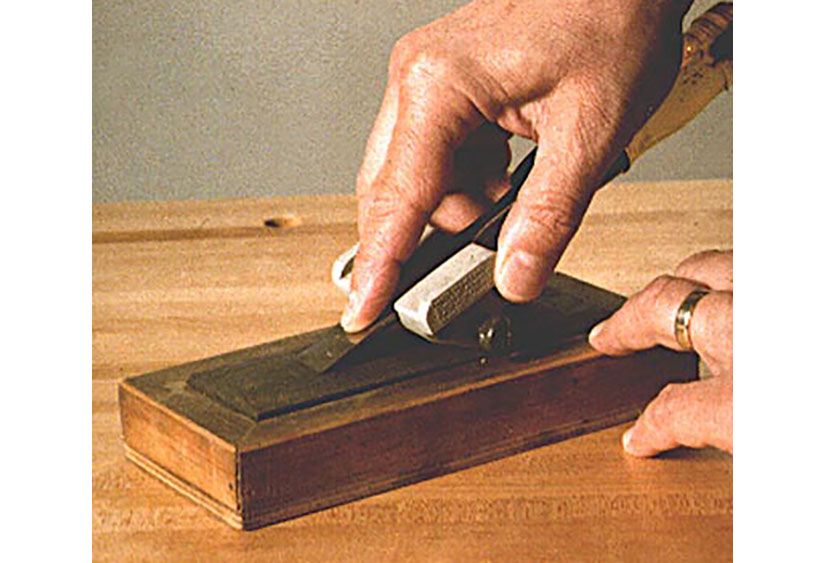
Don't even try to use a dull chisel. Hollow grind the edge on a grinding wheel, maintaining the factory bevel angle. Then hone the blade on a flat oilstone or waterstone, using a sharpening jig, such as the one shown in top photo.
Be sure, too, to keep the back of the blade flat all the way to the cutting edge. If it curves up as shown in the illustration above right, the chisel may be hard to control and won't cut cleanly.
Chisels handily meet many workshop situations. But, leave such things as opening paint cans or prying off door and window trim to the proper tool. You can use the chisel to clean off dried glue squeeze-out, pare down a tenon to fit a mortise, or trim a plug flush to a surface. Here are some other chores where the chisel comes in handy:
Cleaning a mortise:
After drilling to remove most of the waste, go in with a chisel to finish a mortise. Work with the bevel up—that is, facing away from the mortise wall. For a through mortise, cut inward from both sides to prevent splintering the back.


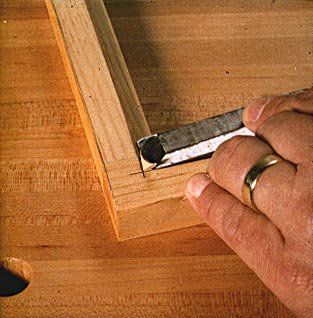
Squaring corners
The chisel shines for squaring up corners, as in this routed rabbet. First, hold the chisel vertically to make a cut extending each side to the corner, as shown below.

Then, remove the waste with a cut into the side of the rabbet, as shown below. Toward the bottom of the rabbet, turn the chisel over, and work with the bevel flat against the wood.
Inletting hardware
Set hinges and other hardware into shallow mortises so they'll sit flush with the surface. Trace the item's outline on the wood with a knife blade. Holding the chisel perpendicular to the surface with the back of the blade to the line, cut to the required depth. Then, clean out the shallow mortise with the chisel, as shown below. Here you work with the bevel down.

Dadoing
Cut the sides of the dado to depth with a backsaw or chisel. Then, clear out the waste with a chisel of appropriate width, as shown below. A scrapwood gauge block, shown, guides the chisel straight into the end of the dado for a flat bottom. (You don't need it as you cut farther in.) To bring the top of the gauge block flush with the bottom of the dado, shim it with a 3x5" notepad opened to the required thickness. Cut from both ends to prevent tearout.

Photography: Hetherington Photography Written by: Larry Johnson