Choosing and Using Flush-Trimming Router Bits

Whether you're creating duplicate project parts from a template or trimming one surface even with another, reach for a flush-trimming bit.
What these bits can do
A flush-trimming bit is, simply put, a bearing-guided bit that's used to rout one surface flush (even) with an adjoining surface. Several types exist, as shown in Five Types of Trimmers, below.


Five types of trimmers
Flush-trimming bits come in several styles.Here's what you need to know about each one:
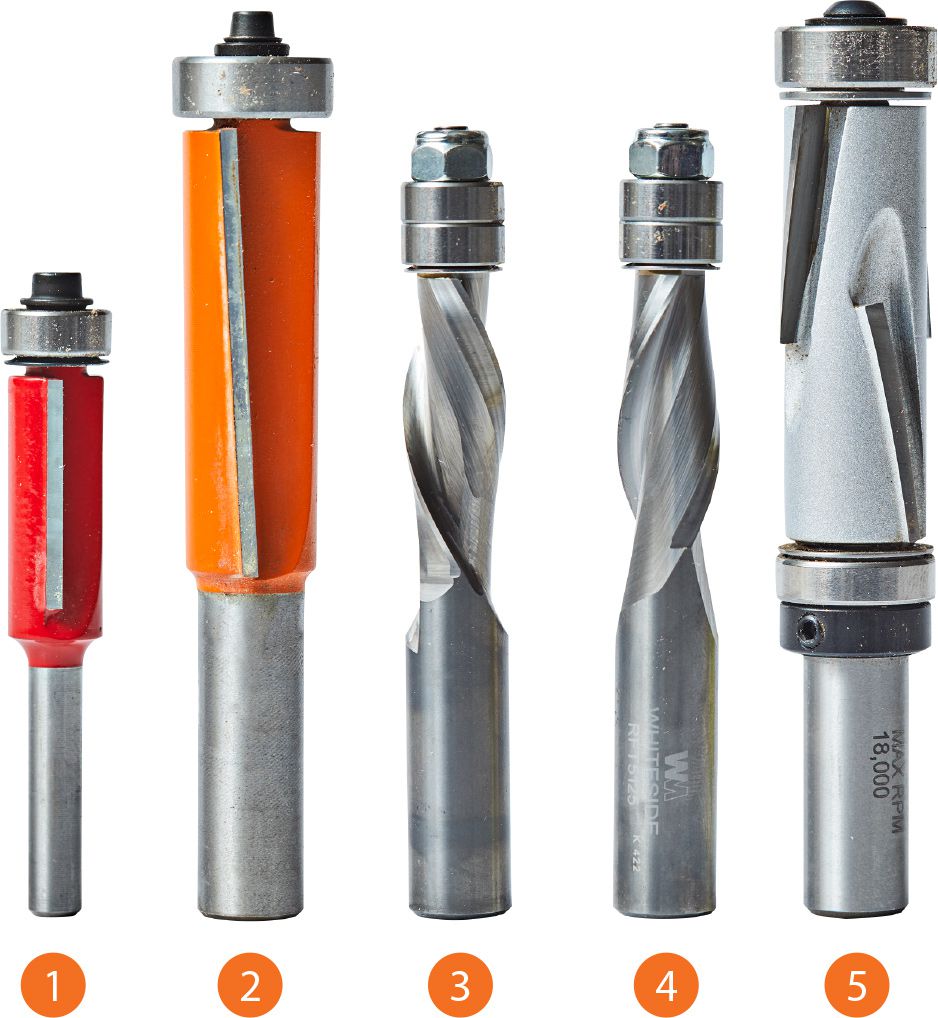
- Straight flute: If you're on a very limited budget, this is your bit. However, its straight flutes increase the likelihood of tear-out.
- Angled flute: This bit costs a little more than a straight-flute trimmer, but its shear-cutting angle reduces the risk of tear-out.
- Downcut spiral: So named because the angle of the cutters push fibers away from the router, this solid-carbide bit costs double or more than a straight-flute bit. However, its shear-cutting angle results in almost no tear-out because in flush-trimming situations, it is pushing the fibers toward the supporting template material that the bit rides along.
- Upcut spiral: Priced about the same as the downcut bit, this bit cuts nearly as cleanly due to its shear angle. Choose this bit when dust collection is a priority. It pulls fibers and chips toward the router where they can be extracted by your dust attachment or more easily fall into your router table.
- Compression: The compression bit costs the most, but we prefer it because it works for nearly all flush-trimming tasks. Featuring both upcut and downcut spiral cutters angling toward the center, it provides the best protection against tear-out. Most of these come with 1/2" shanks. Dual-bearing compression bits (one above and one below the cutters) prove useful in almost any flush-trimming scenario.
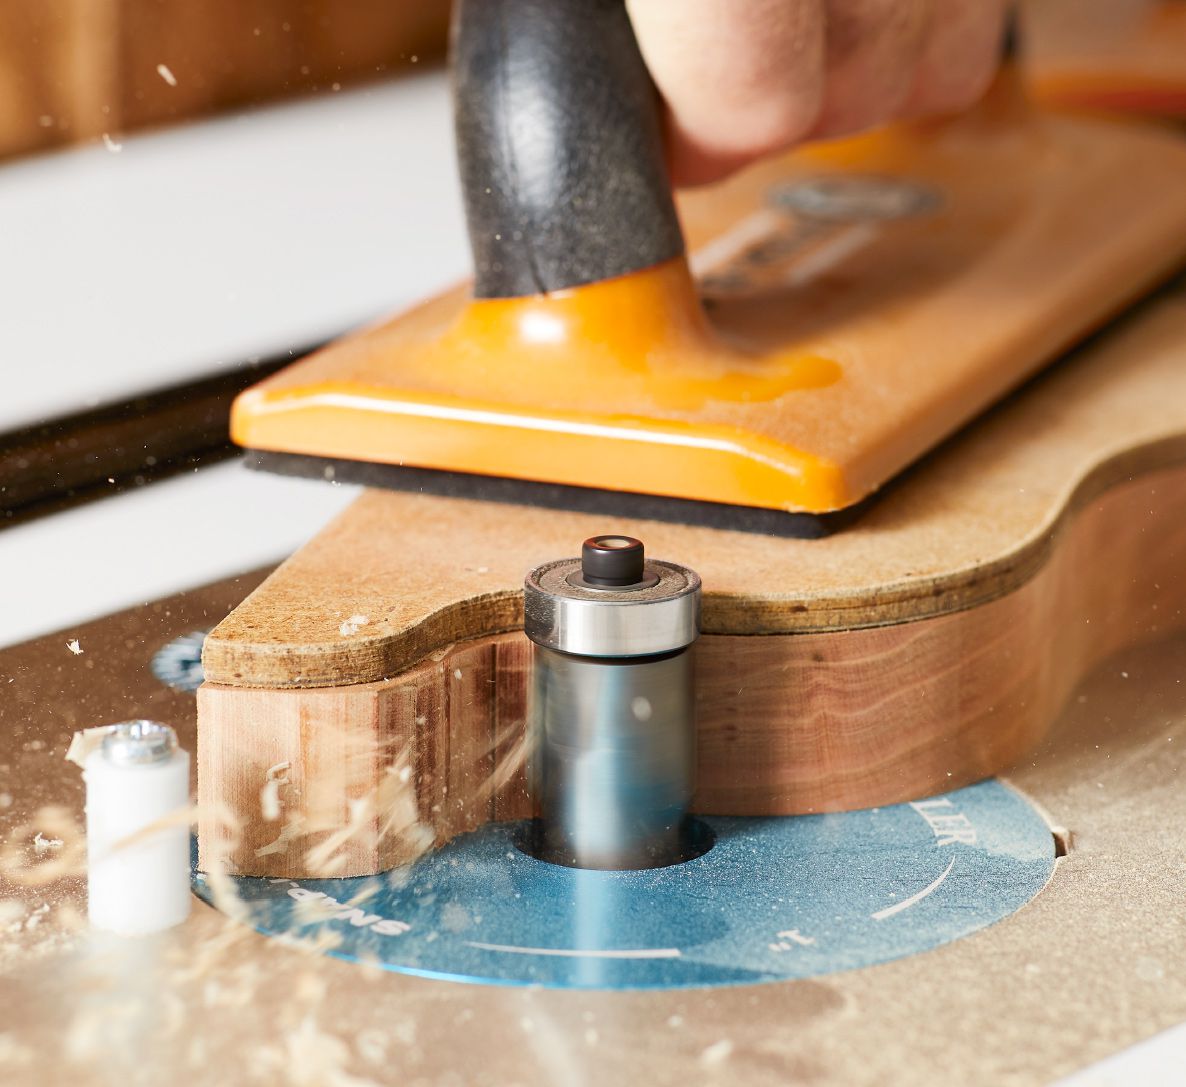
With all types of flush-trimmers, the bearing, located at the end of the bit and matching its diameter, rides against one surface while the cutters trim the other surface perfectly flush, as shown in the opening photo.

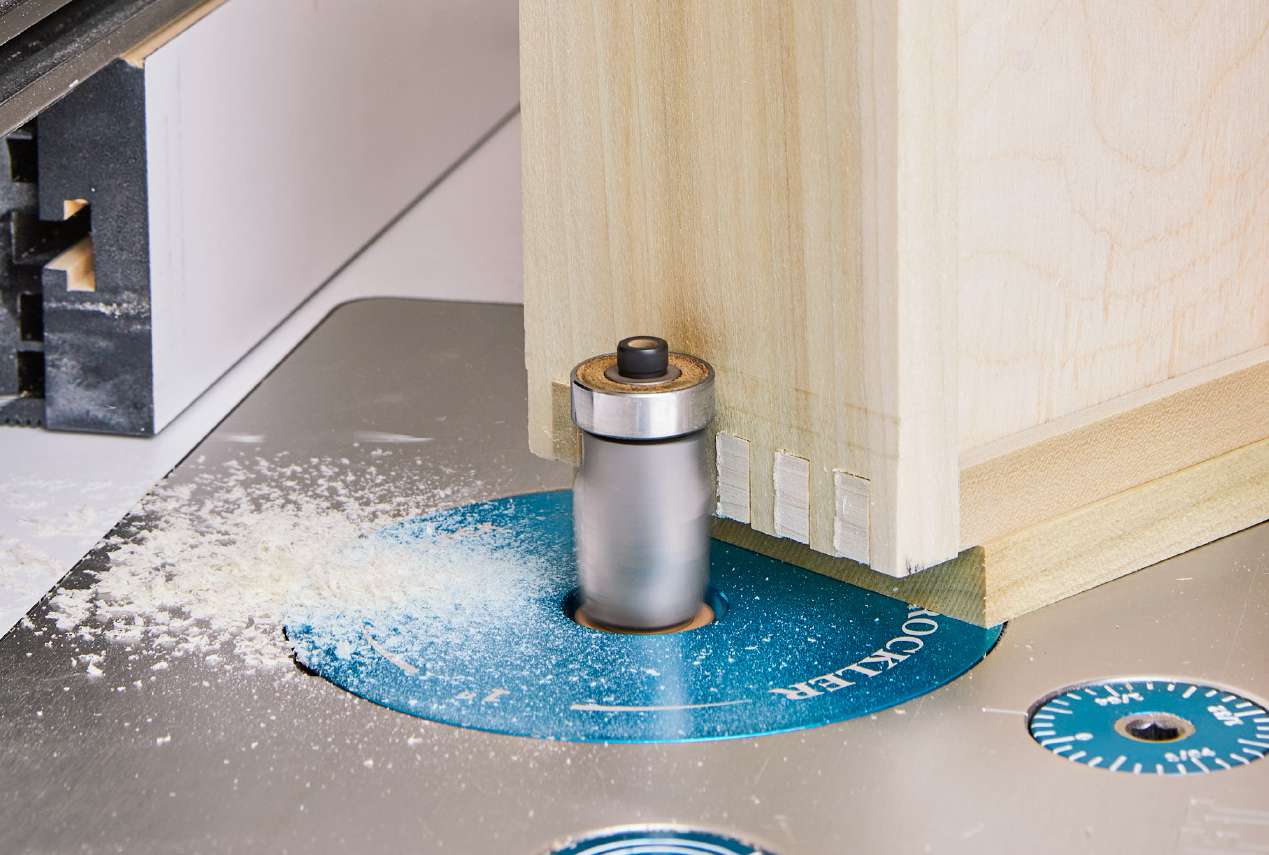
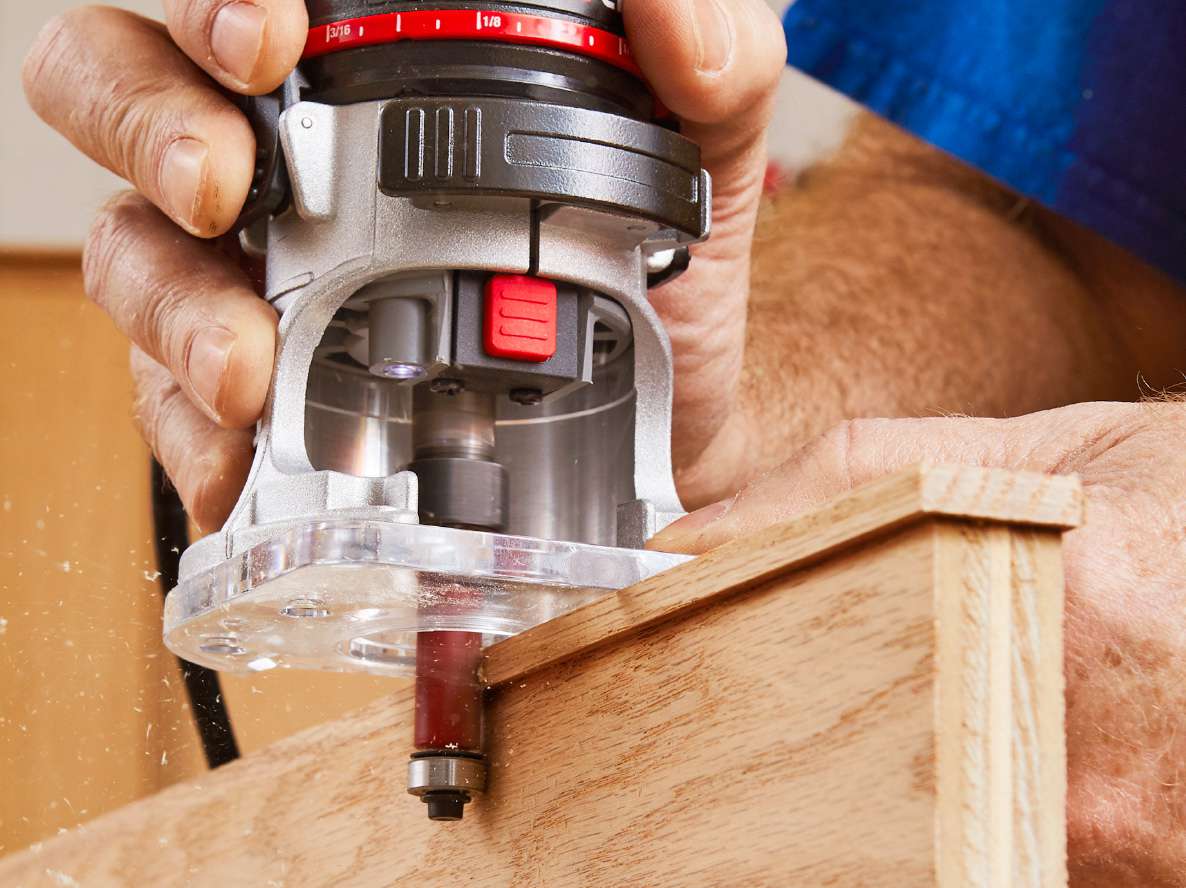
Flush-trimming bits excel at trimming edge banding or solid-wood edging and trimming inlays, near the begnning of the article, as well as finishing off proud box joints, above, and through dovetails.
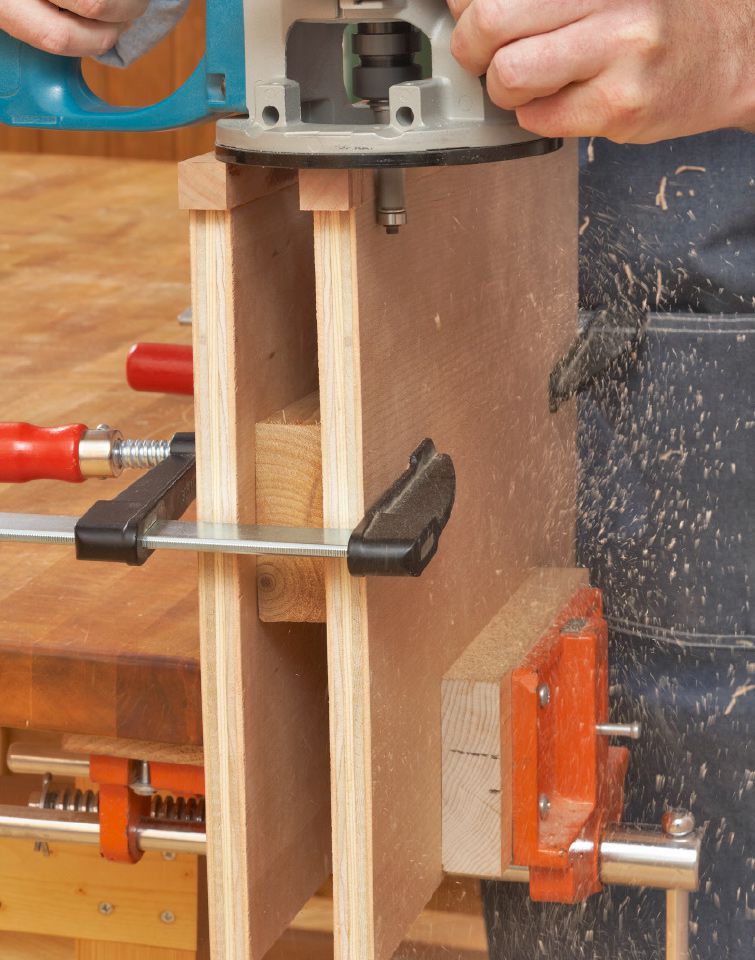
Regardless of the cutter length, you need only extend enough bit so that the bearing rides against the reference edge. We also prefer flush-trimming bits over pattern bits for template-routing at the router table (see Flush-Trimming Vs. Pattern Bits: What's the Difference?, below, because they place the template on top where it's visible and expose no more of the bit than necessary.
Flush-Trimming vs. Pattern Bits: What's the Difference?
A flush-trimming bit has a bearing mounted at the end opposite the shank. A pattern bit's bearing rests between the cutting edges and upper shank, as shown above. They perform essentially the same task, but with one significant difference: the amount of bit that must be exposed to make the cut. A pattern bit's entire cutter length must be extended from the router base or table for the bearing to reach the template, a potential safety hazard that increases with longer cutting edges. These bits have a capability flush-trimmers don't, though: With the cutters at the end of the shank, you can rout partial-depth mortises, rabbets, or bowl interiors while following a template.