Get better cuts from any circular saw

Start with the right blade
Replace the 24-tooth blade that came with the saw with a 50- to 60-tooth blade for cleaner crosscuts in solid wood, veneered plywood, and other sheet goods. For general use when cut quality isn't critical, use a 40-tooth blade. If you're ripping solid wood, switch back to the 24-tooth blade.
Beat tear-out in 3 ways
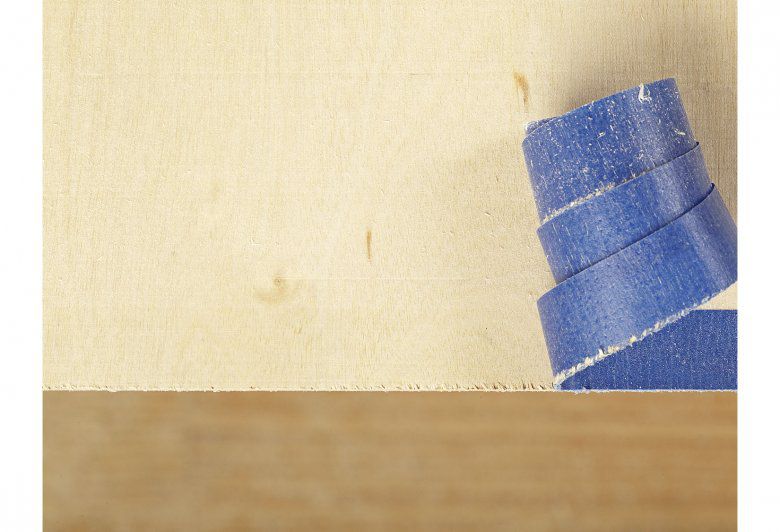
Because a circular-saw blade cuts on an upward rotation, the bottom face, in which the teeth enter the cut, will almost always have a clean, tear-out-free surface. Meanwhile, the top face suffers tear-out so bad it cannot be used in a visible area on a project. (See the three photos at below for different degrees of grain tear-out.) So whenever possible, put the best face down when cutting. When you must cut with the best face up, use one of these tips to make your workpiece edges look like the one in the best photo.


Score the cutline first
Make your cut in two passes instead of one. A shallow scoring pass cleanly shears the surface fibers rather than lifting them upward.


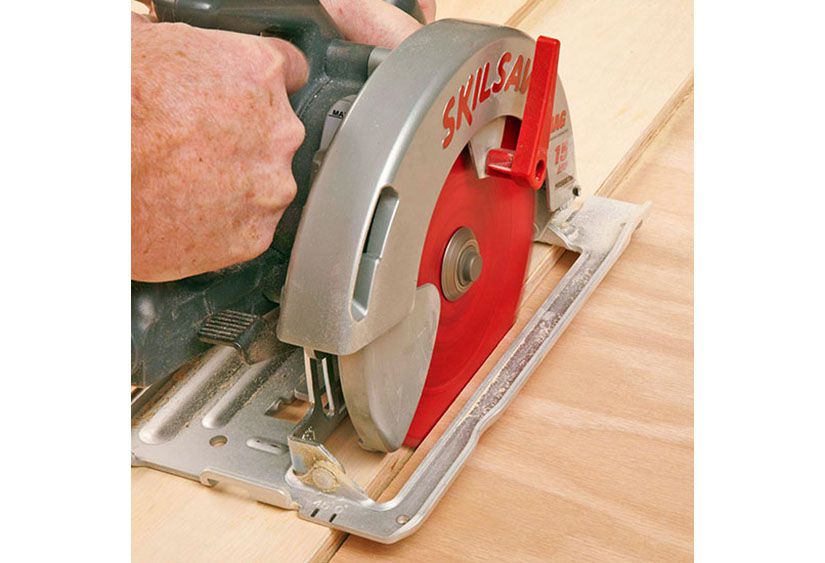
Set clearance to zero
To support the wood fibers, especially plywood's thin veneers, where the blade exits the workpiece, attach an auxiliary subplate to your saw's footplate (also called a base or shoe). When you plunge-cut through this extra layer, you'll create a zero-clearance opening around the blade to eliminate tear-out.
CAUTION: Be extra careful when using a saw this way because the blade guard cannot cover the blade below the auxiliary footplate.

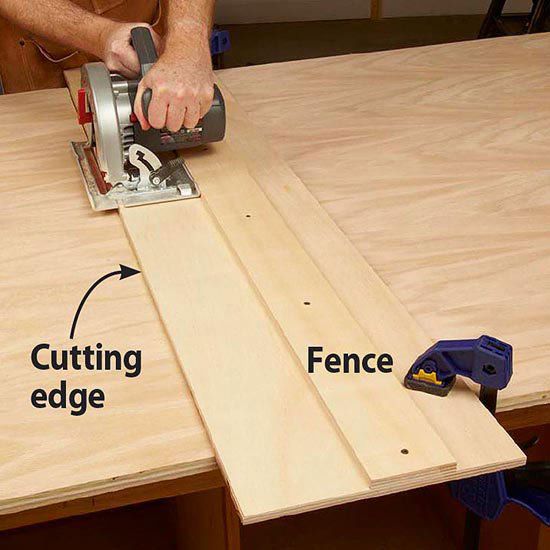
Make your own guide
A custom edge guide for your saw not only beats tear-out, but also makes it easy to align cuts. Start by building a jig based on the drawing below; adjust the width as needed for your saw. We made ours long enough for crosscuts in 4'-wide sheet goods. Make the base's cutting side about 1⁄2 " wider than the distance between your saw's blade and the footplate edge below the motor. Trim the guide to custom-fit your saw by running the footplate against the fence to create the zero-clearance support. Clamp the jig on the "keeper" piece when cutting because the jig does not provide zero-clearance for the cutoff.

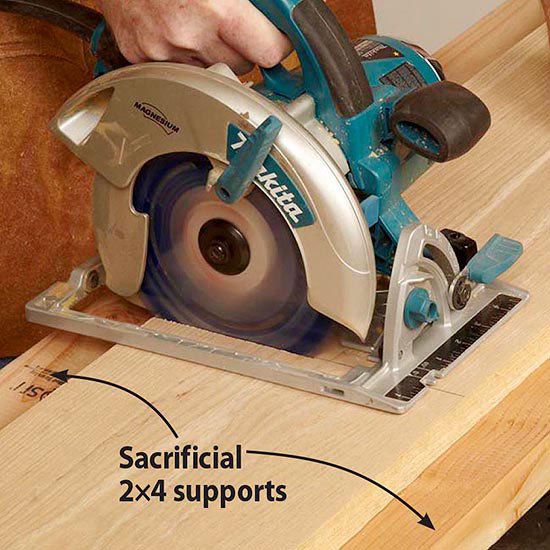
Prevent splintered cutoffs
If you crosscut solid wood or plywood without supporting both the keeper piece and the cutoff, you'll frequently get a splintery tear-out along the far edge when the cutoff drops away before you've finished the cut. To avoid this, dedicate two inexpensive boards as "sacrificial" supports, set in place on sawhorses or your workbench top.