Clamp Beyond Your Clamp Capacity

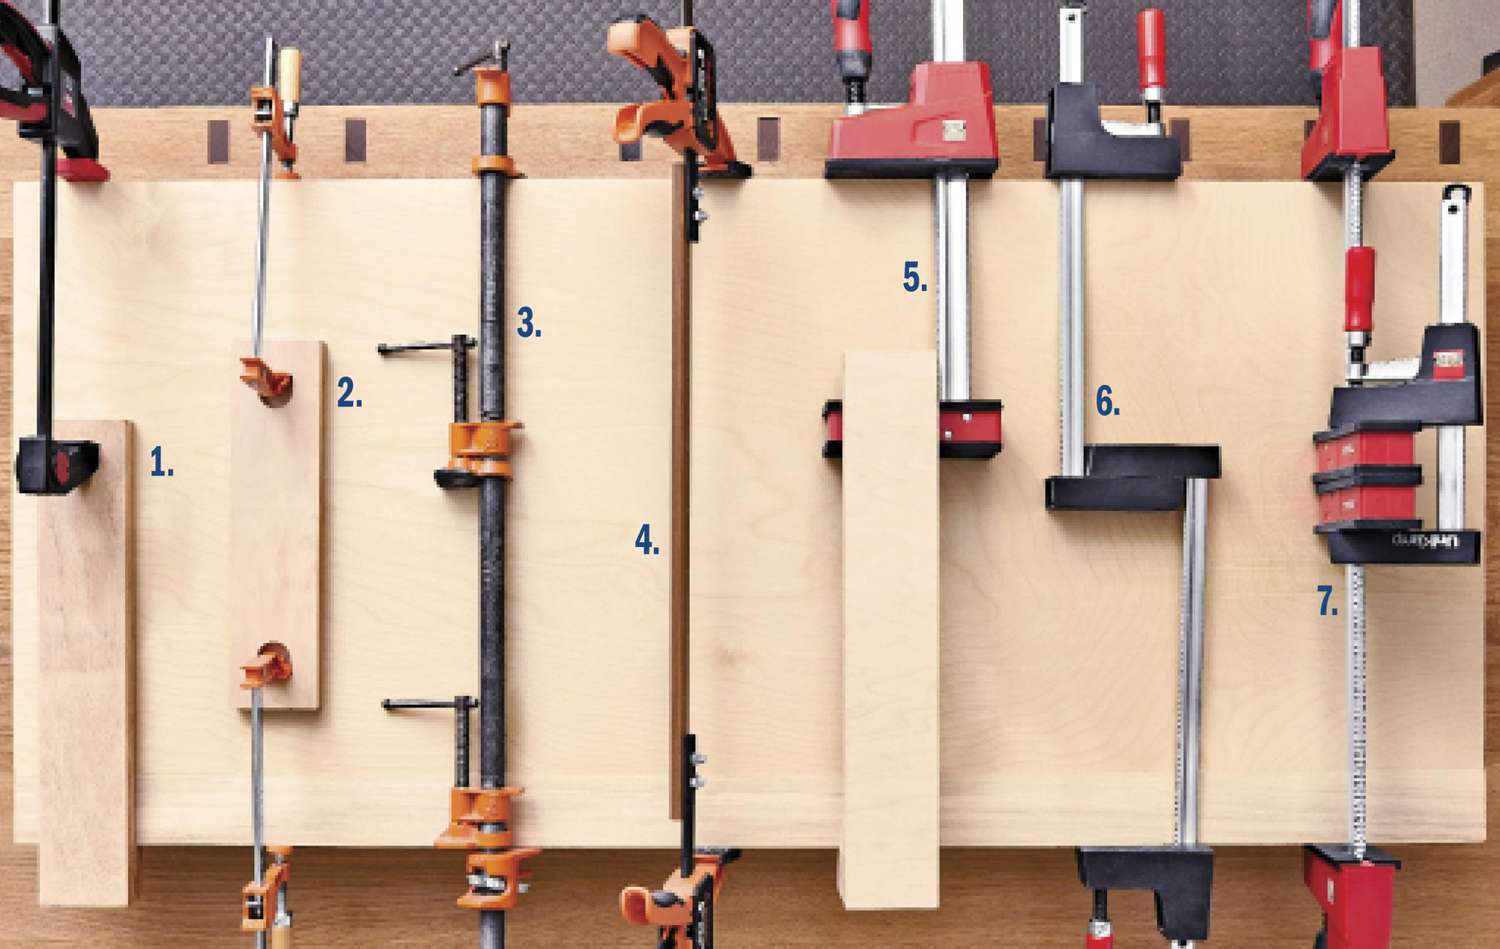

Every bit as frustrating as not having enough clamps is not having clamps that reach where needed. Whether you need to span a cabinet or wide panel, or apply clamping force beyond the reach of a clamp's jaws, these tips help you stretch your clamp's potential. And you won't have to store all those long bars or pipes.
1. Add a shop-made auxiliary jaw using scraps of 3⁄4" plywood or solid stock. Drill a hole at one end to accept the clamp's fixed jaw and square up the near end to provide a flat surface for the clamp jaw to grab. Glue a short scrap to the end (below) to hook over the opposite end of the workpiece. Drive screws into the hook for additional strength, if needed.

2. For even more clamping force, drill a hole at both ends of a scrap and use it to bridge between two clamps.
Note: Methods that raise the clamp bar out of parallel with the workpiece tend to lift pieces out of alignment. Keep a close eye on pieces as you work.
3. Instead of buying pipe couplers, use a fixed jaw as a coupler. We used this method to combine three short pipe clamps into one long one.
4. Join two one-hand bar clamps by removing the fixed jaw from each clamp. (You may need to drill or knock out the drift pin at the end of the bar.) Then, bolt in a length of metal bar. We pressed an old shelf standard into service. Drill holes through the extension and clamp bar so you can insert two bolts in each end to keep the bars and extension aligned.
5. For jobs needing parallel-jaw clamps, add a hook to both ends of a plywood scrap. We glued two layers of 3⁄4" plywood to reach over the clamp jaw, and three layers with a gusset on the opposite end to grab the edge of the workpiece (below).

Note: Extensions with wood cleats hooked over a workpiece edge may not withstand the full force a clamp can generate, but should work for most jobs with closely mating surfaces.
6. Hook together two parallel-jaw clamps jaw to jaw. This method allows you to use heavy clamping force.
7. If you need the full depth of the parallel jaws, reverse the fixed jaws, and hold them together using a third clamp. Even clamped together, the fixed jaws will begin to separate as you snug up the clamps, so use this where heavy clamp force isn't needed.
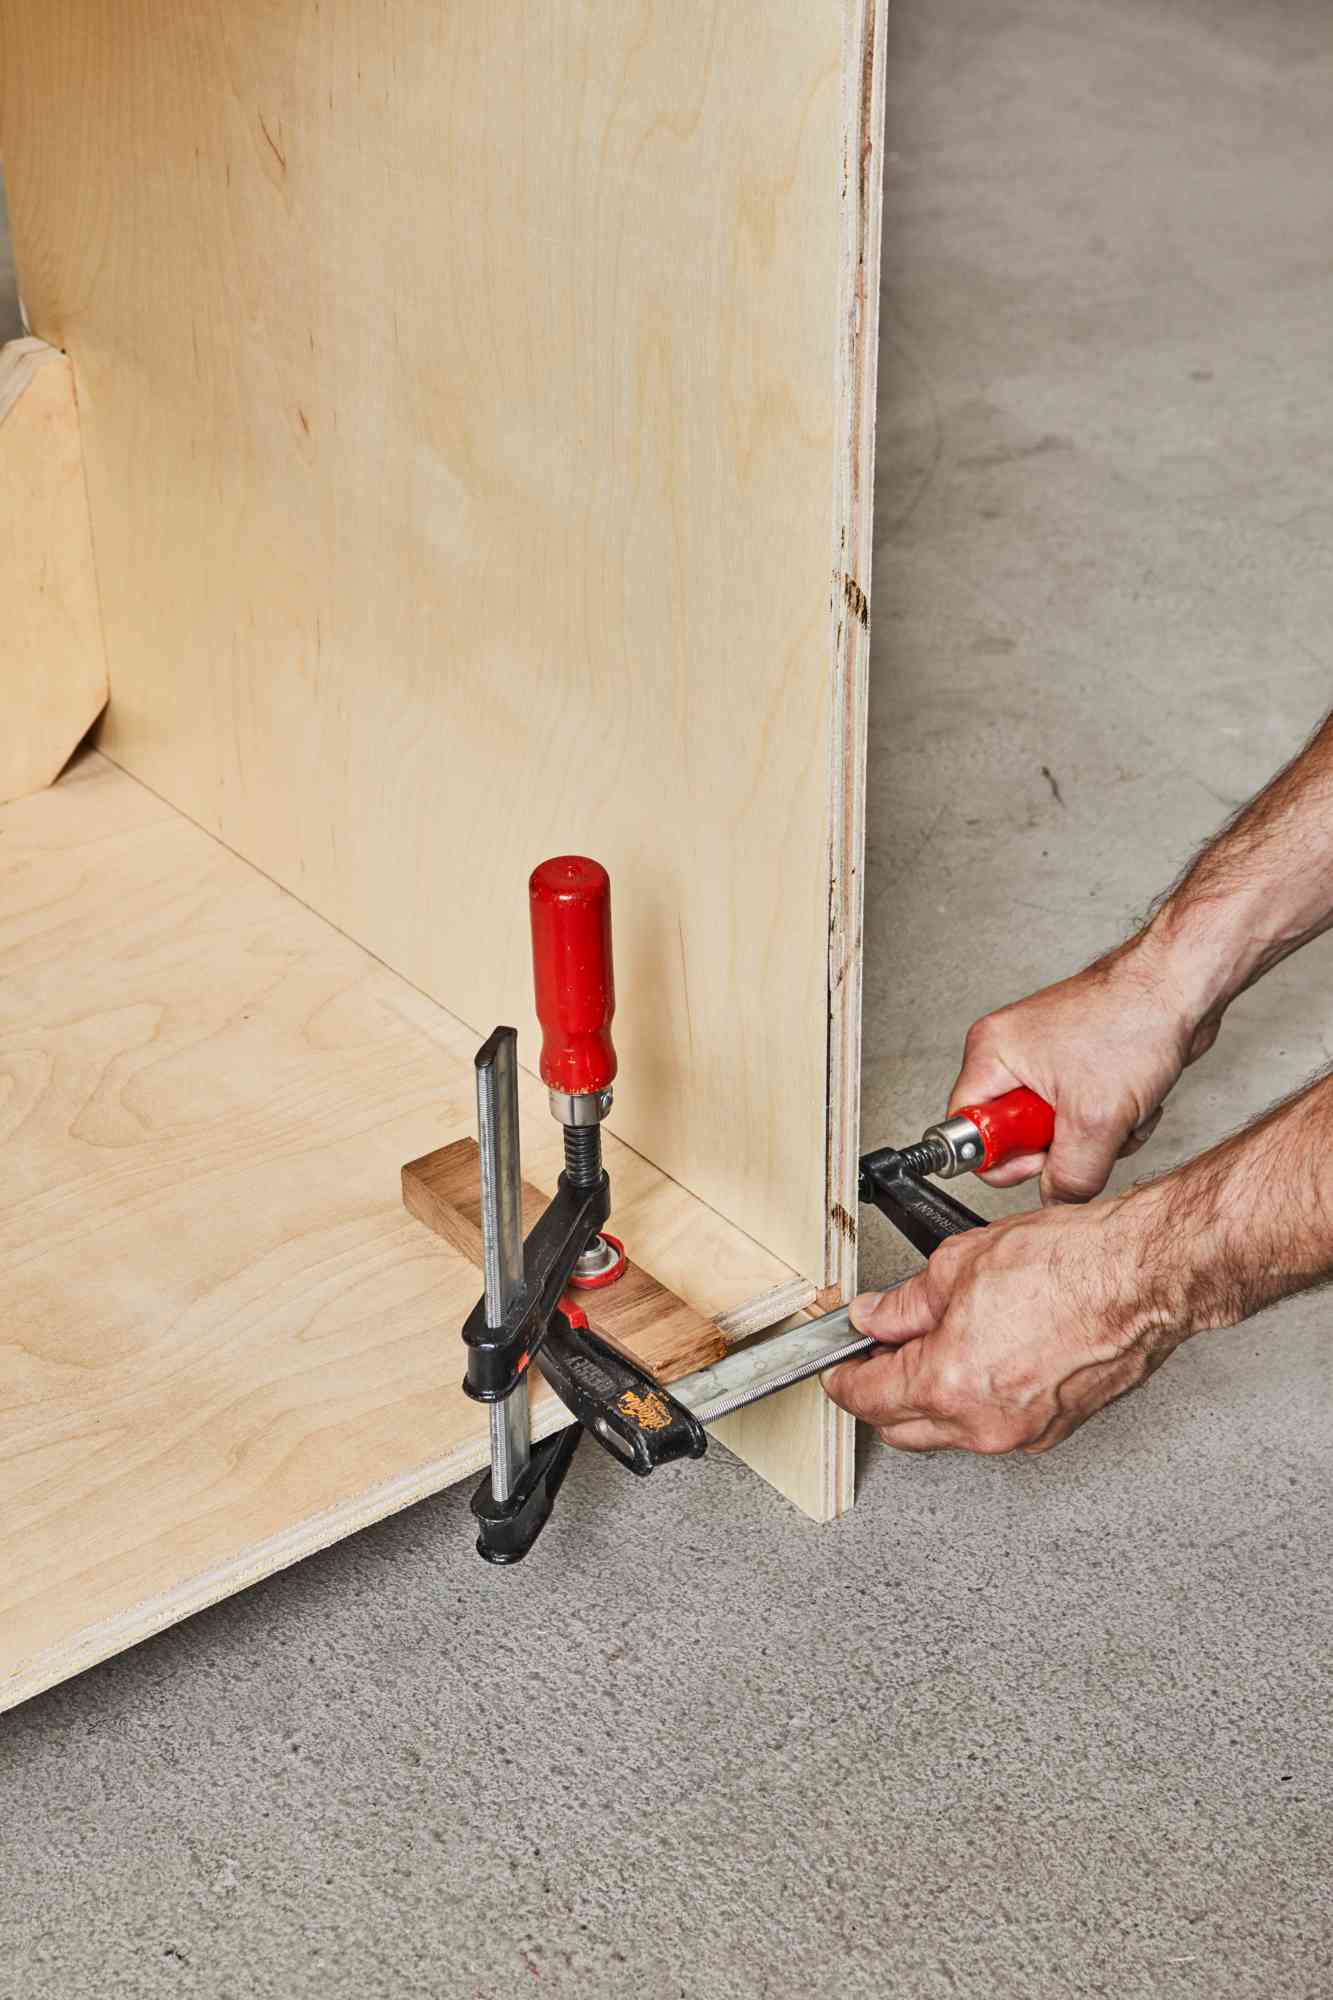
Reach deeper
Sometimes you need to clamp a good ways from the edge of a workpiece. When your jaw clamps prove too shallow, try these techniques.

To apply clamping force across the full width of an assembly, use a caul with a slight crown. The 30"-long cauls shown have a crown of about 1⁄16" from the center to each end (see photo below ). Place the crowned edge against the workpiece; clamping the caul flattens it, applying pressure from the center of the workpiece to each edge.


Extend the reach of bar clamps with wood jaws [Drawing 1]. A threaded rod with nuts on each side of each jaw keeps the backs of the jaws from binding, and directs clamping force to the front.

Download a full-size pattern for the jaws.

If you have 1⁄2" pipe clamps, make extensions from 3⁄4" pipe fittings to slip between the jaws [below]. Make sure the faces of the elbows rest flat on the workpiece surface as you tighten the clamp jaws.
