Clamping with Wedges
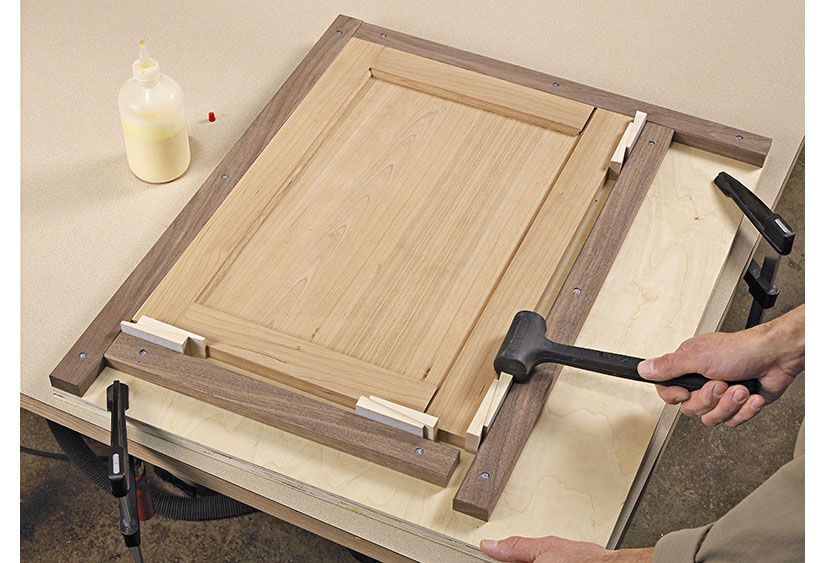

Make doors and frames
If you're making multiples of the same project, such as frame-and-panel doors or picture frames, it makes sense to build a jig, such as the one shown above. This simple jig uses opposing wedges to push together the joints while keeping the assembly square and flat.
To build a jig like this, glue and screw two cleats to the plywood base at a right angle. Coat the plywood and cleats with polyurethane or any finish that will seal the wood and prevent accidental glue adhesion.
Bandsaw eight wedges, each with about a 5° angle. Coat the smooth side of four wedges with polyurethane, and add self-adhesive sandpaper (180 or 220 grit should do) to the smooth face of the other four wedges. Dry-fit your project against the fixed cleats. Screw the remaining cleats to the plywood—no glue—about 1⁄2 " from the project edges. Insert the sandpaper-backed wedges against the cleats at the joint lines, then insert the remaining wedges against their partners (coated side against the project), and tap them to close the joints. After doing a dry run, disassemble, add glue to the joints, and repeat the clamping procedure.
Edge-wedge against a clamp
Simplify clamping solid-wood edging onto plywood with a few one-hand bar clamps and wedges. After gluing on the edging, secure a clamp to the plywood, leaving about a 1⁄4 " gap between the edging and bar, as shown below. Tap a wedge into that gap to press the edging tight to the plywood. Repeat as needed along the workpiece edge.


Integrate wedges as "clamps"
You can design some projects with wedges that serve both functional and decorative purposes. As shown on the bench below, wedges driven into mortises in the stretchers—with or without glue—draw the legs and stretchers tightly together. And in the bottom photo, a slot cut into the wide tenon on the leg accepts a slightly tapered wedge that spreads the tenon against the glued mortise walls in the seat. Drive it snug, let the glue dry, then trim the wedge flush for a nice, contrasting look.

