CNC Cutting with a Drag Knife


It's hard to imagine CNC cutting without the router or bit (or ear-splitting noise), but switch off the router, forget the bit, and give your ears a rest while we take a closer look at the drag knife.
A drag knife cuts much the same way your utility-knife-wielding hand does. But rather than pivoting the material and your wrist, a drag knife mounts in the collet of your (powered-off) CNC router and swings around a bearing as the CNC draws it through the material.
I'll show you how to set up a toolpath in VCarve Pro (with and without its Dragknife "gadget") and then use this technique to enhance some woodworking projects.
Setting up your CNC
Because you will use a drag knife on materials even thinner than 1/64", your spoilboard must be perfectly smooth and flat. Attach a temporary spoilboard to cover any fastener holes or T-track slots. Then, run a fly-cutting pass to make it dead flat.
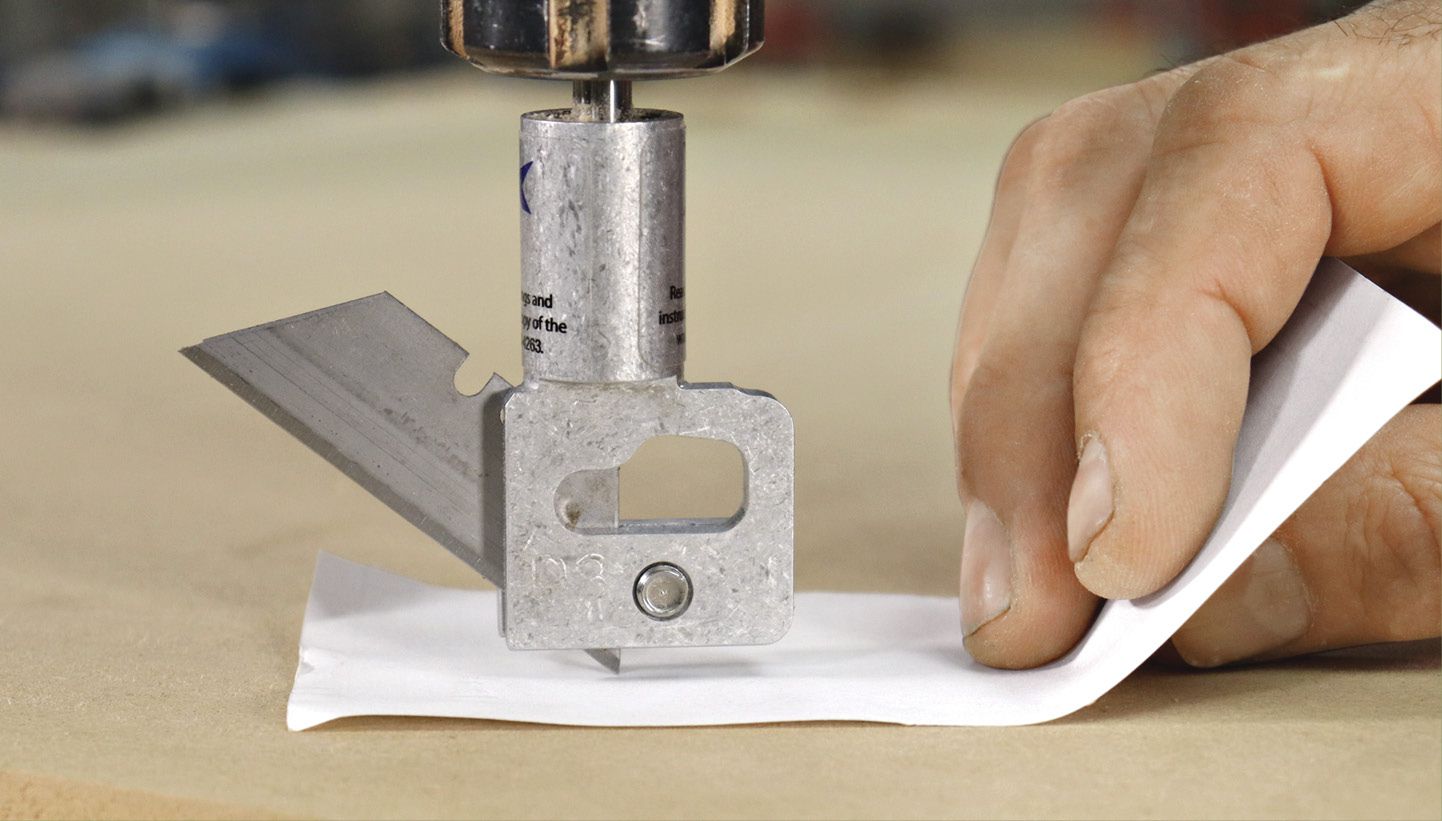
Unplug the router or set your spindle rpm to zero. Install the drag knife and zero the Z axis (Photo, above).
Make a stencil
Those thin, flexible plastic Open/Closed or Garage Sale signs from the home center make great stencil material for personalizing projects, painting logos, or adding your name to your tool cases. Measure the thickness of the sign with digital calipers. Then, enter the sign's thickness and dimensions in VCarve's Job Setup panel.
Use the Create Text tool to add text to the workspace. Choose a stencil-style font with bridges in letters like O and P that will hold the letter's interior in place once they're cut.
For this project, we'll use VCarve Pro's Dragknife gadget to cut the stencil. The gadget simplifies creating toolpaths for a drag knife. The gadget requires you to convert text to curves (a step not required for other shapes). Right-click on your text and choose Convert to Curves.
Choose Dragknife Toolpath from the Gadgets menu. Set the cut depth to the material thickness and the swivel depth to half that. The machine can cut this thin material in one pass, and the owner's manual of your knife provides the blade offset. Leave the tolerance angle at the default setting of 20 degrees. Select your drag knife (I'm using a Donek drag knife) and click OK to choose your machine's post processor and save the toolpath.

To keep the thin plastic from buckling from the knife's cutting pressure, mount the sign to your spoilboard with a thin coat of spray adhesive. Run the toolpath then remove the stencil by gently peeling it up from one corner (Photo, above). The letters will stay behind. Grab a can of spray paint and you're ready to leave your mark.
Line a box with felt
After designing and cutting a box using your CNC, copy the interior cutline from your box's design to be used for a felt liner. Measure the felt thickness and start a new job with the material's dimensions. Paste the cutline into the workspace.
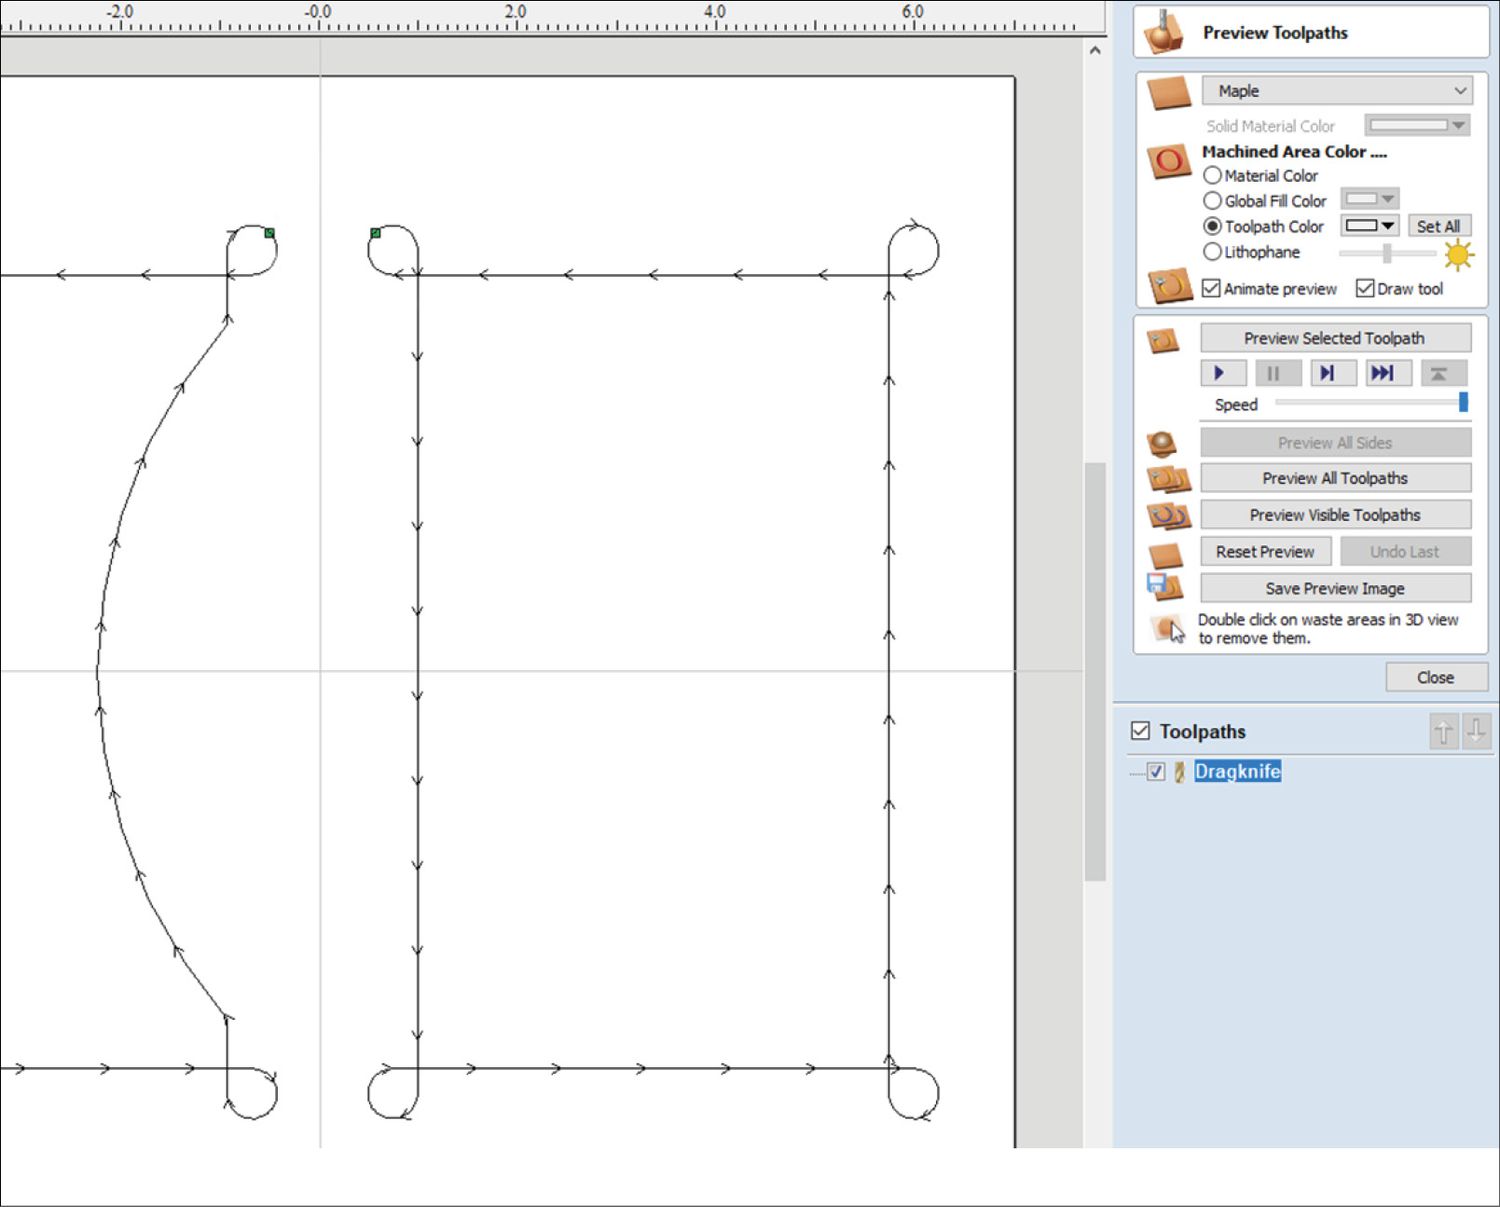
For this project, use the Profile Toolpath rather than the Dragknife Toolpath gadget. Select your drag knife from the tool database, set the cut depth, and set the machine to cut centered on the vectors.
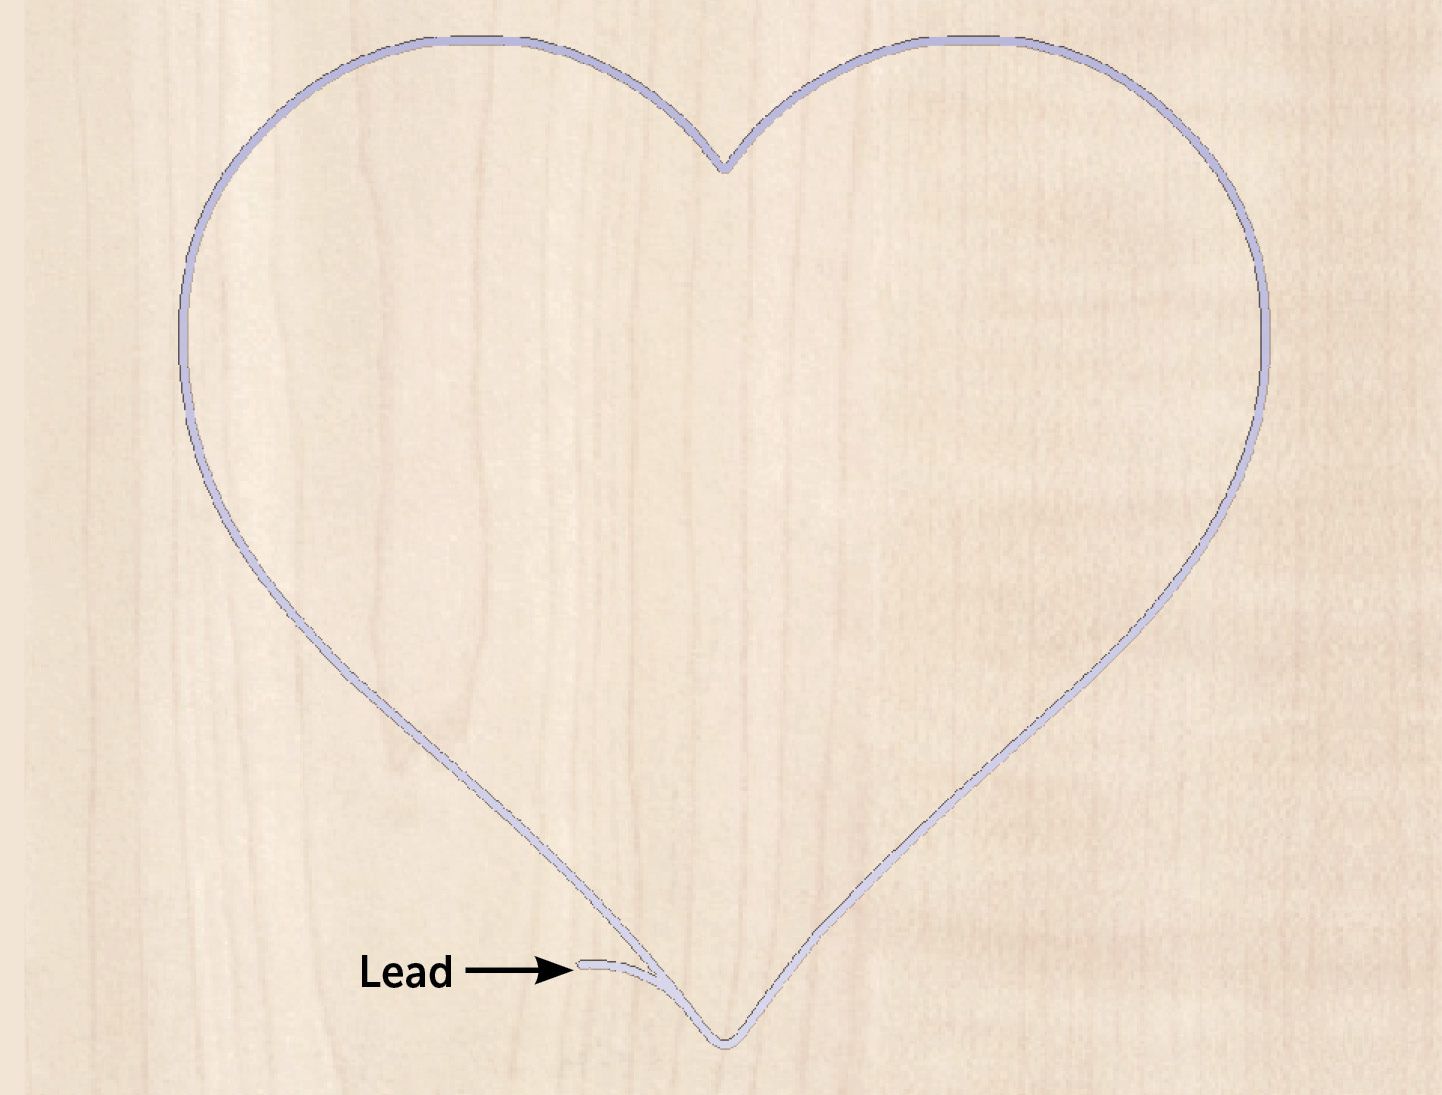
Open the Leads tab and select Add Leads (Photo, above). Leads add a little on-ramp into the toolpath, allowing the knife to swivel into position, parallel to the cut path as it enters the toolpath. (Because I'm using adhesive-backed felt, I switched to masking tape to fasten it to the spoilboard. Spray-adhesive would cling to the backing, causing it to separate before I'm ready.)
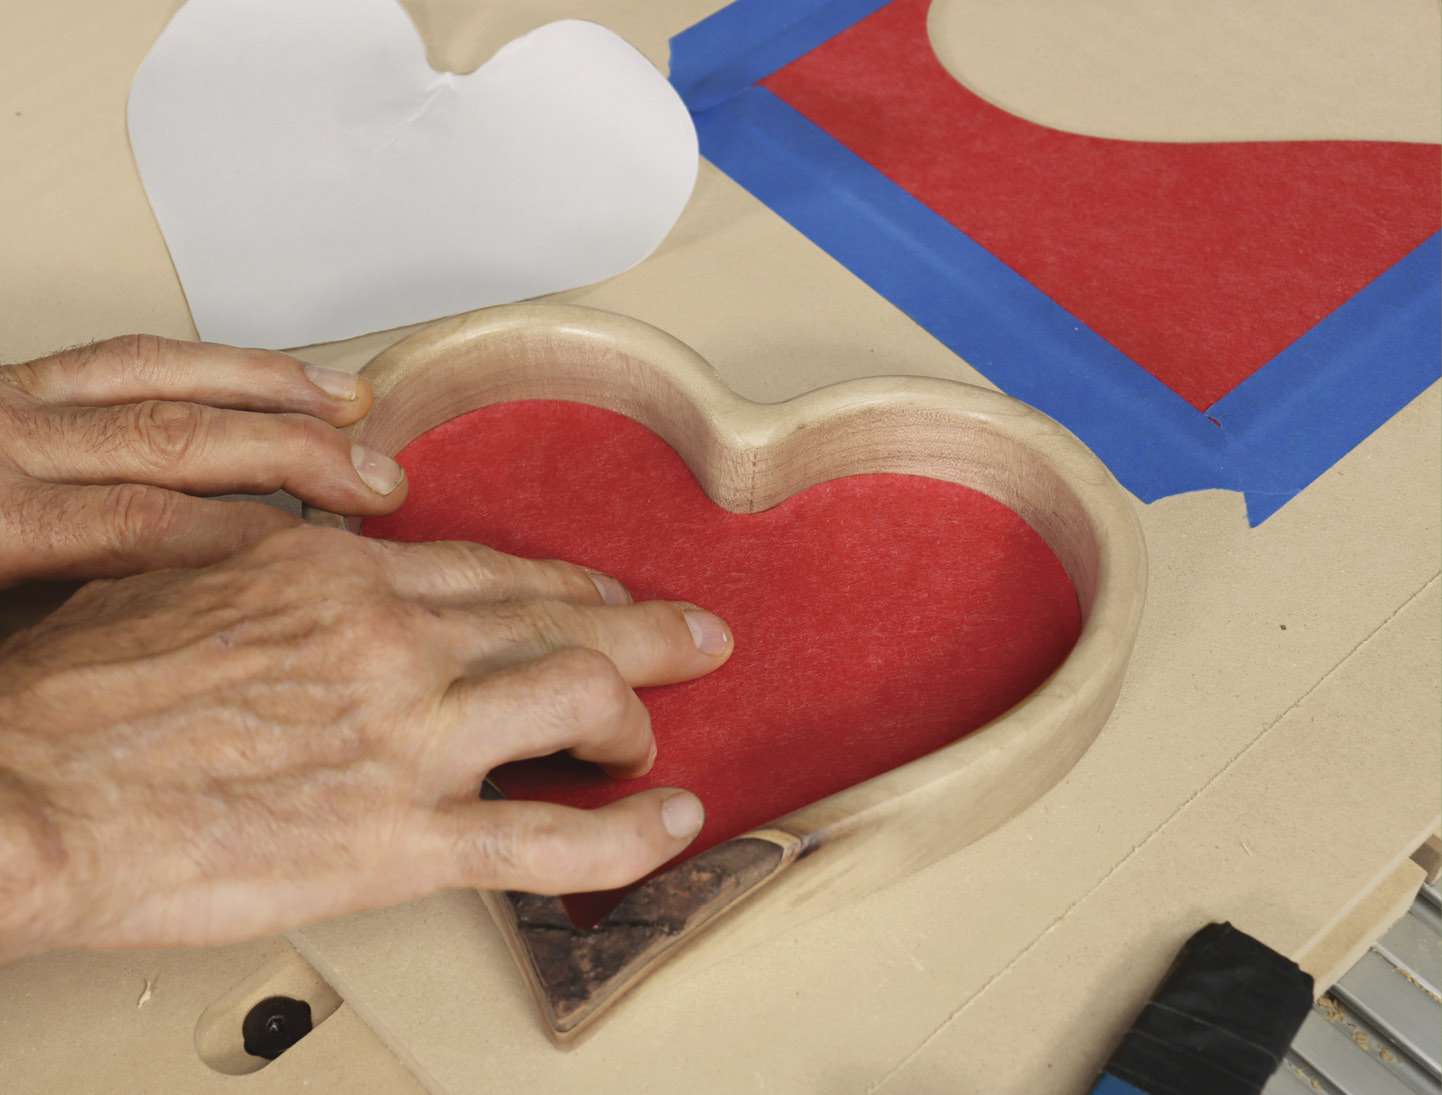
Zero the axes as before, run the toolpath, retrieve the completed box bottom, and install the perfectly shaped liner (Photo, above).
Create a veneer inlay
Next, let's make a contrasting veneer inlay. We can use the drag knife to cut the intricate inlay and a bit to create the mating recess.
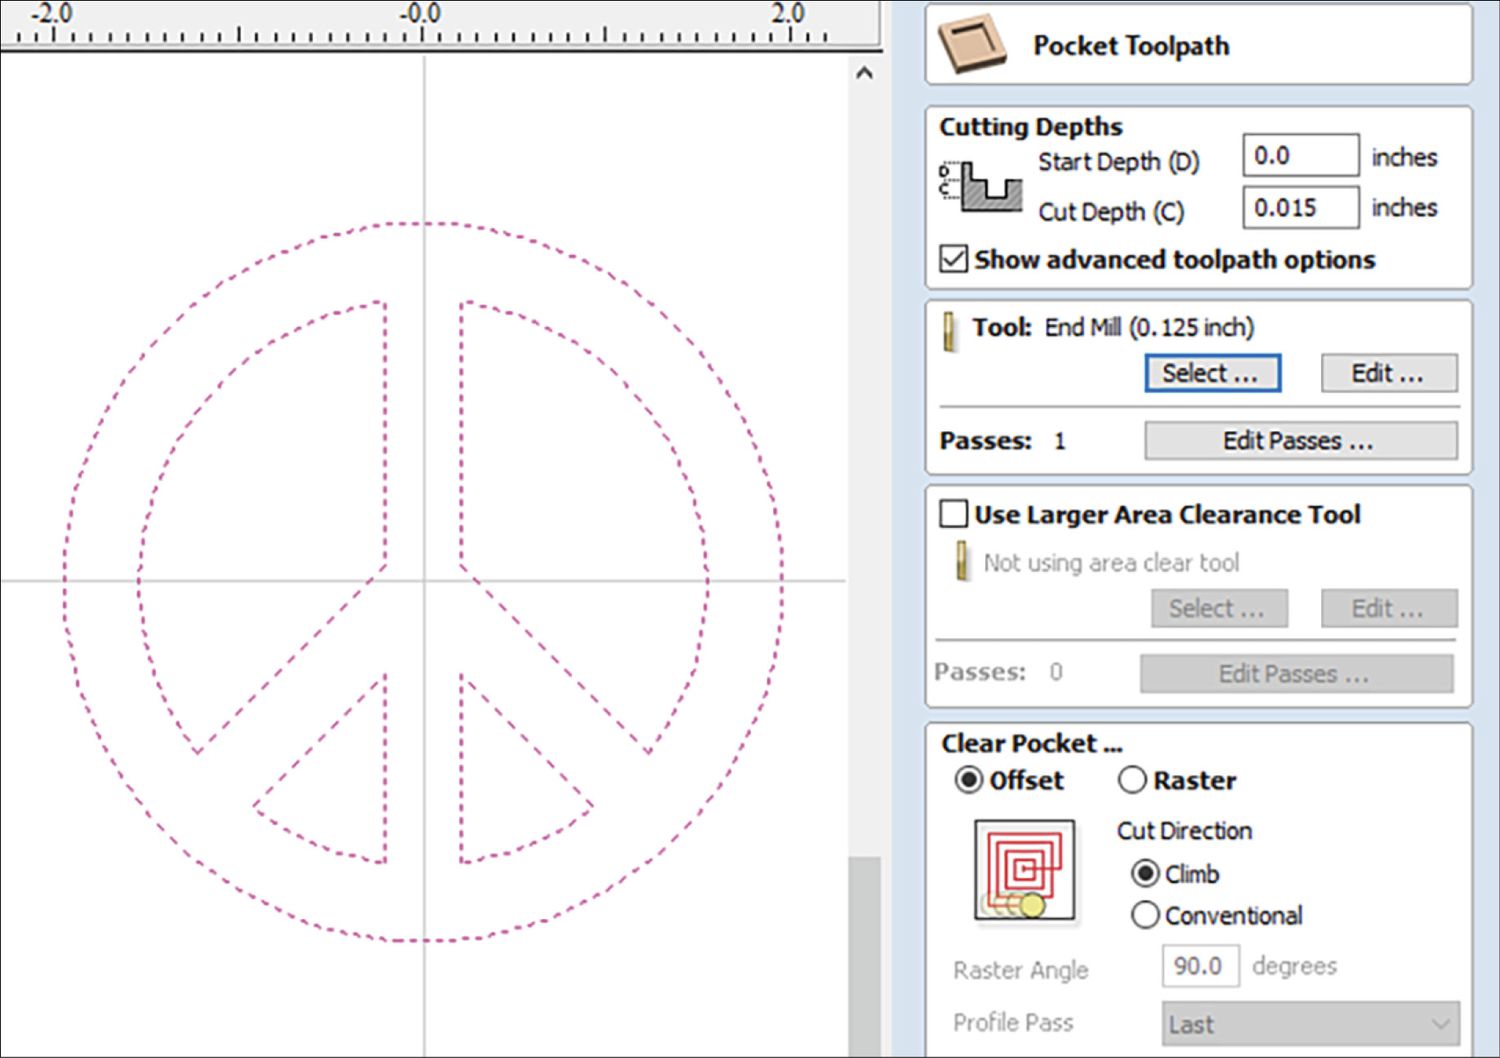
Start a new job with the dimensions of the veneer. Create the design for your inlay (Photo, above) and save the toolpath from the Dragknife Toolpath gadget.

Reinforce the back of the veneer (Photo, above) and adhere it to the spoilboard with masking tape. Then, run the toolpath.
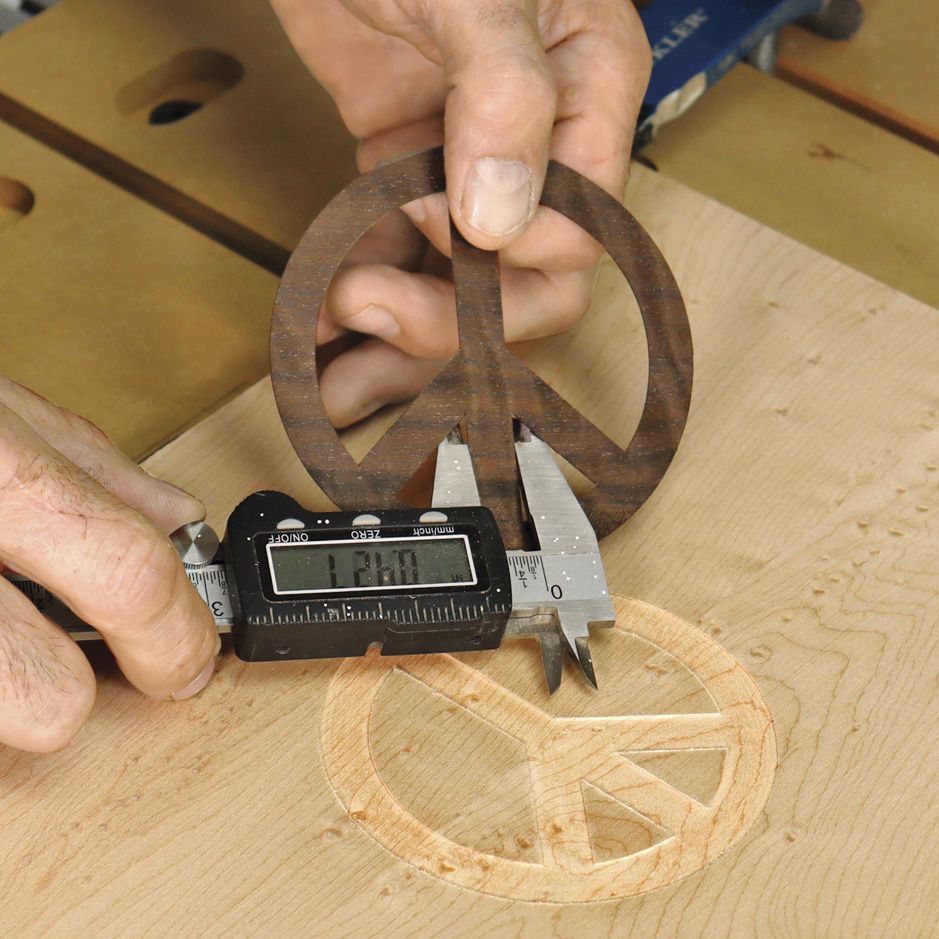
Copy and paste the inlay design into a new job and save it as a pocket toolpath with the cut depth set slightly less than the veneer's thickness. Start with a scrap workpiece to test the toolpath. After running the job, keep the workpiece secured while you check the fit of the inlay (Photo, above).
If necessary, the easiest way to make adjustments is to lie to the software about the diameter of the router bit. Open the toolpath you used to cut the recess and edit the bit diameter up or down to change the size of the recess. If the recess was too small, decrease the diameter of the bit and recut the toolpath in the same test piece. If it was too large, increase the diameter of the bit and try again in a new piece of scrap. When you've finalized the fit in scrap, cut your project piece and glue the inlay into place.
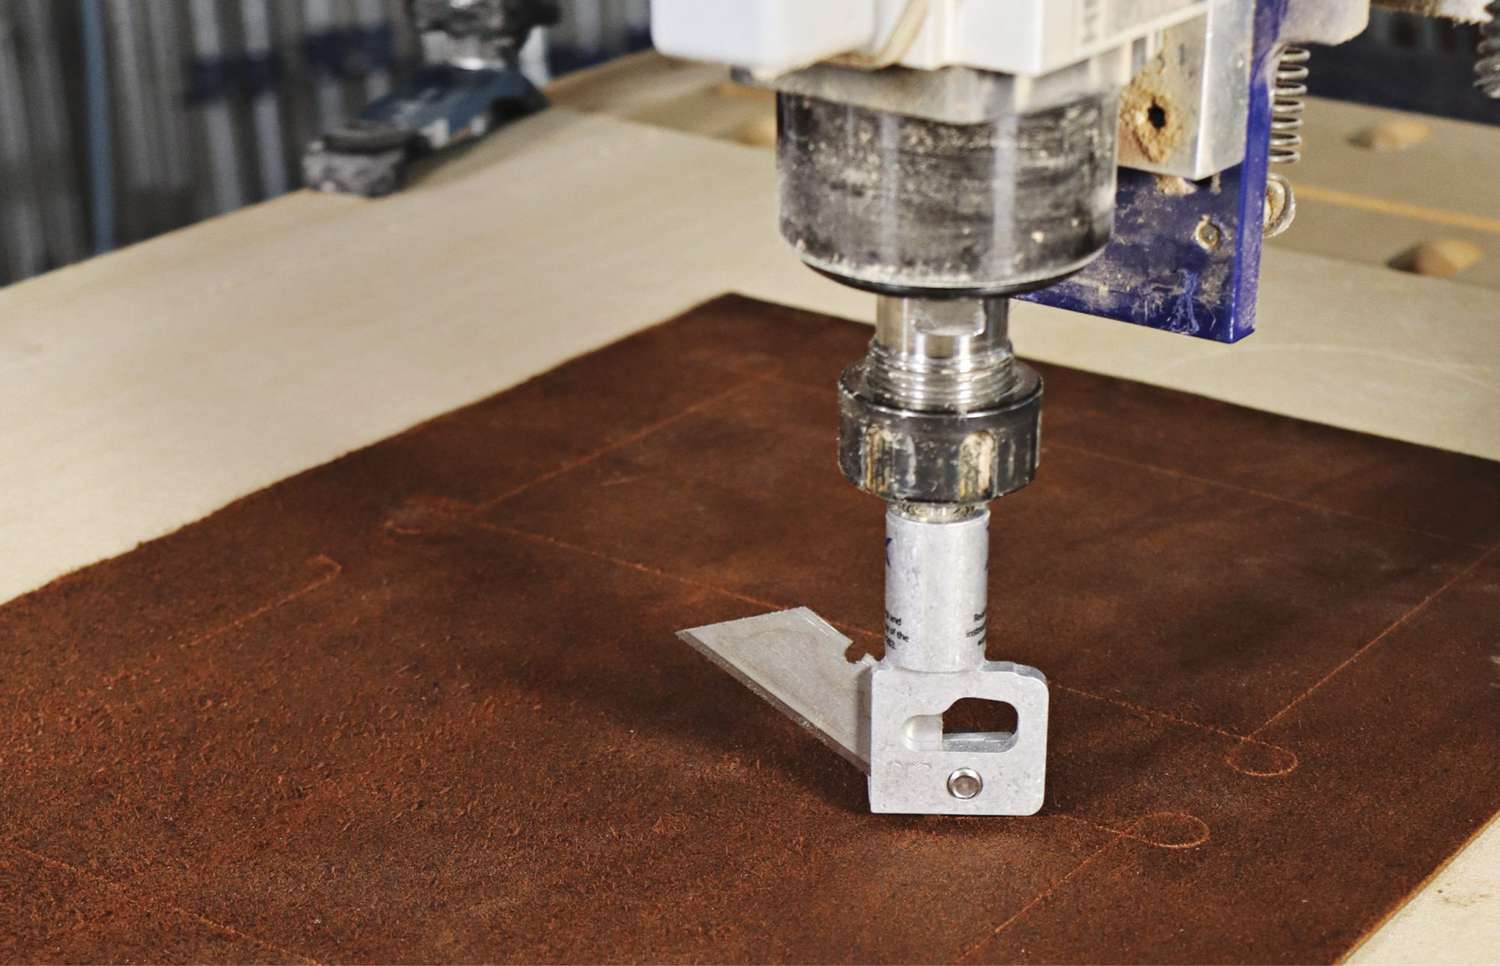
Cut leather
I'm impressed with a drag knife's abilities, but I think cutting leather is one of the coolest. Leather, leather adhesive, and rivets are readily available, making this an easy addition to your CNC skill set.
Start a new job with the dimensions of your leather and add a rectangle for a tool pouch back. In order to get crisp outside corners without using the Dragknife Toolpath, you need to add a fillet to the corners. Open the Fillet Tool and select Plasma/Drag Knife Fillet. Give it a 1/4" radius. Then, click on each corner of the rectangle to add a loop. The fillet automatically becomes part of the rectangle, making it one continuous vector.
Copy and paste the filleted rectangle and tweak its design to create the tool pouch front. (I added a scooped top edge for easy access.) Create a toolpath for this project using the 2D Profile Toolpath (Photo, above).
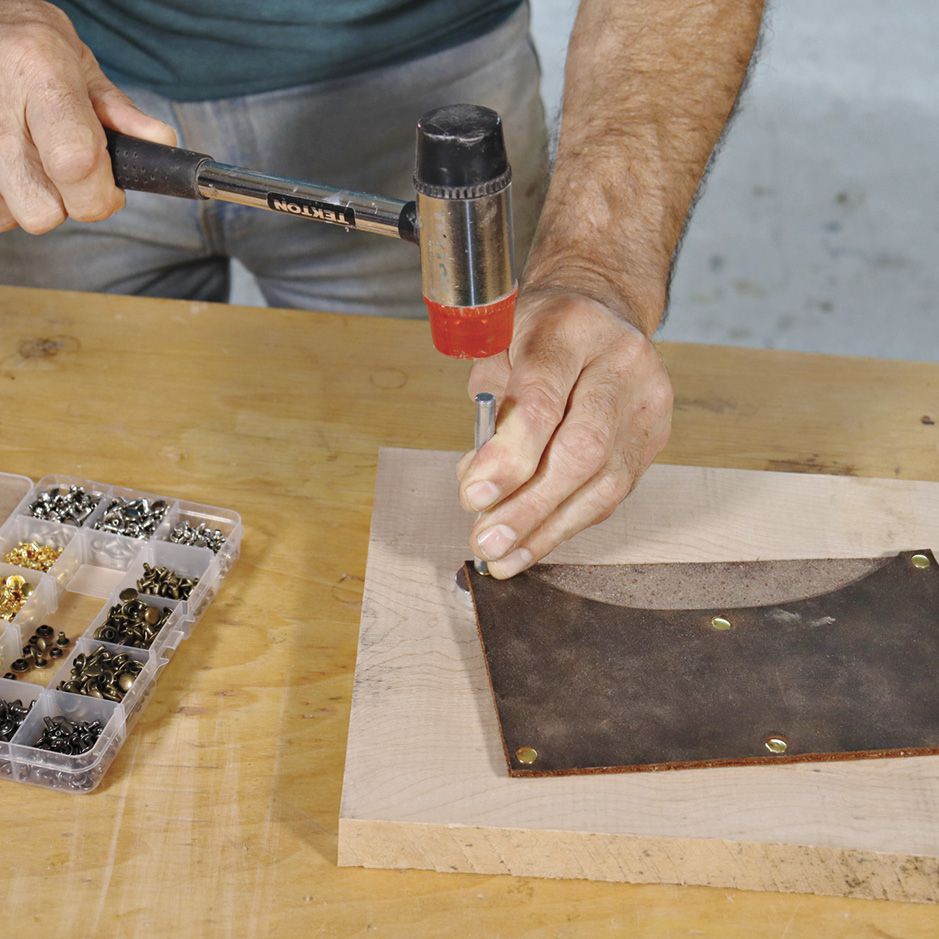
Apply spray adhesive to the smooth side of the leather, adhere it to the spoilboard, run the toolpath, and assemble your leather tool pouch (Photo, above).
Like any skill, using a drag knife takes practice and experimentation. Don't be afraid to mix and match the techniques, toolpaths, hold-downs, and materials I've covered to see what work best for you.
Choosing a Drag knife
I've mainly used a drag knife from Donek in this article, but I also use another style from WidgetWorks Unlimited.
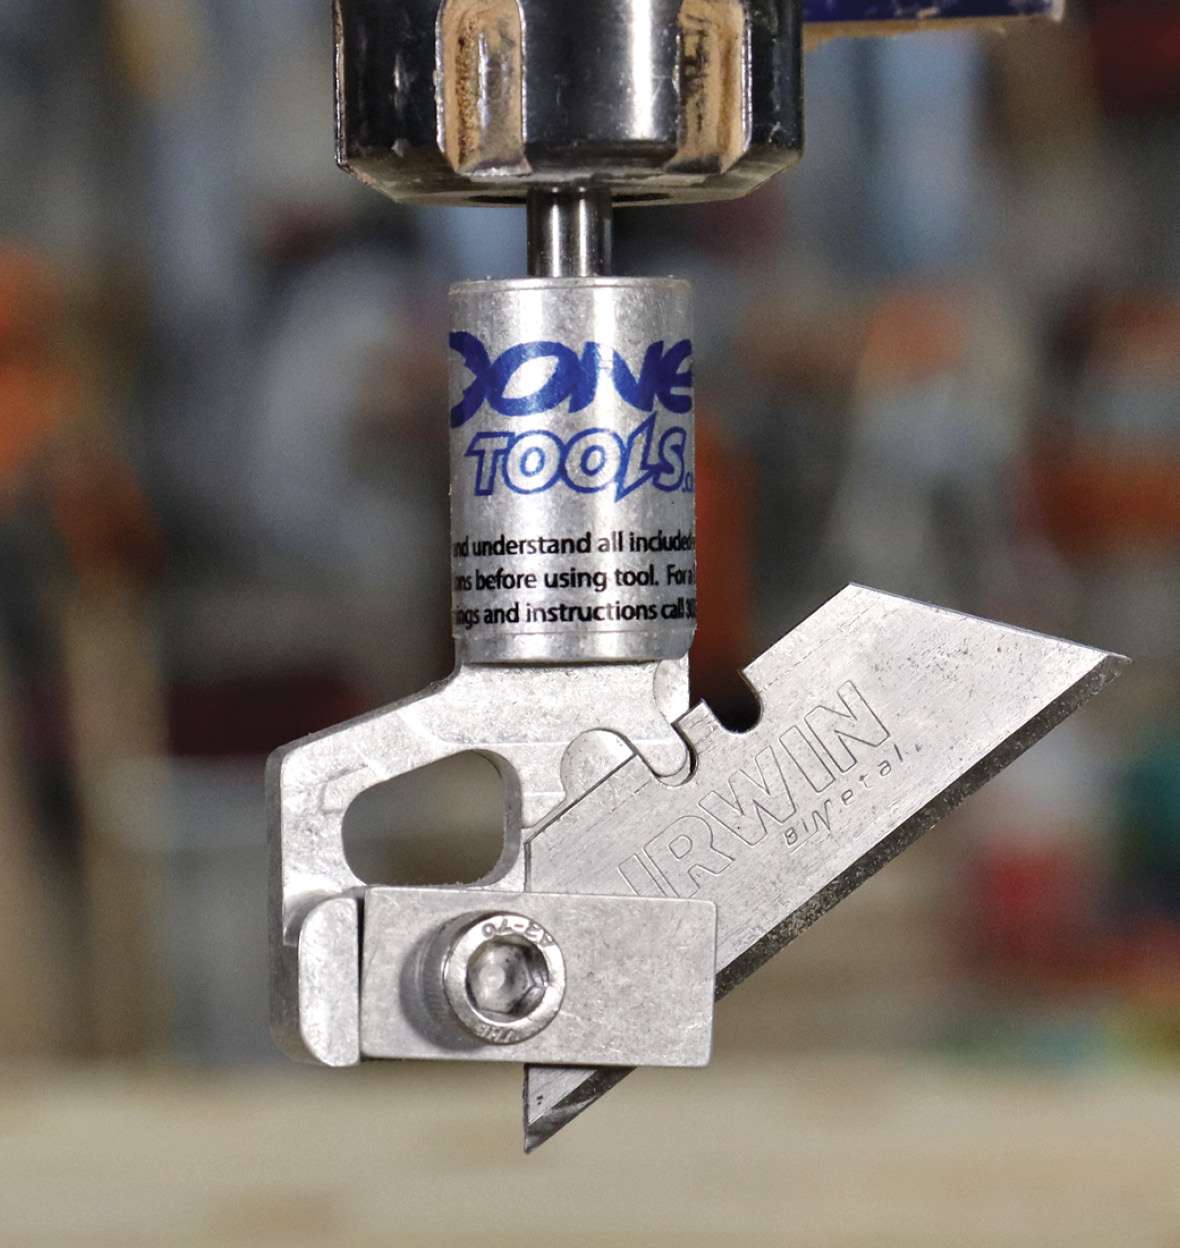
Donek Tools makes several drag knives to accommodate different collet sizes and material thicknesses. Those for thinner material can also cut tighter-radiused corners. The knives accept standard box-knife blades.
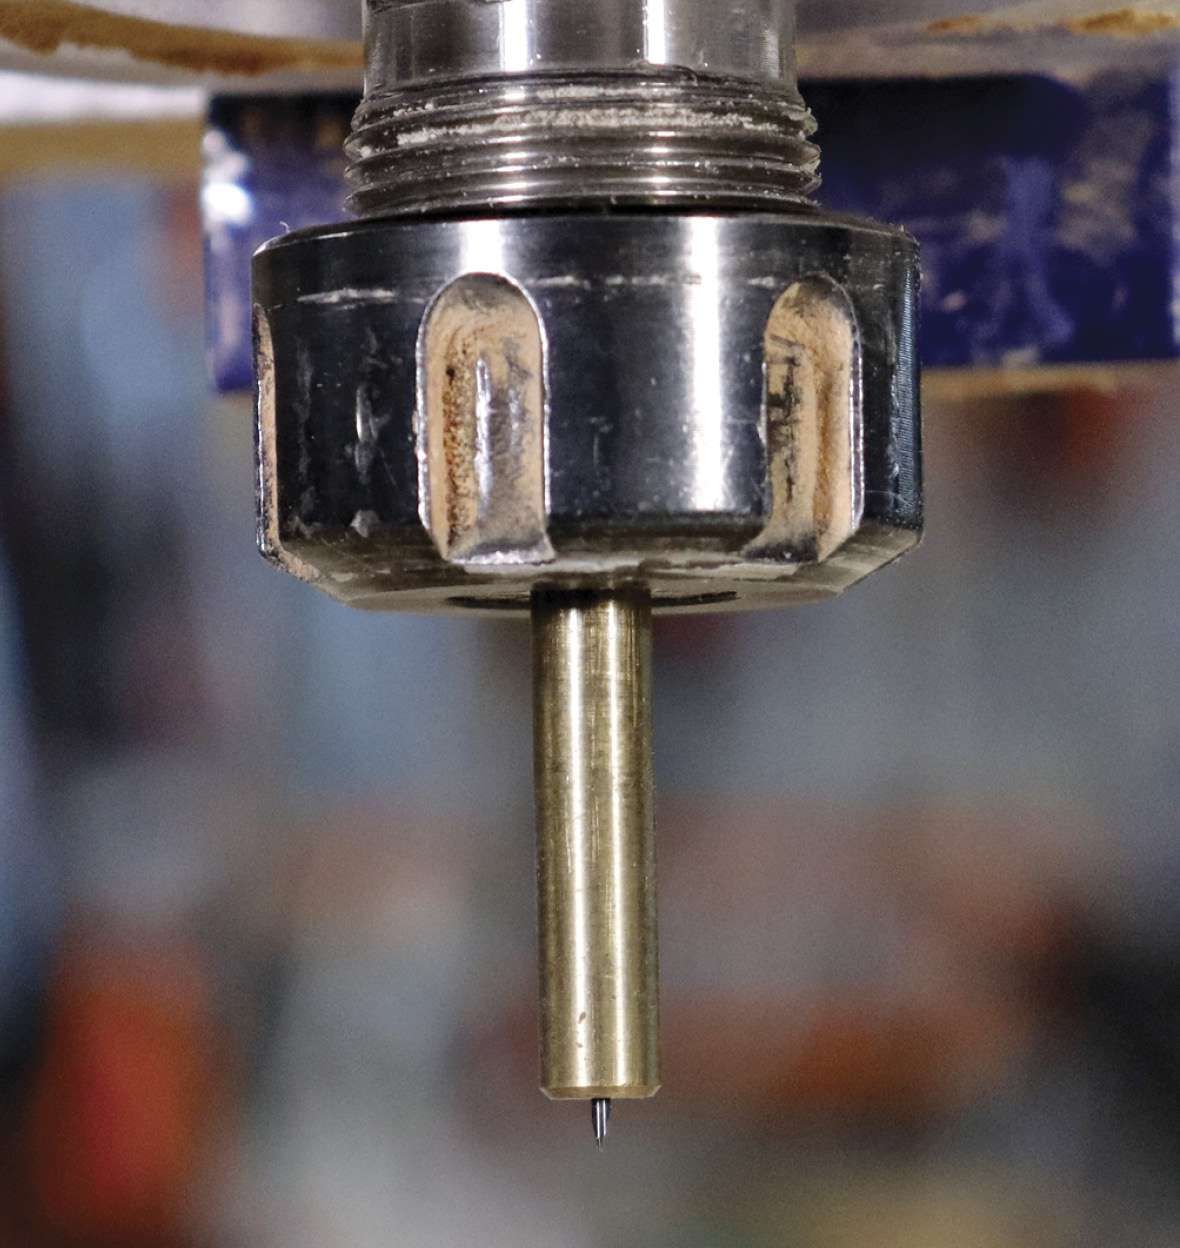
The WidgetWorks Unlimited knife centers a custom blade in a rotating sleeve. This allows it to cut tight inside and outside corners. The knife is spring-loaded, which allows it to compensate slightly for spoilboards that aren't perfectly flat. Material thickness is limited to about 1/32", so it works for sign vinyl and thin plastics, paper, and cardboard, but not for leather or felt. Carbide replacement blades are available.
Sources: Donek drag knife, Donek Tools, 303-913-4263, donektools.com. Sign vinyl drag knife bit, WidgetWorks Unlimited, 914-602-9999, widgetworksunlimited.com.