Crown Molding Miters

Q: In a crown-molding shelf project in a recent woodworking magazine, the instructions call for mitering the ends of the crown molding but don't say how. Wouldn't this kind of operation involve compound angles?
— Bill Beaton, Gibons, B.C.
A: Yes, mitering crown molding does require cutting compound angles, Bill, but you don't need a compound mitersaw to do it.
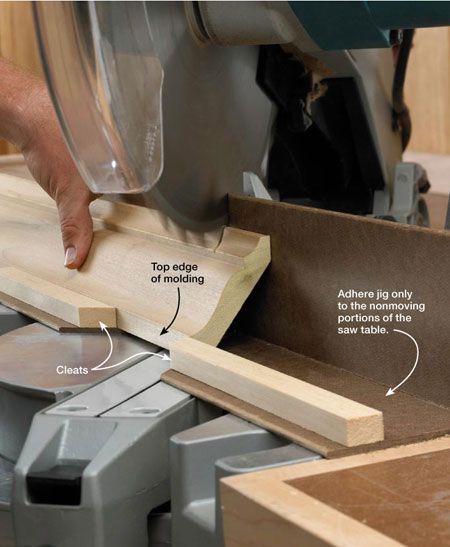
If you have a standard mitersaw, cut the molding "upside down," as shown at right. The jig makes this task easier by preventing the molding from slipping as you cut. It consists of a couple of hardboard scraps and solid wood cleats adhered to the saw with double-faced tape. Using this setup, you can cut your molding to length, relying on the saw's built-in 45° and 90° stops.
If you have a compound mitersaw, lay the molding flat on the table. Set the miter angle at 31.62° — a positive stop on many compound mitersaws— and the bevel angle at 33.86° (34° is close enough).
You can accomplish these cuts at the tablesaw, too. But you'll need to make test cuts in scrap to get the angles just right.
The WOOD® magazine editors
If you like this project, please check out more than 1,000 shop-proven paper and downloadable woodworking project plans in the WOOD Store.