Cut Perfect Circles with a Tablesaw, Router, or Bandsaw


Whether you're a tablesaw tinkerer, a bandsaw builder, or a router rooter, I have a method to make you a circle-cutting genius.
For each of these examples, I'll demonstrate cutting a 12"-diameter circle. For a different-size circle, just position the pivot point on the jig for the desired radius.
Circles on the tablesaw…really
Let's begin with the tablesaw, a tool not normally known for cutting curves. But you can do it with a simple shopmade jig and a combination blade.
Start with a 16×16" base of 3⁄4 " plywood, a hardwood strip to fit the tablesaw's miter slot, and a scrap about 3⁄4 ×2×14". Screw and glue the scrap across the back of the base to form a handhold for pushing the jig during use. Attach the hardwood strip to the underside of the plywood base, parallel to one edge, with the right edge of the base butted against the blade [Photo A, below].

Mark a point half the diameter (6" in this case) from the blade and the leading edge of the jig. Drill a 1⁄4 "-deep hole matching the diameter of a finishing nail and tap the nail into the hole. Clip off the head, leaving about 1⁄4 " exposed to create a pivot pin.
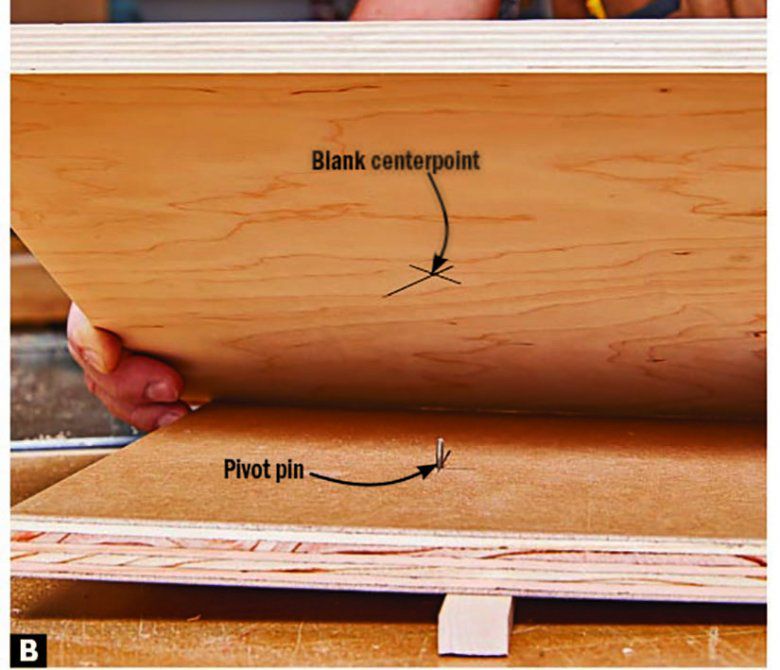

To ensure a completed circle without a flat spot, cut a square blank 1⁄8 " wider and longer than the desired diameter. Mount the blank on the jig [Photo B, above]. Turn on the saw and begin cutting away the corners [Photos C–E, below].


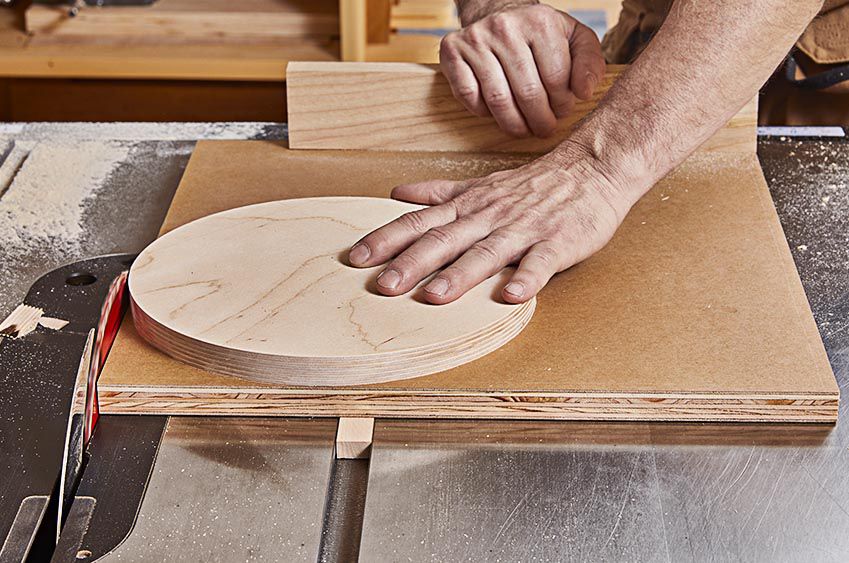
To complete the circle, move the jig forward slightly while rotating the blank to remove the last remaining waste and create a smooth edge [opening photo].
Take the router for a spin
A plunge router works best in this application.
A router fitted to a trammel and using a straight or spiral bit [Skill Builder, below] helps you cut circles with baby-smooth edges. Plus, it gives you the option to create rings.
Skill Builder
Routing with a twist

For routing on the back face of a blank, I use a 1⁄4 " spiral upcut bit. The upcutting action creates a chip-out-free show face. By pulling sawdust up and out of the cut it eliminates burning along the cutline, a common occurrence with straight bits.
Tip! The circle size is limited only by the length of the trammel. They are easy to make, so have several sizes on hand.
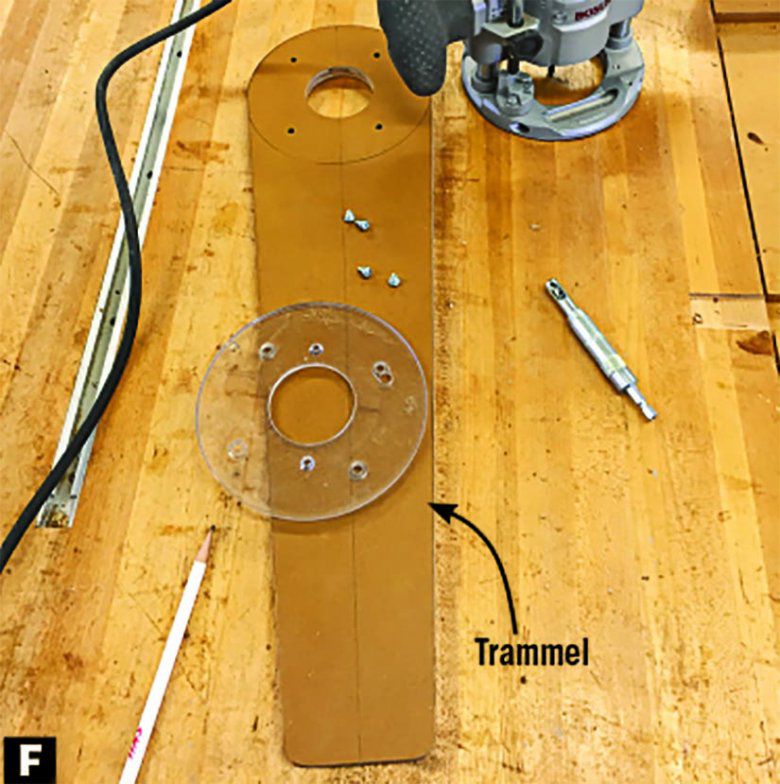
I've found that 1⁄2 " plywood or MDF makes a lightweight trammel. First, cut the plywood to the width of your router base and at least 6" longer than the needed radius. This allows room to attach the router and a bit of extra length [Photo F, below]. Remove your router's subbase, trace around it, the bit opening, and the screw-attachment holes. Attach the router [Skill Builder, below. Draw a line down the center of the trammel's length.
SKILL BUILDER
Drill spot-on mounting holes

A self-centering bit ensures accurate hole placement when mounting the router to the trammel. Countersink the screw holes to prevent the screwheads from dragging. You may need to purchase longer screws..
For a 12" circle, I cut a 14"-square blank. On the back face, drill a 1⁄8 " hole 1⁄4 " deep at the blank's centerpoint.
Using double-faced tape, mount the blank good-face down on a piece of scrap larger than the blank. Measure 6" from the inside edge of the router bit and drill a 1⁄8 " hole through the trammel at that mark. Mount the trammel to the blank [Photo G,below].

Note:
Routing clockwise prevents the screw from winding out of the hole.
Set the router-bit depth at 1⁄4 " and, while keeping slight pressure on the pivot point, slowly rotate the router in a clockwise direction to complete the first pass. Lower the bit another 1⁄4 " and repeat this process until the circle separates from the blank [Photo H, below]. To rout a ring, see Photo I, below.


The bandsaw rounds it out
Fit your saw with a 1⁄4" 6-tooth-per-inch blade for a smooth cut.
Outfitted with a 16"-square jig made from 3⁄4 " plywood, the bandsaw makes it easy to quickly cut circles. The jig should work on nearly every bandsaw table and accommodates circles up to about 25" in diameter.
Using the bandsaw allows you to cut through materials too thick for the other methods.
Cut a miter-slot runner about 31⁄2 " longer than your bandsaw table. Using a square, draw a line 3" from the left edge of the plywood base. Attach the runner to the base so the blade cuts on that line. Allow enough of the runner to extend beyond the leading edge of the base so you can clamp the runner to the table. Two 11⁄2 "-wide plywood blocks on the bottom of the jig serve as stops when positioning the jig for use [Photo J, below].

Place the jig on the table, turn on the saw, and advance the jig into the blade until the stops contact the edge of the table. Turn off the saw.
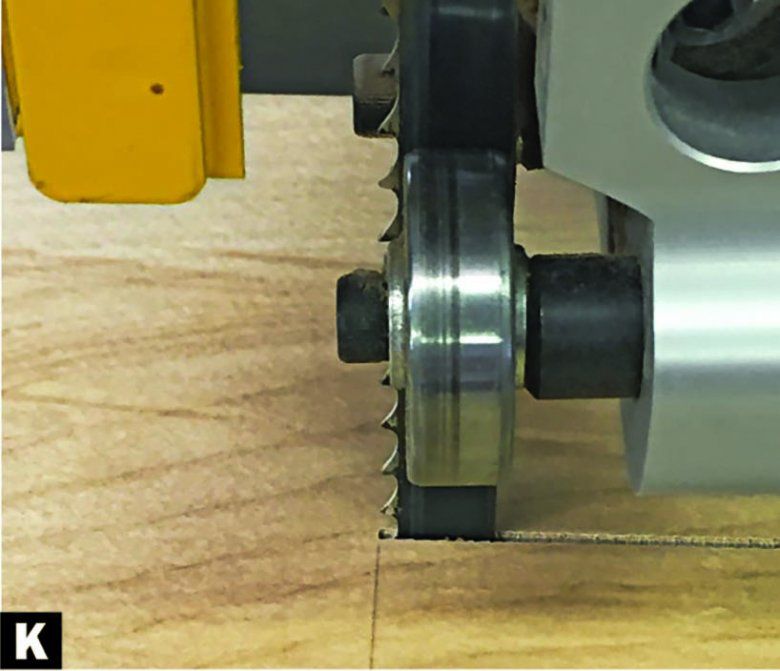
Where the kerf stops, mark a reference line perpendicular to the kerf [Photo K, below]. Remove the jig from the saw. Install a finish nail on the line 6" (for a 12" circle) from the blade and clip it off to1⁄4 " long.
Next, cut a square blank 1" wider and longer than the desired circle diameter. Drill a centered hole on the underside to accept the finish-nail pivot.
Place the blank on the jig. Advance the jig into the running blade until the stops contact the table, and apply a spring clamp to hold the jig in place. Slowly rotate the blank clockwise to cut the circle [Photo L, below].

Pretty easy, huh? Now you have some options for that next circle-cutting job!