Cutting-edge Chisel Skills


A chisel may be the most versatile hand tool at your disposal. It looks like the simplest of tools—essentially just a sharp steel wedge—but appearances can be deceiving. There's much to learn about effectively putting a chisel to work. So let's get started.
Chisel basics
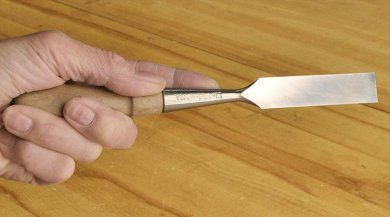
To help you do anything well, a chisel must have a sharp cutting edge and a flat back. Whether you buy a bargain-basement set, the most expensive chisels out there, or you work with Grandpa's hand-me-downs, take time to properly flatten the back and hone the edge [Photo below]. Doing so ensures success in all of the essential skills described here.

For an accurate chisel cut, always first score a line where you want the cut to be, using either a marking gauge or knife. That cut will not only show you where the chisel's edge should go, it also will guide the accurate placement of the cutting edge.

Flatten the backs of your chisels and get their cutting edges razor sharp.
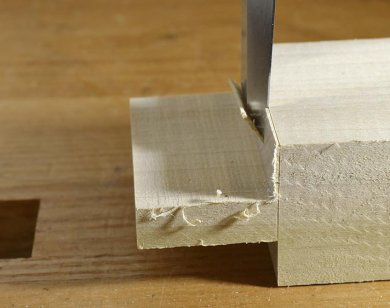
Even with a scored line, however, you can't simply fit the cutting edge into the line (with the bevel facing the waste side of the cut) and chop down. Physics dictates that doing so will drive the flat back of the chisel across the line. [Photo above]. To avoid such an oops, remove as much waste as possible first, leaving the scored line. That way, the chisel cut at the line meets less resistance on the bevel side of the tool. Removing less wood results in a true cut [Photo below].
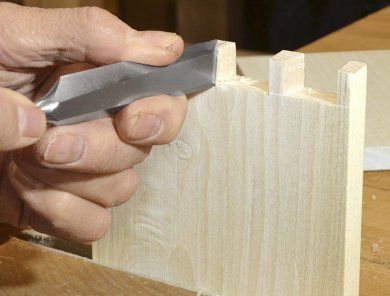
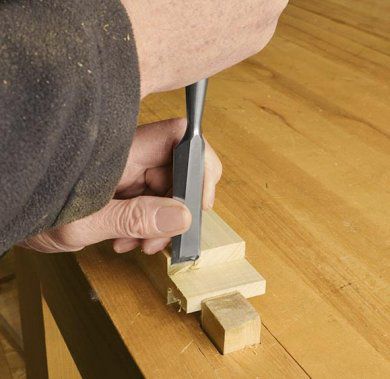
Before you make a cut, consider grain direction. Chisels follow grain direction, and wood will cleave along the grain. If the cut gives you more than one choice in chisel direction, choose the path not likely to result in a stray cut or grain tear-out [Photo below].
Also pay attention to hand placement. It might be tempting to hold the work with one hand and inadvertently aim the chisel at that hand. Don't. Always keep both hands behind the cutting edge.
4 essential chisel skills
It pays to approach every chisel task knowing the most-appropriate method before you put steel to wood. These techniques will get you through virtually every job involving a chisel.
1. Chopping
This skill entails removing a lot of waste quickly, such as when cutting mortises or dovetails. It requires the considerable force of striking the end of the chisel's handle with a mallet. Though many fancy wood mallets exist, I prefer a plastic dead-blow mallet for chopping—it won't mar the chisel handle and can deliver plenty of force.
For a good chopping grip, wrap all your fingers around the handle. Always chop with the workpiece clamped to a rock-solid surface. Hold the work stationary between bench dogs, secure it with a holdfast, or clamp it to a board held in a vise [Photo below]. Don't try to hold the workpiece between vise jaws—it will move with each mallet strike.


2. Paring
For refined work, such as cleaning up mortise side walls [Photo, above], tenon shoulders, dovetails, or even small miters [Photo below], use hand force only to drive the chisel forward, removing no more than 1⁄32 " at a time. Again, always clamp the workpiece; never hand-hold it.
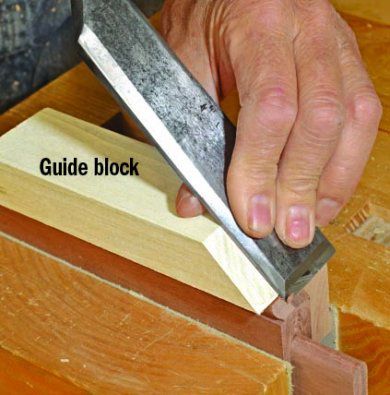
For best results, use a classic paring grip [Photo above]. When paring tasks call for extra downward pressure, such as cleaning up tenon shoulders, try a modified chopping grip, with your thumb over the end of the chisel handle, using your other hand to guide the blade [Photo below].
3. Slicing
Use this method to cut pegs, dowels, and other projections flush with surrounding wood. Hold the chisel in a paring grip and use the other hand to hold down and pivot the chisel [Photo below]. Again, don't try to remove too much at one time.

4. Scraping
A sharp chisel works great for cleaning up glue or evening up surfaces in tight areas. Hold the chisel handle with a modified chopping grip and use your other hand to pull the chisel blade toward you—hold the blade low to prevent chatter [Photo below].
