Dealing with Wood Movement

Woodworkers must understand three fundamental truths about our favored material:
1. Wood moves.
2. Wood never stops moving.
3. Attempts to constrain wood movement will cause problems.
Fresh-cut lumber may contain more water than wood by weight, resulting in a moisture content over 100%.
The reason? Moisture. Standing trees and milled logs are full of it. Lumber shrinks while drying until it reaches a point of equilibrium with its surrounding environment. Even then, wood still takes on moisture and expands in the humid days of summer, then releases water and contracts as the air dries out in winter. A finish may slow the rate of expansion and contraction, but it will not stop it. Neither will securing wood to something seemingly unmoving, such as a plywood panel, a table base, or even a sturdy piece of steel—that only sets up a cause for wood or joint failure.


Understand how wood moves
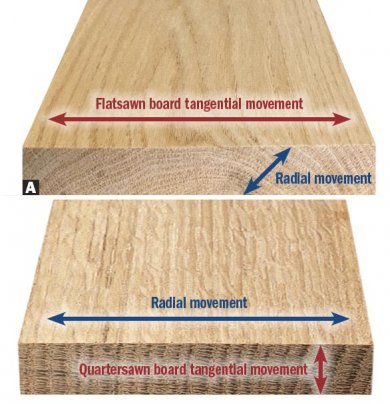
The rate and amount of movement vary based on climate (humid or arid, indoors or outdoors), wood species, and grain orientation of the board (flatsawn, riftsawn, or quartersawn). In all cases, wood moves the most tangential to its growth rings [Photo A], and negligible amounts radial to the growth rings and along its length. Use the chart above to calculate movement for several common species.

See and deal with movement
Any joint with the grain of its members running perpendicular to each other, and any element that surrounds or attaches to a solid-wood panel, need careful scrutiny to address expansion and contraction. As a general rule, you can ignore wood movement in a cross-grain joint up to four inches wide without incident (that's why mortise-and-tenon joints work), but beyond that you need to incorporate measures to allow the wood to move. Let's look at some of these strategies.
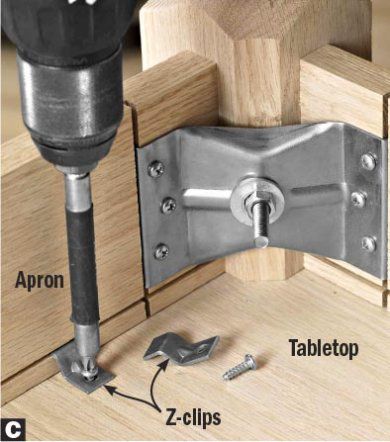
A wide tabletop amplifies the wood-movement challenge. Common approaches for securing a tabletop to a base include using commercially available figure-8 fasteners, Z-clips, or shop-made fasteners [Photos B—D].


Learn five ways to make breadboard ends.
Some tabletop designs incorporate breadboard ends to keep the panel flat [ Drawing]. Although a tongue on the end of a tabletop fitting into a groove on a breadboard appears to fly in the face of avoiding cross-grain construction, securing only the center of the joint allows the tabletop to expand equally toward both edges. Pegs near each end, glued only to the breadboard, slide within slots in the tongue and keep the breadboard from popping off.

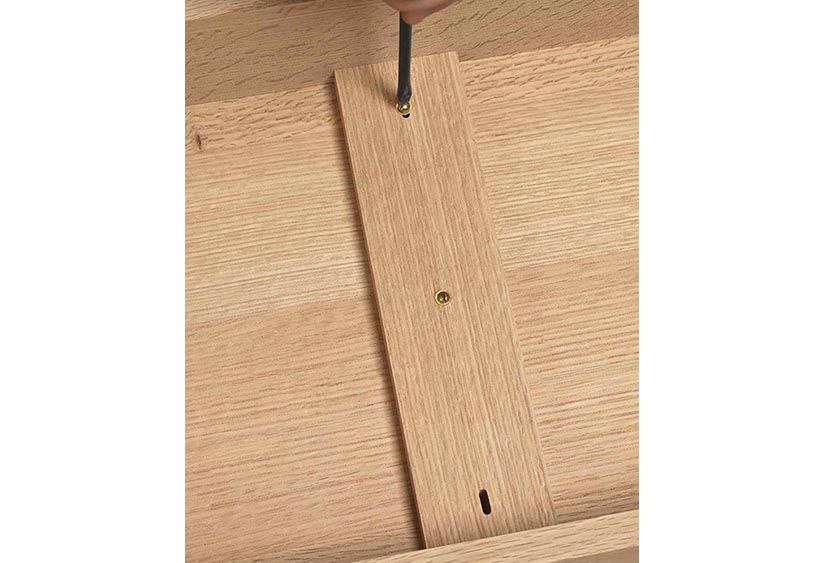
Blanket chest lids often include battens screwed (not glued) to the underside to help keep the lid flat. But the batten must allow the lid to expand and contract. A screw-slot router bit [Photo E, Source] cuts a slot with a countersink or counterbore to recess the screwhead for a more attractive appearance. Or, to leave a clean face on the batten, drill a deep counterbore on the back face of the batten [Photo F]. For a hardware-free solution, use a sliding dovetail joint to secure the battens [Photo G].


Adapt the screw-slot or sliding-dovetail strategies when securing wood drawer slides or web frames to the sides of a solid-wood carcase. Metal drawer slides provide expansion slots for fasteners [Photo H].

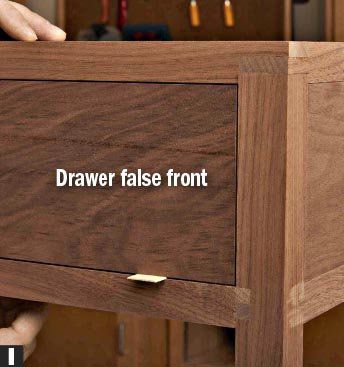
Drawers must slide in and out of a fixed opening without binding. Building the drawer box 1⁄4 " shallower than the height of the drawer opening provides more than enough room for expansion. Inset solid-wood drawer fronts must allow for expansion, without creating unsightly gaps when the front contracts. A 1⁄16 " gap all around should accommodate this [Photo I], but consider fine-tuning that amount following the adage, "Build loose in the winter and tight in the summer."
A solid-wood drawer bottom needs to float, too. Accommodate its movement by gluing it only at the front, directing expansion under the drawer back [Photo J].

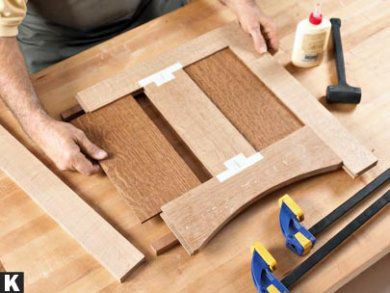
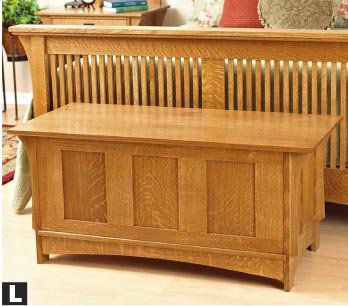
Frame-and-panel construction provides a way to use solid-wood panels for carcase components and doors, without worrying about the entire assembly expanding and contracting excessively. The panel fits into grooves along the inside edges of the frame pieces [Photo K] and fits close vertically (with the grain), but loose horizontally (across the grain). Because the panel floats (no glue), it expands and contracts within the grooves, and the frame size remains unchanged. (If desired, a dab of glue at the top and bottom center of the panel will prevent rattling.)Wide assemblies can be divided into several frames holding narrower panels [Photo L].
Sheet goods, such as plywood or veneered MDF, won't expand or contract significantly, so using these in place of solid wood eliminates concerns about movement. But the same rules apply if you join solid-wood components to sheet goods. For example, when screwing a solid-wood top to a plywood carcase, drill standard pilot holes at the front of the carcase panel, and slots toward the rear [Photo M]. This forces the panel to move toward the back, keeping reveals at the front consistent.

With these strategies in mind, ask yourself each time you approach joining two pieces of wood, "Will this joinery interfere with the wood's seasonal movement?" If the answer is yes, consider your options for creating the joint in a way that lets the wood move freely.
Source: Screw-slot router bits, counterbore no. 18J1160, countersink no. 16J 1170, Lee Valley, 800-871-8158, leevalley.com.