Dial in Accuracy with Calipers


Because calipers physically contact the surfaces being gauged, they deliver hair-splitting measurements you can't get from sighting across the markings on a ruler or tape measure. Here's how to choose and use calipers.
Understanding the tool
Typical calipers open a little more than 6", although 3" and 4" models provide enough capacity for most woodworking tasks and stow easier in a shop apron. The display, whether an analog dial or digital LCD readout, shows measurements in fractional (1⁄64 "), decimal (increments to .001"), and/or metric (.1 or .01mm). Fractional readings are most useful for woodworking, but decimal and metric scales can simplify math. Markings on the bar, below, provide quick reference, including whole-inch increments.
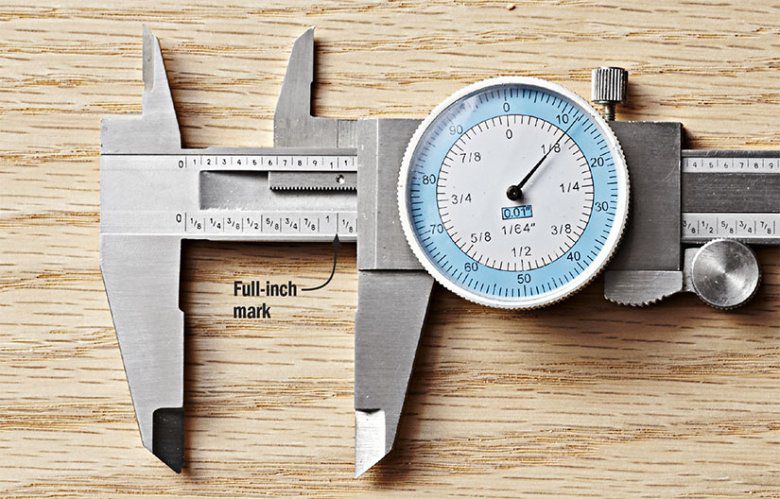
On digital calipers, the LCD screen provides a fast and precise read. And you can convert measurements from fractions to metric (and to decimal imperial [.001"] on some models) with the push of a button. On the other hand, analog calipers, which we prefer, allow you to eyeball gradations between marked increments, and never have a dead battery.
Taking a measurement
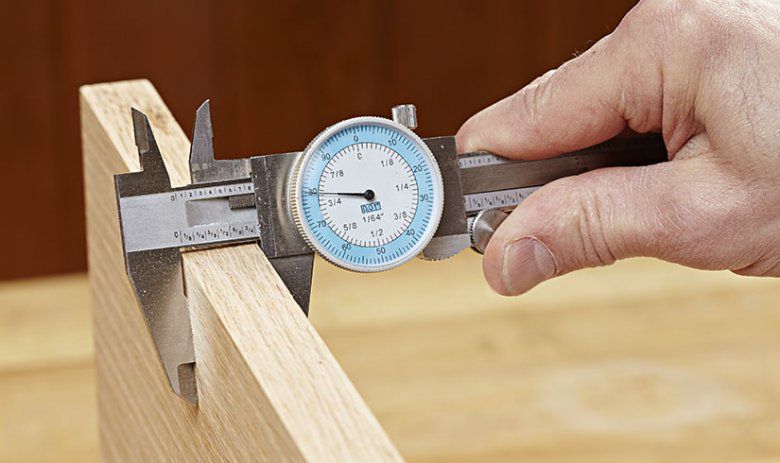
Whether dial or digital, all calipers work in the same fashion. First, close the jaws. If the display doesn't read zero, adjust the calibration. For a dial model, loosen the bezel clamp screw, if it has one, and rotate the bezel until the zero on the scale aligns with the pointer and retighten the screw. For digital versions, simply press the zero reset button.
Left-handed? Search online for left-handed calipers. Most models are digital.
Before taking measurements, brush the surfaces of the workpiece clean to prevent sawdust or other debris from affecting your reading. Then gently touch the jaws to the workpiece, photo's below. Forcing the jaws or thumbwheel can distort the caliper and throw off the reading. If you want to preserve the measurement after removing the tool from the workpiece (to compare to another workpiece, for example), tighten the jaw lock to prevent the jaws from moving.


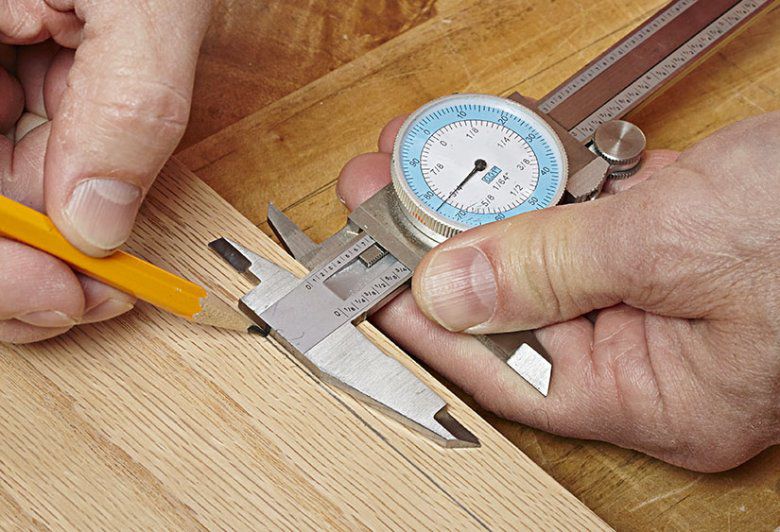
In addition to determining dimensions, calipers serve as a layout tool, photo below.
While you can spend north of $100 on calipers, you can find a quality pair suitable for woodworking tasks for $20–$40.
SKILL BUILDER
What's the difference?
To quickly find the difference between the thickness of two pieces, or the depth of two holes, measure the thinner or shallower of the two first, below. Tighten the jaw lock and zero the scale, inset. Now, loosen the lock and measure the thicker or deeper item, below. The display shows the difference between the two, inset. Fast, accurate, and no math required!

