Embrace the Slop to Eliminate the Slop


When you first imagine a design you want to build, it is perfect in its form. You sketch it on paper or draw it on a computer. Its dimensions are flawless. All of its joints are tight. Then you go into the shop, and all of that perfection slips away into the irregularity of reality. You can spend a lot of time and effort trying to cling to that perfection, or you can just figure out the best place for the slop.
Hide it
One of the most useful outcomes of a design is figuring out where to hide the slop. For instance, the seam between a table frame and the top is rarely tight. You don't need to spend time making it so because the top usually overhangs the frame, and that seam ends up on the underside of the table, where we don't see it. It helps to think of many woodworking projects as a stage set; there is a side you see, and a side you don't.

Cover it
The most common way to hide a seam is with trim. Trim is usually seen as decoration, but its real function is to conceal. Traditional trim—ogees and quarter rounds, for example—works well to cover a seam or ragged edge. Or you can incorporate a covering or trim to be part of the form. I worked on a bench recently where I made the edge of the bench thicker. This thicker piece also worked as the trim, covering the seam between the bench and its base.
Celebrate it
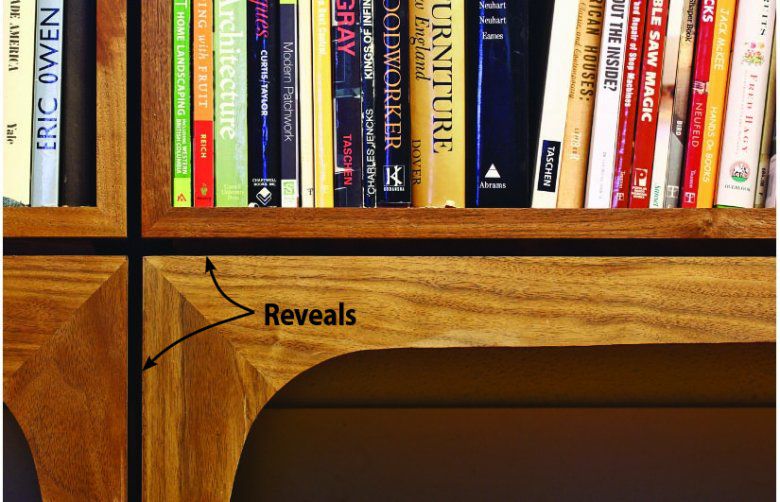
The opposite of trim is to separate two pieces with a reveal. You celebrate the seam to a point where the slop is in plain sight but unnoticed. A 1⁄16 " gap in a seam is much more noticeable than that same 1⁄16 " variance in a reveal. Recently I made a bookcase that I wanted to sit flush with its base.
Making the case and base exactly the same length and width is almost impossible, as is making a seamless fit between the two. Instead, I created a 1⁄2 " gap between them so the case "floats" above the base. Your eye now reads them as flush, and the silhouette is not broken by a piece of trim.
Cut it off
Woodworking is about cutting apart and reattaching wood. This process can continue over and over, working toward the final form. At each step, there is an opportunity to cut off the slop of the previous assembly. A well-used example of this is when making a rail-and-stile panel door. In the first step, I make the panel the size I want it and make the rails and stiles a little bit big. Once glued up, I cut the door to the final size. This cleans up the top and bottom, giving a perfect joint between each rail and stile. I noticed this in Sam Maloof's chairs where he would make the joint perfect on the inside and not worry about what the outside looked like. Then, when dry, he would carve the joint, cutting off the slop on the outside to make the final form.
A master woodworker isn't one who is invariably able to overcome the gap between the perfection of their design and the imperfection of their medium. Rather, he or she is a woodworker who embraces that gap to arrive at a project of which to be proud.
