Face-jointing Without a Jointer

Traditionally, a jointer flattens boards and a planer brings them to thickness (see Parallel universe, below). But if you don't own a jointer, or you need to flatten a board wider than your jointer beds, your planer or router can do the flattening when you follow these steps.
Parallel universe
The standard procedure for milling lumber starts with flattening one face of a board on the jointer, then surfacing the opposite face flat and parallel to the first at the planer. You may be tempted to skip the first step and head straight to the planer. But this approach usually yields less than satisfactory results.
With both a planer and jointer, the board travels over a bed while a spinning cutterhead shaves off material. On a jointer, you guide the workpiece by hand over the cutterhead, removing material from the bottom face. A planer's cutterhead removes material from the top face driven by pressure rollers that press the board flat to the bed. If the bottom face isn't flat, the board simply springs back to its distorted shape after clearing the rollers. So instead of a flat face, you end up with a board that is just as twisted as when you started (only thinner).
Run along the sidelines
What's the difference between warp, twist, bowing, and cupping?
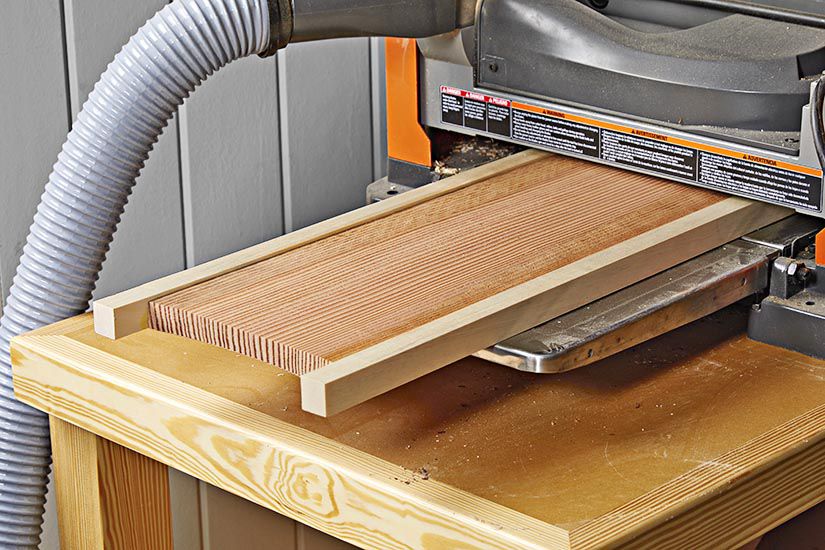
For a slightly cupped workpiece, attach a pair of runners to the edges of the board to support the workpiece during planing. Start by cutting a pair of runners 2" longer and thick enough so they stand 1⁄8 " proud of the cupped board you're flattening. Place the board on your workbench or a flat surface, then attach the runners to the edges of the board with glue or double-faced tape [Photo A]. Make sure both runners rest flat on the worksurface.
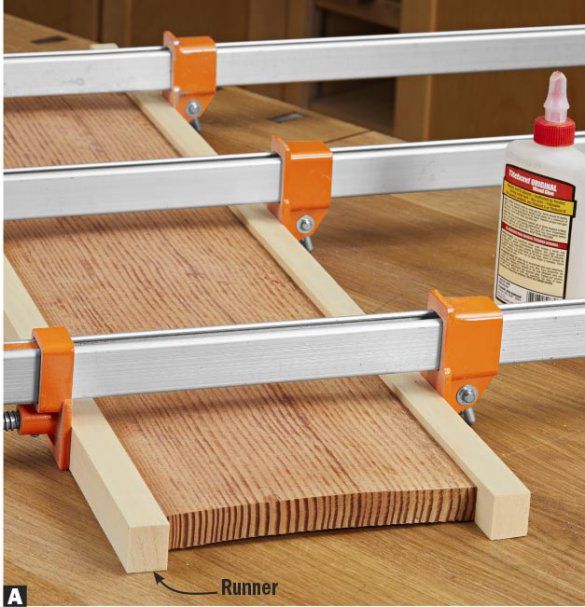

With the board fully supported by the runners, feed it through the planer, taking light passes. The runners take the brunt of the force from the planer feed rollers, preventing them from distorting the workpiece during planing. With one face flat, remove the runners and flip the workpiece over to plane the opposite face.
Tip!
Scribble lines across the face of the board to help monitor the planing progress.
For extra-wide or severely cupped boards, rip the board into two equal-width pieces (cupped side facing up so the board doesn't bind the blade). Plane the pieces individually using runners. Then re-rip the edges at the tablesaw or joint them at the router table to ensure they're square to the now-flat faces before gluing them back together. (Mark the ends of the boards before planing so you can glue them back together in the same orientation.) This divide-and-conquer approach minimizes the amount of wood removed, yielding a thicker finished board.
Resist the twist
Tip!
For a severely twisted board, knock down the high spots on the bottom face with a hand plane first to reduce the amount of shimming needed.
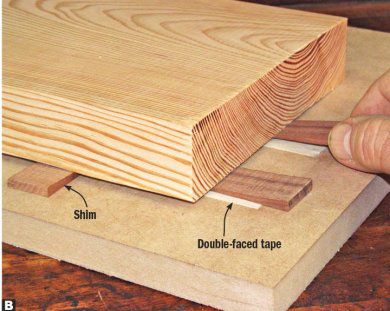
A planer can also flatten one face of a twisted or warped workpiece, so long as you "fix" the workpiece in a stable position. To do this, make a sled from MDF or plywood a couple of inches longer and wider than your workpiece (but not wider than your planer's capacity). Glue to the top of the sled at the trailing end a cleat thinner than the stock you're flattening.
Butt one end of the workpiece against the cleat and press down on the board at opposite corners to locate gaps where it doesn't contact the sled. Insert wedges or shims under these trouble spots to remove the wobble [Photo B].
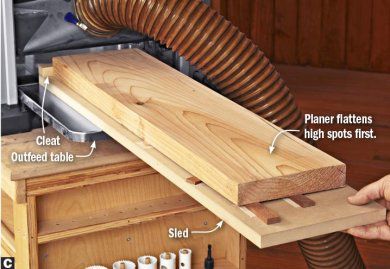
With the shims installed, feed the sled and workpiece through the planer, taking light passes until the face is flat [Photo C]. Remove the workpiece from the sled and flip it over to plane the opposite face flat.
Going wide
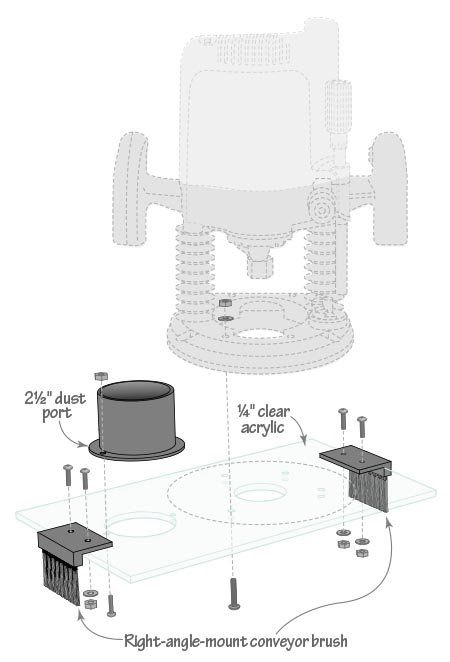
Flattening slabs or boards wider than the width of your planer presents some additional challenges. If ripping the boards to fit through your planer isn't an option, consider skipping the planer altogether and using a router flattening jig. Start by cutting a plywood base large enough to accommodate the piece you wish to flatten [Drawing 1]. Add a pair of rails along the edges. Make a carriage to straddle the base and cut a piece of acrylic to fit inside the carriage. Remove the subbase from your router and mount the router to the acrylic plate [Drawing 2]. Attach a fitting for your shop vacuum hose [Sources] to the plate.
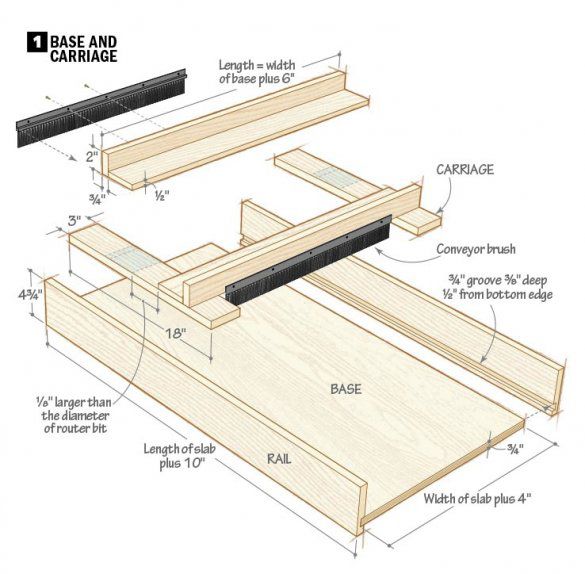

To use the jig, place the workpiece on the base and shim underneath to prevent rocking. Screw hardwood cleats to the base to trap the workpiece. With a shop vacuum attached, rout back and forth across the workpiece, taking no more than a 1⁄8 "-deep cut [Photo D]. Slide the carriage along the base until you've worked the entire length of the board. If necessary, plunge the bit a little deeper and take another series of cuts, until you flatten the entire face. Then flip the board over, remove any shims, and repeat the process to flatten the second face. Sand both sides to remove the router marks.
![Using a flat-bottom planer.Using a flat-bottom planer or dado bit [Sources], work your way back and forth along the length of th](https://imagesvc.meredithcorp.io/v3/mm/image?url=https%3A%2F%2Fstatic.onecms.io%2Fwp-content%2Fuploads%2Fsites%2F49%2F2021%2F07%2F13%2F1192.jpg)
Sources:
Conveyor brush: 2"×6' conveyor strip brush, no. 7372T11, $75.51; 27⁄16 "×3' (right-angle) conveyor strip brush, no. 7372T15, McMaster-Carr, 630-833-0300,
mcmaster.com.
Dust port: 21⁄2 " dust port,
no. 42137, Rockler,
800-279-4441, rockler.com.
Bits: 2" dado and planer bit, no. 52-506; 11⁄2 " dado bit, no. 52-504, Infinity Cutting Tools, 877-872-2487, infinitytools.com.