Fast & Easy Template Routing

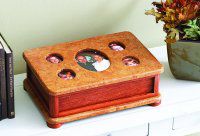
Most of us can crank out consistently straight and square project parts all day long. It's making duplicates of irregular shapes, such as the oval cutouts in the Photo-Frame Catchall Box, shown below, that throw us a curve. That's where a template comes to the rescue. Follow these guidelines to ramp up your consistency.
Step 1: Make the template
We like to make templates from 1⁄4 " hardboard or 1⁄2 " medium-density fiberboard (MDF). Both prove easy to machine and offer greater stability than solid wood. Their only drawback: Corners and detailed areas can lose their shape or get dinged if dropped or bumped. If you want to make more-durable templates, use Baltic birch plywood. You'll get great stability and gap-free plys, but it can cost double or triple the price of MDF.
Lay out your design (to actual size) on the template material or adhere a copy of the pattern. After drilling starter holes, use a scrollsaw or jigsaw to cut away the waste to within 1⁄16 " of the pattern lines. Sand the edges smooth and remove the pattern.
Step 2: Use the template to duplicate workpieces
Position the template on your workpiece and trace the pattern with a pencil. Then cut it to within 1⁄16 " of the line. Repeat for multiple workpieces.
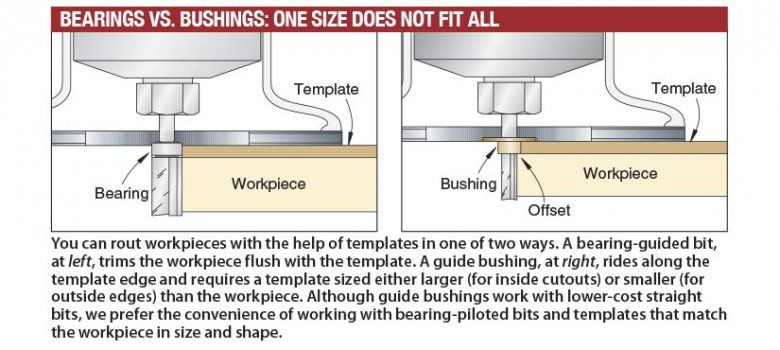
Mount the template to one of the workpieces with cloth-backed double-faced tape. For the quickest, easiest way to trim your workpieces to shape use a bearing-guided flush-trim (bearing below the cutters) bit or pattern (bearing above the cutters) bit in your router or router table. The bearing on these bits rides along the template edge while the cutters remove the remaining material from the workpiece, making its edges flush with the template, as shown in the drawing below.
To begin, choose your bit. Both types of bearing bits work well for handheld and table routing, and each has an advantage. Flush-trim bits provide better visibility when used in a router table because the workpiece rides on the table with the template on top. Pattern bits, with the bearing between the cutter and the shank, don't need to trim the full workpiece thickness in one pass. Rather, you can use a pattern bit with a short cutterhead (and cheaper price tag) and make the cut in two or three passes.
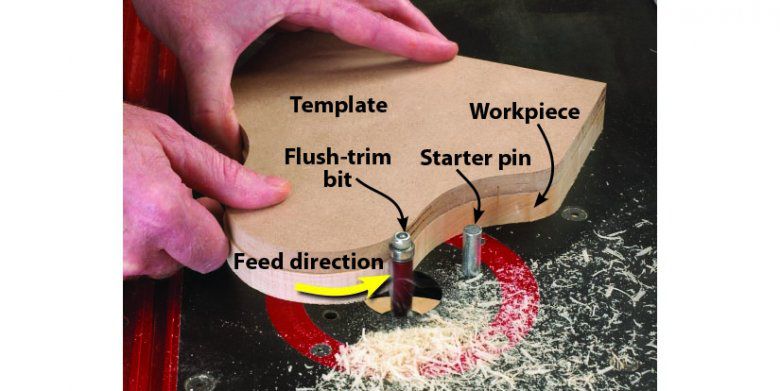
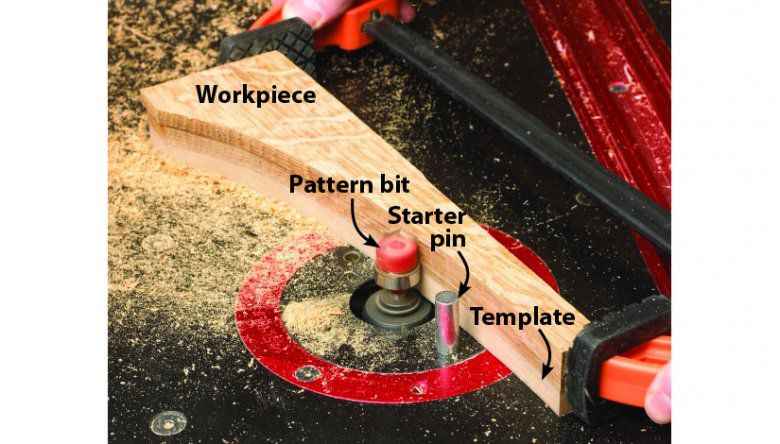
For use in a router table, set the bit height so the bearing rides in the middle of the template's thickness. Insert a starter pin near the bit. (You don't use the starter pin for inside cutouts unless the opening offers enough room that it won't get in the way after you engage the bit.) Turn the router on, anchor the workpiece against the starter pin, and slowly ease it into the bit until the bearing contacts the template. Rout in a right-to-left or counterclockwise motion for edge trimming, as shown above; use a left-to-right or clockwise motion for inside cutouts. Once you've begun cutting with the bit, pull your workpiece away from the starter pin.
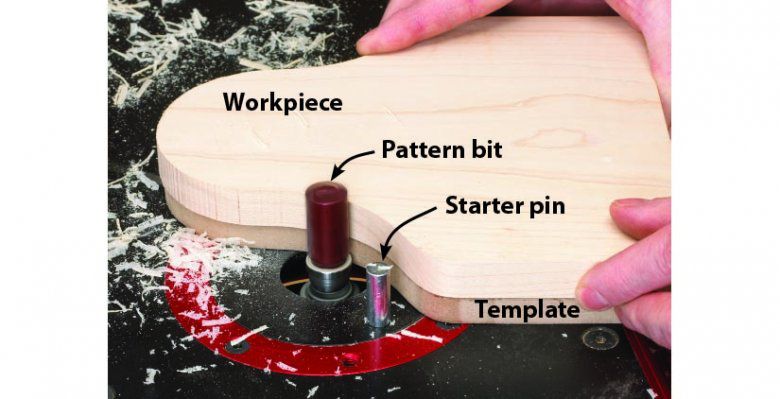
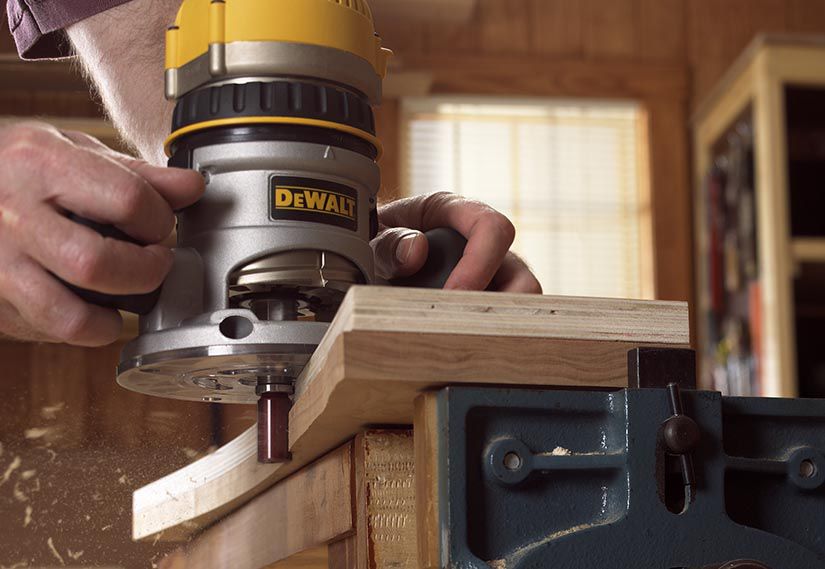
A pattern bit works similarly to a flush-trim bit, except you flip the workpiece so the template rides against the router table top, as shown above and below, or the router subbase. Work in the same manner with these on your router table. With a handheld router you need to elevate your workpiece, which will be on the bottom, with blocks to avoid cutting into your workbench.