For a tough finish, use epoxy

If you want a thick finish that has no trouble standing up to spilled water and alcoholic drinks, and can absorb a lot of physical punishment, epoxy does the job. However, it calls for much different application techniques than traditional wood finishes, and perfect results can prove tricky to achieve. Follow this advice for quality results.
Epoxy comes in two parts: resin and hardener. Some brands call for 1:1 mixing; others, two parts of resin and one of hardener. For this article, we used System Three Mirror Coat, a 2:1 product from System Three Resins. It's available from Woodcraft in a 11⁄2 -pint kit, item 143153. With 11⁄2 pints, you can cover nearly 5 square feet with a coating 1⁄16 thick. A 11⁄2 -quart kit covers 91⁄2 square feet, item 143154. Call 800/225-1153 if you have questions or want more information.
Your workshop should be well ventilated and between 70° and 85° while you work with epoxy. Use eye protection and gloves. If necessary, clean uncured epoxy from your skin with soap and water or vinegar.
For best results, take care to mix the two parts accurately, and prepare no more than you'll use in 30 minutes. Place your project on cardboard or a tarp to catch any drips, and make sure the surface to be coated is level. A single thick coat can result in trapped bubbles as air rises out of the wood pores, so plan to apply two coats. A thin first coat allows the air to escape through the epoxy before it cures, paving the way for the second coat to go on more smoothly. Allow the first coat to dry, and then apply the second coat within 72 hours of the first application to ensure proper bondepoxying. If you want to apply epoxy on both sides of a surface, turn the project facedown and do the underside first.
To embed pictures or other objects in the finish, place them in the thick coat while it's wet. Cover them with subsequent coats.
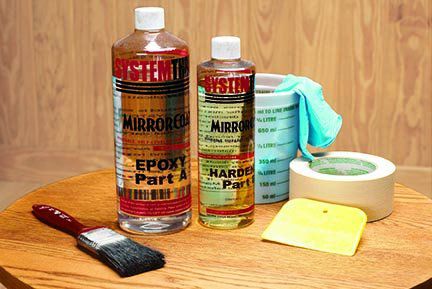
Photo above: Along with a two-part epoxy product, you need a mixing container; gloves; masking tape for the underside of the surface; a leveling tool, such as the plastic spreader shown here; and an inexpensive brush that you'll throw away after coating the edges.

Photo above: Apply masking tape flush with the edge of the surface to be coated. We placed short strips all the way around the table, each one protruding slightly, and then trimmed them with scissors. After you pour the epoxy, allow it to set up, and then peel away the tape. Any epoxy "stalactites" will come with it.

Photo above: Use a measuring spoon or small cup to measure out the resin and hardener into your mixing container, and then stir it steadily for two minutes with a stick. Scrape it off the sides as necessary, but don't mix vigorously enough to introduce air bubbles.
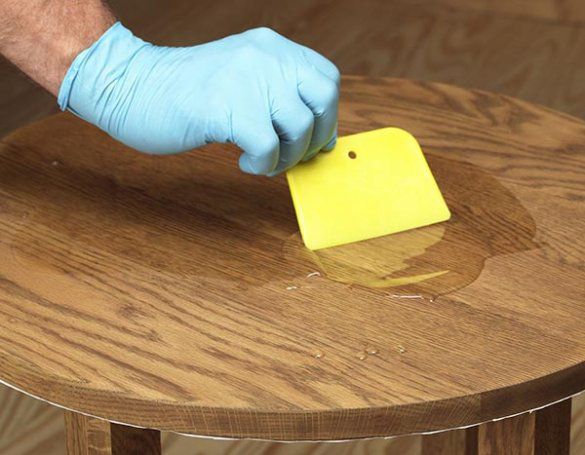

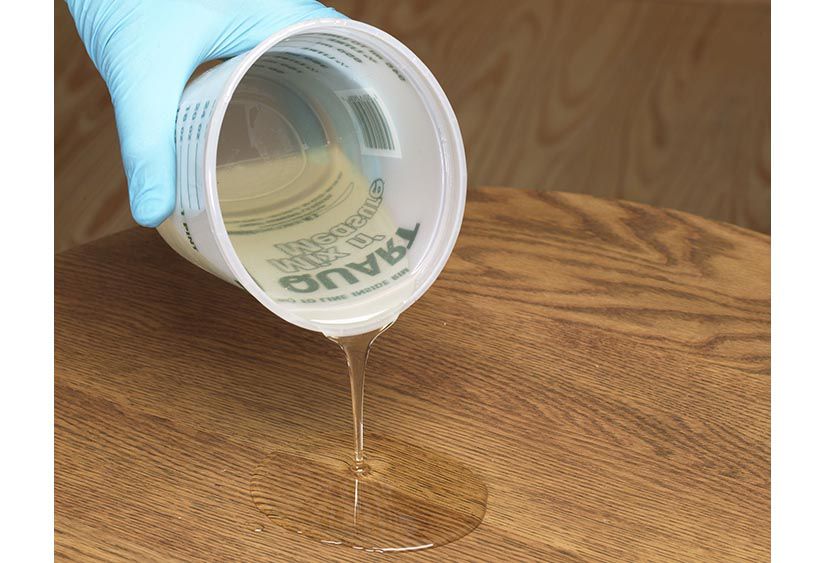
Photo at left: Pour the epoxy mixture onto the surface, and spread it with your plastic spreader. After applying your first thin coat, wait 30 minutes, and then use this same tool to scrape off the excess. Pour the second coat up to 1⁄8 " thick, and again use the spreader to assist the self-leveling process.
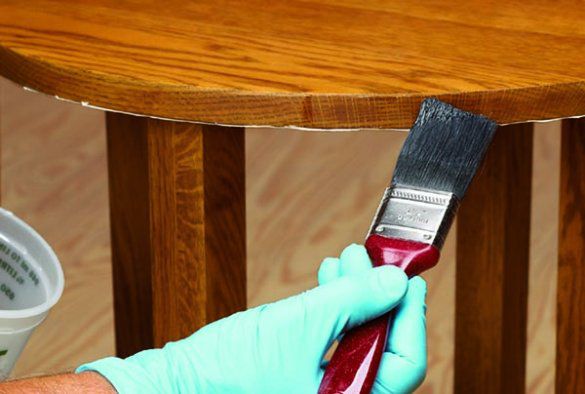
Photo above: Use a brush to coat the edges with any epoxy that overflows the top. Dip into the mixing container if you need more material to produce an even layer. Expect to leave a thinner coat on vertical surfaces than you did on horizontal ones.

Photo above: Continue to inspect the surface for several minutes after you finish spreading the thick coat. Blow gently on any air bubbles to make sure they pop. As an alternative, use a blow dryer set to its lowest blower speed. Be careful to hold it well away from the surface, and keep it moving to avoid putting ripples into the finish. Or, do the job with a heat gun held 6" to 12" from the surface.
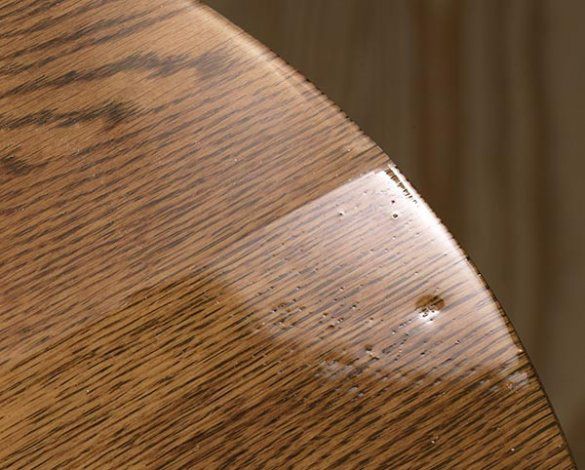
Photo above: If your cured epoxy finish contains craters and bubbles, you can rub out all or most of them. Begin with 320-grit wet/dry sandpaper, water, and dish soap. Continue on to higher grits until you're satisfied with the results. We left the right half of the table untouched, while working up to 4,000 grit on the left half with abrasive pads on a random-orbit sander. Most of the flaws disappeared, as did the high gloss. To restore glossiness, continue with finer rubbing compounds.