Get a Grip on CNC Work
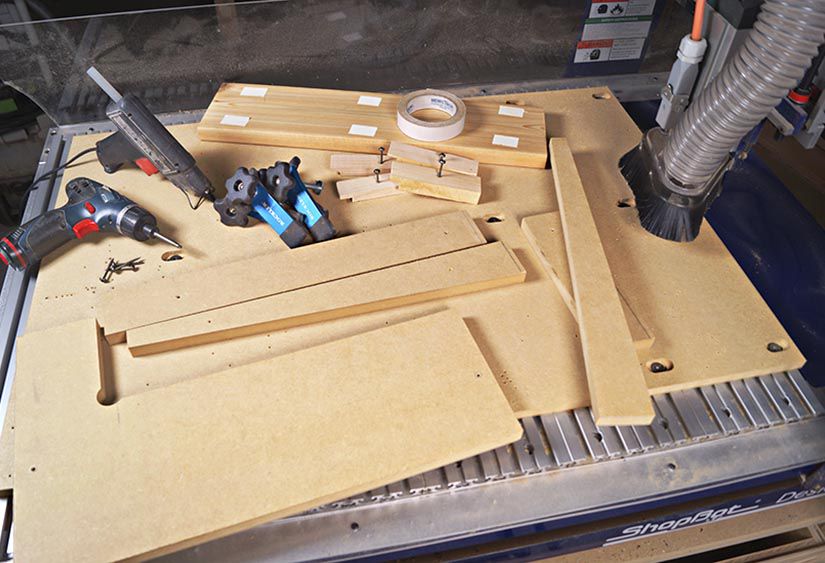

Computer numerically controlled routers do a lot of work quickly and precisely. But they don't provide any clue that a workpiece will come loose from its worksurface until it happens. And then you have a minor disaster. For success—and safety—always firmly secure the workpiece; your grippy router mat simply won't do the job. These six tested techniques ensure that workpieces stay put on a CNC machine.
Commercial hold-downs
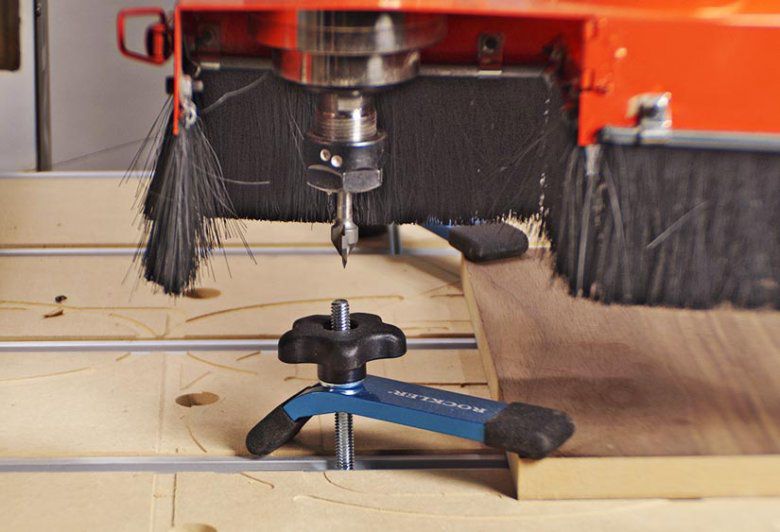
You'll find many styles of hold-downs, including the one shown [Photo below, Sources], that engage the T-tracks in the tables of some CNC machines. These install and adjust easily, and provide plenty of pressure to hold your work. Go with aluminum hold-downs rather than steel, just in case the cutter hits one.
Shop-made clamps
Hardwood scraps make great hold-downs, especially for machines without table T-tracks [Photo below]. In addition to wooden hold-downs being priced right, accidental contact between one of them and a router bit causes no damage to the bit. And these hold-downs have a low profile. To make one, rabbet one end of a piece of scrapwood 4–6" long. Cut the rabbet depth slightly less than the thickness of your workpiece.

Wedges
For machining multiple same-size parts, try wedges coupled with an anchor board and battens [Photo below], all made from MDF or plywood. They allow you to get a workpiece on and off quickly, and lock it into the same XY position every time. First, create the anchor board on the CNC machine, providing a hole at any inside corner for dust relief. Cut a 5° angle on the wedges.
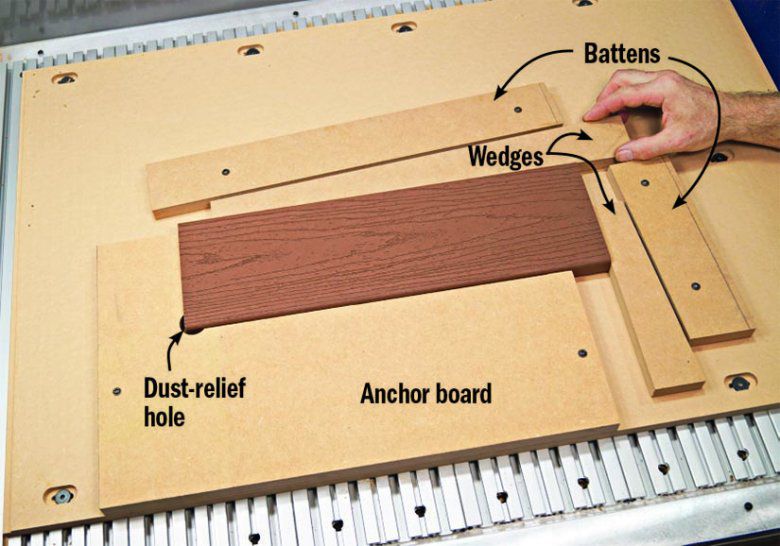
Screw the anchor board to your spoil board, with its edges parallel to the X and Y axes. (MDF spoil boards call for coarse-thread screws for good holding power.) Place the workpiece against the anchor board, slide a wedge against the workpiece, position the batten, and screw the batten in place. Repeat for the second batten. Secure your work by lightly tapping the wedges with a mallet.
Screws
You can screw the workpiece to a wooden table, if the design allows. Include the screw locations in your design and create a separate tool path for them [Photo below]. This guarantees they stay clear of the cutter while machining the design.


Run only the tool path for the screw holes, using a V-bit with a 1⁄8 "-deep cut to mark the screw locations [Photos below]. Without moving the workpiece, drill the screw holes and screw the workpiece to the table.


Double-faced tape
Double-faced tape works fine for light-duty cuts, such as 3D carving and lettering [Photo below, Sources]. For maximum tape grip, make certain the spoil board and workpiece are flat and free of dust. You'll probably have to pry your work from the spoil board after completing the cuts, so don't try this with delicate pieces.

Hotmelt glue
This adhesive applied to all four edges has enough holding power for even the most aggressive cuts [Photo below]. But applying it and waiting for it to cool takes more time than other hold-down methods.
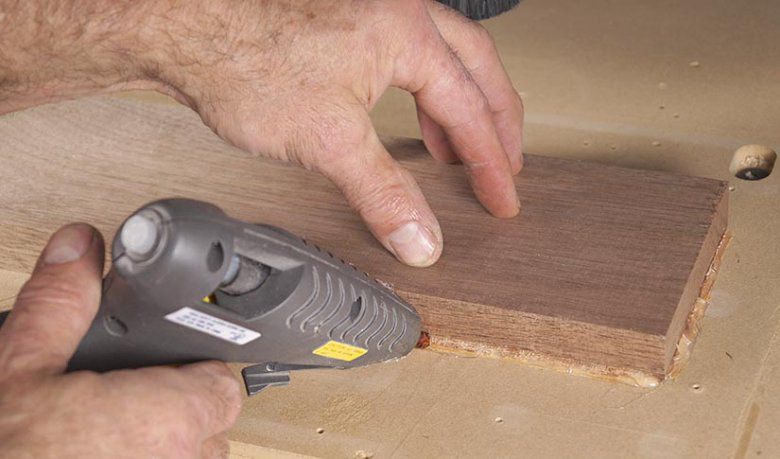
After completing the CNC cut, slice through the glue with a utility knife to release the workpiece. Before mounting your next workpiece, clean glue residue from the workpiece and spoil board with a sharp chisel .


In addition to classes at Vondriska Woodworks in Hammond, Wisconsin, George Vondriska teaches at woodworking shows, guilds across the country, and Weekend With WOOD. Order his book, CNC Essentials: The Basics of Mastering the the Most Innovative Tool in Your Workshop.
Sources:
Hold-down clamp