Get on board with Guide Bushings


Bushing types and sizes
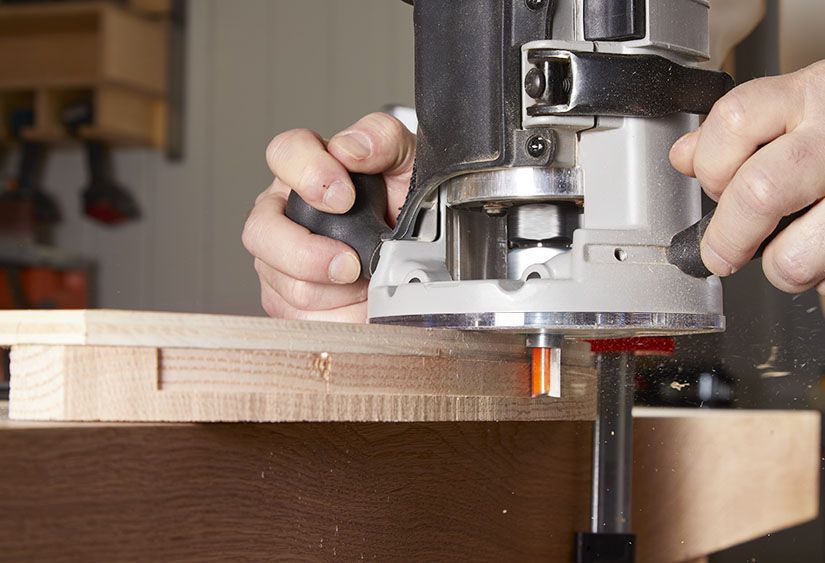
Guide bushings are short tubes (or barrels) of various diameters and lengths, mounted to a metal plate that fits in your router's subbase and through which a router bit extends. The bushing serves to space the bit a fixed distance from a template or straightedge.
Most router subbases accept either universal bushings, also known as Porter-Cable (P-C) bushings, or a proprietary bushing [Photo A]. Universal bushings fit into a stepped hole that's 13⁄8 " in diameter at the outer face and 13⁄16 " in diameter on the inner face. A threaded ring locks it into the subbase.
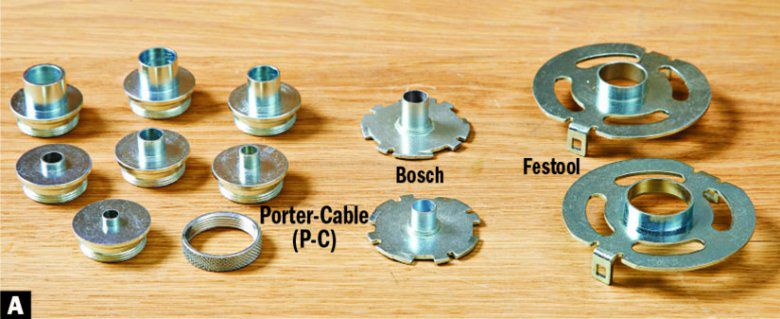
Most guide bushings are referenced by the outside diameter (O.D.) of the barrel. Universal guide bushings range from 5⁄16 " to 1" O.D. (Bosch has a guide bushing in one of its kits with an O.D. of 13⁄8 ".) The most used bushing in my shop is a 3⁄4 " O.D., but having a full kit provides plenty of options. You also need to know the inside diameter (I.D.) to ensure that your selected bit will fit through.
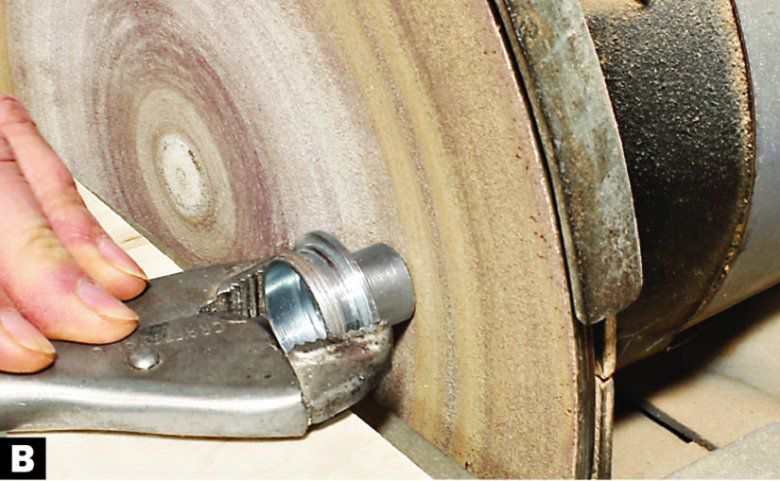
Bushing barrel lengths run 3⁄16 " to 5⁄8 ". The barrel needs to be shorter than the thickness of the template or straightedge so it doesn't rub on the workpiece. Because bushings are brass or steel, you can grind them shorter, if needed [Photo B].
SKILL BUILDER
Accuracy requires centering
If your subbase—and consequently your guide bushing—sits off-center of the bit, the gap between the bit and bushing is larger on one side than the other, leading to inconsistent results as you move the router. To properly align the subbase, use a centering cone, which is often included in a router kit [Photo below]. You can also find accessory cones at most woodworking stores, or use a chamfer bit if you stay mindful of the bit's sharp edges.

Create identical parts
Bushings excel for pattern routing. Shape a template from plywood, hardboard, MDF, or acrylic and use it over and over to produce identical pieces. Because of the offset between the bit and bushing, the bit traces a slightly larger version of the template [Photo C]. To calculate this offset, take the guide bushing's O.D., subtract the bit diameter, and divide by two. Note that to create identical pieces, you must use the same router bit and bushing each time. Switching either, or both, changes your results.

Rout inlays
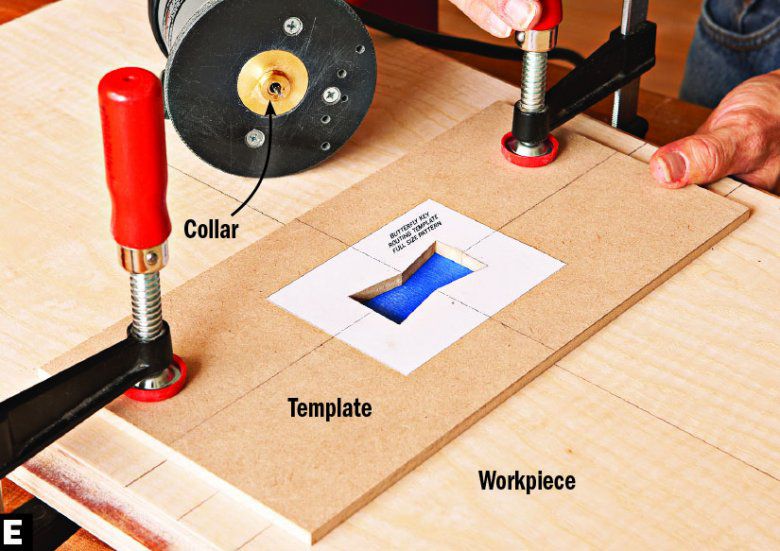
Create beautifully fit inlays with an inlay kit. It pairs a guide bushing with a collar matched to a specific-diameter bit. The collar compensates for the bit diameter and the offset between the bit and collar. Inlays routed without the collar [Photo D] fit perfectly in recesses routed with the collar in place [Photo E]. Sand or plane a slight chamfer on the bottom of the inlay, then glue it in place.

Rout shelf-pin holes
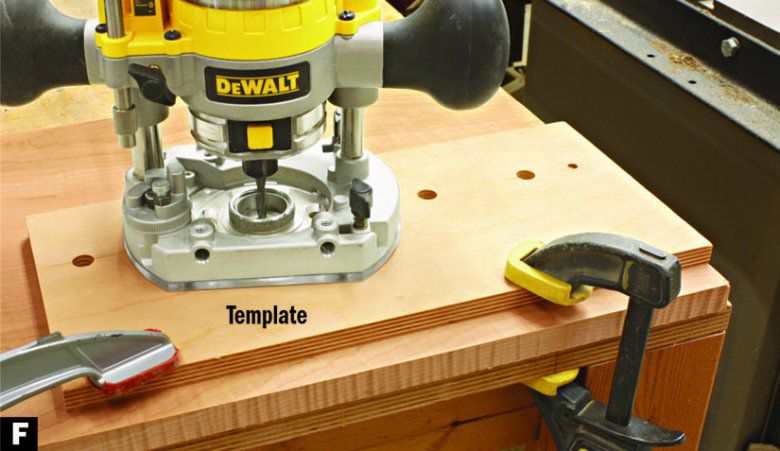
Make perfectly spaced holes for shelf pins with a shop-made template and a plunge router. To make the template, drill a series of holes matching the bushing O.D. into a piece of plywood, MDF, or acrylic. Space the holes as desired for the shelf pins. In your plunge router, install the bushing, and a spiral upcut bit that matches the shelf-pin diameter. Set the router depth stop so the bit reaches the desired depth below the template. Clamp the template onto a workpiece, register the bushing in a hole, and plunge the bit down to create a dead-straight shelf-pin hole [Photo F].
Cut circles hassle-free
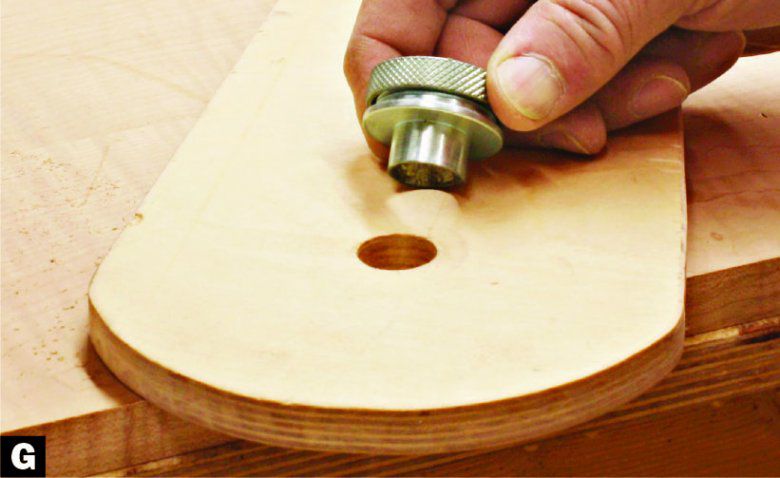
With a typical circle-cutting jig, the router's cord wraps around the tool as you work, and at some point during the cut you must let go of the tool to reposition your hands. But cutting circles using a guide bushing and this trammel [Photo G] eliminates those issues.
Tip!
Use a spiral downcut bit for the cleanest cut, especially across the end grain.
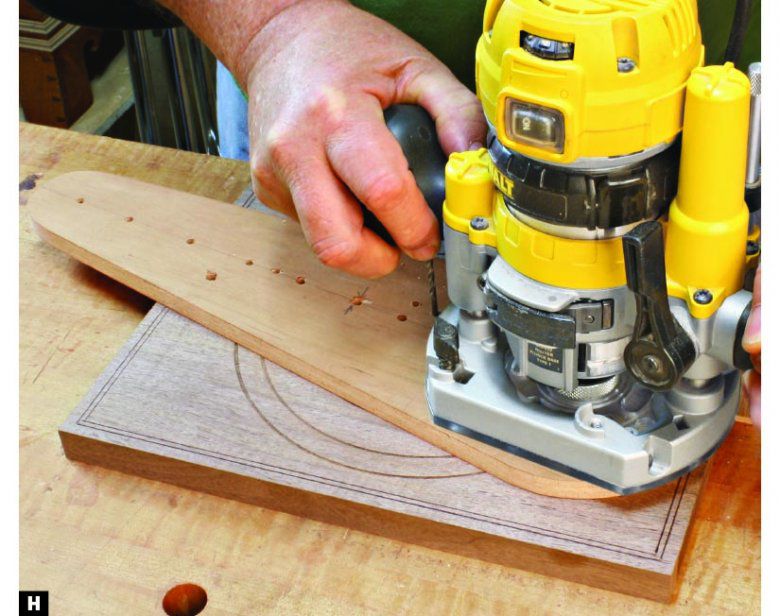
Drill a hole near one end of the jig to match the O.D. of the bushing barrel. Install the bushing in your router and slip the bushing into the hole with the bit extended beyond the jig. Measure from the cutting edge of the bit to the desired radius, and drill a hole through the jig at that point to accept a pivot pin. (A cut-off finish nail works well.) Slip the jig over the pivot pin, and rout the circle [ Photo H].
Perfectly place sliding dovetails
The easiest way to create dovetail sockets for sliding dovetails, such as when connecting dust panels or dividers to case sides, is to pair a 3⁄4 " O.D. guide bushing and 3⁄4 " dovetail router bit. When run against a straightedge, the bottom edge of the bit cuts in-line with the outside edge of the bushing [Photo I]. Simply align the straightedge at half the bit diameter (3⁄8 " in this case) from the centerline of the desired slot. Because the widest portion of the bit sits below the bushing, the bit never contacts the bushing. But this also limits your height adjustments, so create a template of appropriate thickness.
