Give Power-Carving a Go

As a method of shaping wood, power-carving boasts some advantages over traditional knife-and-gouge carving. You can remove lots of wood fast—even if it's extremely hard, knotty, or has difficult grain; you don't have to pay close attention to grain direction; and you're less likely to cut yourself.
But these advantages don't come without drawbacks. Traditional carvers object to power-carving's noisiness, lamenting that the process more closely resembles grinding than carving. Others argue that smooth, powercarved surfaces lack the tool marks that lend texture and character to carvings. (Some carvers effect a compromise on this point by roughing a carving with rotary tools, then completing it with handtools.) Then, of course, there's the dust. (See below.)
You can't let the dust get to you
Power-carving raises lots of dust. And the speed and rotation of the bit will throw much of it right at you. Carving for more than a few seconds turns the air hazy with fine dust, which is both hazardous to breathe and messy to clean up.
When power-carving, wear a dust mask or respirator and eye protection, at the very least. A cap and apron can help keep some dust out of your hair and off your clothes.
Ideally, you should isolate your carving area and equip it with air-cleaning and dust-collection devices. Working in front of a portable air cleaner, like the one shown below, can keep dust down. You also could work in front of an open hose from your shop's dustcollector. Many carving-supply dealers sell a variety of devices designed to deal with dust.


TAKE ONE OF THESE TOOLS FOR A SPIN
Handheld rotary tools and flexible-shaft machines are the basic rotary power-carving tools. Power-carvers have been known to use die grinders, angle grinders, and all types of sanders. Some turn to micromotor machines or ultrahigh-speed air-turbine tools for detail work, but that's another story.
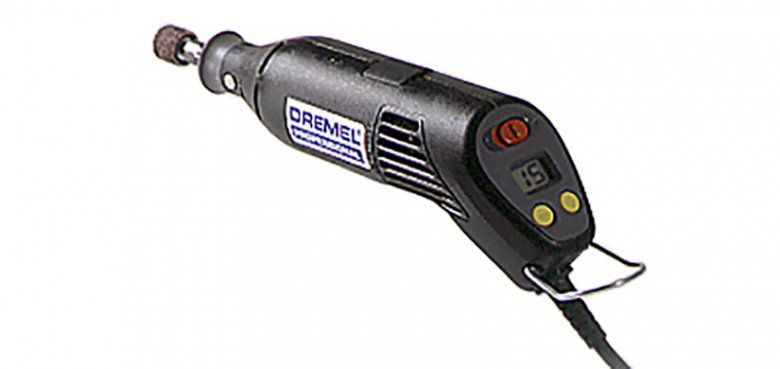
Start with an easy choice: the handy handheld tool
The versatile handheld rotary tool (below) offers easy entry into power-carving. Many a carver has turned out show-winning work with one of these and just a few bits. For carving, a variable-speed corded tool offers the ideal combination of power and flexibility. Interchangeable collets allow these tools to take bits with either 3⁄32 " or 1⁄8 " shanks. Rechargeable rotary tools generally offer neither adequate power nor runtime.
A serious carver's tool: the flexible-shaft machine
For anyone who carves many hours at a time, the flexible-shaft machine (below) offers several advantages, including light weight. "You don't think of a rotary tool as weighing much, but one starts to feel heavy after several hours of use," explains Sheila Hunter, a carver from the Kansas City area. "The smaller, lighter flex-shaft handpiece is easier to hang onto and less tiring to use," she says.
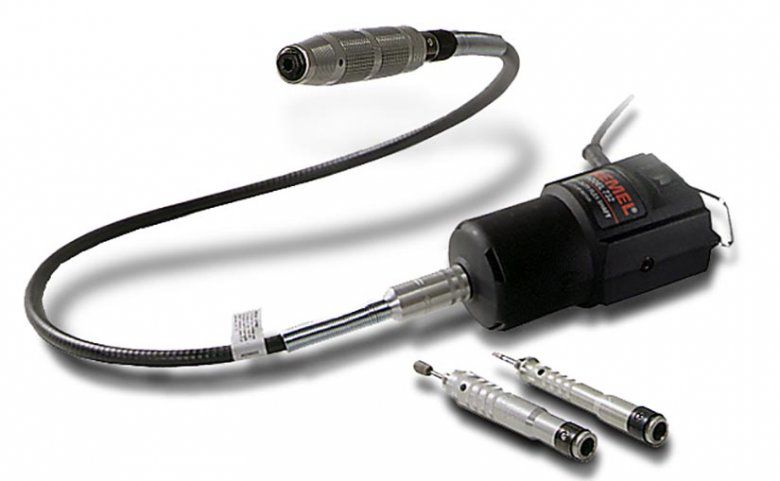
Flex-shaft carving machines generally boast more power than handheld tools, too, so they can handle larger cutters. Many handpieces will accept collets up to 1⁄4 ", enabling use of the largest available carving bits.
Try these tips for top results
* Move the tool so the bit rotates into the work: Cut from right to left if you're holding the tool with the bit pointing away from you, left to right if it's facing toward you.
- Don't force the cutter into the wood. Let the bit do the cutting; you just guide it.
- Keep the bit moving to avoid burning and gouging.
- Take care at corners. The rotation of the bit can kick the tool over an edge or end if you try to start a cut there. You'll do better to turn the workpiece around and carve off over an edge or end.
- Start with the tool running at a mid-range speed. If the bit chatters as it cuts, increase the speed.
BITS: LET'S CUT THE CONFUSION
Deciding which bit to use from the bewildering array available might seem perplexing. Choosing one won't be so baffling if you start by answering these questions:
- How much wood do you need to remove?
- How fast or how precisely would you like to do it?
- How smooth do you want the carved surface to be?
Your answers, in conjunction with the capsule descriptions of bits below, will point you toward the type of bit to use. As for the size and shape, pick the largest practical size of a shape that fits the job. The illustrations below show some of the many shapes available.

Comparing the cutters

- Tungsten carbide burrs, such as Kutzall (A and B, above) and Typhoon bits (C), remove wood faster than any others. A big, coarse (silver) Kutzall is just the ticket for roughing out a carving. Medium (gold) Kutzalls and Typhoon bits are slightly less aggressive, but leave a smoother surface.
- Steel or carbide burrs cut like files. The cutting edges lie parallel around a single-cut burr, like the pear-shape one (D). They cross on a double-cut bit (E). A coarse doublecut burr (F) cuts fast and, like all burrs, leaves a fairly smooth surface. Solid carbide burrs cost more but last longer than steel ones, and some can be resharpened.
- Cross-cut burrs (G), often called stump cutters, carry milled teeth arranged in rows. They're available as coarse, fine, or extra-fine. A coarse one can remove wood fairly quickly, while finer stump cutters are well suited to precise shaping. All leave a slightly ridged surface.
- Ruby carvers (H), named for the mineral particles bonded to their steel bodies, have become practically standard equipment for power carving. These medium-fast cutters come in three grits, leave a sanded-looking surface, and last a long time. Many carvers do most of their work with an assortment of ruby carvers.
- Diamond points (I), coated with diamond chips, remove wood faster and leave the surface smoother than ruby carvers. They're usually smaller than the ruby tools, so lots of carvers prefer them for detailing. Some, identified as safe-end diamonds (J), have no abrasive on the end. On wood, a diamond bit should last a long time. You can buy these versatile bits most economically in sets.
- Texturing stones (K)—silicon carbide, corundum, or other abrasives similar to sharpening stones—are the least aggressive tools. They come in varied grits, and often are identified by color. They leave a soft-looking, smooth surface, and can cut fine lines for texturing and detailing.
- Drums (L), discs, and other sanding tools serve for both shaping and finishing. Many carvers blend contours using a foam-cushioned sanding drum. For longevity, you can't beat ruby-carver bands for small sanding drums.
Sizing up the bits to buy
When you shop for carving bits in person, it's easy to pick out one that looks about the right size. But when ordering from catalogs, you'll have only dimensions to go by. (Some catalogs show bits at or near actual size for easier selection.)
Sometimes you'll encounter ISO sizing—a three-digit number (often part of the bit's catalog number), such as 025 or 130, that indicates the bit's diameter. To convert the ISO size to millimeters, place a decimal point between the second and third digits from the left. So the 025 bit measures 2.5mm in diameter and the 130, 13 mm. (25.4mm = 1")
Shanks measure 3⁄32 " in diameter for most bits, 1⁄8 " for some. Large burrs designed for aggressive cutting often feature 1⁄4 " shanks.
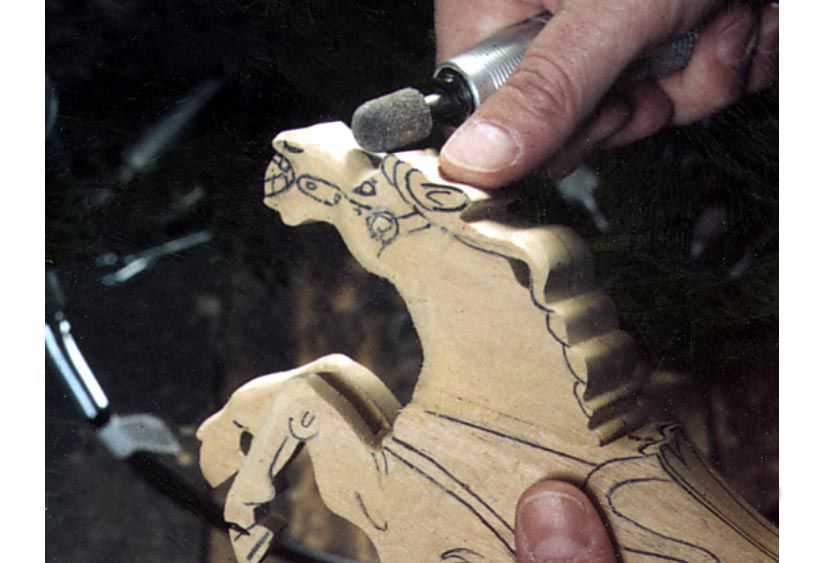
Get a good grip on the tool
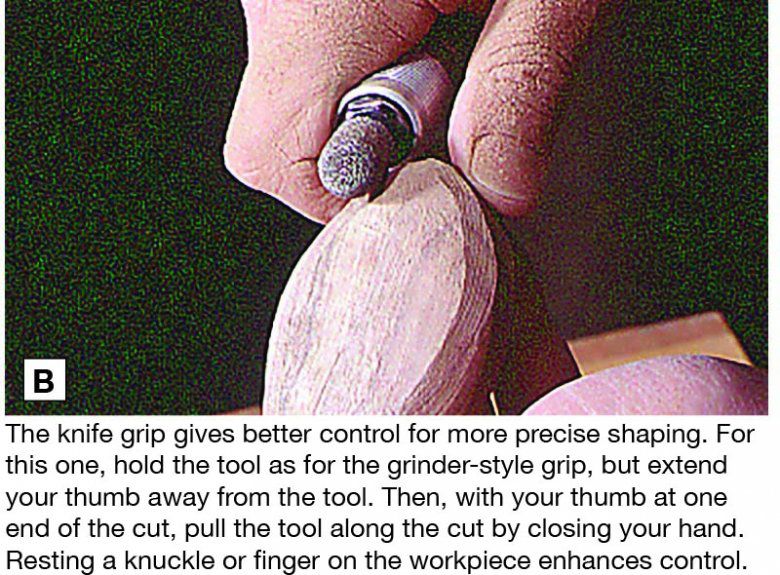
The secret to success in power-carving lies in keeping the bit under control. The first step is to get a firm, comfortable hold on the tool. Some popular ways to hold a rotary carving tool are the grinder-syle (Photo A), knife-style (Photo B), and pencil-style (Photo C) grips.


Clean bits carve better
A bit may not cut as well after some use. That's not necessarily a sign that it's worn out; maybe it's just loaded up with wood fibers and resin. Cleaning may revive it.
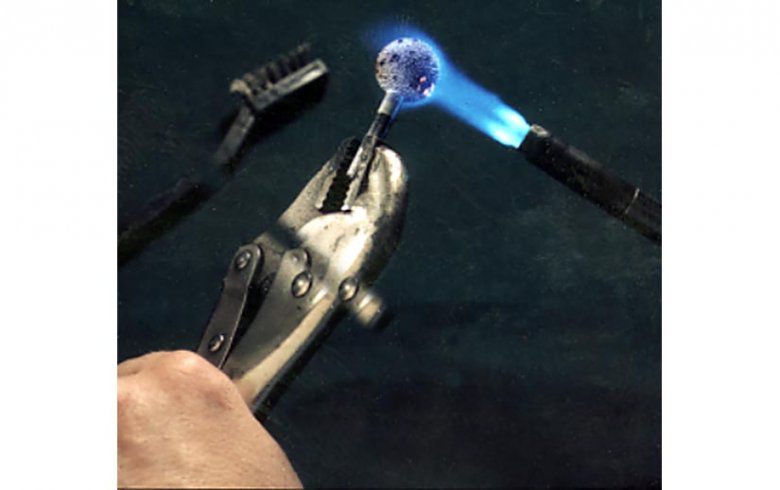
Clean light buildups from burrs, ruby carvers, and diamond points with a brass-bristle brush, about the size of a toothbrush. Go after heavier deposits with oven cleaner. Blast a clogged Kutzall with the flame from your propane torch (below), then brush it clean.
Many carving-supply dealers sell blocks and dressing stones for maintaining ruby carvers and diamond points. A crepe sanding- belt stick cleans texturing stones and sanders.
SAND A STYLIZED BIRD
When we asked carver Sheila Hunter for a quick, easy power-carving project, she had the perfect answer: a styized bird, like the one shown below, see link below for full size pattern. With no more than a sanding drum chucked in a handheld rotary tool, you can carve one in just a few minutes.

To carve the bird, transfer the top- and side-view patterns to a 2x2x6" block of suitable stock. (For power carving, that can be virtually any wood. We used a mahogany scrap for the one shown.) Bandsaw or scrollsaw the two views.
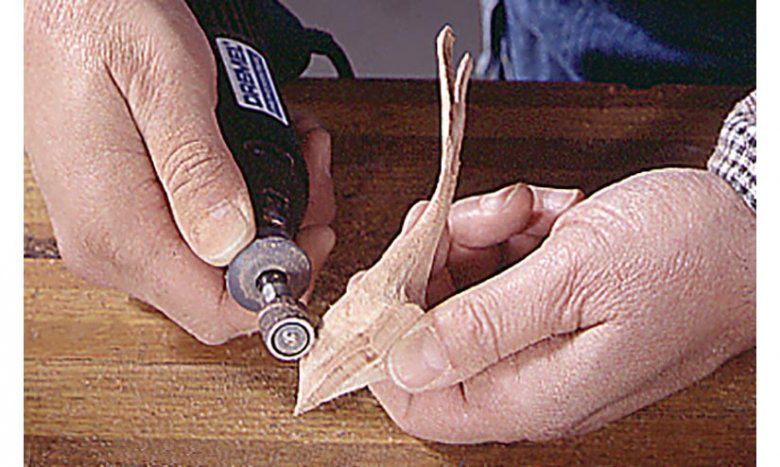
Then, chuck a 1⁄4 , 3⁄8 , or 1⁄2 " sanding drum to your rotary tool, and install a 60-grit sleeve. Sand the corners of the blank round, as shown above. Leave a small, rounded flat spot on the bottom for the bird to sit on. Shape the body, head, and tail. As you thin and shape the tail, support it with your finger, as shown below.

Once you've shaped the bird, change to a 120-grit sanding sleeve. Blend the contours, and remove deeper scratches left by the coarser drum. Hand-sand the bird with 150- and 220-grit sandpaper, going with the grain. Finally, apply a clear finish.