How to Cut Identical Shapes on the Bandsaw

When I was commissioned to make a set of eight chairs, I was faced with cutting multiple back slats with serpentine curves. I had to figure out a way to make all the slats identical. I used a template and a simple bandsaw jig to make the duplicate parts.
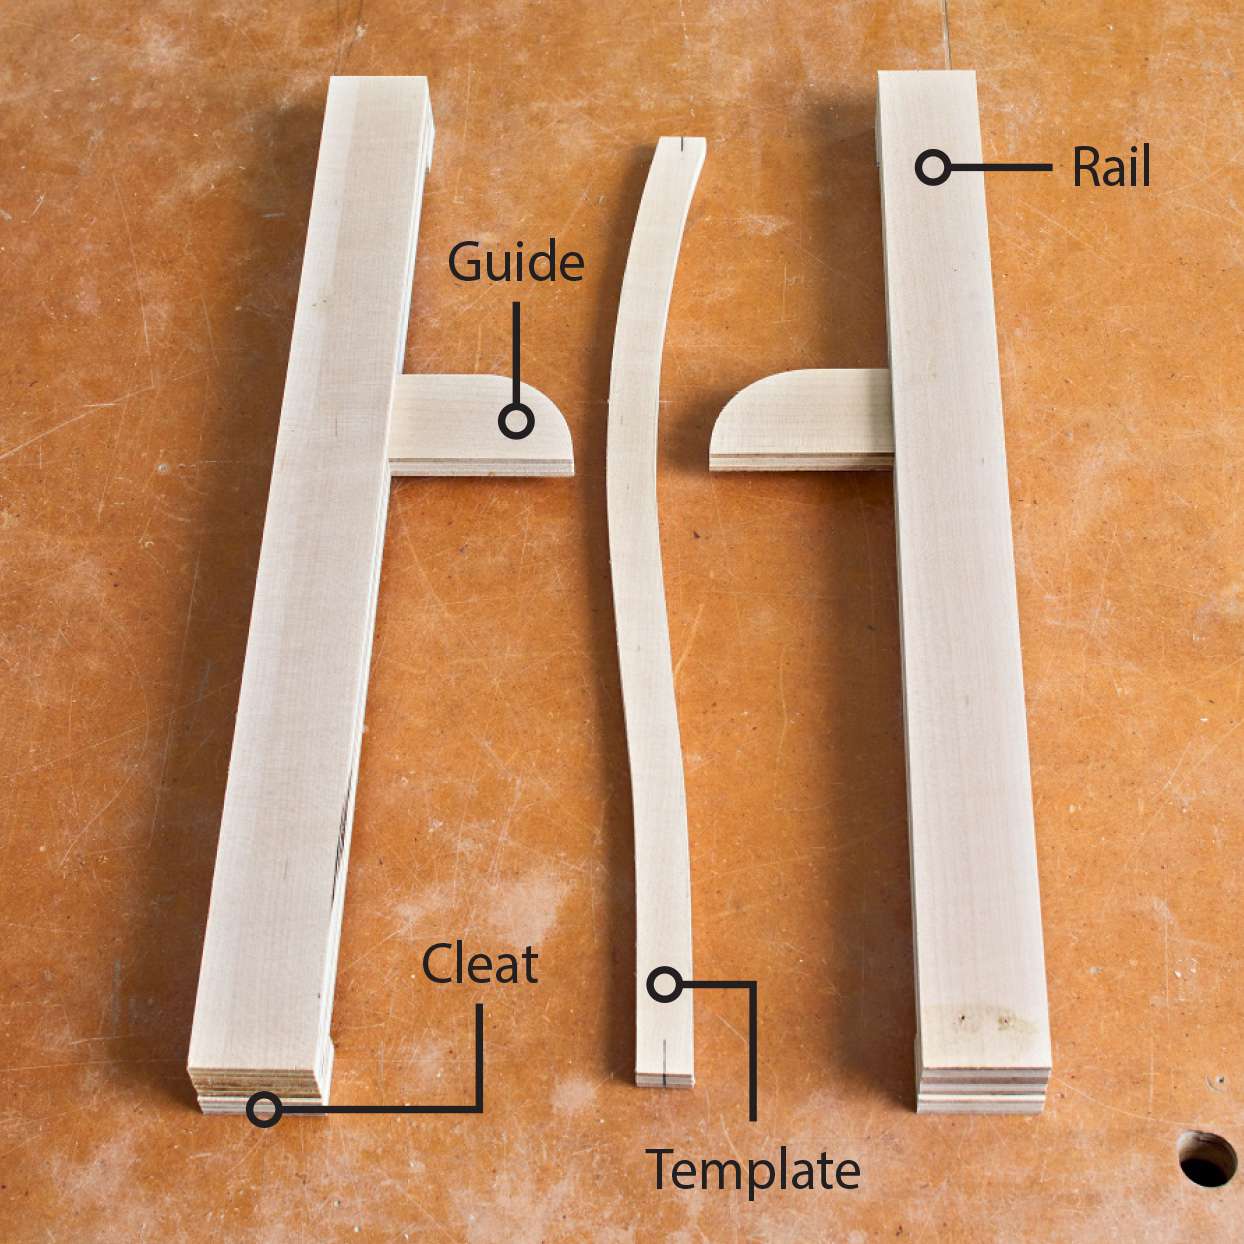
My bandsaw jig, above, consists of two rails that span the bandsaw table from front to back. Cleats at each end overhang the table edges to help position the rails, and clamps hold them in place (previous page). A guide extends from the bottom of each rail toward the blade to capture a template that has been cut to the desired shape and fastened to the bottom of the workpiece.
Build a simple bandsaw jig
Make the rails from two layers of 1/2" plywood. First, cut six 2" strips a few inches longer than the depth of your bandsaw table.
Glue two strips face-to-face to make each rail, and trim the edges flush and straight after the glue dries. From one remaining strip cut four 1"-long cleats. Fasten a cleat, checking for square, at each end of the rails for a snug fit over the front and rear of the bandsaw table.
Cut 6"-long guides from the remaining strip then bandsaw a point at one end of each guide. Sand a slight radius at the point for the template to smoothly ride against during the cut. Place the rails on the bandsaw table against the blade and mark the tooth location. The guide will be attached in front of the blade with the flat edge aligned with this mark. Position the guides and mark their width on the rails. Rout dadoes on the bottom to fit the guides. Glue the guides in place then wax the points of the guides to reduce friction during use.
Creating cloned parts
The first step to creating identical parts is to make a template shaped to match the desired profile—in this case, the curved slat. Make the template from material at least the same thickness as the jig's guides; I used the same 1/2" plywood. Take time to sand the template smooth to avoid transferring any lumps and bumps to the final workpiece.
Cut the blanks to finished length. Because I assembled my chairs with loose tenons, I didn't have to account for tenon length. I did cut the mortises in the ends while the stock was still square. If you use traditional mortise-and-tenon joinery, do the same for the tenons on your slats.
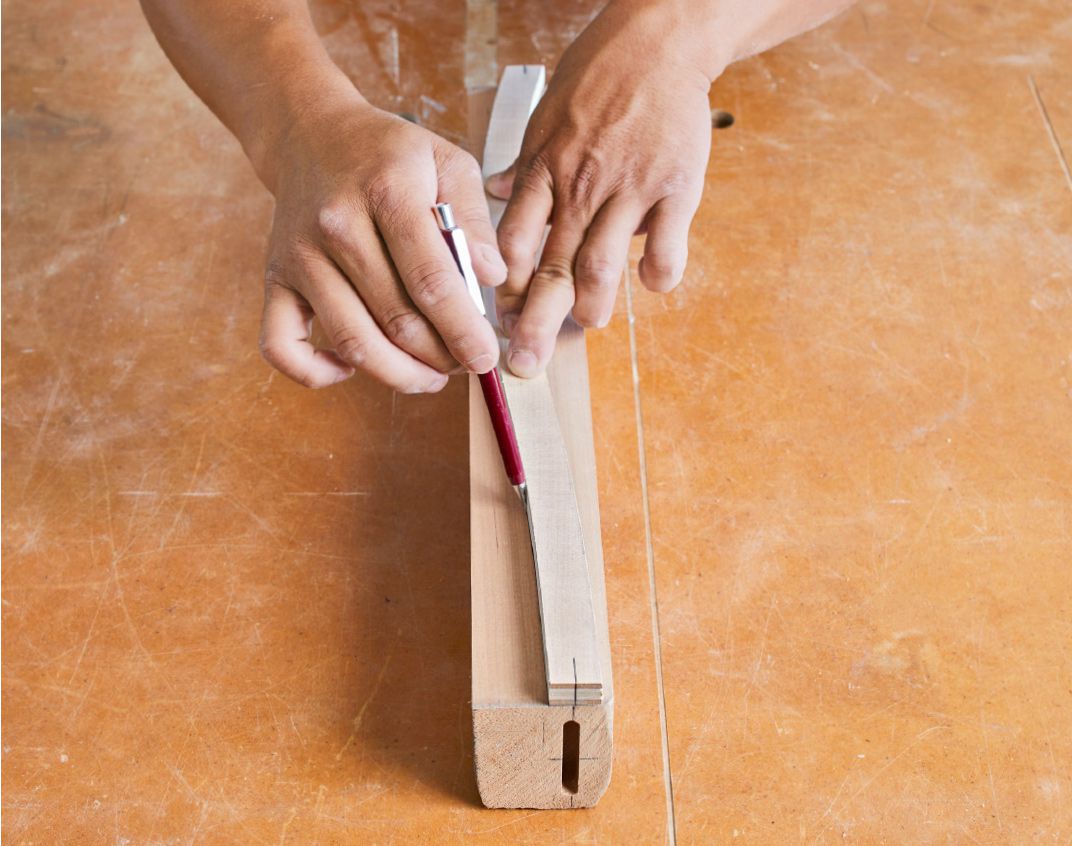
Trace a guideline on one side of the blank to serve as a reference to follow at the bandsaw. To do this, align the template with a corner of the blank and draw the outline on the face, above.

Then secure the template to the opposite face of the blank with double-faced tape, above.
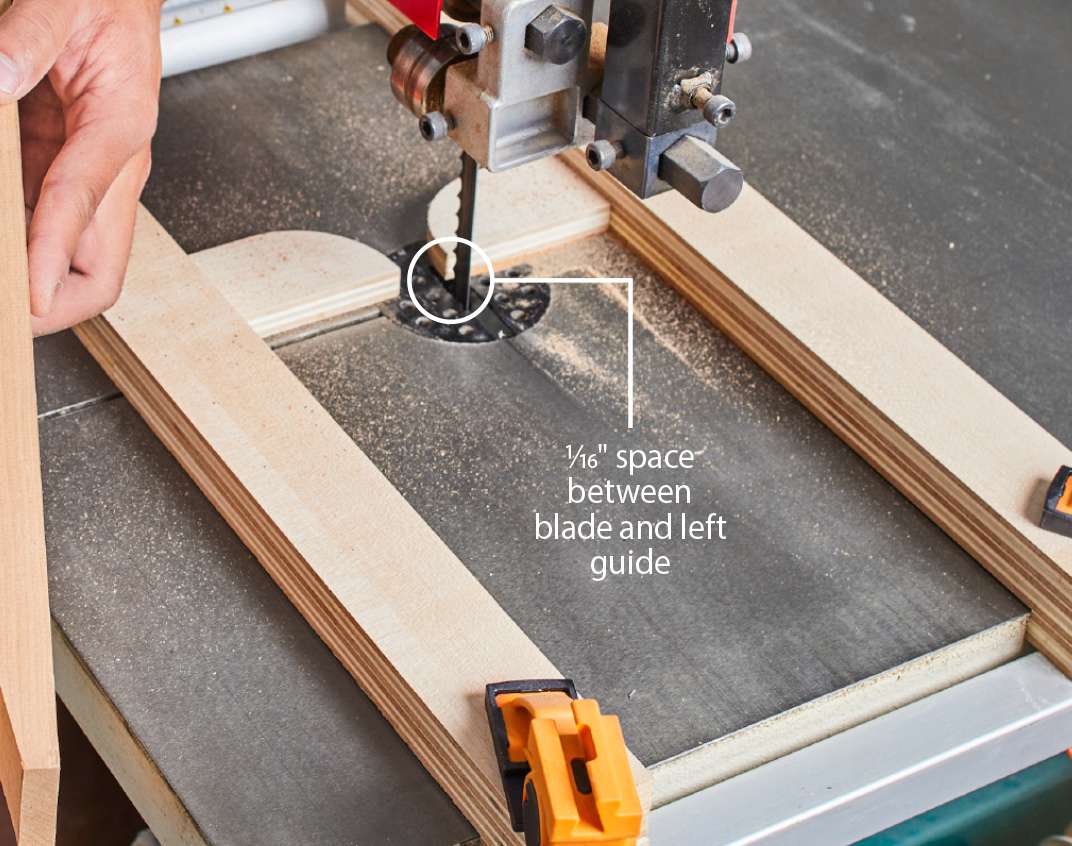
Clamp the jig rails to the bandsaw table, leaving 1/16" space between the blade and left guide, above. Use the template as a spacer to position the right guide. The template follows the left guide while the right guide offers additional tracking, balance, and workpiece support during the cut.
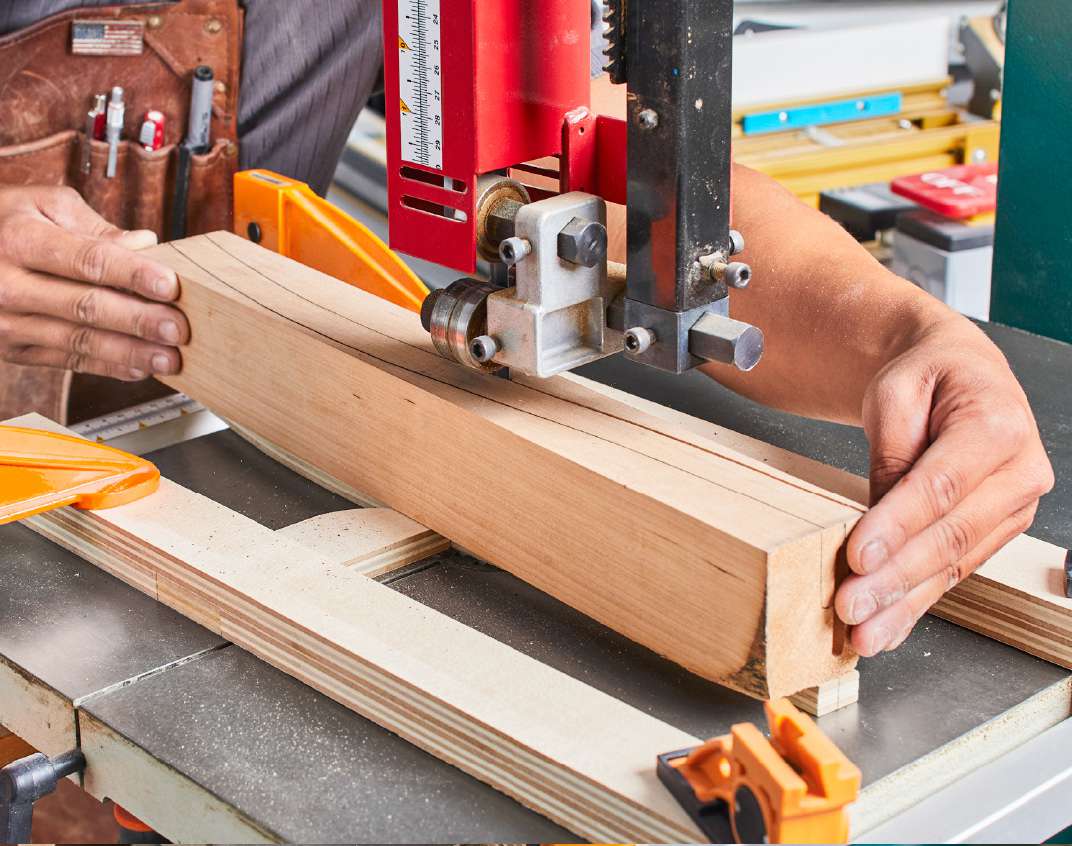
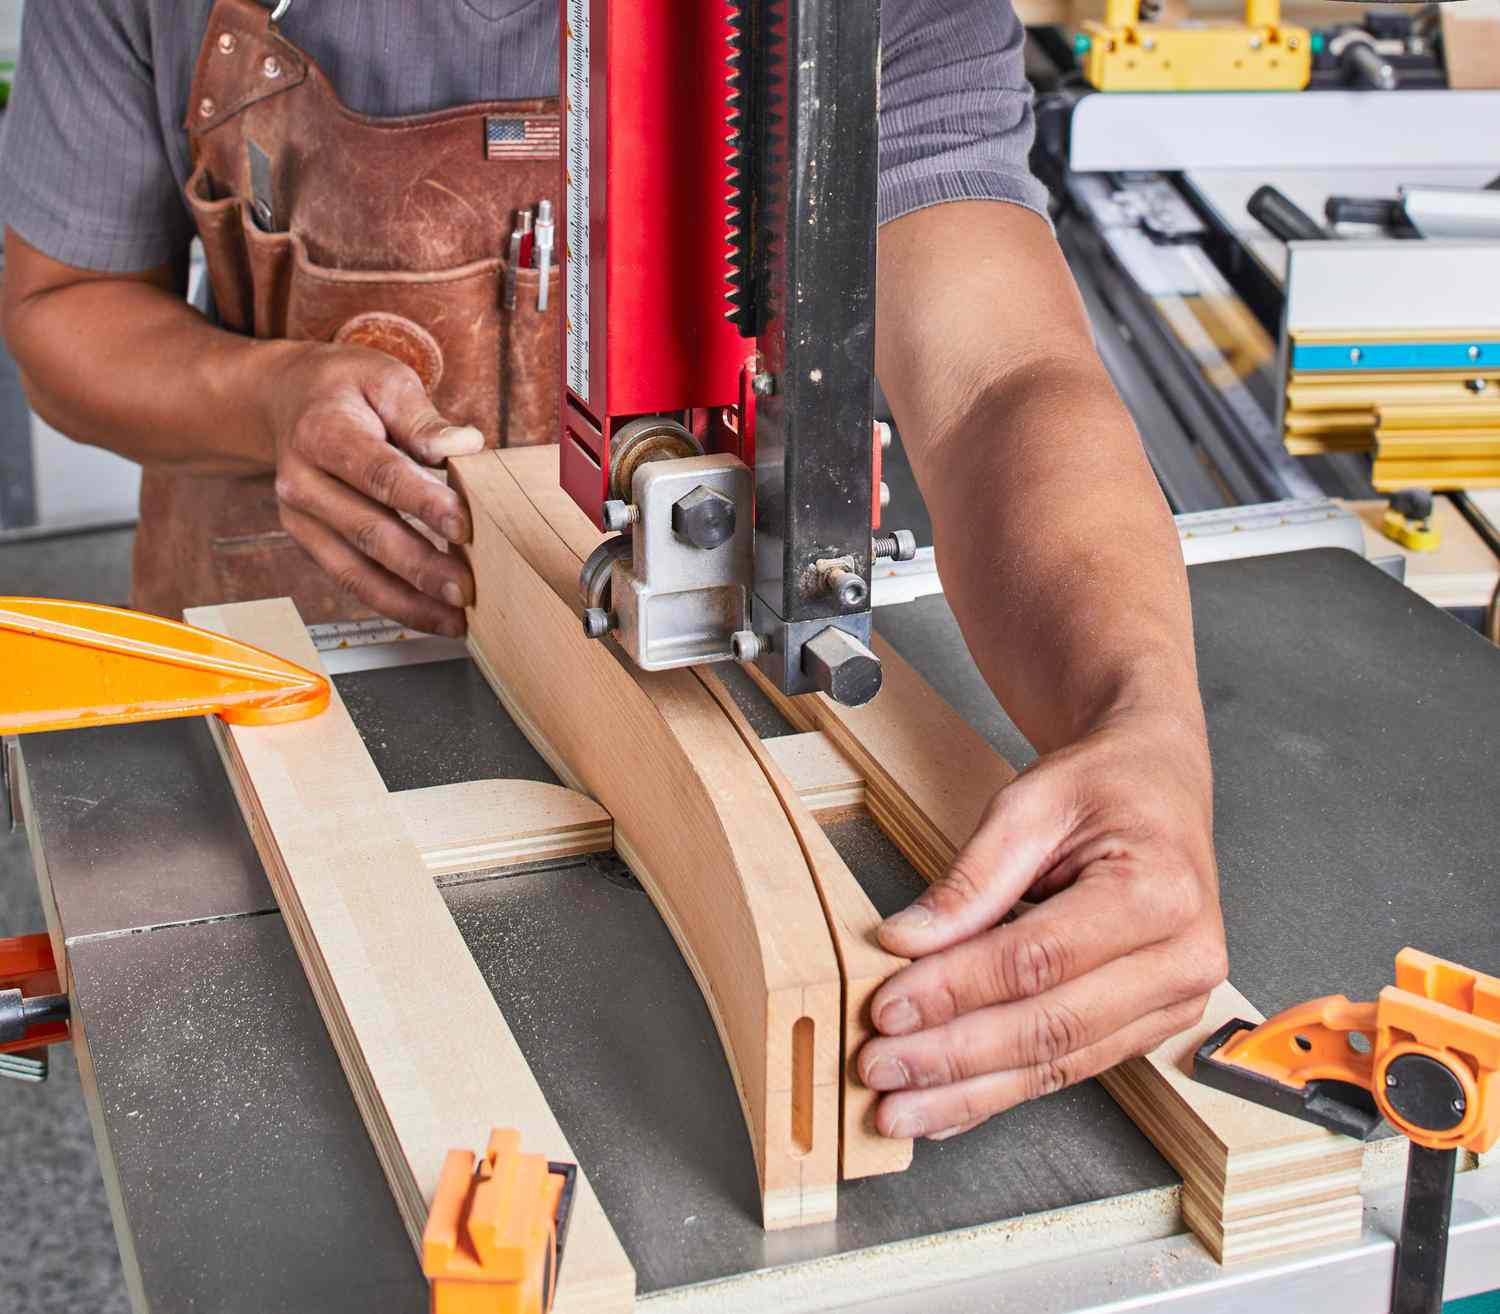
Place the end of the blank on top of the guides with the template positioned between them. Feed the blank slowly to leave the cleanest possible surface. Maneuver the blank so the blade always cuts parallel to the traced pencil guideline, above.
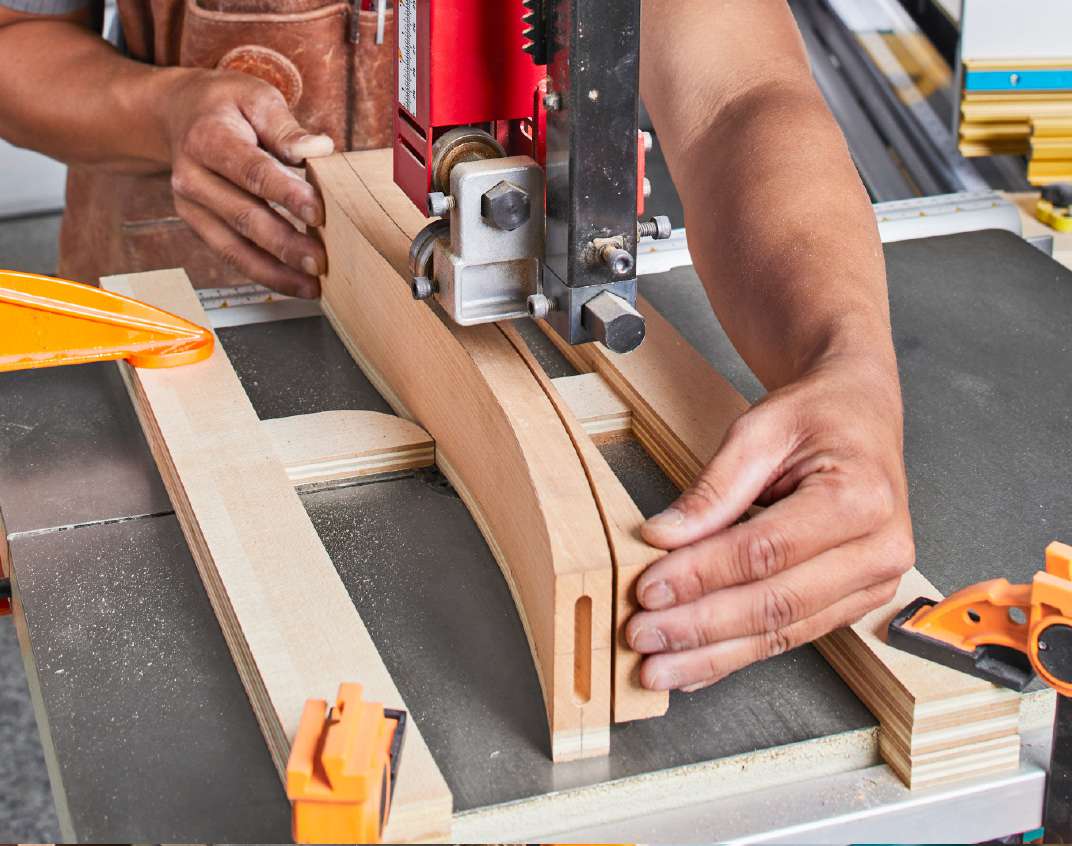
I grip the blank at the ends making it easy to feed the material while moving my hands laterally to follow the curves. Once you've cut one face, rotate the blank 180° and cut the opposite face, above. All that's left is smooth the curves. See Shapely Curves, below.
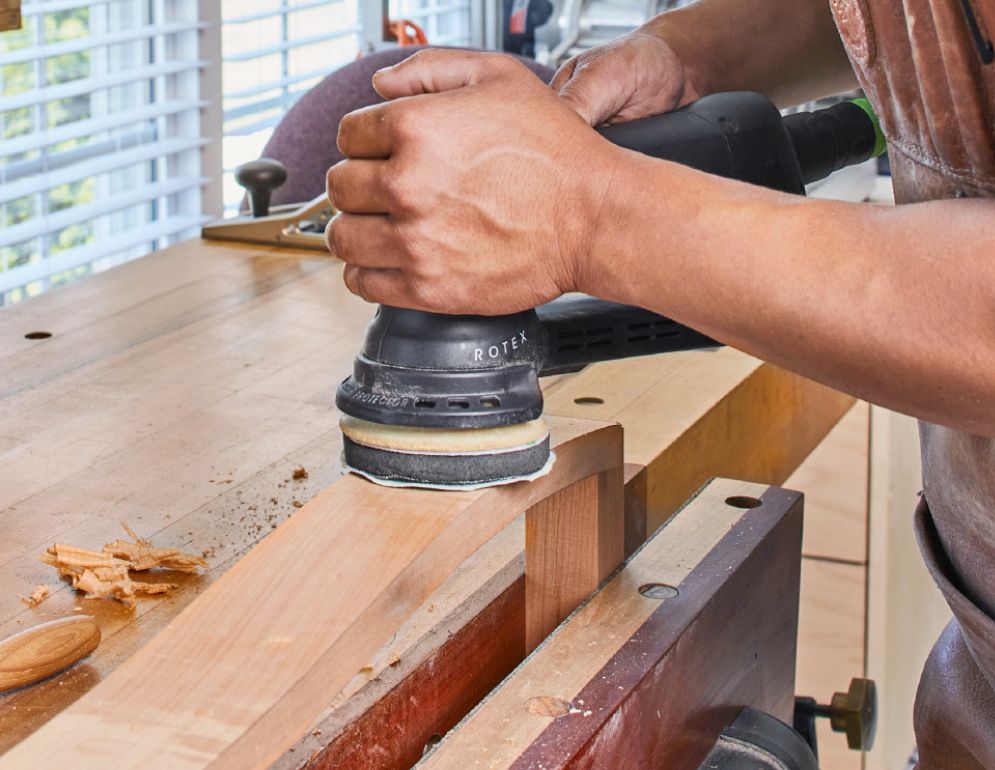
Shapely Curves
The slats require some handwork to remove the bandsaw marks. But they're too wide to use a flush-trim bit at the router table, so you have to get creative.
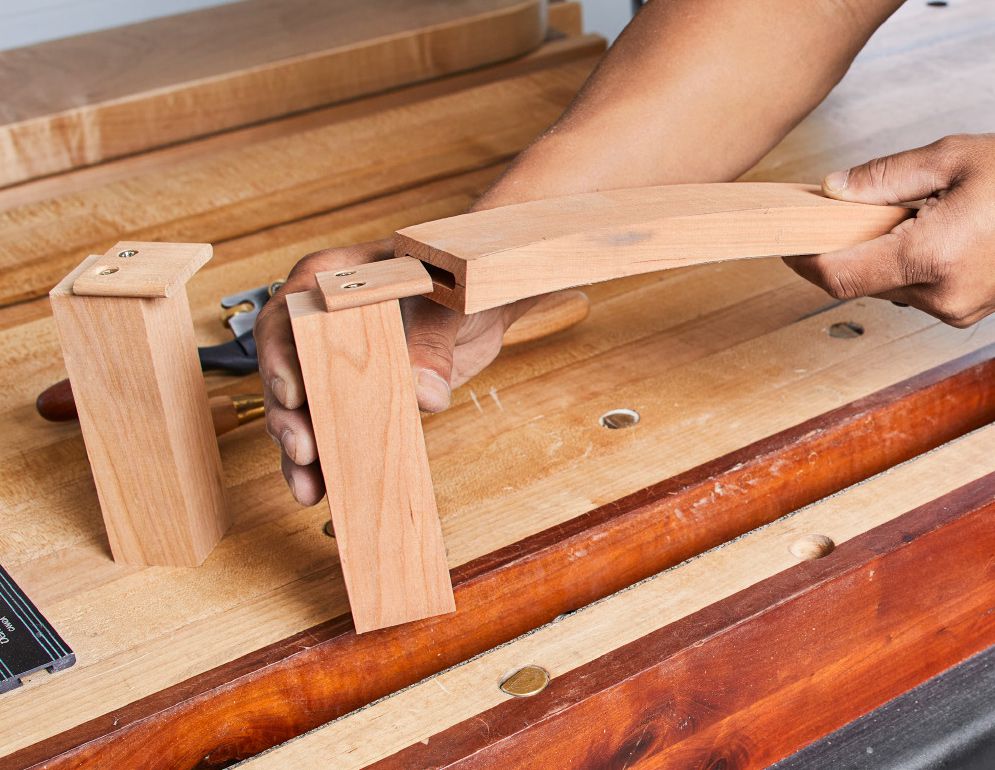
Securing the slats while you work them smooth is part of the challenge. I used a couple of blocks clamped in the face vise. I fastened a floating tenon to the end of each block and secured the slat between them with the tenons in the mortises.
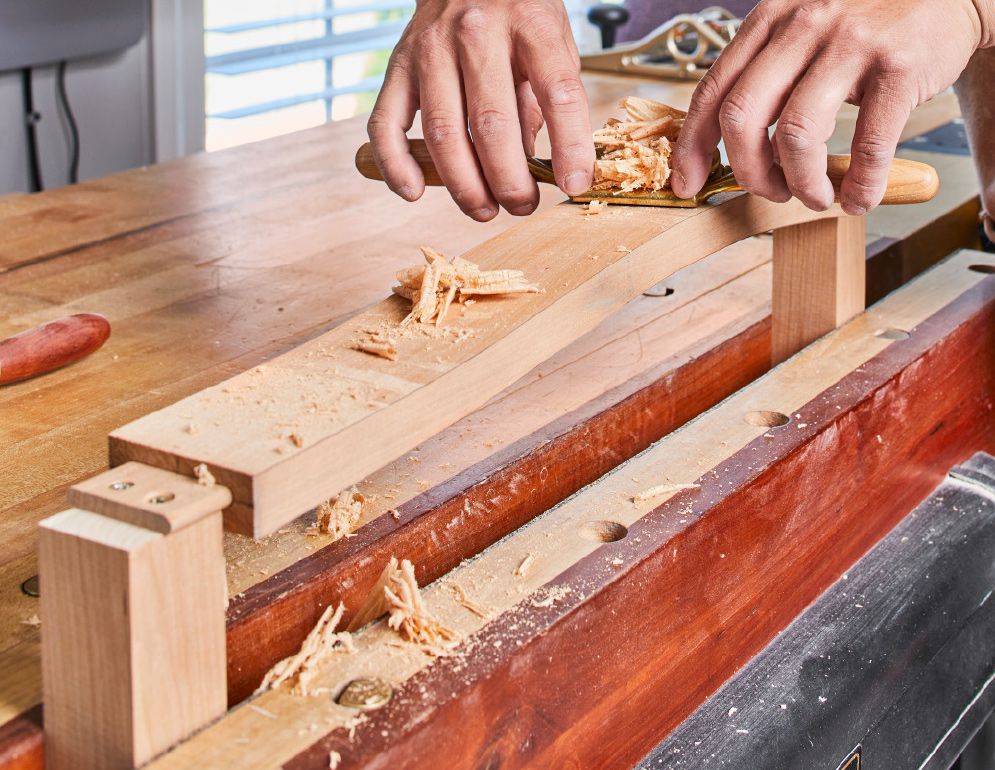
I like to use spokeshaves, a card scraper, and an orbital sander to get a finish-ready surface. The spokeshaves remove most of the blade marks left by the bandsaw. Work to the layout lines you marked on the blank. Finish up with the card scraper and then a random-orbital sander, using progressively finer grits.