How to enlarge gridded patterns


You may have seen "gridded patterns" in WOOD® magazine or other project plans and wondered how you're supposed to use them to draw large patterns. Or, you may have another drawing or plan that you're working from that you want to enlarge.
If you live near a copy shop, you may be able to have them copy and enlarge the patterns on large format paper. That's the simple solution that will cost you a little money. But you can, instead, enlarge the patterns by hand for nothing more than the cost of your time.
For patterns already gridded, on a blank sheet of paper, use a straightedge to draw a grid of squares of the size indicated on the plans. (If you're enlarging patterns that aren't already gridded, first draw a grid on the original pattern, then a corresponding grid of larger squares, based on the enlargement scale you want. So, for example, if you wanted to enlarge the pattern 200%, you might draw a 1⁄2 " grid on the original, and a 1" grid on your blank sheet.)
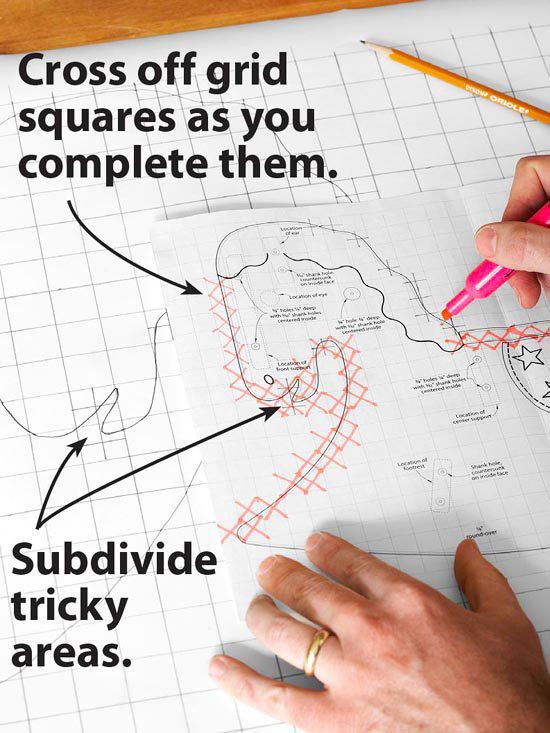
Now start transfering the lines from the squares on the original to the squares on the blank. Start with the easy stuff. Counting boxes to determine their locations, draw in any straight lines and large curves, as shown in the top photo. Where the pattern contains small details or compound curves that change direction mid-grid-box, use a straightedge to subdivide both the miniaturized plan and the enlargement grid, as shown below. This will make the details easier to fill in.