How to glue up a perfect panel


All boards are not created equal. Some boards follow the rules and stay straight and flat. Others rebel. If you take time to find the cooperative ones when you set out to make a panel, the task will be much easier.
Here's what you need to consider when you visit the lumber rack at the home center or wood supplier: straightness, color, and grain figure.
Sight down the edge of a board and you'll quickly spot any bowing. Look down the face to check for twist.
Once you've found some boards that you might like to take home, stand them up side by side to make sure they get along with each other visually. We used red oak for this project, and found significant color variations. Some boards showed a pink tinge, others looked brown, and a couple were alm ost white. Stick with boards of the same color.
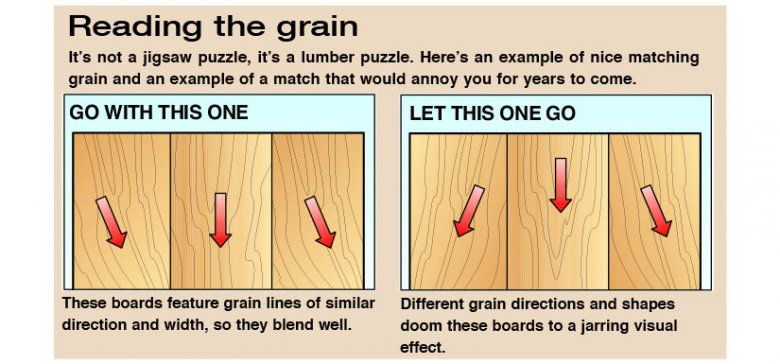
Grain matching isn't as straightforward as color matching, but think ahead. Can you see similar patterns on all the boards? If so, you'll have an easy time making joints that seem to disappear instead of standing out.
Cut them down to size
If you buy lumber that has been stored inside a store, you can start to work it as soon as you get it into your shop. Lumber that's been stored outdoors or in an unheated, uncooled warehouse will need a few days to adjust to your shop's humidity.
Before making any cuts, double-check your tablesaw and jointer to make sure they're set at exactly 90°. You might have been told that a slightly rough surface glues better. Not so. Smoother is better. Still, if you use a high-quality ripping blade on your saw, you can produce edges suitable for gluing without even going to the jointer.
You'll probably buy stock that's surfaced on both sides and one or both edges. If it has one rough edge, rip that away on the tablesaw. Then crosscut the boards to length plus a few extra inches. That allows for planer snipe and also comes in handy when you're searching for the best grain match.
Now take those wide boards and rip them into pieces no wider than 4". It seems like a shame, but doing this virtually eliminates a wider board's natural tendency to cup. Even if you rip a board in half and wind up gluing those two halves right back together again, you have relieved tension within the stock. That will help keep your panel flat.
Get ready to glue
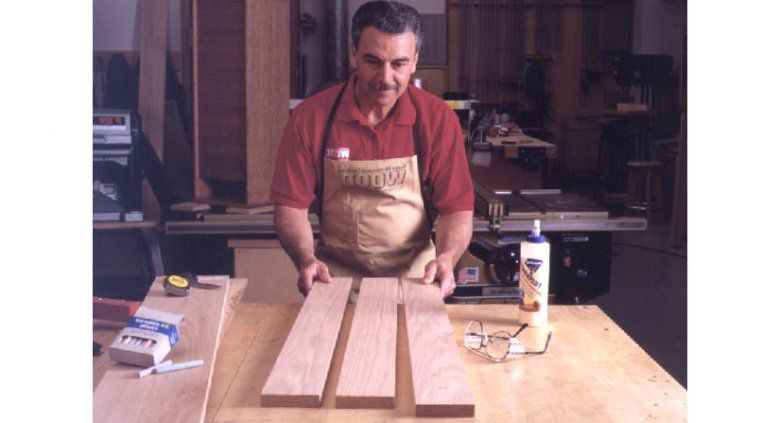
Now comes your chance to imitate nature. Lay the boards on your workbench, as you see in the photo above. Look for an arrangement in which the grain on each piece seems to flow visually into the adjacent piece. (See "Reading the Grain" below.)
Again, consider color. For example, you'll get a better-looking result by placing a couple of light boards at the sides of the panel, rather than alternating them with darker pieces.
Some woodworkers swear by flipping every other board to alternate the growth rings that you see on the end grain. However, you can ignore that factor once you've ripped the boards to 4".
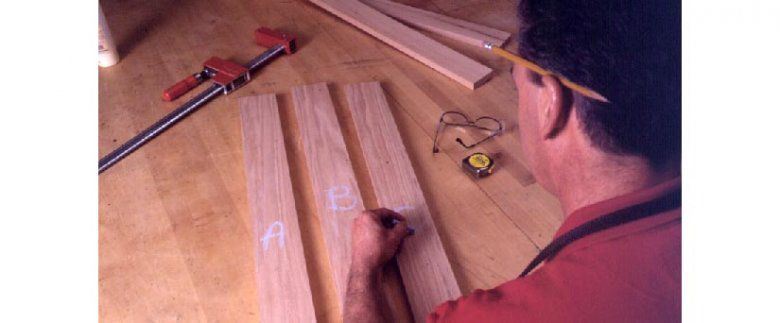
After you've decided how the boards will go together, mark them in alphabetical order with chalk, as in the photo below. The chalk rubs off easily after glue-up.

Check the fit one last time. If any gaps show, go back to the tablesaw or to the jointer, or get out a long, sharp jointer plane. Make the edges as straight as you can along the length of the board and keep them square with the face, too.
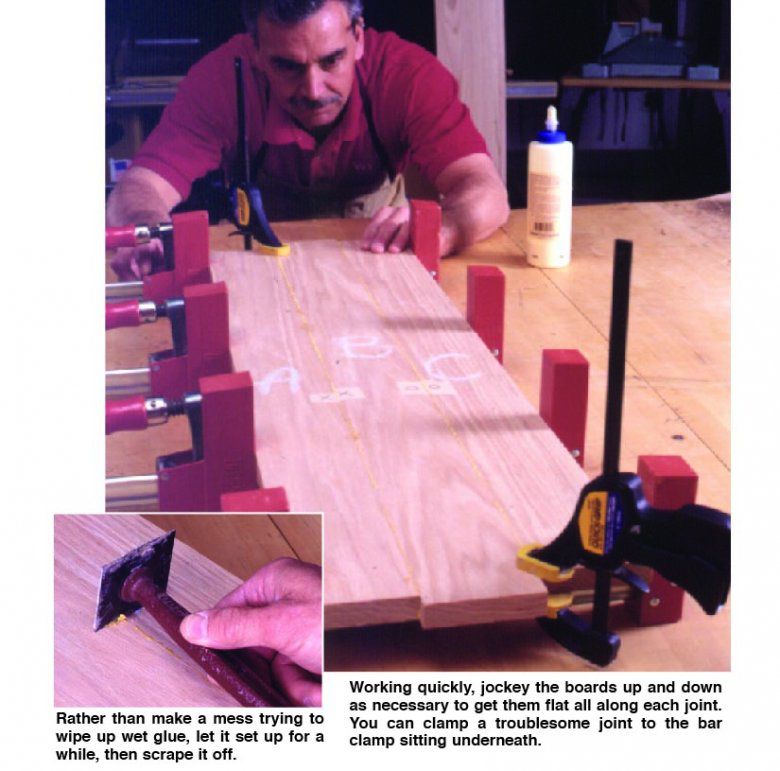
When the boards fit tightly, place waxed paper on your workbench to catch any stray glue drips. Set bar clamps or pipe clamps on the paper, spaced about 12" apart. It wouldn't hurt to put waxed paper directly on the clamps, too. The waxed paper will keep the clamps clean and won't stick to your glued-up boards.
We used four Bessey K Body bar clamps underneath our 36×24" assembly. The jaws stay parallel to the workpiece and keep the boards flat. Other kinds of clamps might need alignment help from two more clamps placed on the top side of the assembly.
Our finished panel ended up six boards wide. But we glued up just half of the panel—three boards—at a time. Otherwise, it takes some scrambling to keep all of the joints in perfect alignment. This method also allows you to run each three-board assembly through a 12" planer after the glue dries.
Lay the three sequentially marked boards on the clamps between the jaws and reach for the glue bottle. We recommend yellow woodworker's glue. It does set up quickly, though, so be prepared to work fast.
You don't need special tools to spread the glue. Simply lay down a bead from your glue bottle, then spread it into an even coat with a finger, as shown in the photo below—you'll develop a feel for the right amount. And you only need to apply glue to one of two mating edges. If you put glue on both boards, you're certain to overdo it.

Rub the glue joints together and line up the boards for the grain effect you planned. Don't worry about getting the ends exactly even; that's one reason you cut them a little long. Snug up all of your clamps, but don't apply much pressure yet.
Start at one end, make sure the joints are flat on top, and tighten that clamp. Overtightening will just force glue out of the joint, so take it easy. You're making a panel, not arm-wrestling.
Work toward the other end of the assembly, checking the joints and tightening the clamps as you go, as shown in the photo below. If you applied the perfect amount of glue, it will show up as tiny beads along each joint.

Clean up, repeat, trim
Let the glue set up until it's rubbery. Then skim it off the wood with a putty knife or a scraper, as shown in the inset photo, above. Leave the clamps in place for an hour or so.
For a panel 24" wide, we glued up another three-board piece, then ran both pieces through our 12" planer to take down any high spots. Then we joined the two halves with the same gluing and clamping procedures as above.
The final panel won't fit through the planer, but that's not a problem. You can easily clean up that single, middle joint with a scraper or a random-orbit sander.
Trim the ends square on the tablesaw, if your panel isn't too wide for comfort. A crosscut sled makes that job easier and safer. Otherwise, clamp a straightedge across the panel and use it as a guide for your circular saw or router.
4 other ways to align edges
All you need is glue to make super-strong edge joints. However, long stock can be tricky to keep lined up while clamping. You can reduce your stress level with one of these methods.
