Install goof-proof, airtight inlays
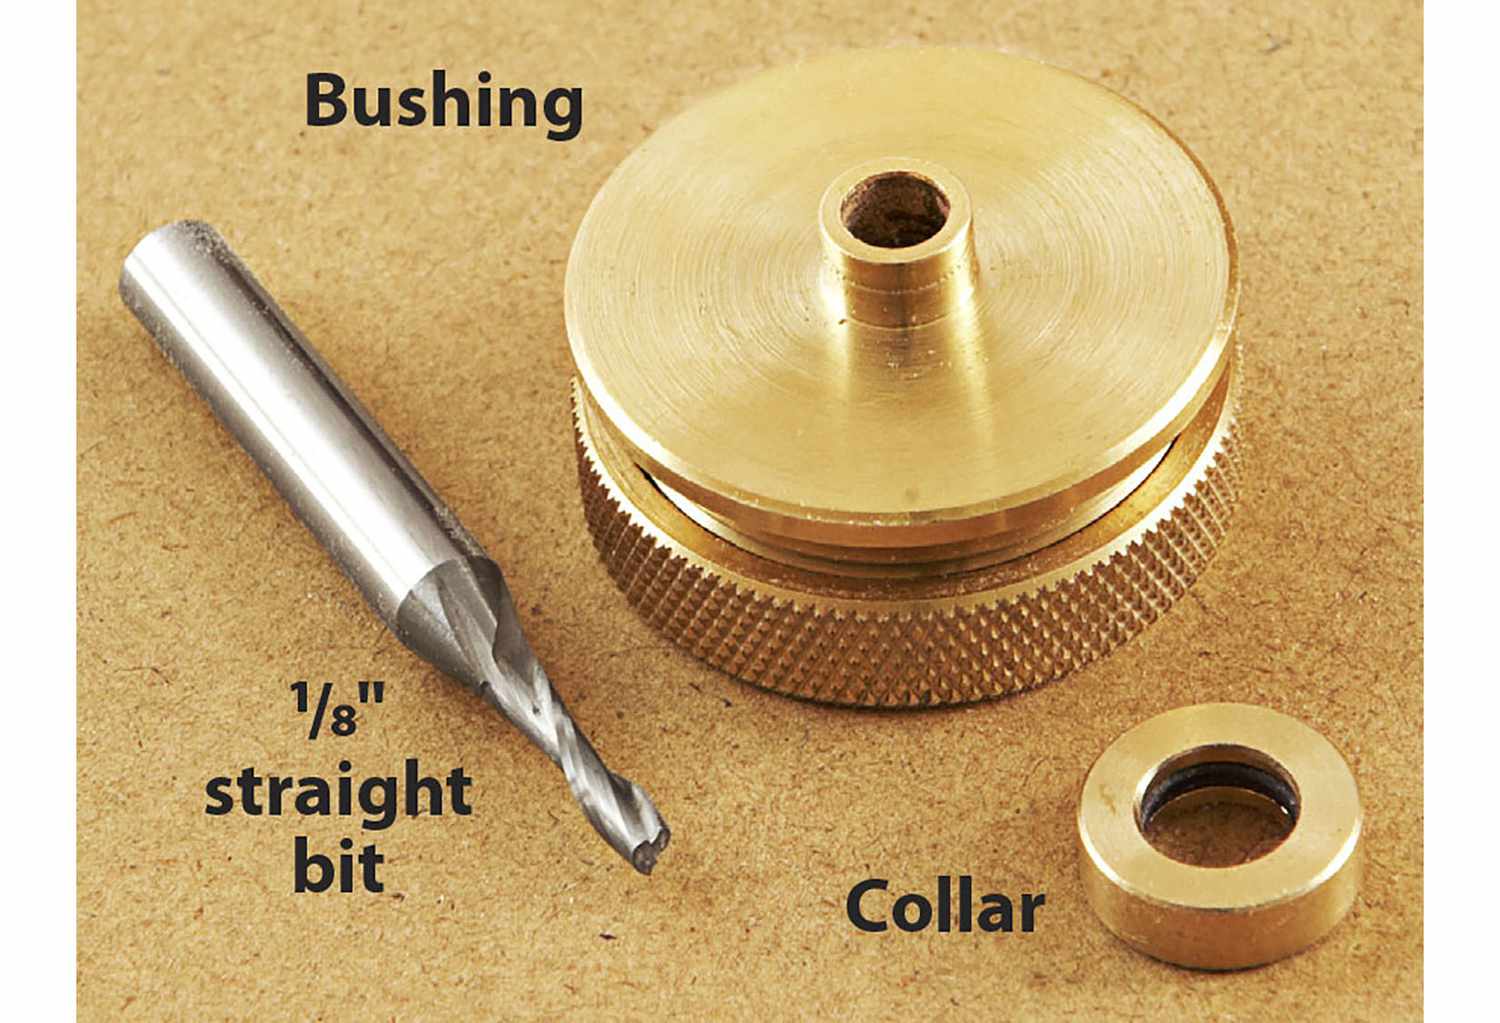

A simple router bushing kit (shown above) makes it easy to add perfect-fitting inlays. The kit consists of a bushing that fits into the subbase of your router, a collar that slips over the bushing, and a 1⁄8 " straight bit. Once you understand how the kit works, turn your imagination loose to dress up your projects with accents in all sorts of shapes. Here's how.
Prepare a template
Don't feel like making your own template? Try a ready-made one.
A shop-made template in the shape of your inlay guides the bushing. Make the template from 1⁄4 " hardboard and size the opening 7⁄16 " wider and longer than the inlay to account for the distance between the cutting edge of the bit and the edge of the bushing. For example, the Butterfly Key Routing Template pattern, below, is 27⁄16 long, creating a 2"-long inlay. Size the template so you can clamp it to the workpiece with room for the router to move between the clamps. (Using a trim router allows for a smaller template.)


Draw centerlines on the template blank in both directions. Spray adhere your pattern to it, centered. At the scrollsaw, carefully cut out the inlay shape; then file and sand the edges of the cutout smooth.
Now lay out the centerlines of each inlay on the workpiece, as shown right, extending the layout lines to the edges of the panel. Cover the inlay area with painter's tape to prevent chip-out when routing. Align the template and workpiece centerlines and clamp the template in place.
Shop Tips
Follow the lines
Rotate the template as needed to align the desired grain in the opening. On these butterfly inlays, notice how the upper row centers a ribbon in the grain along the length of each inlay.

Rout the recess
Install the kit's guide bushing, collar, and bit in your router, and set the bit 1⁄4 " below the bushing. Rout away the waste within the cutout. On the tool chest, we then moved the template to each remaining set of layout lines and repeated the process.
Carefully remove the painter's tape. Quick Tip! Prepare for liftoff. Peel the tape toward the opening to prevent lifting small chips of veneer. With a chisel, complete the angles at the corners of each recess.
Make the inlays
On the tool chest, the inlays stand proud of the door face, so we prepared a 3⁄8 x5x24" walnut blank. (For inlays flush with the surface, prepare a 3⁄16 "-thick blank.) Clamp the template to the blank, shown below. Remove the collar from the bushing, reset the bit height to 3⁄16 " below the bushing and rout the inlays. Note: Keep the bushing tight to the template at all times. Any place it pulls away from the template creates a gap between the inlay and recess. At the end of the cut, hold the router in place, shut it off, and allow the bit to stop before lifting the router.

Scrollsaw or bandsaw the keys from the blank, following the routed outline. Then clean up the edges with a chisel and file, slightly undercutting them to create a tight fit in the recess. On the tool chest, we sanded the top faces of the inlays to 220 grit, creating a 1⁄16 " chamfer along the top edges.
Now glue and seat the inlays as shown below. For flush inlays, sand the inlay even with the surrounding surface after the glue dries.
