Make dings disappear


Professional furniture finishers and restorers know how to make their repairs disappear within the grain and color of surrounding wood. Equipped with basic knowledge about wood tones, the techniques presented here, and a little practice, you can master this skill, too.
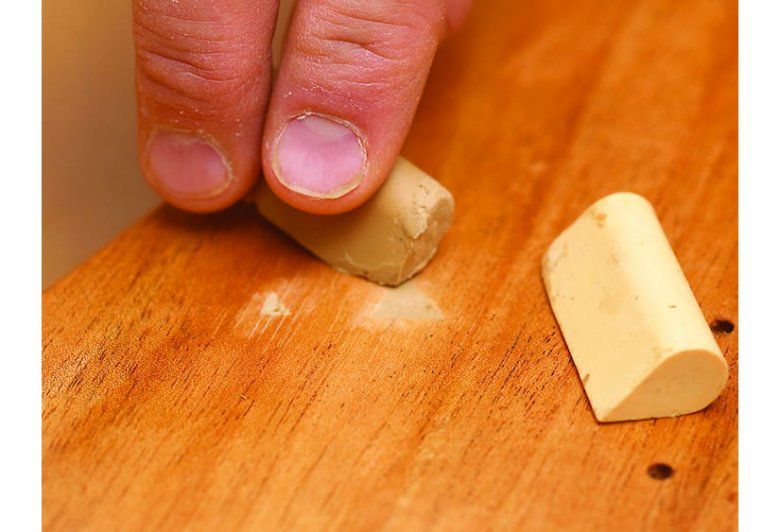
Start by restoring a flat surface using a wood patch. Any solid filler material that bonds with the wood and flexes as it shrinks and swells will work. Patches can be made from ingredients as simple as sawdust mixed with wood glue or as sophisticated as wax burn-in sticks used by professionals.
Common store-bought wood fillers include acrylic-based products that clean up with water prior to drying; gypsum-based products often sold in powder form, giving them a long shelf life; and nitrocellulose-based putties that cure quickly. All three will perform well for general woodworking repairs using the cover-up techniques explained here.
Whichever type you choose, don't assume that "stainable" equals matching. These patching compounds will likely absorb more or less stain than the surrounding wood, as shown in the photos below.


Keys to a convincing cover-up
The patch-hiding technique we use here works on new wood and finished projects. This cover-up technique uses earth-tone pigments to conceal patched areas. An assortment of earth-tone powders from Lee Valley Tools (800/871-8158) includes colors you'll need except white. You can find white pigment at art supply stores, which sometime sell earth-tone colors as fresco powders.
Professional refinisher Alan Noel uses pigments from the Furniture Doctor in Augusta, Georgia (800/715-2380). Owner Walter Smith offers a touch-up kit with seven 1-ounce jars of white, black, and earth-tone pigment powders plus a graining pen and five touch-up sticks.
You'll also need a fine-tip sable brush; a piece of glass roughly 6" square or larger; dewaxed blond shellac mixed to a 1-pound cut or thinner; denatured alcohol for use as a shellac thinner and brush cleaner; sandpaper in 220 and 320 grits; a putty knife; crafts knife; and painters' masking tape.
Filling and flattening
Two ways to patch wood right the first time

Filling gouges, especially deep ones, leads to a common problem: dips and bumps in your patch. Just when you think everything's even, the drying process leaves a dip in the center of the patch that has to be filled. Solve this problem when patching unfinished wood by surrounding the patch area with two layers of painter's tape, as shown above. That creates a shallow buildup on the surface while preventing putty from filling the pores of the surrounding wood. After the putty dries, remove the tape to leave a small raised area ready to be sanded with a flat sanding block. Patches may be softer than surrounding wood, so avoid soft or pliable sanding pads that might leave a depression. Patching finished pieces is trickier because you need to avoid damaging the surrounding finish. Instead of masking tape, use one layer of transparent shipping tape with the damaged area cut out. Fill and partially sand the patch with the tape still attached. Then remove the tape, and finish sanding using 400-grit paper on a sanding block that's as wide as your patch.
Making a patch match
This is a skill best developed by practicing on scrapwood. If your patching material is stainable, consider sealing the patch surface with thinned shellac to avoid over-darkening the patch. Then stain your wood to the desired color and apply a sealer coat to the whole surface to lock in the finish.

A dry-pigment color chart similar to the one shown above gives you an approximate sense of a pigment's color, but the actual color will change after adding shellac and applying it to the wood surface. Always match colors under natural or incandescent light for the greatest accuracy. For easy matching, mix colors atop a piece of glass resting on the wood near the patch.

Some pigments provide a close color match by themselves. Burnt sienna approximates cherry, for example, and burnt umber comes close to mahogany. Match red or white oak by tinting yellow ocher with white pigment and adding burnt umber as needed to mimic red oak.
Using the tip of a crafts knife and your glass palette, add small amounts of pigments you'll need to achieve the right color. Then add drops of shellac to the glass and gradually mix in pigments. If the shellac dries before you can complete your layer, rejuvenate it with a couple of drops of denatured alcohol. Shellac dries quickly but allows you to remove even dried layers using a rag moistened with denatured alcohol. Don't oversaturate your patch with alcohol; it may loosen or decay.
If the shellac still dries before you complete the match, substitute natural (clear) liquid stain as a carrier for a longer drying time. You can switch to shellac after gaining more experience. Let the natural stain dry; then seal each layer before adding the next.
Start by applying a background color—the lightest shade you see in the wood. Brush with the wood grain slightly past the rim of the patch to more effectively blend your repairs with the surrounding wood, especially if any stain applied prior to color matching left a ring around the patch. Allow that layer to dry thoroughly, and seal it with your topcoat or a spray finish, if necessary.
On the subsequent layers, add slightly darker tones to gradually build your way up to the color of the surrounding wood If you're using the natural stain, seal the changes after each layer. Then add grain lines to help tie the patch into the surrounding wood, as shown above. Space the lines to copy adjoining grain and cross the edges of the patch. Do this before your last overall finish coat to help blend these marks into earlier layers and surrounding wood.
You're finished when the patch meets Alan's "6-foot rule": If the patch blends in from 6 feet away, it's a match.