Maximize Your Mitersaw


You can build wood projects for a long time without a power mitersaw, but once you have one, you find all sorts of ways to use it. It's handy for crosscutting long stock, making repeatable cuts, cutting flat miters, making compound cuts for angled sides, and more.
Like any tool, the mitersaw becomes more valuable and more fun to use if you set it up properly and learn how to use it to its full advantage. So try these keys for making your mitersaw do its very best.
Get squared up
Start by aligning your mitersaw accurately. Use a reliable square to see if the blade sits exactly 90° to the fence with its miter pointer set at "0." If the setting is off, check the owner's manual for the proper adjustment procedure. You'll either loosen the fence and square it to the blade, or loosen and adjust the gauge and turntable assembly, as shown in the large photo, opposite.
Now use your square to align the plate of the blade with the table. Make any adjustment by loosening the knob or lever that holds the saw head in place, tipping the head out of the way, and turning the stop bolt, as shown in the photo below. Set the bevel pointer to zero.

Also check the 45° setting. It can be difficult to fit a standard gauge in place for this step, so make a 45° cut on the end of a piece of scrap, using your newly calibrated miter scale. Hold this piece against the blade plate, as shown in the photo below, and adjust the bevel stop according to the instructions in your owner's manual.

Upgrade your blade
The blade that came with your mitersaw might not be the best one for your purposes. Make a few test cuts. If the results show excessive tear-out or rough saw marks, improve your saw's performance with a replacement blade. Look for a high-quality blade with 60 carbide teeth for most jobs, or choose 80 or even 96 teeth for the smoothest possible results. Match the tooth configuration to the task, as you would with a tablesaw blade.
If you have a sliding compound mitersaw, use zero- or negative-hook blades. They're safer than blades with more aggressive configurations because they don't "grab" the workpiece. Save your best blade, or blades, for fine woodworking. When it's time to cut 2x4s for a carpentry project, use a less-expensive blade with fewer teeth.
Along with the traditional ways of shopping for blades, you can find helpful information for each manufacturer's blades on the company's web site. For one example, the Freud site takes you through a short series of options to find the right blade for any mitersaw application.
Cuts that look sharp
When you need precise results, use the hold-down that came with your mitersaw, or clamp the workpiece to the fence or table. No matter how firmly you hold it, an unclamped workpiece can shift imperceptibly as you make the cut.
Decrease the chance of splintering on your workpiece with a zero-clearance auxiliary table and fence, as shown in the photo below. Cut two pieces of 1⁄4 " hardboard, one the size of your mitersaw fence, the other to match the table, and secure them in place with cloth-backed double-faced tape.

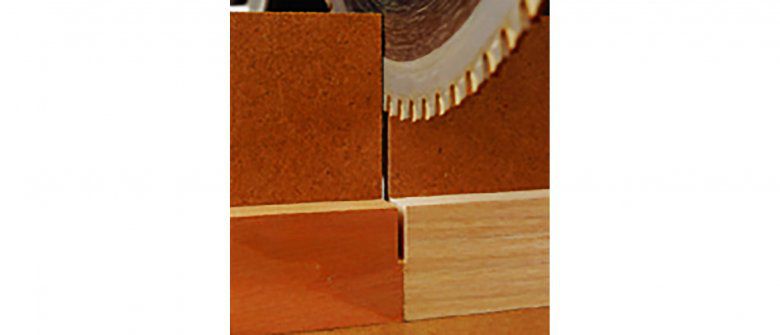
Here's another tip for top results. When you need to "nibble" a blade's width of wood, or less, from the end of a workpiece, slide a scrap piece against it, and clamp them both firmly to the fence or table. This puts a solid mass of wood under the blade, as shown in the photo below, and your blade will cut straight, rather than seeking the path of least resistance.
For the clearest look at your cut line, place the workpiece on the table with the keeper part on the left and the waste on the right. In our experience, more-accurate cuts result when you lower the blade before turning on the saw, and match a left-leaning tooth to your line. Finally, resist the urge to race through each cut. For the cleanest possible cuts, wait until the saw gets up to speed before lowering the blade into the wood, and give it time to make the cut, too.
Cut tight miters with these tables
A compound mitersaw gives you a great advantage in making angled sides, but first you have to find the right settings. Keep in mind that mitersaws have detent settings for the most common angles, making set-up quick and easy. In the charts below, we've compiled the information you need for a variety of situations. Use these settings with your stock lying flat on the table.

For a flat frame, refer to the chart above and simply set the miter angle of your saw by pivoting the head. For a box with angled sides, set your miter and bevel as shown in the charts below, and make a compound cut at each end of each piece.

Give your mitersaw a resting place
Now, where are you going to put your saw? Mitersaws are portable, but not as portable as, say, a cordless drill. A mitersaw is much more convenient to use if it has a permanent home. You can find plans for our "Mobile Mitersaw Center" in issue 119.
If you don't have room for a permanent stand, you can store the saw away and place it on your workbench when you need to use it. Or, you might prefer to buy a portable stand. If so, consider the features below.
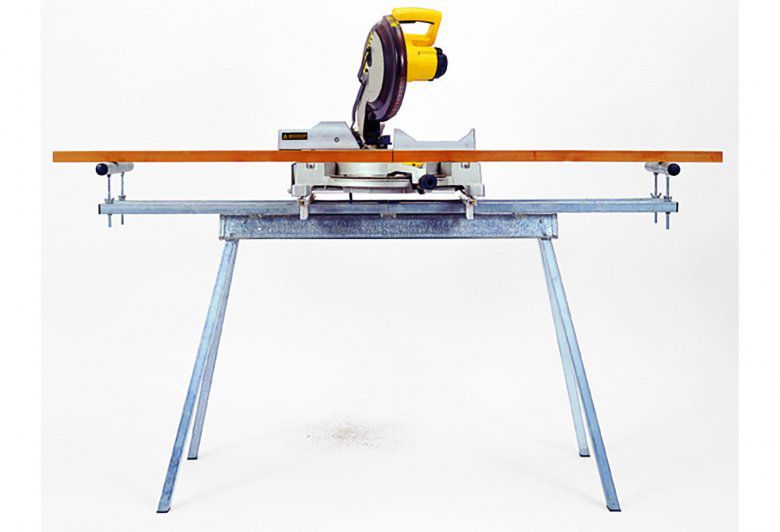
* Portability. Some models sport big wheels that make it easy to move them outdoors and on stairs. Others have small wheels suitable only for rolling on a smooth, hard floor. Choose the style that will suit your needs. Also, if floor space is at a premium in your workshop, and you have a storage spot for your mitersaw, consider a stand that you can quickly fold up and stow in tight quarters.
* Size. Make sure your saw will fit on the stand's table and turn through its cutting range without interference. Also, check to see if it's big enough to hold other portable machines, such as your planer.
* Stop system. Sometimes you'll want to make several cuts at a given length. Miter stands offer a range of ways to set a stop for such tasks—but some don't include a stop system at all.
* Workpiece support. The most portable stands tend to use single-point supports to hold long boards. If you're willing to sacrifice some of that portability, you'll find models with extension wings that do a better job.