Maximize Your Wood By Resawing

5 Good reasons to resaw
Resawing means ripping a board standing on its edge; and doing so opens up your woodworking to a lot of new possibilities.
1. Maximize exotic or pricey boards. You can make multiple matching project parts from a single piece of costly or prized wood. For example, if you want to make door panels from bubinga or bird's-eye maple, rather than using full-thickness boards, simply resaw several veneers from one board and laminate them to a less-expensive substrate, such as plywood or MDF. Once they're captured in a framed door, no one will be the wiser.
2. Waste less wood at the planer. Let's say your project calls for 1⁄4 "-thick wood—which can be hard to find—and all you have is 3⁄4 " stock. Rather than turn two-thirds of that 3⁄4 " board's thickness into planer chips, simply resaw it in half and then plane those slabs to 1⁄4 ".
3. Extend the lives of planer knives. Because changing or sharpening dull or nicked planer knives proves more time-consuming than changing out a worn bandsaw blade, it's wise to limit the amount of wear on those costly knives when you have other options. So resaw slabs to the approximate thickness, and then make only a pass or two through the planer.
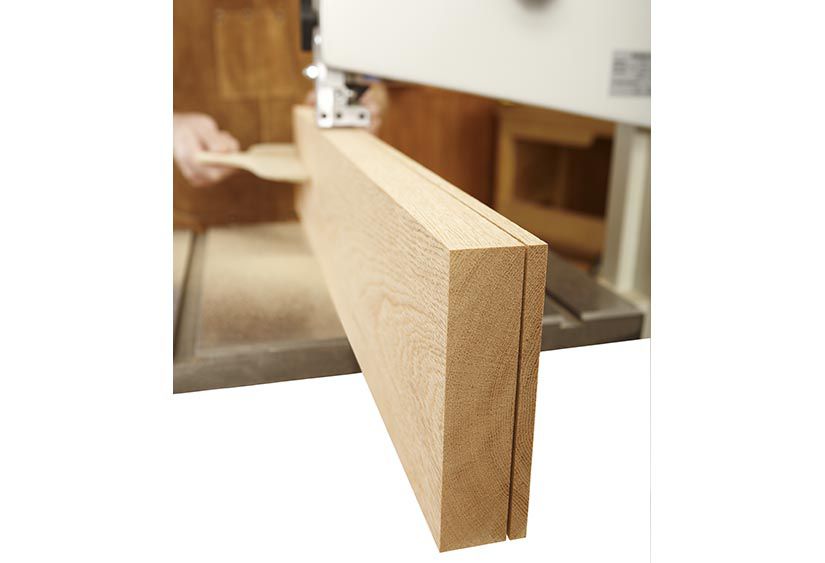
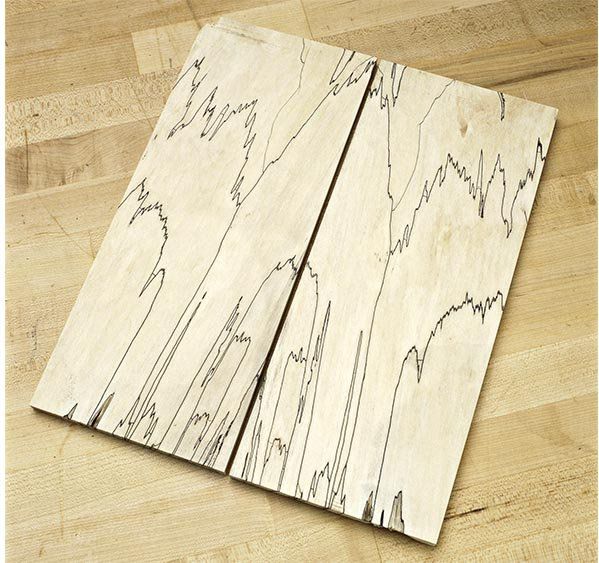
4. Bookmatch stock for stunning panels. On almost any project with a trapped panel, from side-by-side cabinet doors to a box top, resawing a board and then matching the two pieces in a mirror-image fashion, as shown below, adds eye-catching pizzazz. You can resaw boards in this manner and then edge-glue them together for a bookmatched case side or top.

5. Create low-hassle curved workpieces. Rather than steam-bending wood, you can get tighter, multiple curves that won't spring back as much by resawing thin strips (usually 1⁄8 " thick), planing or sanding them smooth, and then gluing them back together, clamped to a form.

Resawing relies on a tightly tuned bandsaw
To make resawing fast, safe, easy, and repeatable, adjust your bandsaw for peak performance. Here's how:
* Start squeaky-clean. Remove the blade (and the table, if necessary), and clean all dust and buildup from the tires, belts, pulleys, and blade guides. Such buildup lessens the effectiveness of these components.
* Install the correct, sharp blade. In general, the fewer teeth per inch, the faster a blade removes waste. It also runs cooler, extending its sharpness. For best results, choose the widest 3- or 4-teeth-per-inch (tpi) blade that fits your saw. These blades cut quicker but leave rougher surfaces than 6-tpi blades.
Our favorite resawing blade, Highland Hardware's Wood Slicer [see Source, below], has a variable-tooth pattern, below, and leaves a kerf thinner than most bandsaw blades. You'll do less sanding or planing on boards resawn with this blade because it leaves a smoother wood surface. The downside? It dulls more quickly than other blades we've used, and costs nearly double a standard blade. Save it for resawing only.
Source
Wood Slicer bandsaw blades: ½" and ¾" widths in various lengths,
Highland Woodworking, 800-241-6748, highlandwoodworking.com.

* Adjust the blade tracking. With the blade guides pulled back and the blade tensioned just enough to hold it in place, spin the top wheel. The blade should track centered or slightly in front of the tire's crown, the peak across its width. If it does not, tilt the wheels as described in your saw's owner's manual.
* Tension the blade. Tighten the saw's spring-loaded blade tensioner, as shown below. Undertensioning a blade results in deflection during the cut—and more work and waste to flatten resawn boards. Overtensioning adds stress to the wheel bearings and blade.
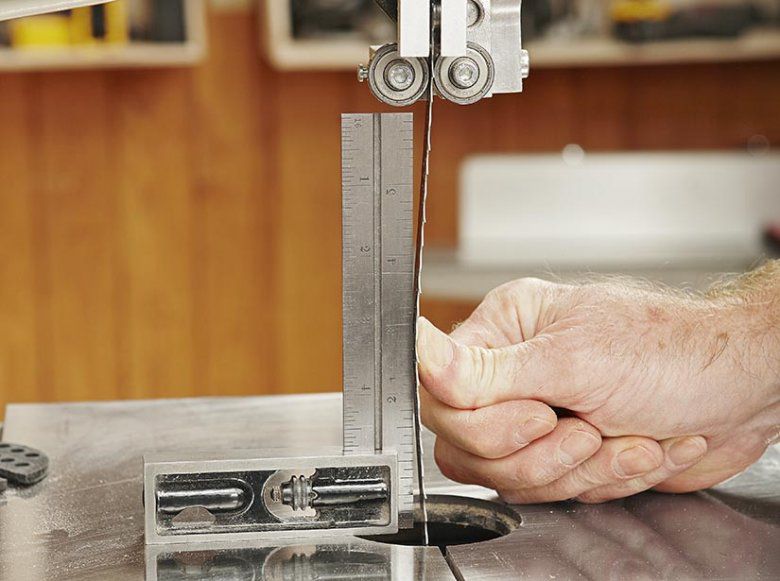
* Square the table to the blade. To make the faces of your resawn slabs parallel, adjust the table exactly 90° to the blade.
* Adjust the blade guides. No matter the type of guides on your saw, set them just behind the teeth, as shown below. Adjust the thrust bearings with the same gap behind the blades.


* Lower the upper guides. Adjust the upper guidepost as shown below.

* Hook up dust collection. Sucking dust from the saw helps the blade run cleaner and cooler, extending the life of the blade, tires, and guides.
Set up the fence
We like to resaw using a rip fence to guide the board through the blade because it enables you to make repeatable rips of equal thickness. If your saw didn't come with a fence, you can buy an aftermarket model, build one from plans [More Resources, at the article's end], or simply clamp on a straight board at least 3" tall.

With the fence set parallel to the blade and 90° to the table edge, test for blade drift—when the blade cuts at an angle not perpendicular to the table's front edge. To do this, mark a line down the length of a scrap board, parallel to the left edge. Running the left edge against the fence, rip the full length starting at the marked line. If the cut strays from the line, you need to adjust the fence angle to match the blade's drift, as shown below, ensuring accurate rips. Once you calibrate a manufactured fence for blade drift, you shouldn't need to do it again until the next blade change.

You might prefer a pivot point
Instead of messing with adjusting a fence for blade drift, some woodworkers like to guide the board freehand using a single pivot point, as shown below. This technique saves time compared to manually setting a clamp-on fence every time, especially if you need to make just one or two cuts. It also typically leaves slightly rougher board faces that require more planer or jointer passes to flatten and smooth.
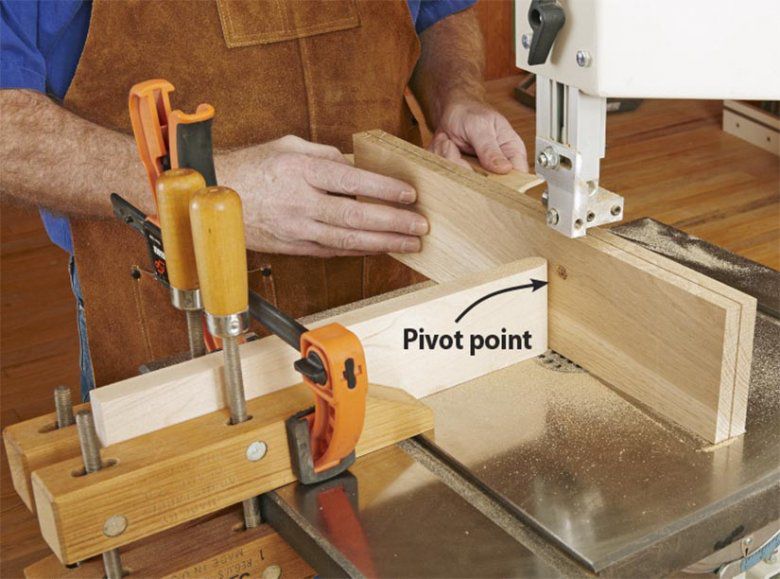
Some fences come with a pivot bar, shown below, or rounded fence attachment, but you can make your own easily. To use a pivot point, space it from the blade the thickness of your desired slabs, plus 1⁄16 " or so. Mark a cutline the length of your blank. With the blank pressed against the pivot, feed the board while steering it to keep the blade cutting on the line.

Now you're ready to saw
Plane both faces of your blank parallel and joint one edge square. When calculating how many slabs you can cut from the blank, allow an extra 1⁄16 " to 1⁄8 " for blade-mark waste that will be planed or sanded away later and another 1⁄16 " for the blade kerf. So, for example, you can only get two 1⁄4 "-thick boards from a 3⁄4 " workpiece.

To cut, hold the board tightly against the fence and table as you feed the wood into the blade at a comfortable rate. Slow your rate if the saw bogs down or the blade wanders from the cutline. For workpieces that you're resawing into three or more pieces, after resawing one piece go back and plane or joint the blank's bandsawn face again. This way, every resawn piece has a flat face to reference on the planer table during final thicknessing later. Finally, remove any remaining saw marks with a planer or sander, taking the pieces to a uniform thickness.
MORE RESOURCES
* Bandsaw tips, guides, tool reviews, and project plans.
* Download bandsaw table and fence plans (small fee).
* Watch a video on resawing (FREE for a limited time). To view more bandsaw-related videos for a small fee, go to woodstore.net and search for "bandsaw video."