Metalworking for the Woodworker

Sometimes, the hardware you want isn't available off the shelf. Or you may want to mix metals, such as aluminum, brass, or steel, into your next wood project. Metal also helps reinforce joints and allows you to accomplish things not possible with wood-only joinery.
With a few simple tools (many of which you likely already have), you can add useful metalworking skills to your repertoire and unlock a new world of making: brass drawer pulls, aluminum tabletop fasteners, inlaid copper bowties, steel reinforcing brackets, aluminum-edged casework, and more.
Material knowledge
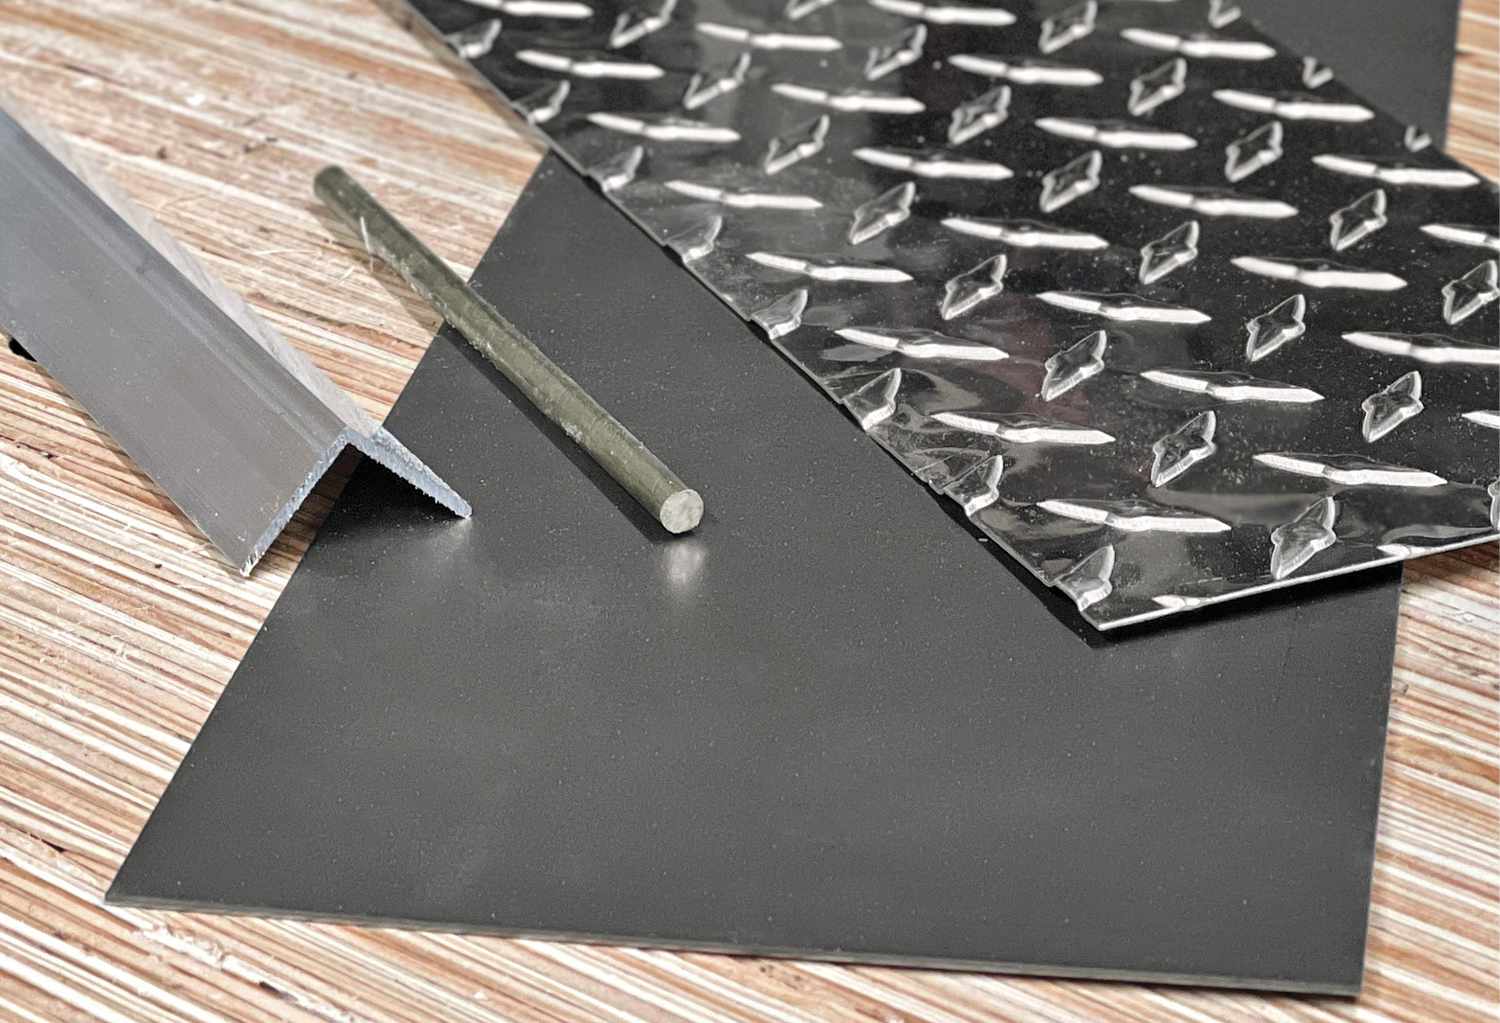

Metals fall into two simple categories: ferrous and non-ferrous. Ferrous metals contain iron; non-ferrous metals include aluminum, copper, and brass, an alloy of copper and zinc (photo, above). Understanding whether your metal is ferrous or non-ferrous is the first step to figuring out how to process it.
Tip! Not sure whether a metal is ferrous or non-ferrous? A magnet will be attracted to ferrous metals
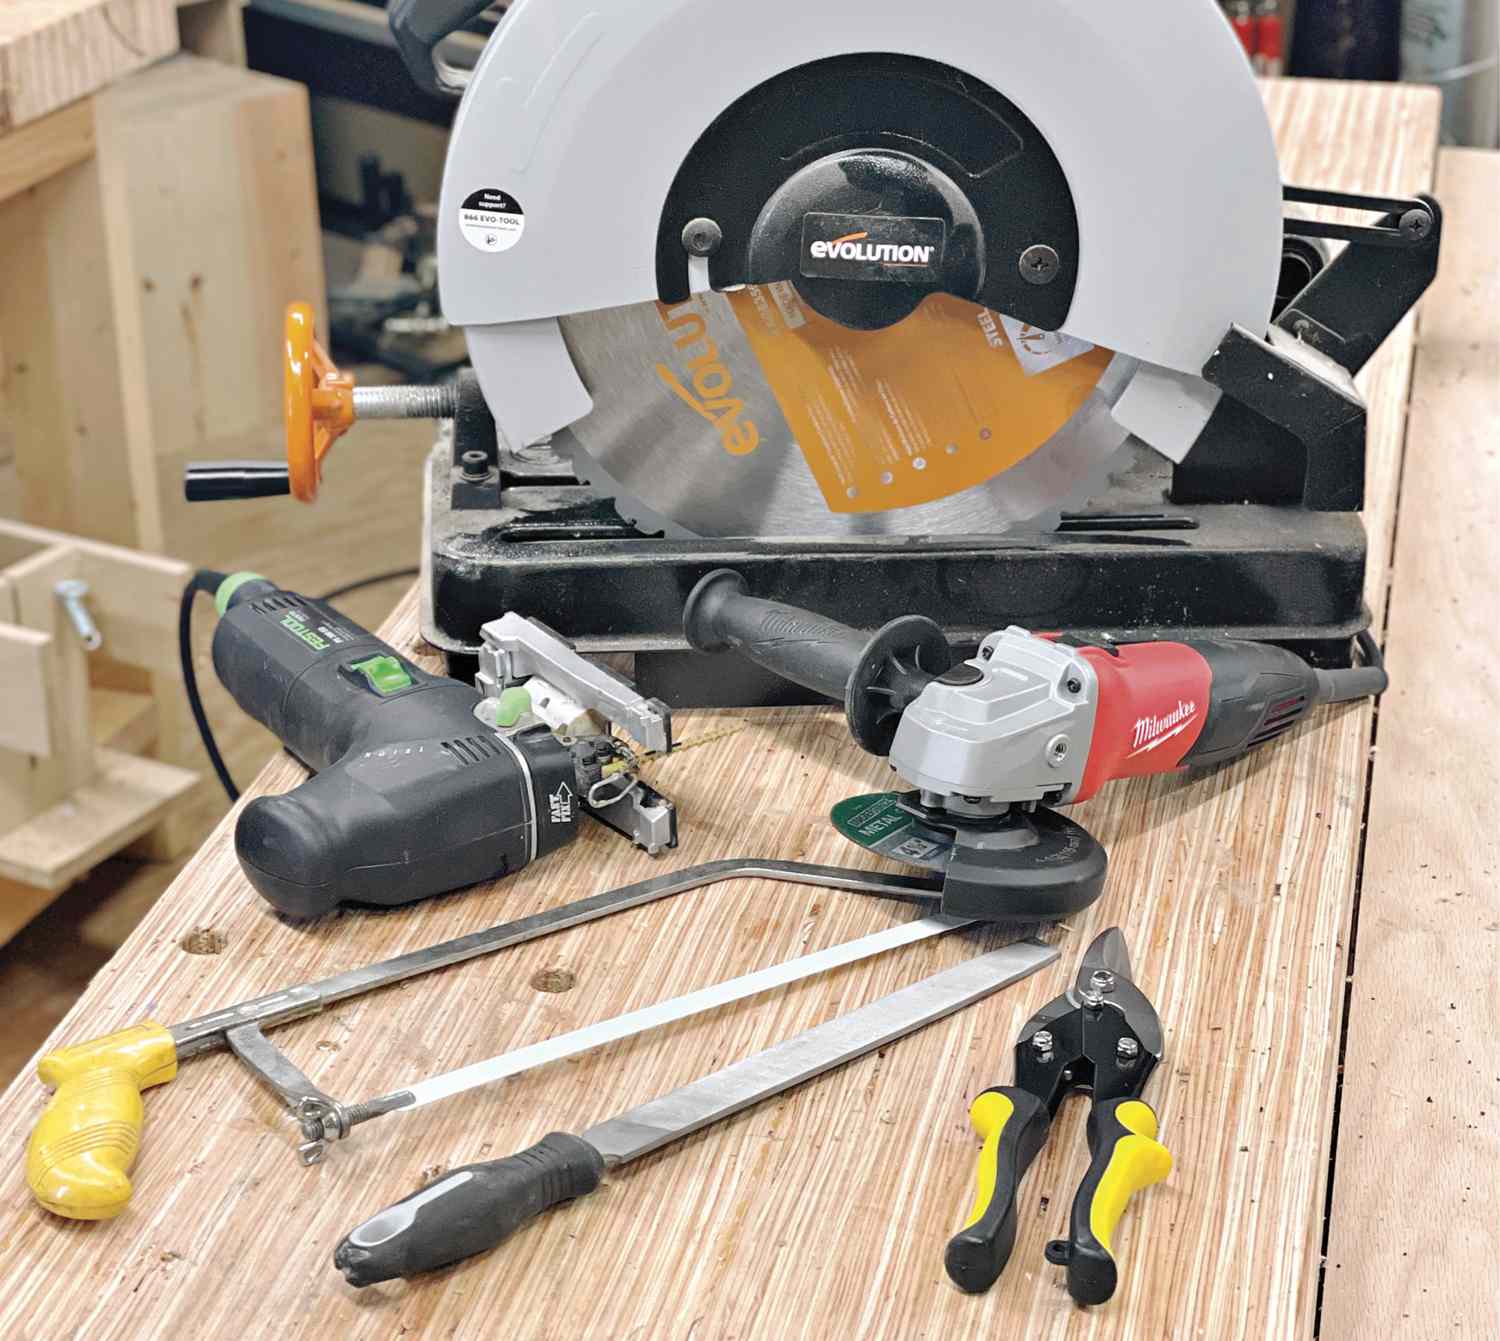

In most cases, non-ferrous metals machine easily with regular woodworking tools (though a material-specific blade typically leaves a better finish). But to cut ferrous metals, choose blades specifically designed for the material. Beyond these typical woodshop tools, a handheld grinder with a cutting disc does a great job cutting both ferrous and non-ferrous metals (photo, above).
Most home centers and hardware stores carry a variety of sheet metal, bar, tube, and pipe stock, mostly in sizes less than 1" square (or diameter) and lengths less than 4'. This convenience comes at a higher price per foot. For better selection (and prices), seek out a dedicated metal supplier. Materials there often come in 12' lengths, though most suppliers will cut it to length for a fee.
Sheet and plate metals typically come in 4×8' and 4×10' sizes at metal suppliers. And again, most will cut it to size for an additional fee—a worthy investment because they can cut these large sheets more accurately and quickly than you can in a home shop. Plus, the more-manageable size and weight minimize the hassle of working with them back in the shop.
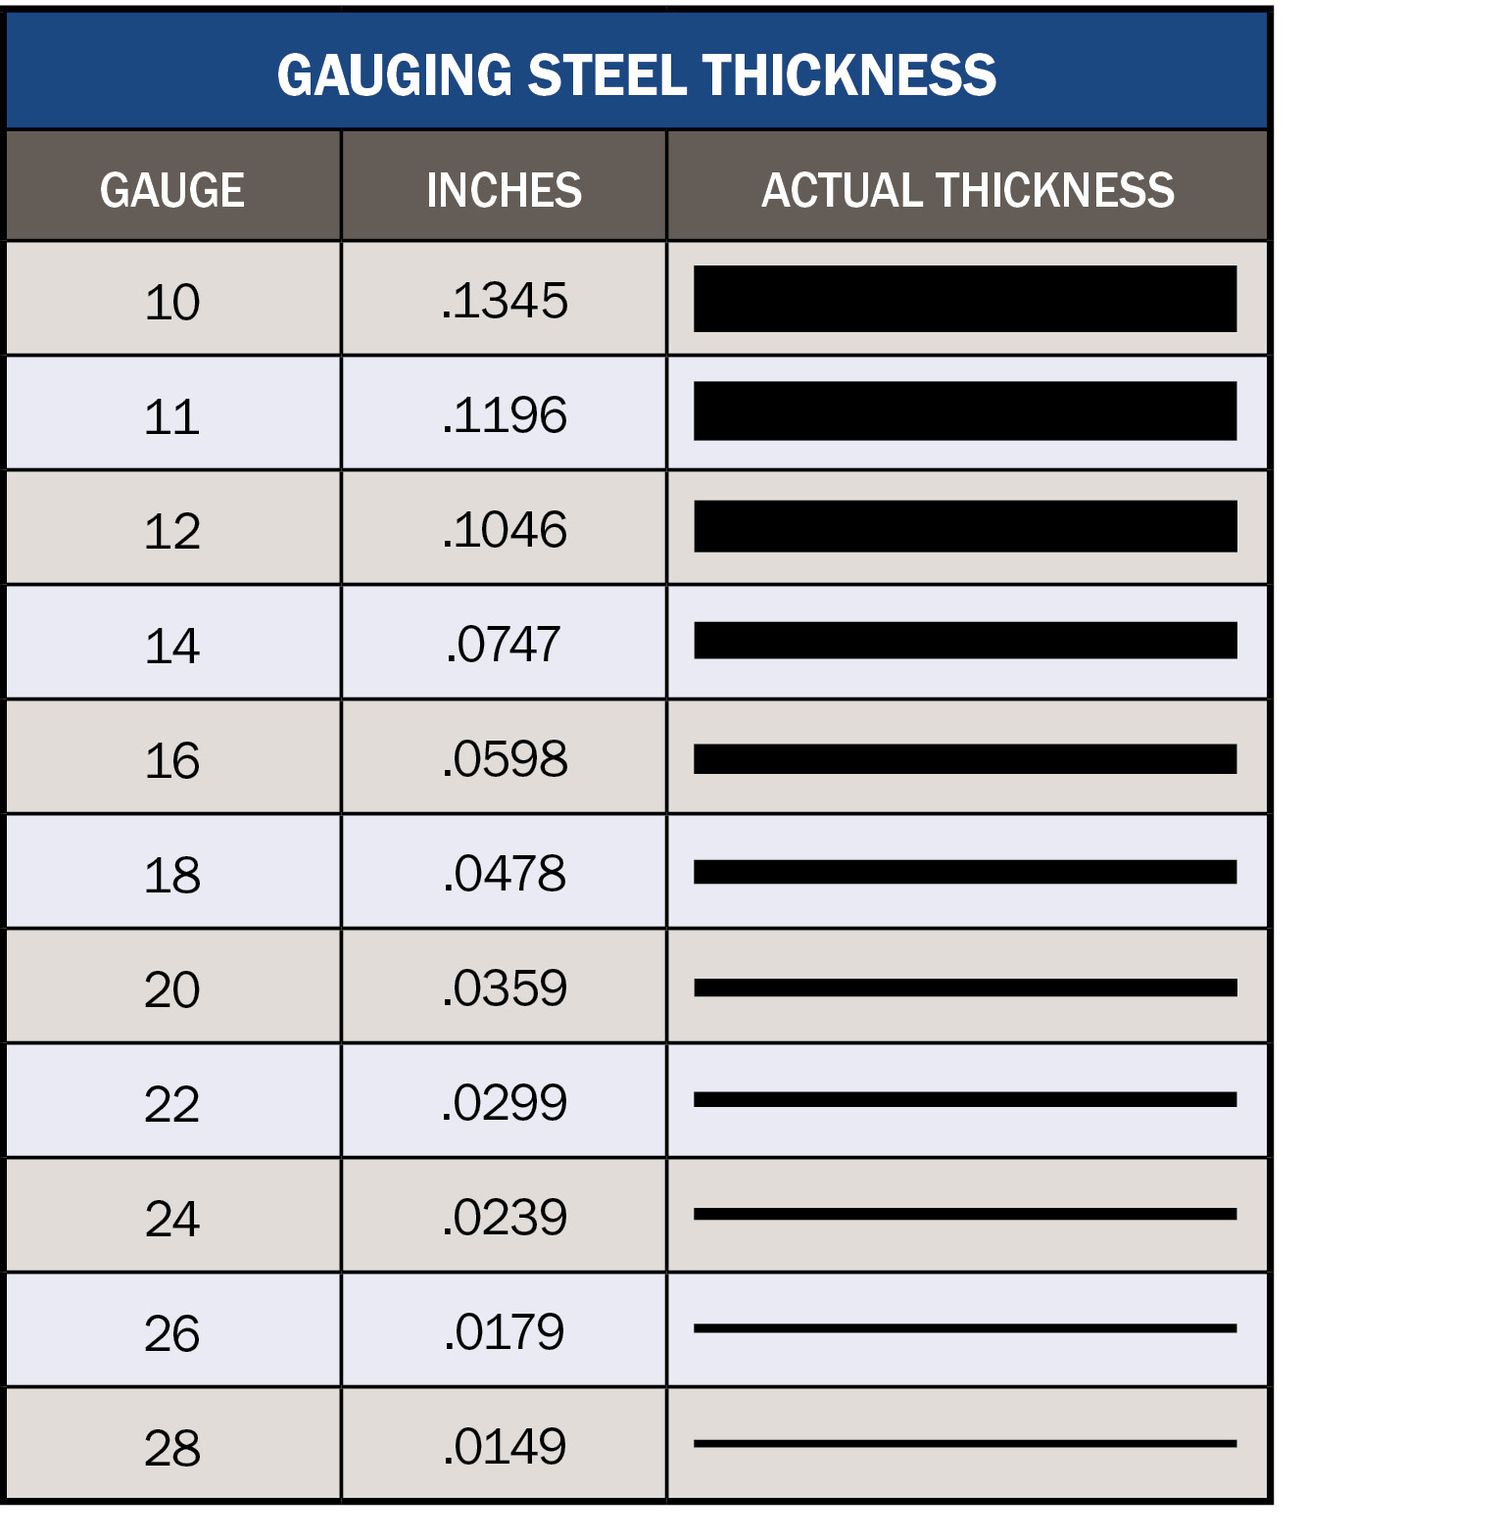
Beyond shape, metal also comes indifferent thicknesses. Fractional or decimal inches define the thickness of aluminum and brass. Steel uses gauge for thicknesses less than 1/4" and inches above that. Rather unintuitively, the smaller the gauge, the thicker the material (chart, above).
Working safely
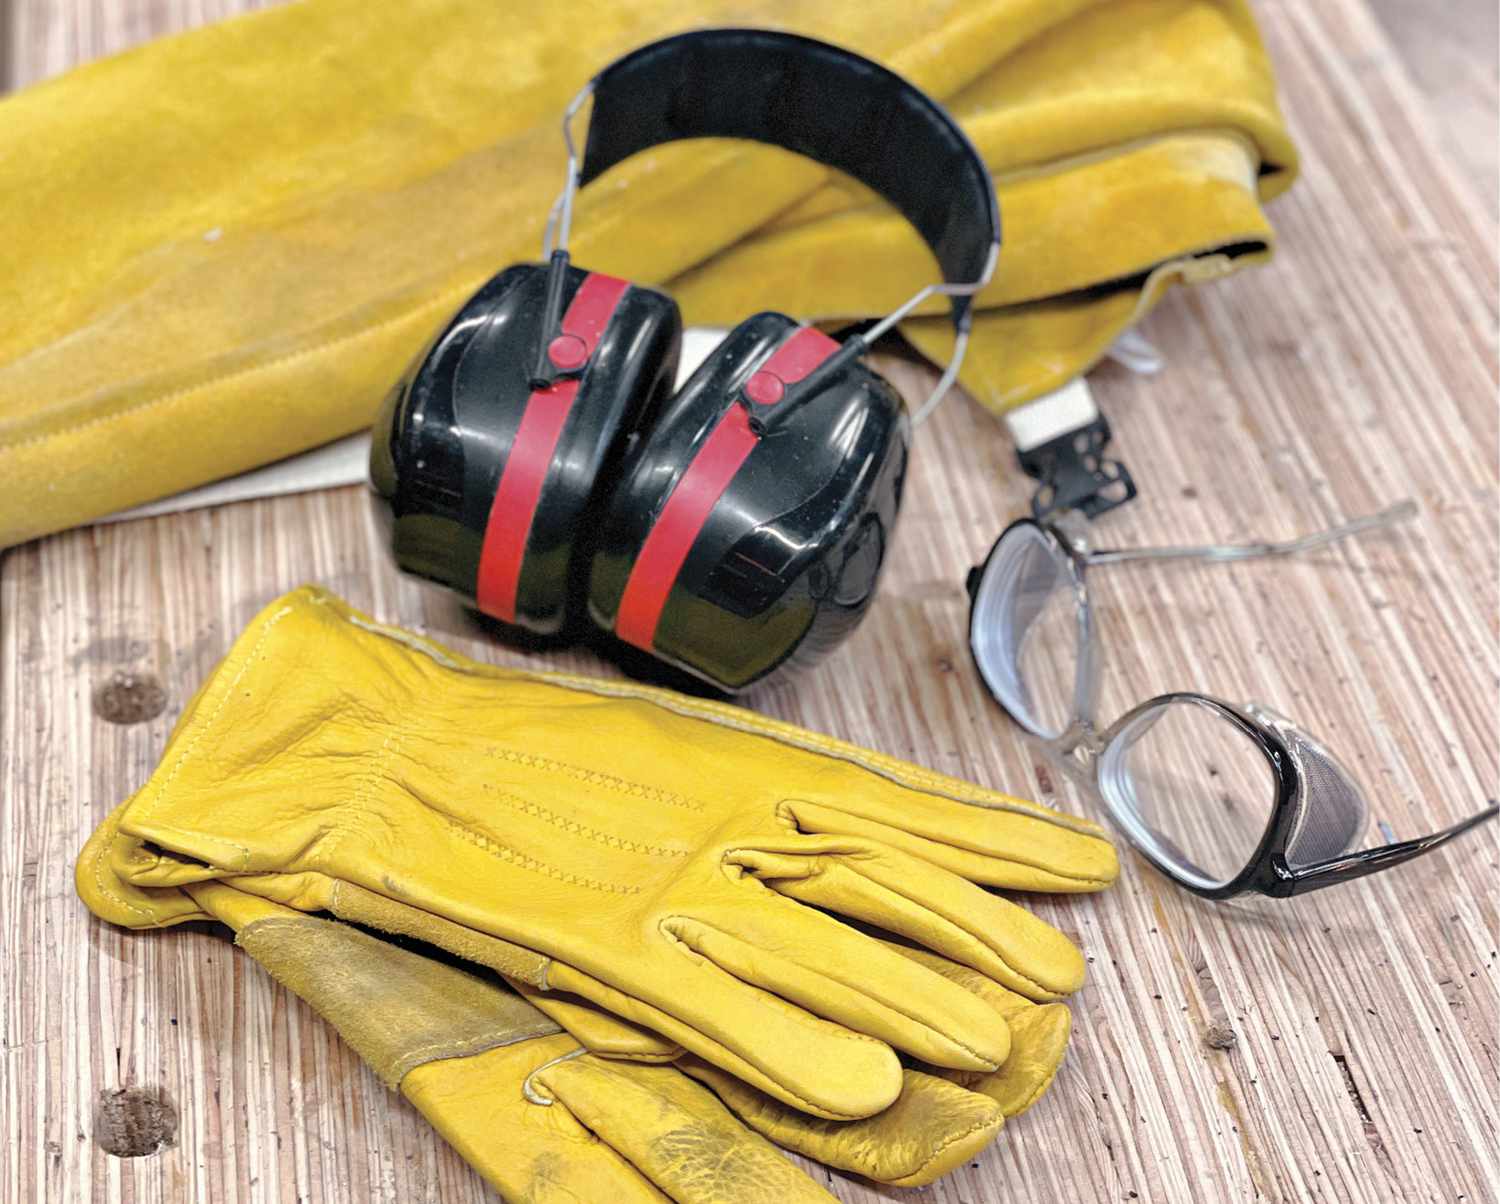
As with all shop work, metalworking requires that you protect yourself with the right gear (photo, above).
Metal pieces flying and spinning around the shop tend to ruin your day, so always clamp your work securely before you cut, drill, or grind. Most metal chopsaws feature built-in clamps. For a typical woodworking mitersaw, add a couple extra clamps when cutting non-ferrous metals. A simple machinist vise mounted to your drill-press table helps position metal securely for drilling.
Cutting metal creates small chips that easily embed in workbench surfaces, scratch wood projects, or damage finishes. The best approach: Dedicate a separate area for metalworking. If that's not an option, temporarily install a protective surface, such as a sheet of hardboard, on your workbench. Then, clean up thoroughly after working with metal.
Obviously, sparks and hot metal chips don't play well with sawdust, solvents, or even synthetic materials used for clothing. When using a grinder or otherwise generating sparks, clear the area of anything combustible. Spend a little extra time cleaning up to make sure nothing is smoldering before you leave the shop for the day. Finally, if something feels dangerous or wrong, find a different way to do it. A hacksaw and a file will cut and shape most metals—it just requires a little more patience.
Let's cut to it
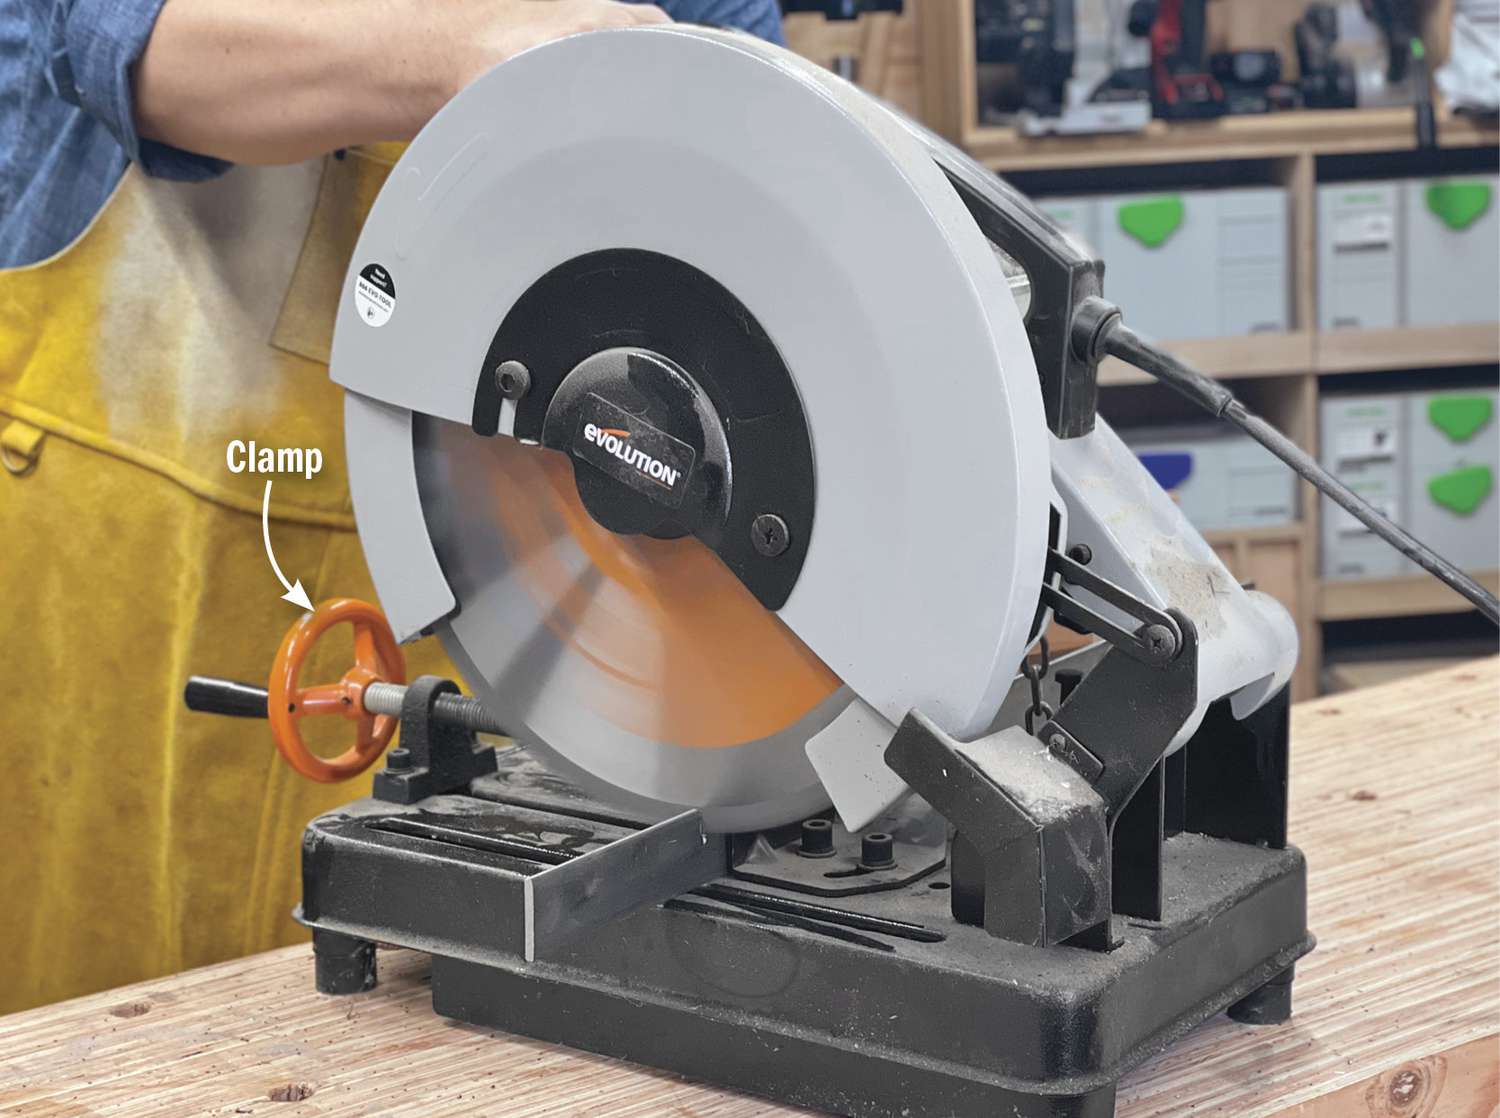
A regular woodworking mitersaw equipped with a blade for non-ferrous metals does a great job cutting aluminum and brass stock to length. But a dedicated metal chopsaw (photo, above) handles those and steel, too. This coldcut chopsaw features a toothed metal carbide blade designed to cut without generating heat or sparks.

Metal-cutting snips, which come in left-, right-, and straight-cutting versions, work great for thin material. For thicker material, a woodworking bandsaw easily cuts brass and aluminum (photo, above). Use a 1/4" or 3/8" blade with 3–4 teeth per inch. Be sure to clean up any metal chips and dust left on the table after you finish to avoid marring future work.
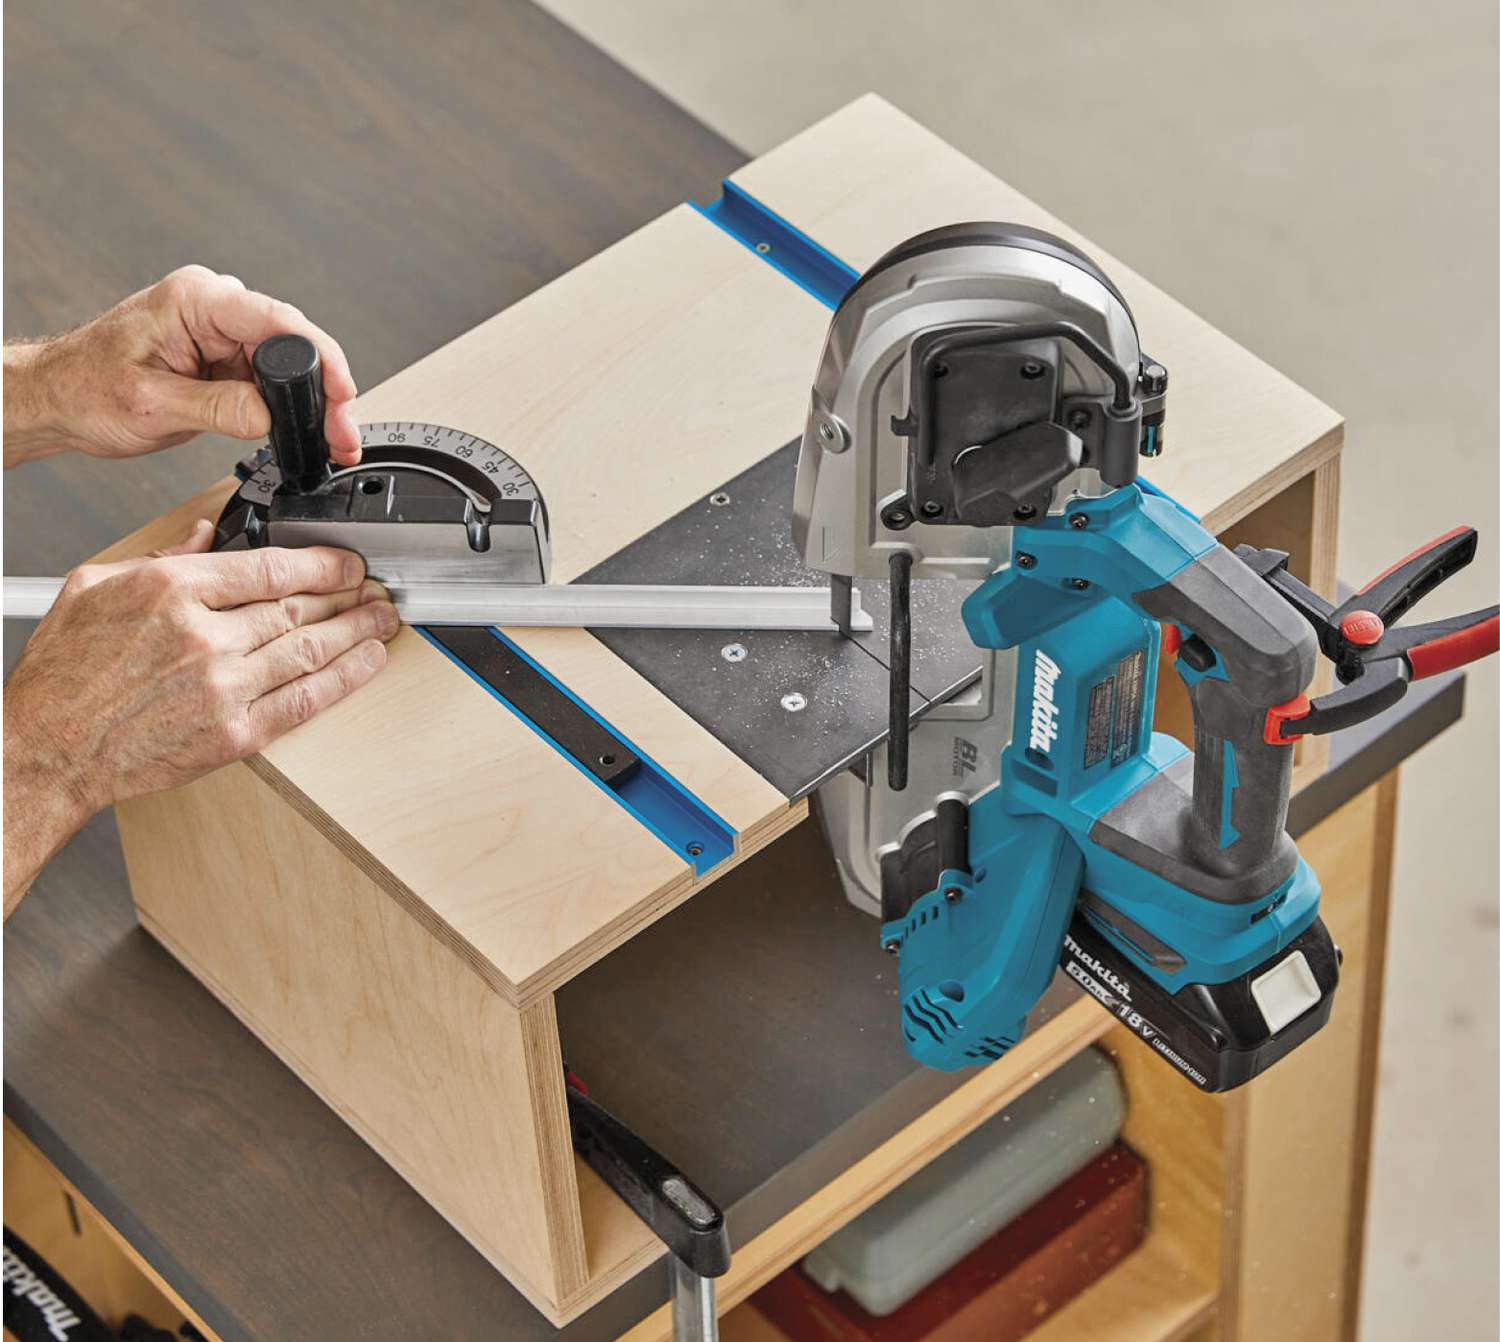
For fast cutting of a metal piece you'd normally hacksaw, a handheld portable bandsaw makes a great addition to the shop. To increase its accuracy, consider making a custom stand (photo, above). The adjustable miter gauge and miter slots improve control and cut quality.
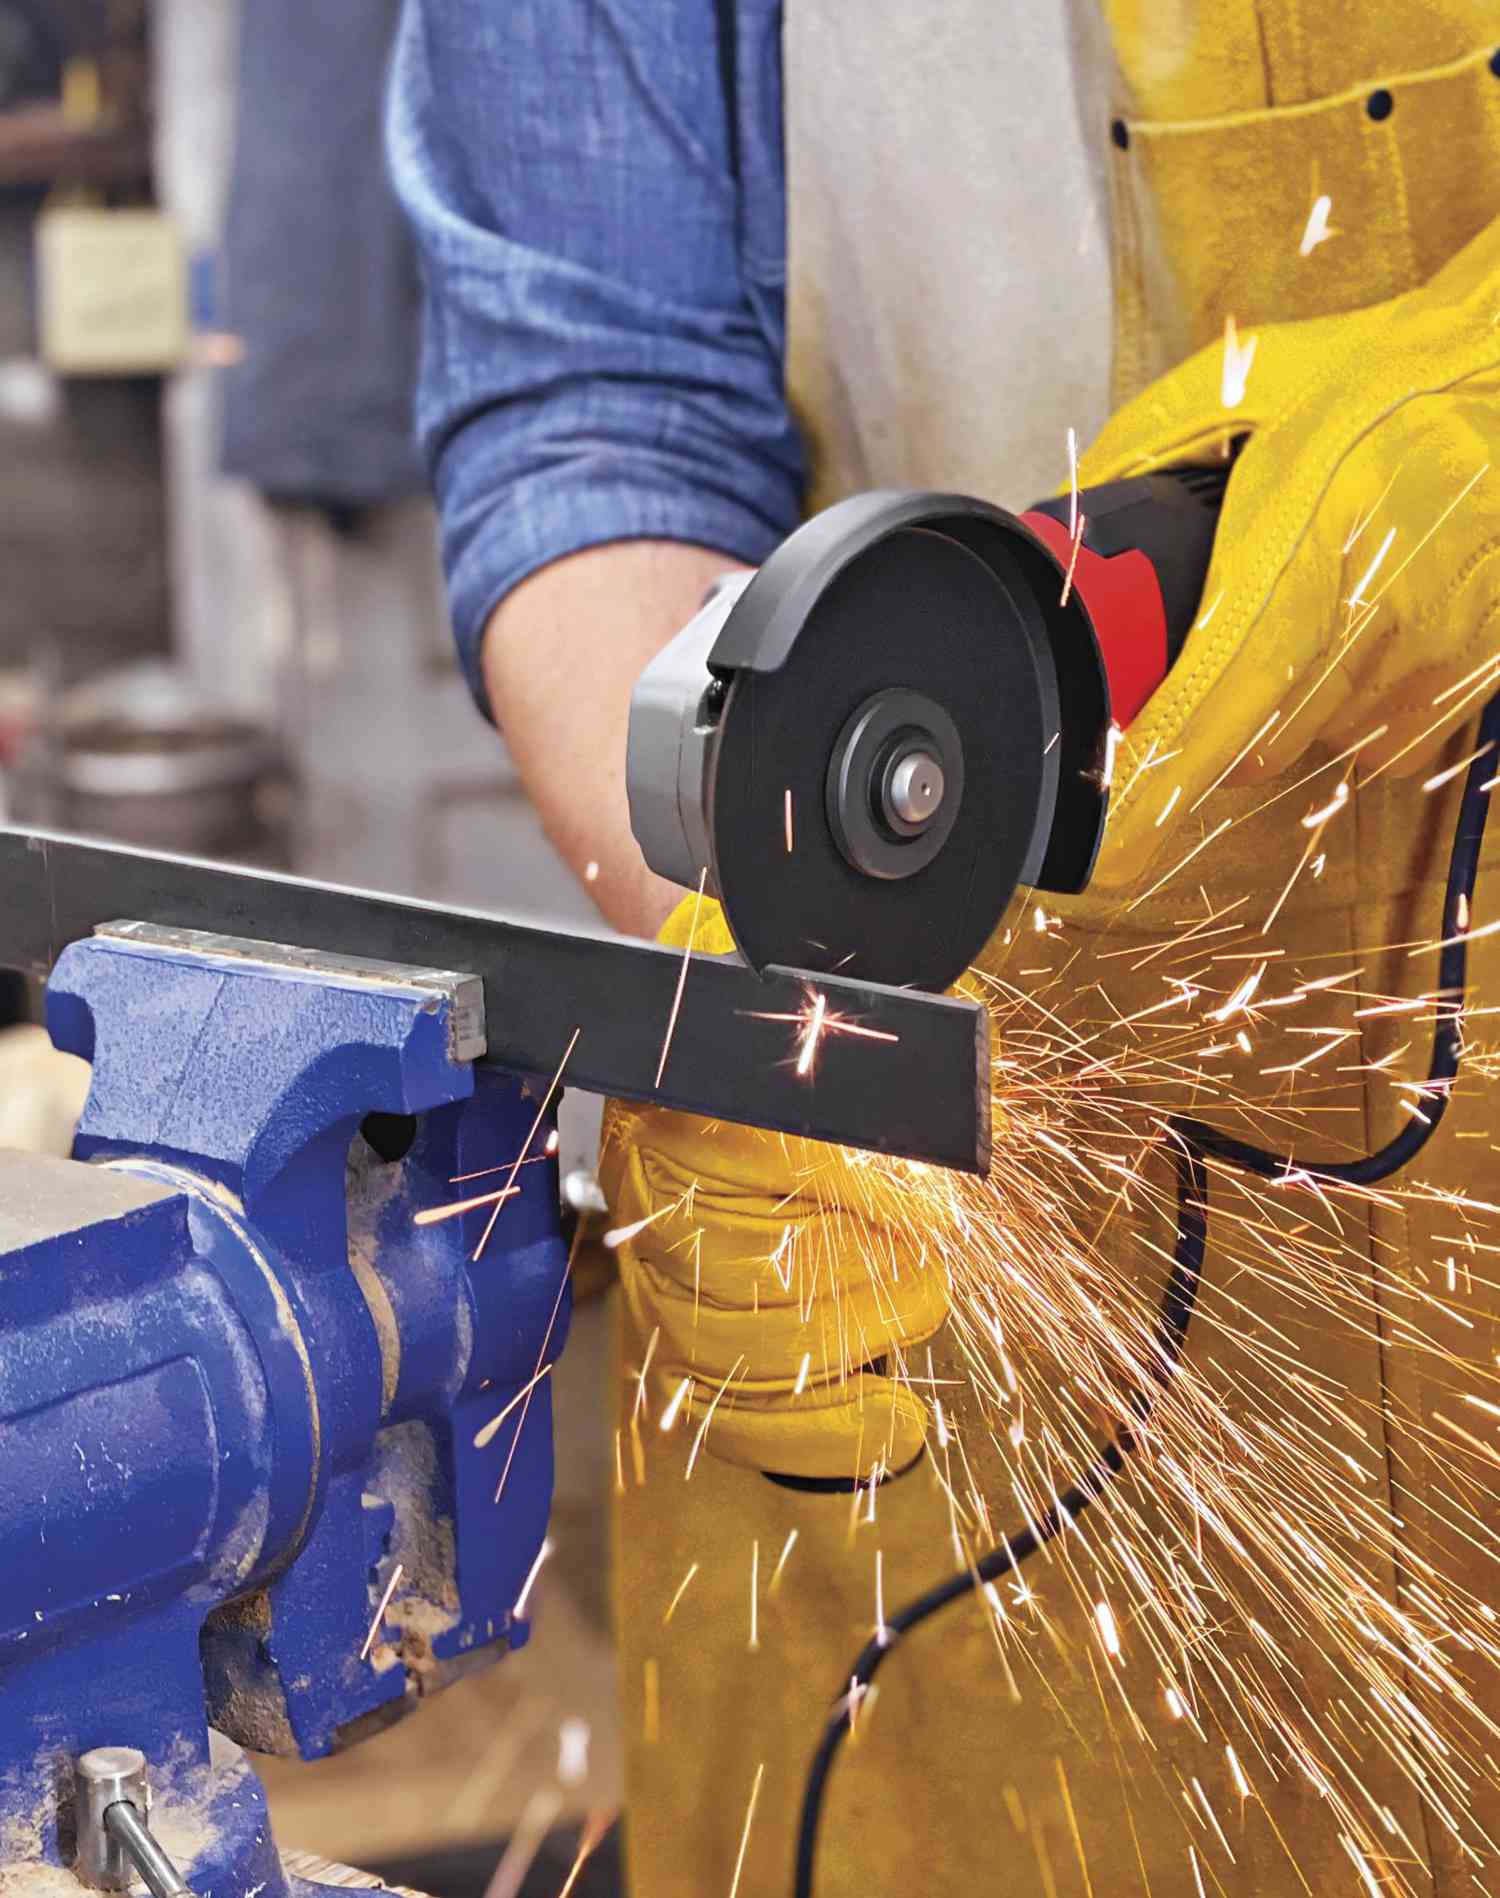
A handheld grinder is one of the most inexpensive and versatile tools around for cutting and shaping metal. The grinder accepts both cutting (or cut-off) wheels and grinding wheels. The thin 1/8" profile of a cutting wheel slices through metal with ease (Opening photo). A bastard mill file takes care of smoothing sharp edges.
Switch to a grinding wheel (1/4" thick or more) for shaping, such as rounding edges and corners: Its thicker profile better withstands lateral pressure. Be sure to keep both hands on the grinder during use.
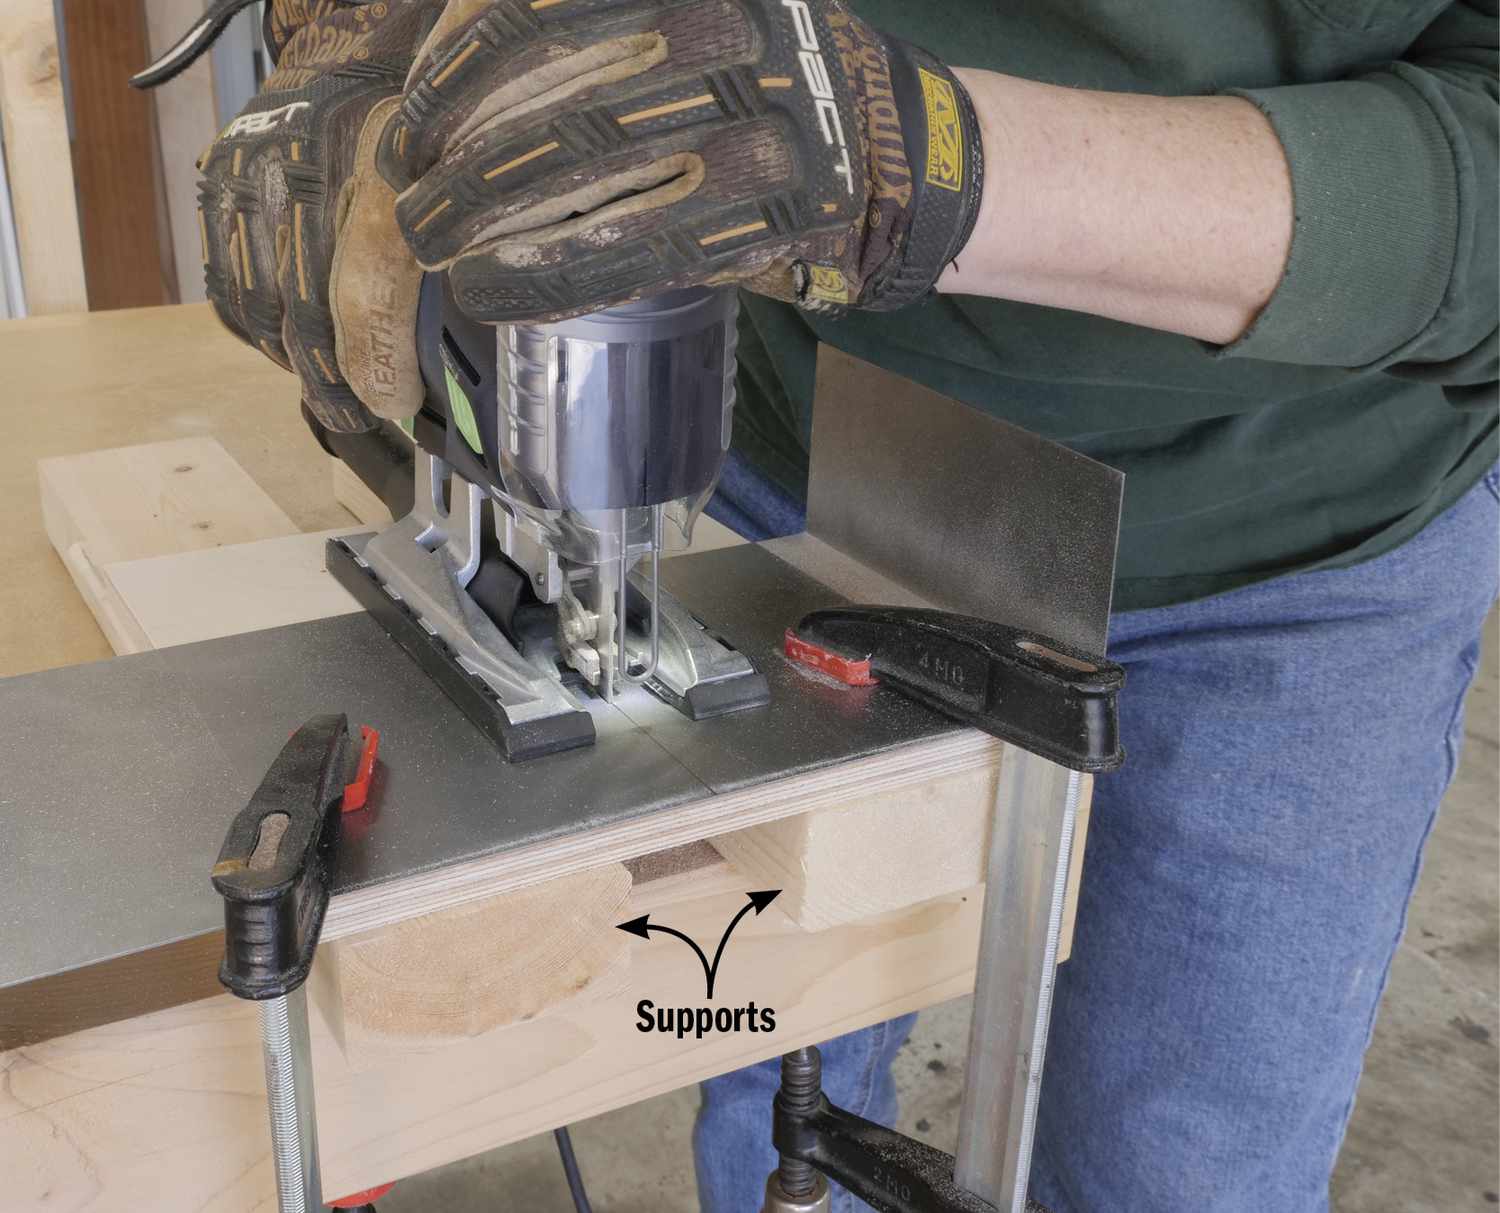
The right metal-cutting blade in a jigsaw does a pretty good job of cutting sheet metals, with no sparks (photo, above). Choose a 24 tpi bi-metal blade for thin-walled pipe and soft metals thinner than 1/8". Switch to a 12–18 tpi blade for thicker or harder metals. The tool tends to struggle with thicker material, so take it slow and easy.
Hit the brake to make a turn
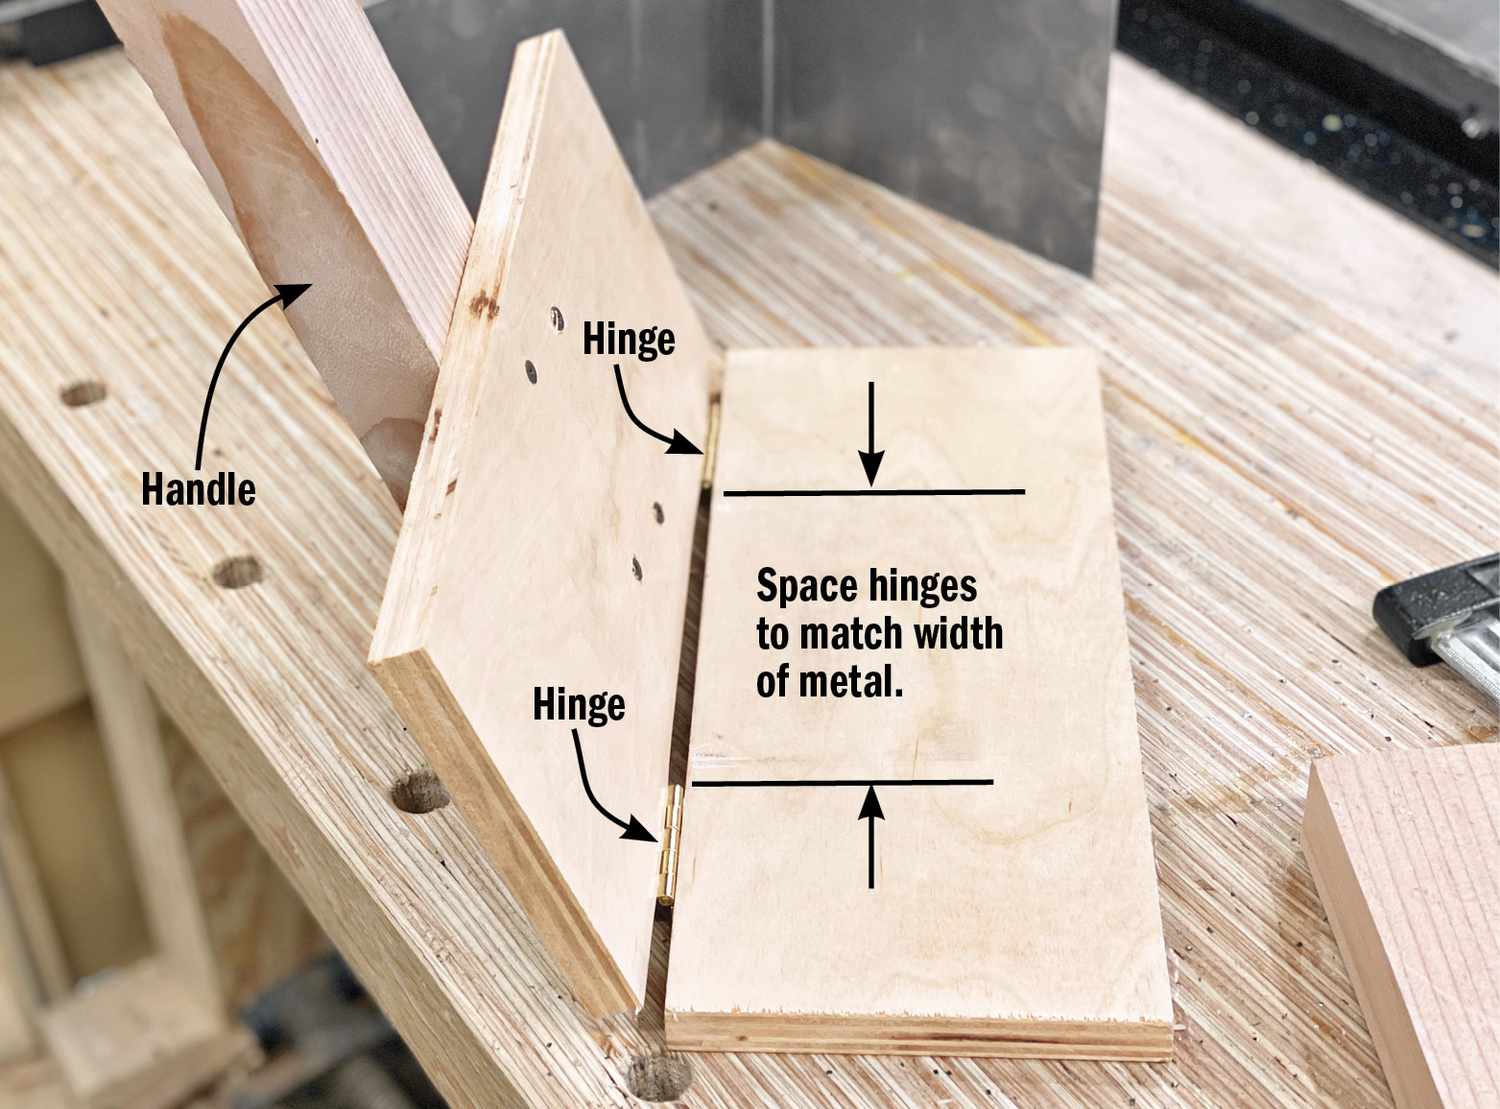
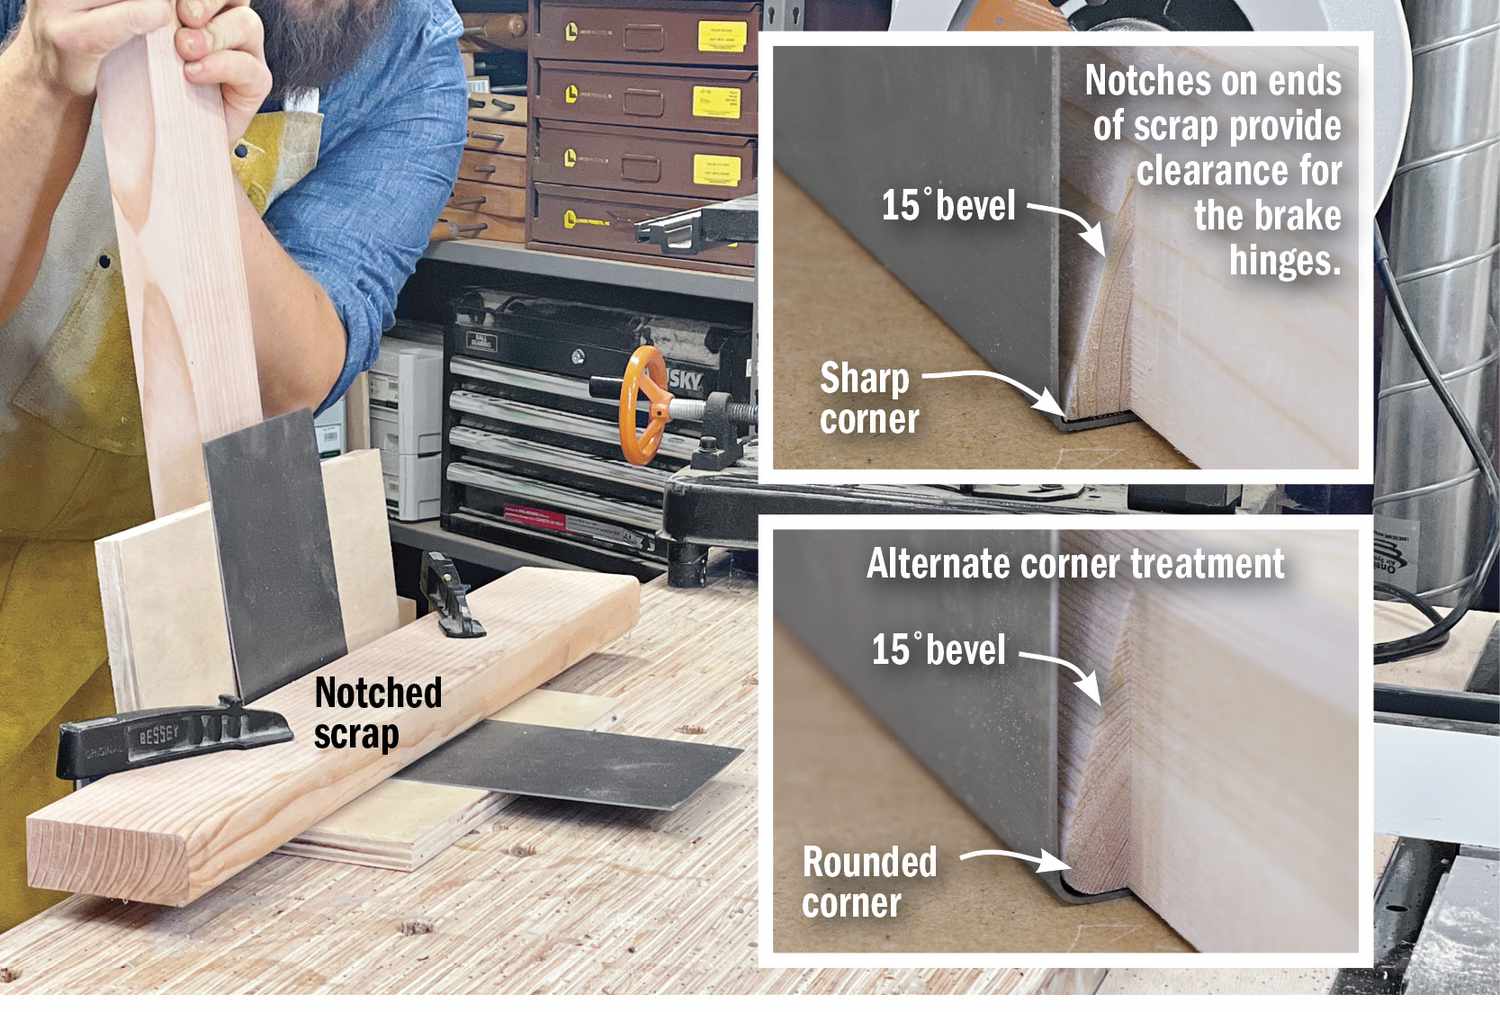
In metalworking shops, a bending brake creates straight, even bends in sheet metal. You can fabricate a shop-made version (photos, below).
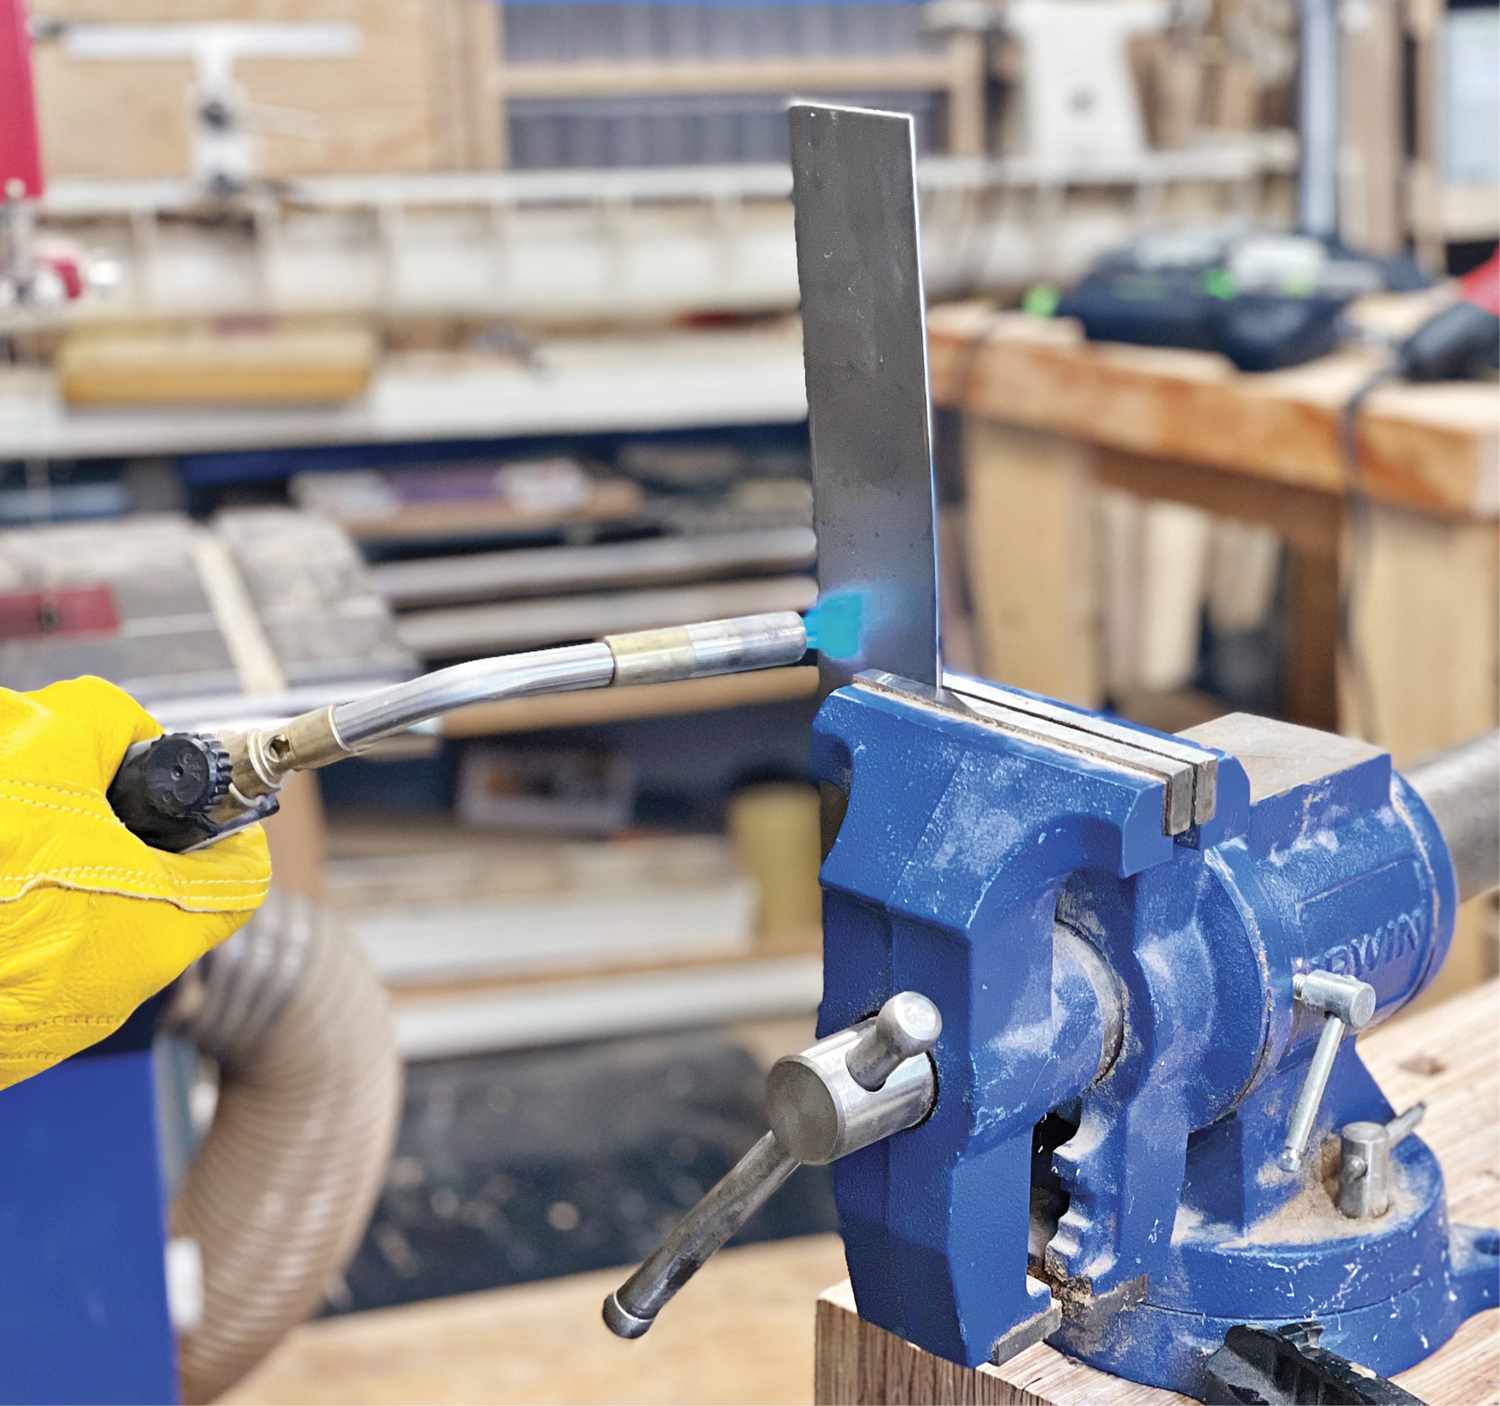
Adding heat to the equation makes bending thick steel stock easier. First, clamp your material in a vise and heat the bending area with a torch (photo, above).
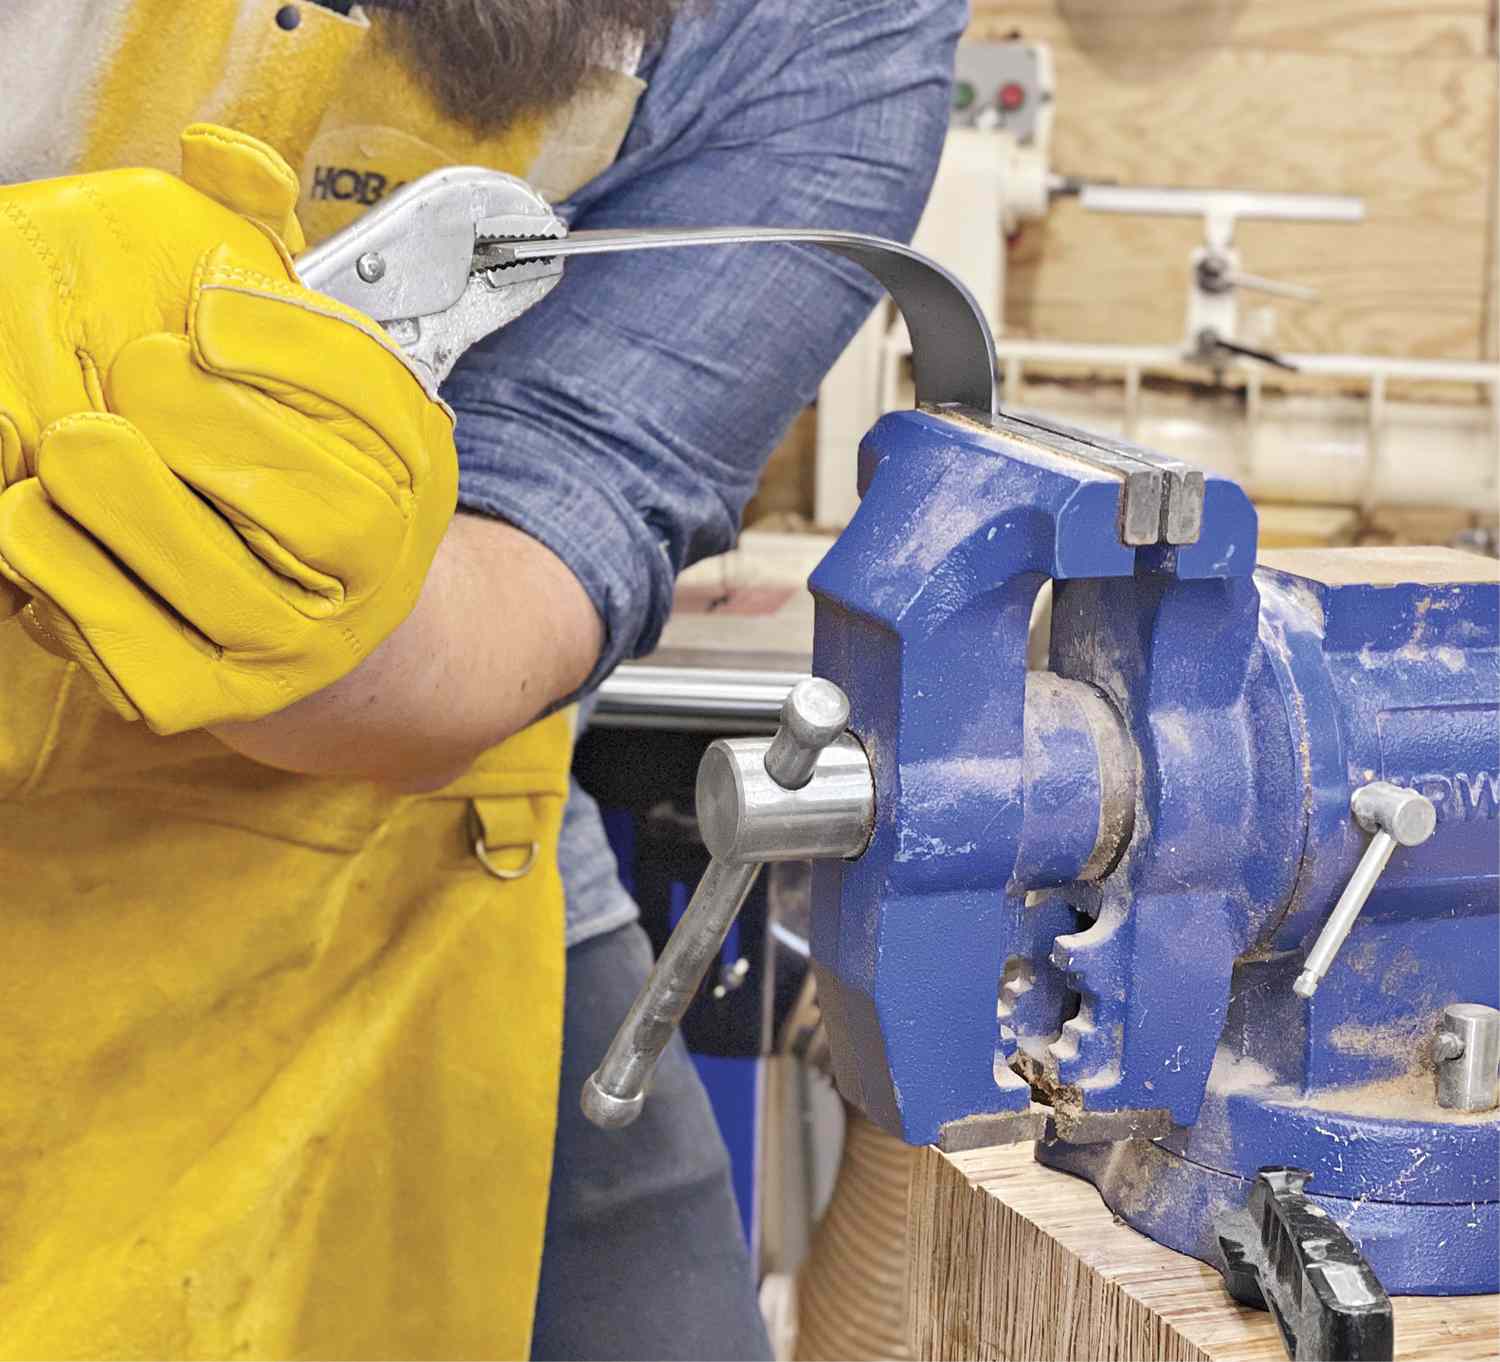
Then, grab your locking pliers and make the bend (photo, above). After the steel cools, it'll hold its shape and remain plenty strong.
Tap dance to sharp threads
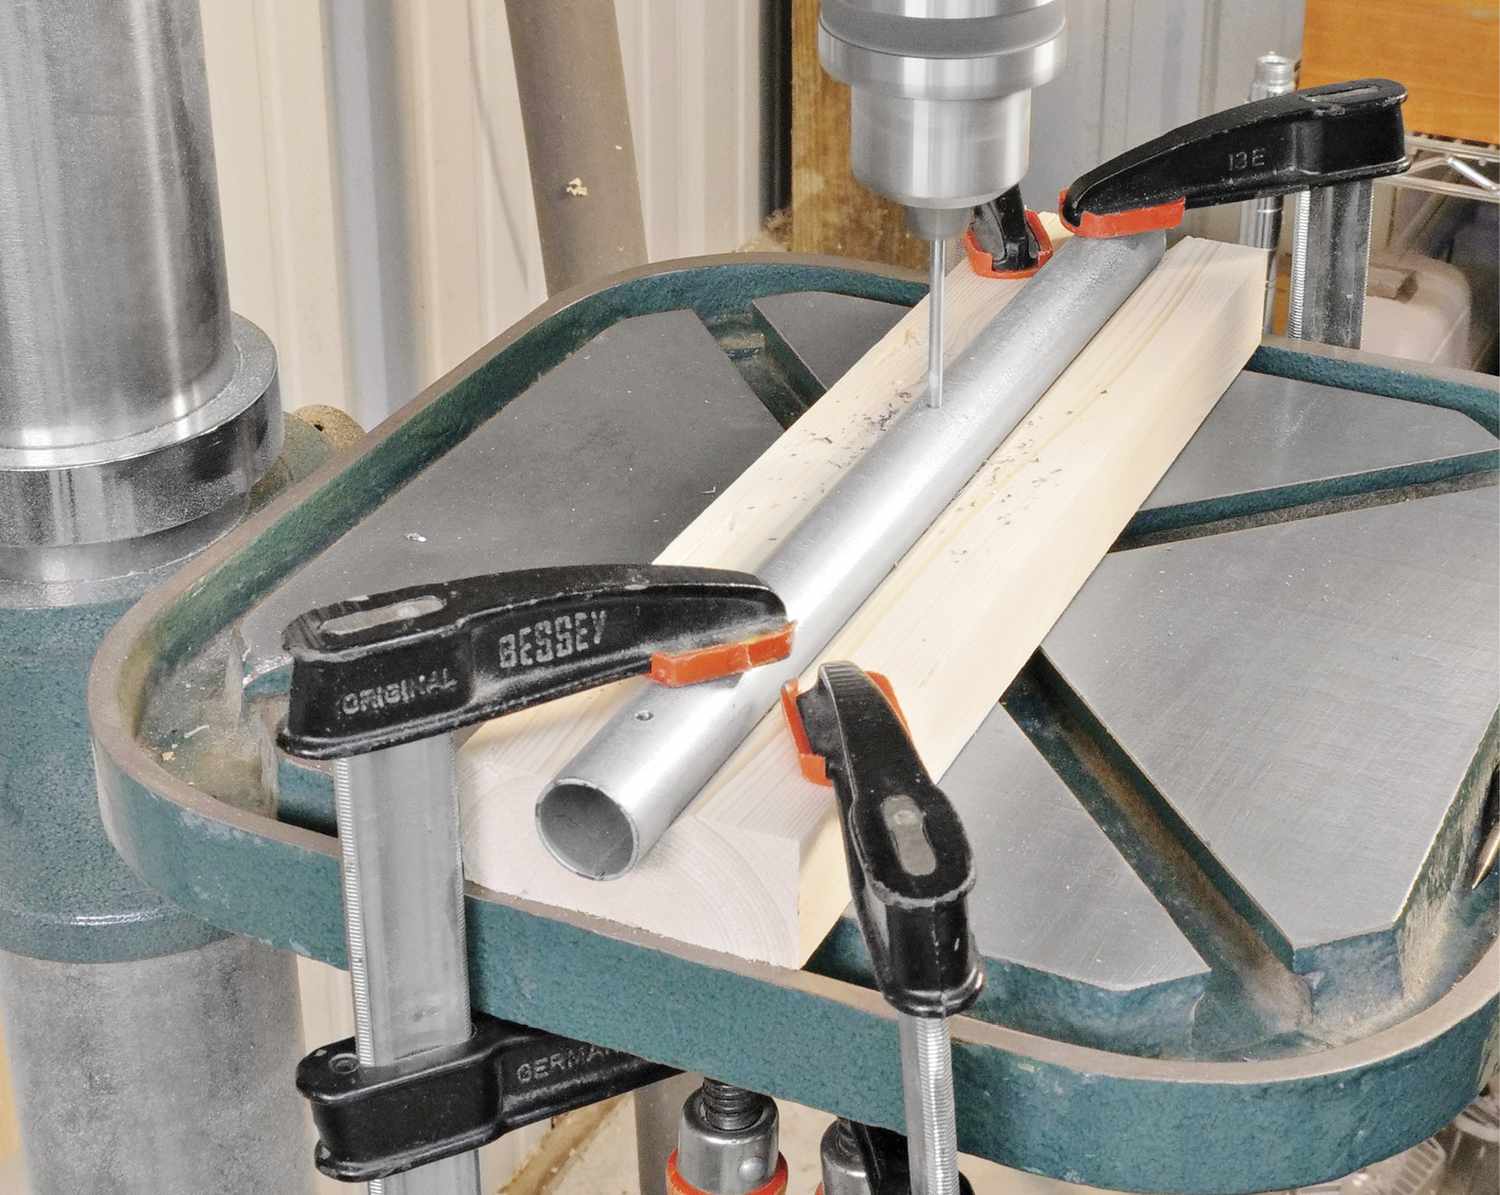
Need to drill holes? Then head to the drill press, a tool actually designed for metalworking. The key: Match the rpm to the bit size. Always clamp your piece in place, whether with a set of F-clamps (photo, above), or a drill-press vise that mounts to the table.
Learn the best bit speed for different bit styles and materials.
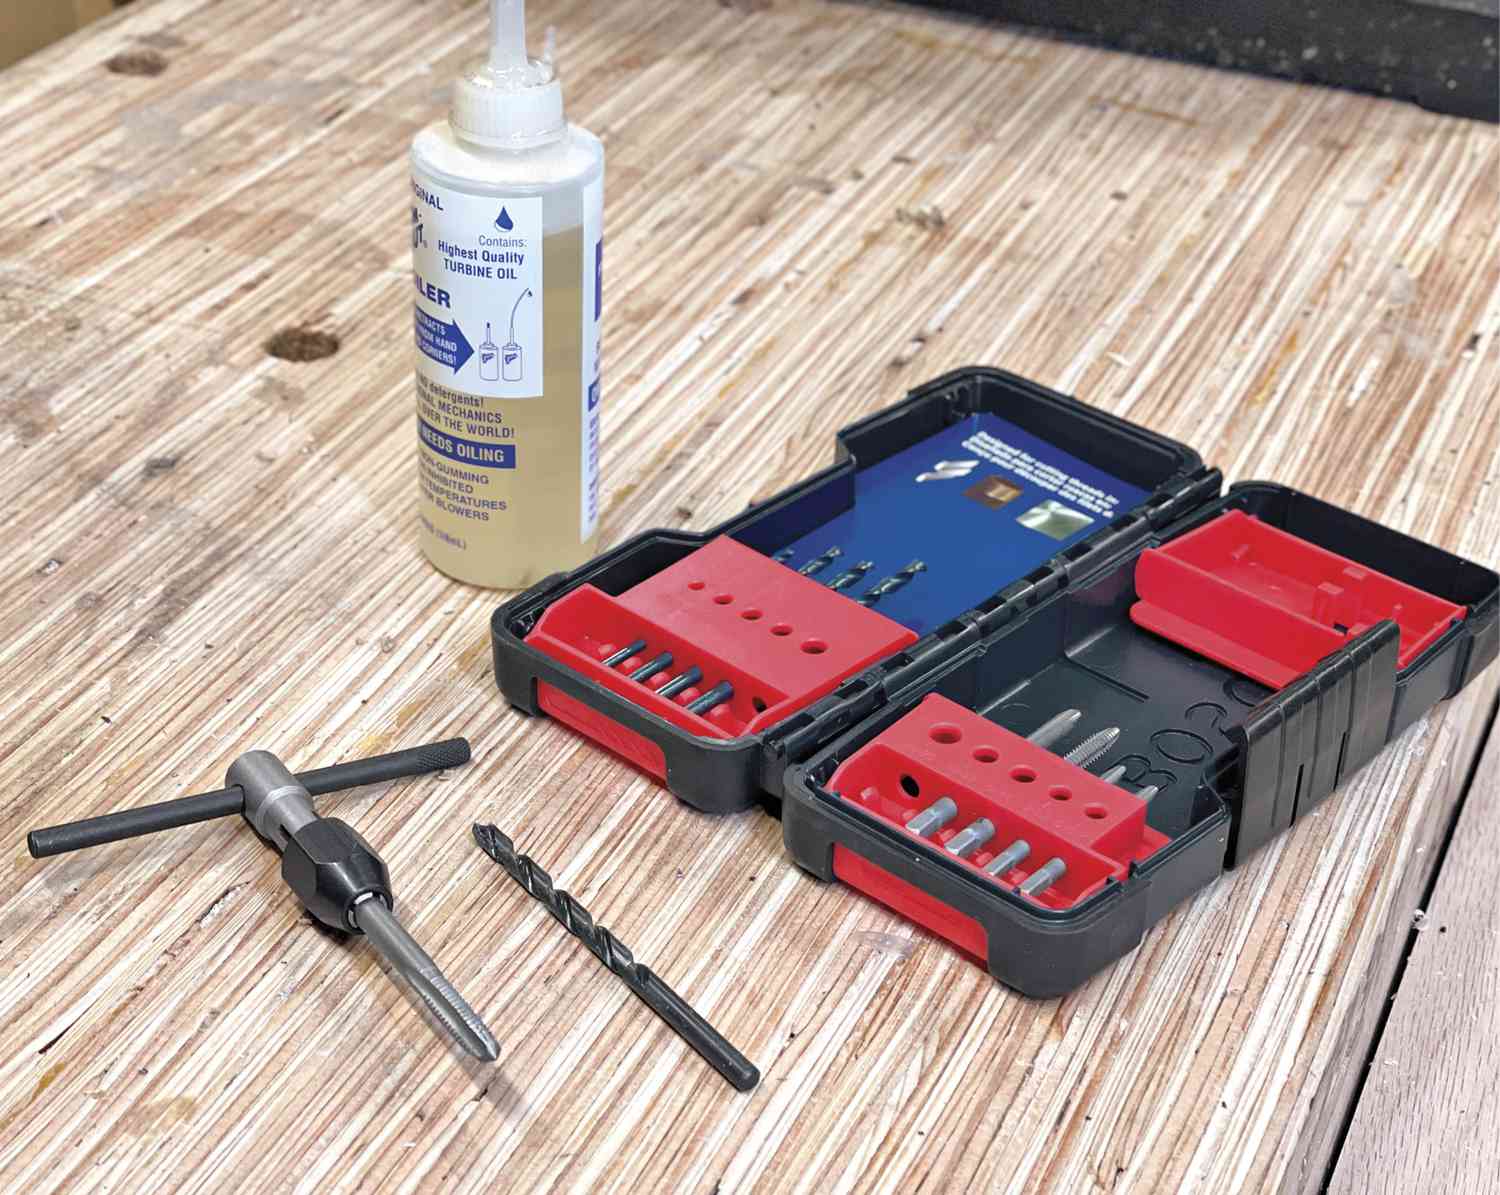
Once you master drilling holes, add threads to accept machine screws and bolts. With an inexpensive tapping kit and cutting oil (photo, above), you can quickly tap threaded holes to join pieces of metal together, or join metal to wood. After drilling the pilot hole, cut a small chamfer to make it easier to seat the tap properly in the hole.
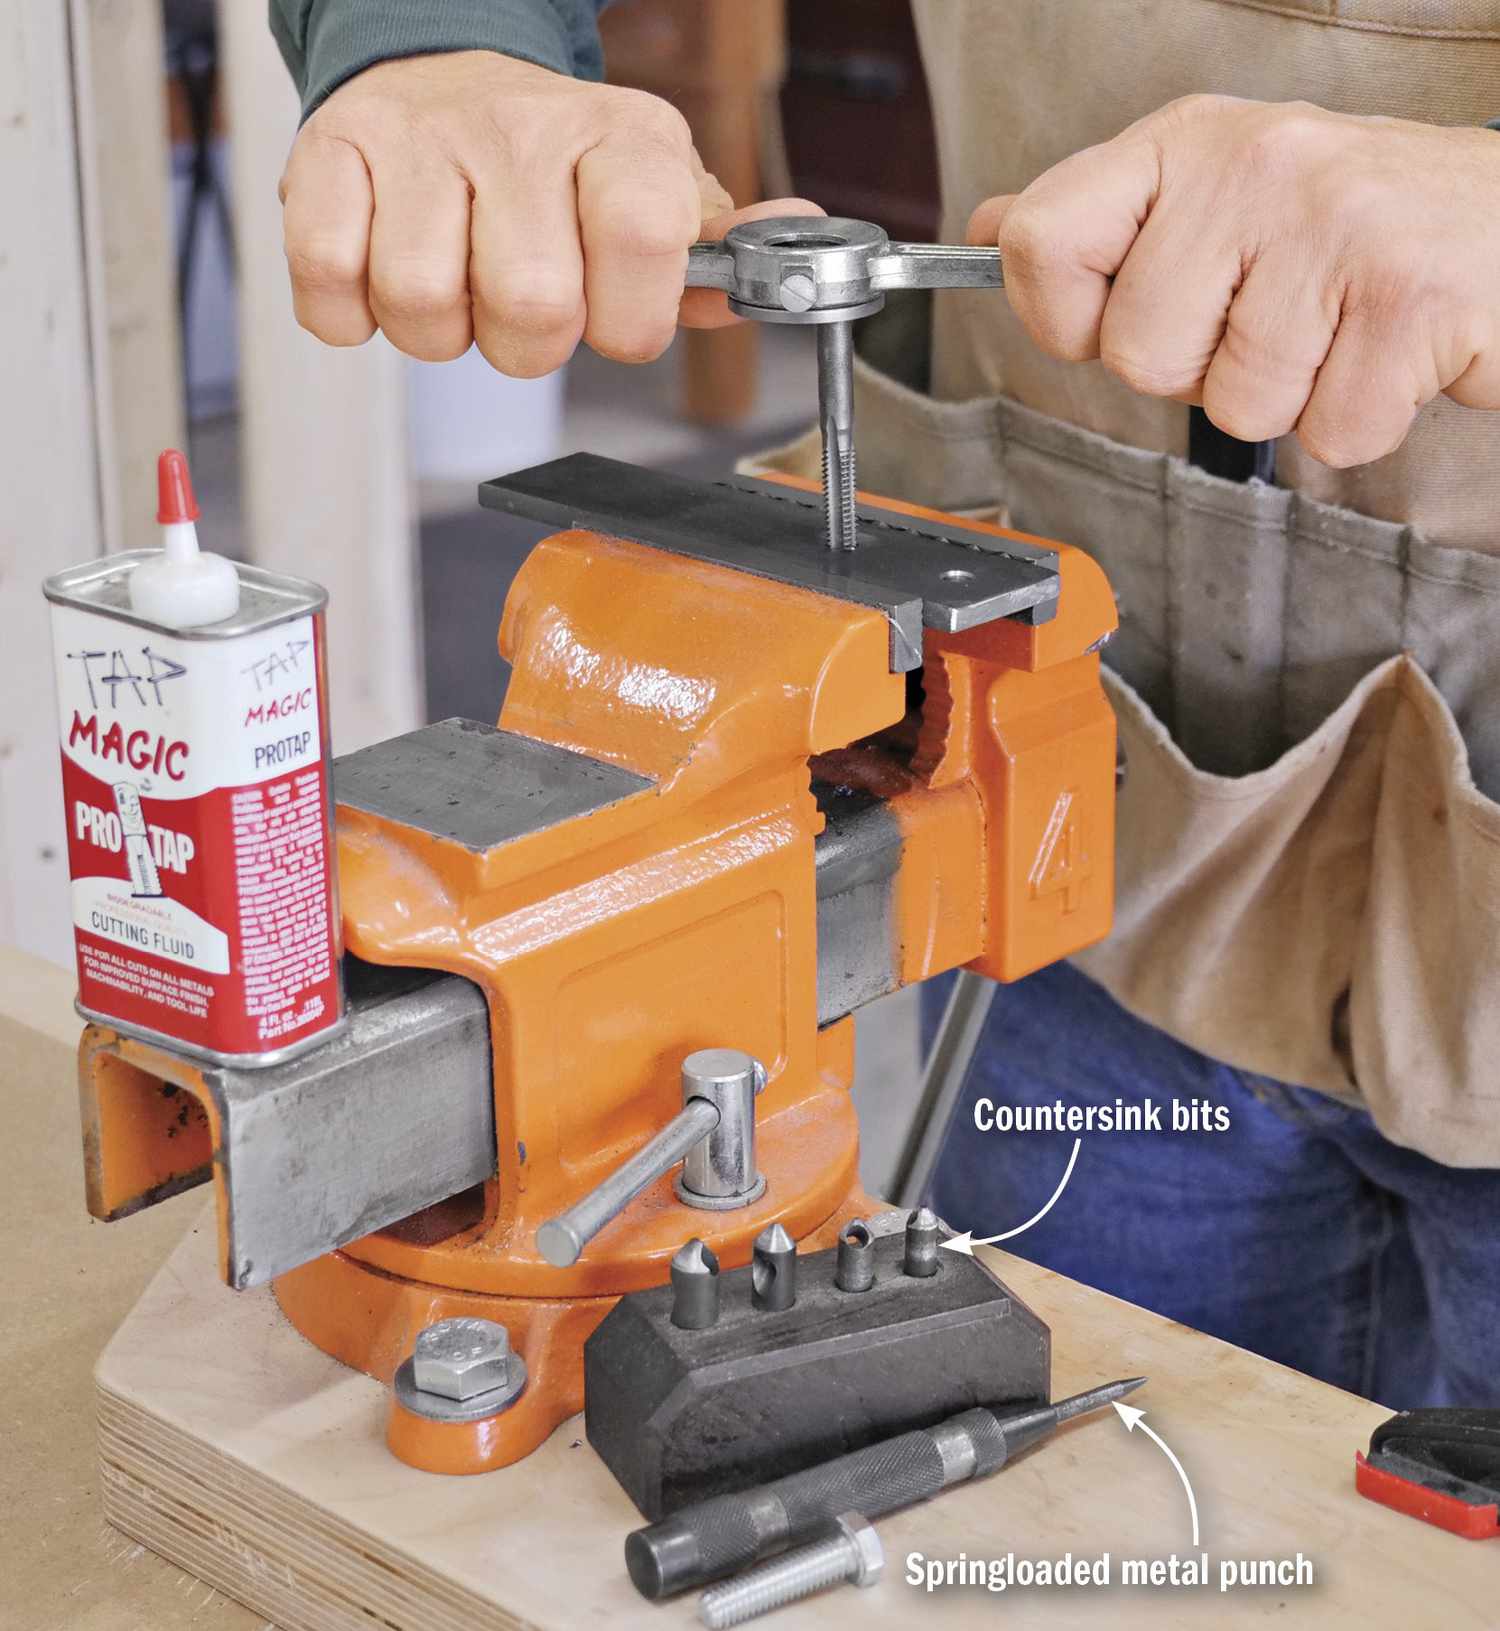
To ensure the tap starts squarely, install it in your drill press and turn the chuck by hand. Once the tap begins cutting, remove the tap from the drill press and fit it into the included handle. Next, make a half turn, back it off a quarter turn, clear out the shavings, add another drop of oil, and make another half turn (photo, above). Keep an eye on the tap to make sure it stays perpendicular to the work.
Continue this forward/back process, stopping occasionally to thread in a bolt of the matching size to check your progress. After tapping the hole, run the tap through one final time to remove excess shavings and ensure clean, crisp threads.
Now it gets riveting

Machine screws and bolts hold tight, yet allow for easy disassembly. For a more permanent joint, and in areas where you may not be able to thread on a nut, choose rivets. Start the riveting process by drilling mating holes in the two pieces of metal you want to join (photo, above).
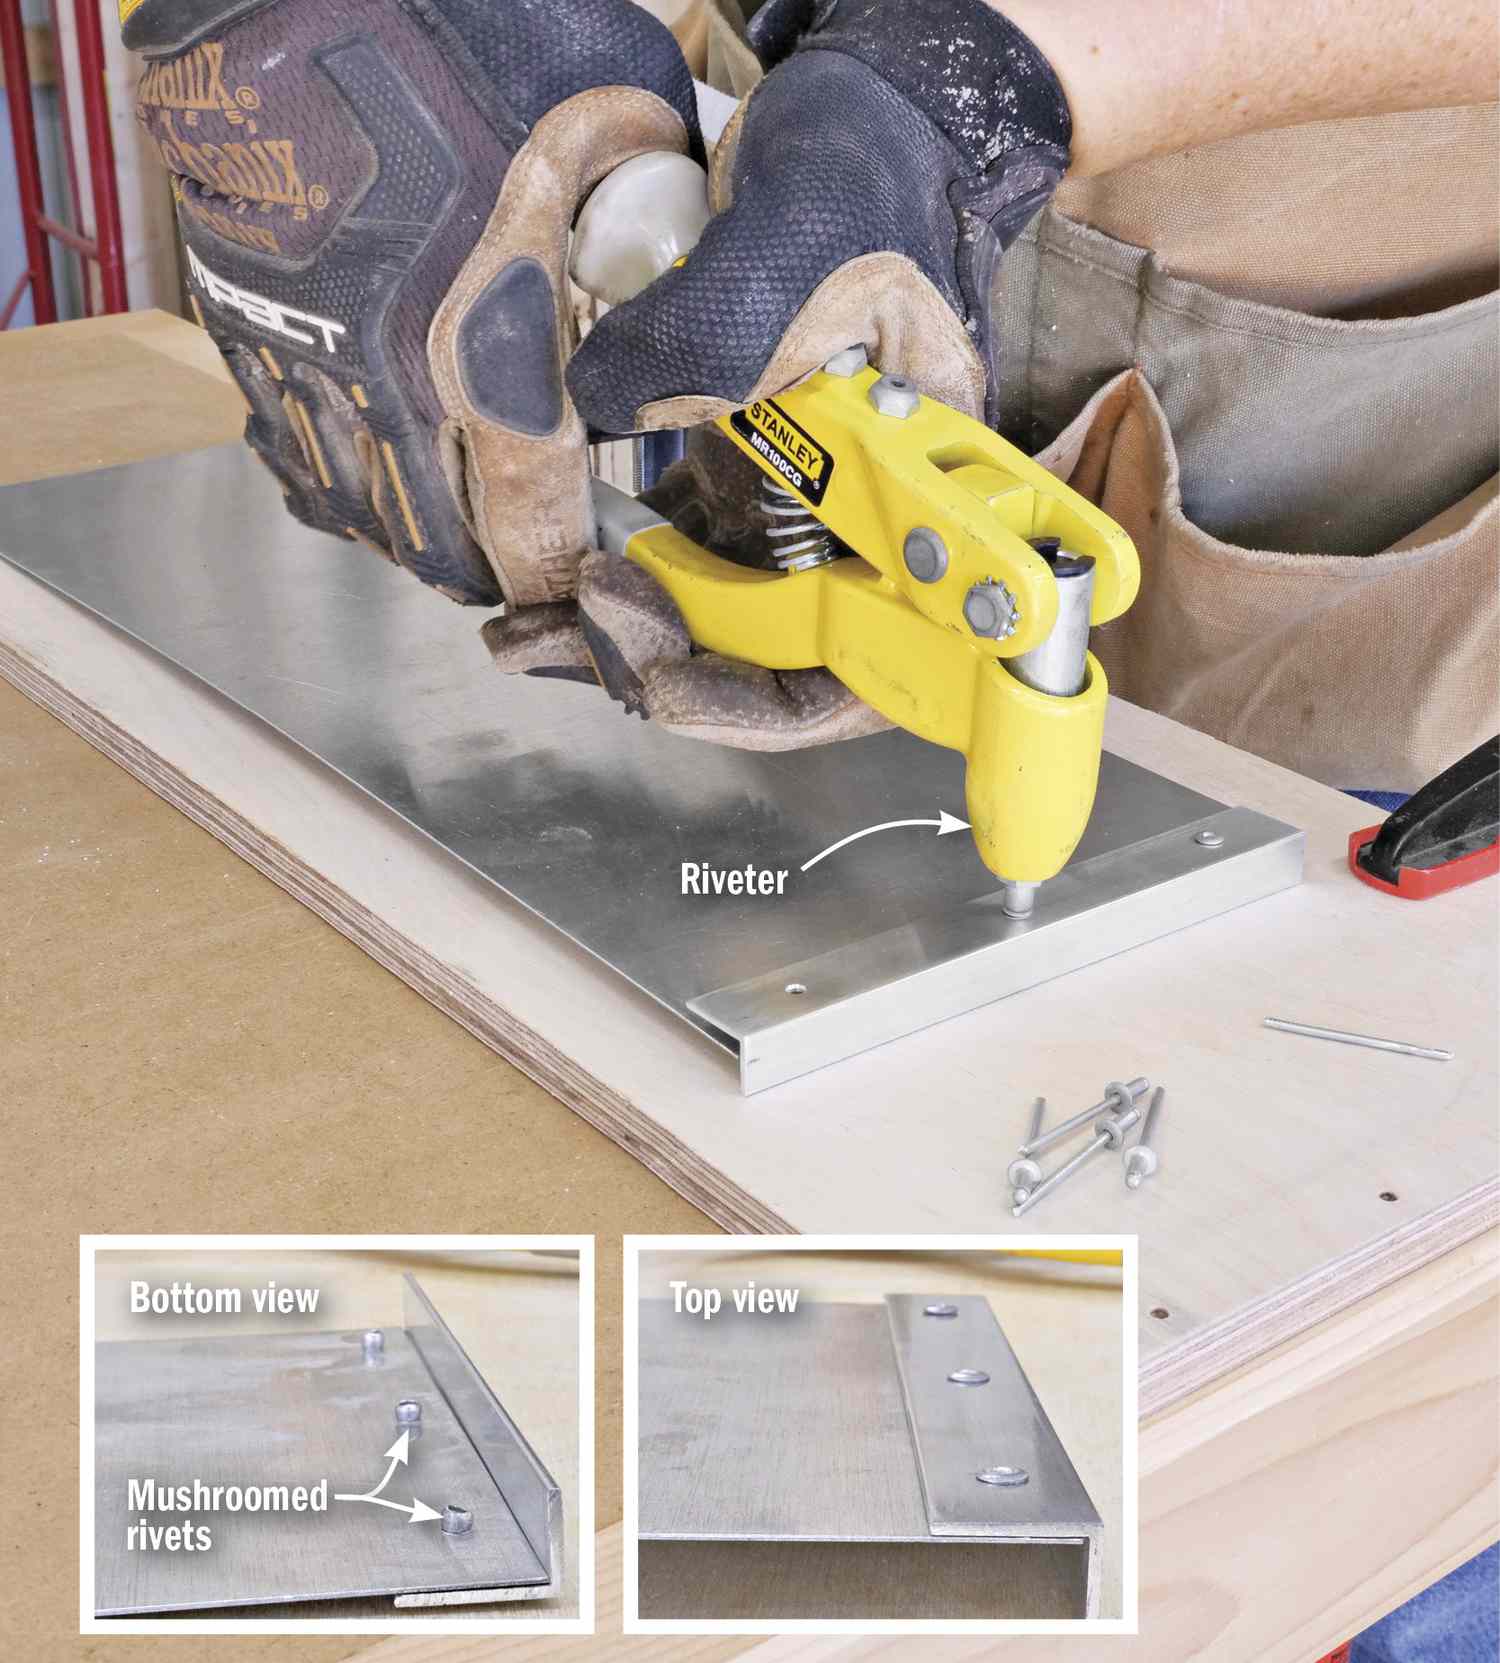
Push a rivet through the two holes, then set the rivet (photo, above).
A manual riveter and rivets will set you back about $30; for faster work, a pneumatic model runs about $100. If you ever need to disassemble a riveted joint, simply drill out the rivet.