Mortising Perfect-fit Box Hinges

Watch a video of this process.
After painstakingly crafting a beautiful box, you want the hinge installation to provide a perfectly aligned lid with a gap-free fit. Accomplishing that involves careful layout and work, but lies within the grasp of any woodworker with sharp tools.
Practice these techniques on scrap first, including installing the hinges. In addition to building your confidence, you'll see how the depth of the mortise affects the gap between the closed test pieces, and how the position of the barrel determines the gap between them with the lid open.
Choose your hinge
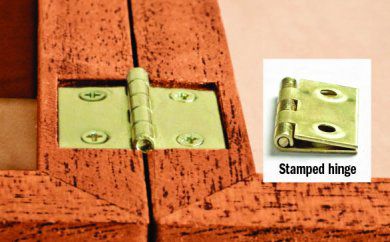
Box hinges come in two types: stamped (above)and milled (below). While both work well, the difference in their prices reflects the difference in fit and finish. Stamped hinges sell for about $2 per pair at home centers and hardware stores, and the small amount of play between the leaves and hinge pin won't affect the lid operation. But because the combined leaves are thinner than the barrel, the leaves must sit below the surface for a gap-free fit between the closed lid and box.
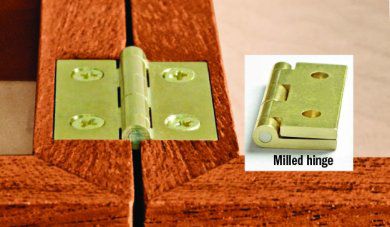
Milled hinges cost $25 per pair and up. For this investment, you get beefier leaves, a more finished appearance, a better fitting hinge pin, and larger, longer screws.
Start with layout
Make your own heirloom marking knife and gauge.
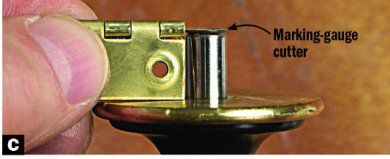
Each mating mortise in the lid and box must be ever-so-slightly shallower than half of the hinge's barrel thickness (the thickest portion of the hinge). This creates a gap-free fit between the box and closed lid. And positioning the hinge so the barrel centerline sits just outside the box provides the smallest possible gap when the lid is open, without causing binding.
Mortises sized for precise fits begin with precise layout. A marking knife and marking gauge score clean, narrow lines, so we recommend them for marking the hinge locations. Follow the steps in Photos A–D, following, to score exact-size mortises.


Rout away the bulk

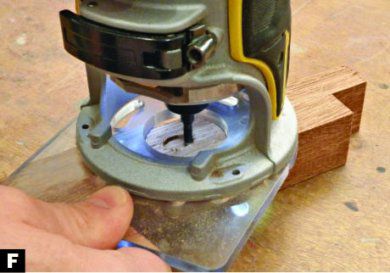

For cleanest cuts, use a down-cut spiral router bit. A trim router with a 1⁄8 " straight bit quickly removes the bulk of the waste in each mortise [Photos E–G, above]. The bit creates a flat bottom that serves as a reference when you chisel out the remaining waste. After completing the mortises on the box, use them to help lay out the mating mortises on the lid
A too-deep mortise causes the lid to bind, preventing it from closing. A too-shallow mortise creates a gap between the lid and box.
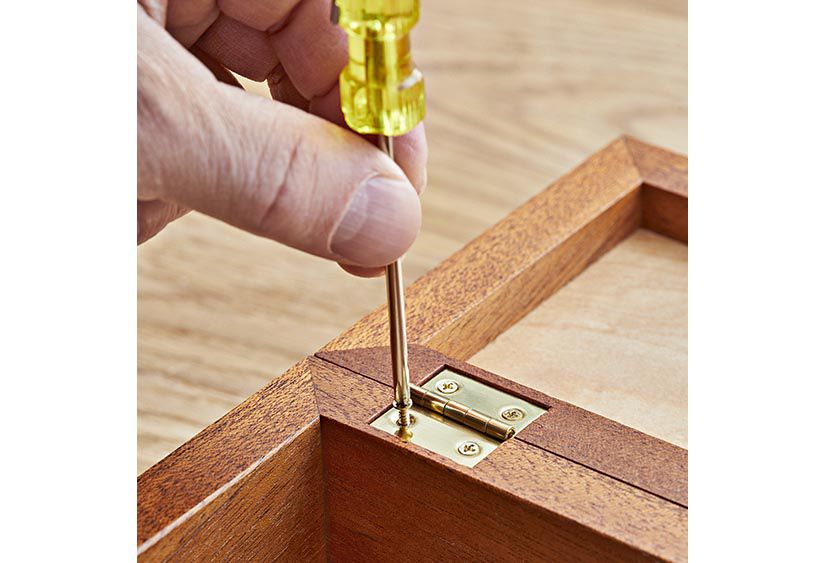
Mark, drill, and screw
After creating perfectly sized mortises, make sure the screws hold the hinges exactly where intended. Driving a screw into an off-center hole pulls the hinge out of alignment.
Brass hinges come with soft brass screws, so to prevent damaging them, drive steel screws of the same size while checking hinge placement. Drive the brass screws only for final assembly. And use a handheld screwdriver, which provides more control than a drill/driver.