5 need-to-know pneumatic nailing tips

Pneumatic pin, brad, and finish nailers make project assembly as simple as pulling a trigger. But these tools can also lead to costly (and painful) goofs if used improperly. Follow these pointers to get the most from any pneumatic nailer.
1. Don't leave 'em proud
Ideally, a nailer's driver should set the fastener about 1⁄16 " below the surface. Many newer nailers have on-tool mechanisms (shown below) to easily adjust drive depth. For nailers without on-tool adjustment, you can tweak the hose air pressure, and consequently fastener depth, using your compressor's regulator. Before using your freshly adjusted nailer, fire a few fasteners into a scrap piece of project stock to make certain they set to the correct depth. Keep in mind that hard or dense wood species, such as hickory or hard maple, may require additional air pressure to drive the fasteners.

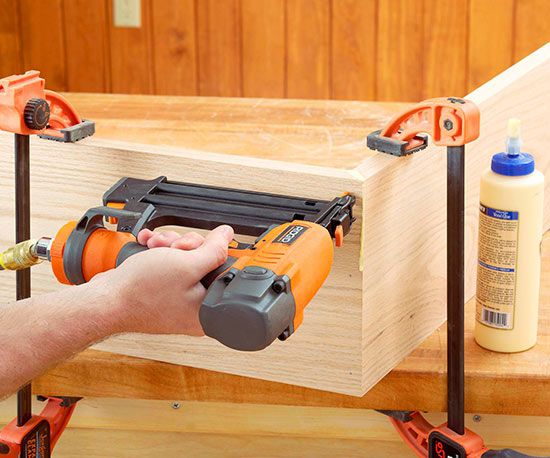
2. Rule of thumb: Keep it away!
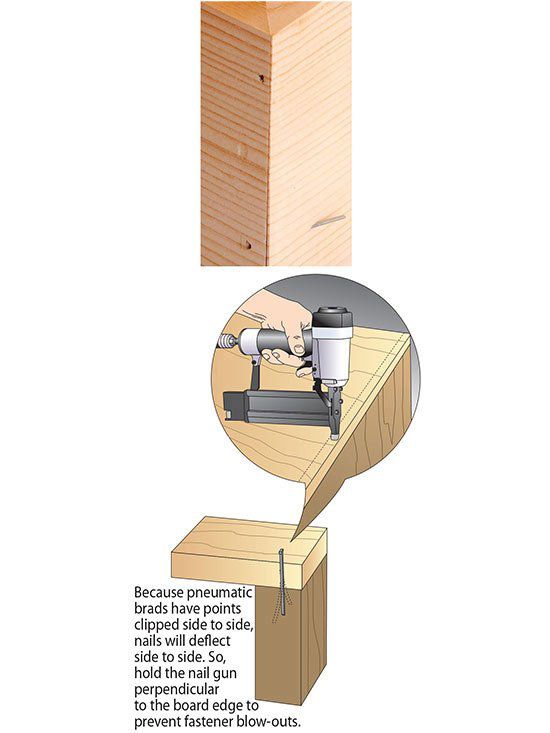
The finer the fastener, the more likely it will follow the wood's grain when fired. Occasionally, that tendency to wander causes the fastener to blow out the side of a joint, as shown. Now imagine the nasty surprise if your fingers were there. Never place your hand in the path of an off-course nail.
To help prevent stray fasteners, move your nailer so the chiseled point of its fasteners runs perpendicular to the wood grain. That way, the point will cut across grain patterns rather than following them (as shown at below).

3. Mind your magazine
While assembling a big project, you may not realize when your nailer runs out of fasteners: Many nailers still fire, leaving an empty dimple in the wood. Every time you fire your nailer, its driver punches forward, and if there isn't a fastener in line below it to absorb the impact, the driver slams into the wood at full force—potentially rounding or chipping its edges with each fire. This can lead to nail jams, partially set fasteners, or a broken driver.
To prevent this, make a habit of checking the nailer's magazine before you begin a nailing session, and keep an eye on your nailer's reload indicators, as shown above.
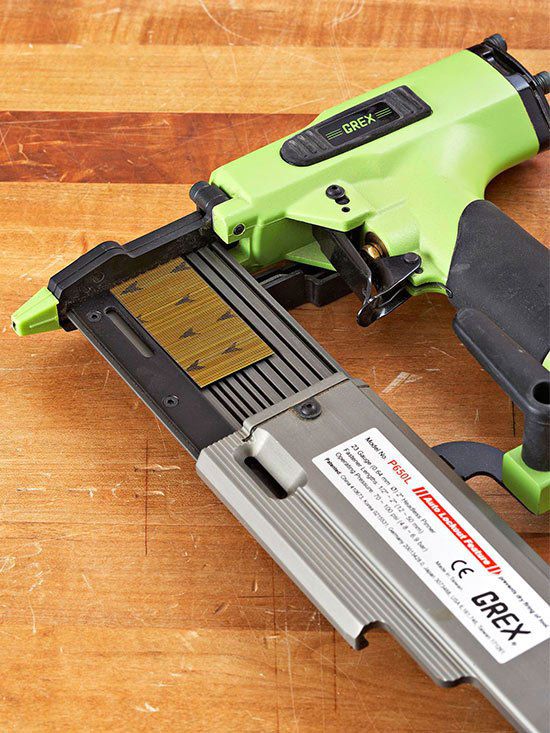
4. Put the pins in properly
Pinners shoot fasteners with no crowns or heads, making it difficult to determine which end is the point. Fortunately, pin manufacturers print arrows on fastener sticks to ensure that you load them chisel-point-down.
Loading them backwards can cause the tool's driver to strike the chiseled point, likely driving it with a glancing blow that leaves the pin proud of the wood. If done repeatedly, this can deform the tool's driver until it won't work properly.
5. Try a lighter touch
If you find an extra dimple near a nail hole (below), it likely resulted from pressing down too hard on the tool when pulling the trigger. Slight recoil from the nailer causes it to lift off the workpiece, and with the operator pushing down forcefully, the nose of the nailer strikes the wood again.
When using a nailer, apply just enough pressure to depress the nose tip. Depending on the weight of your nailer, you may not need to press down at all before firing.
