Pocket-hole pointers

Prepping the stock
Make precise, square cuts.
When making projects with right angles, such as cabinets or face frames, square cuts ensure square assemblies. Set your tablesaw's blade precisely 90° to the tabletop before cutting parts to size, and make sure your miter gauge is exactly 90° to the blade. Anything less will result in gaps or unsquare joints. If you cut stock on a mitersaw, tune it up as well.
Plan your work, work your plan.
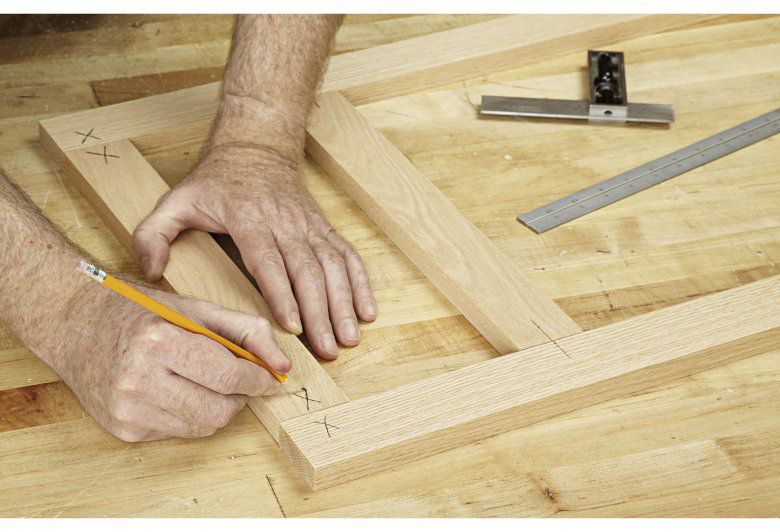
After cutting but before drilling, lay out project parts in the orientation you want, and then mark the back faces, as shown below. Be sure to also draw other layout marks, such as where a middle rail lines up with the stiles. Then drill pocket holes into the marked faces to prevent accidentally drilling into the best face.
Grab the best grain.
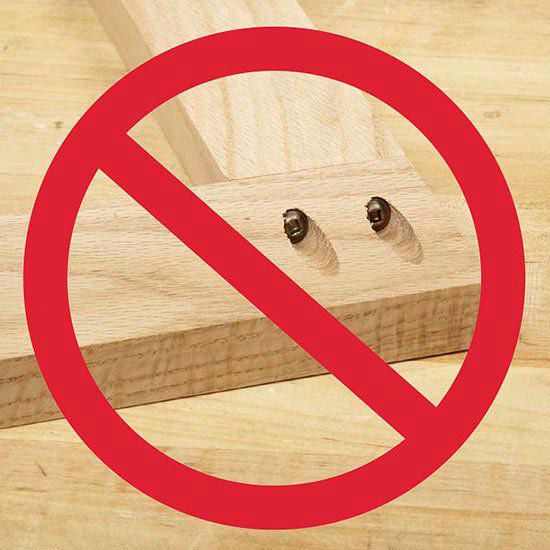
Drill pocket holes so screws thread into edge or face grain for maximum purchase; avoid screwing into end grain, as shown below.

Drilling the holes
Set the correct pocket depth.
For strongest joints, set the stop collar according to your jig's instructions. The pilot point should stop 1⁄8 " from the workpiece's end or edge, as shown below. Check this each time you use the jig to avoid accidentally drilling too deep.

High speed = cleaner holes.
A corded drill bores a cleaner hole than a cordless one because of its faster bit speed. Excessive tear-out around the pocket could indicate a dull bit. Keep a second bit on hand so you can switch to it when the first begins to dull.
Smooth the way.
Before drilling, spray the bit with a dry lubricant, such as Bostik BladeCote, to reduce drilling friction and prolong sharpness. Repeat after every 20 or so holes.
Clear chips frequently.
Pull the bit out when you've reached about half depth to clear the chips; then finish drilling. This reduces friction and bit dulling.
Match up different thicknesses.
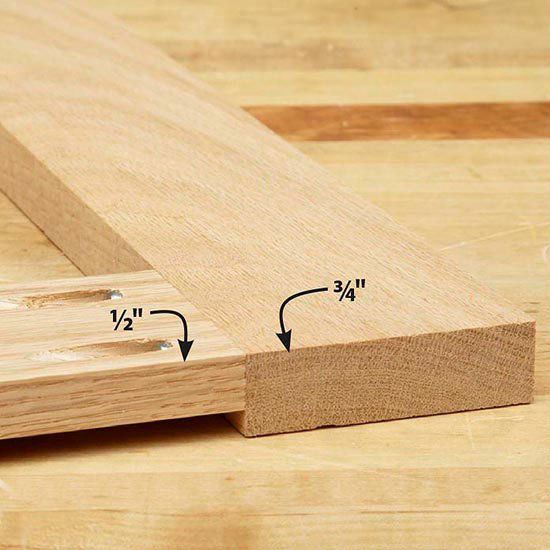
When joining boards of two different thicknesses edge-to-edge or end-to-edge, as shown below, set the pocket-hole depth for the thinner board. If joining boards end-to-face or edge-to-face, such as in a table apron to the top, set the depth for the thickness of the board with the pockets, regardless of which is thinner, and then use a shorter screw if necessary.
Screw and glue
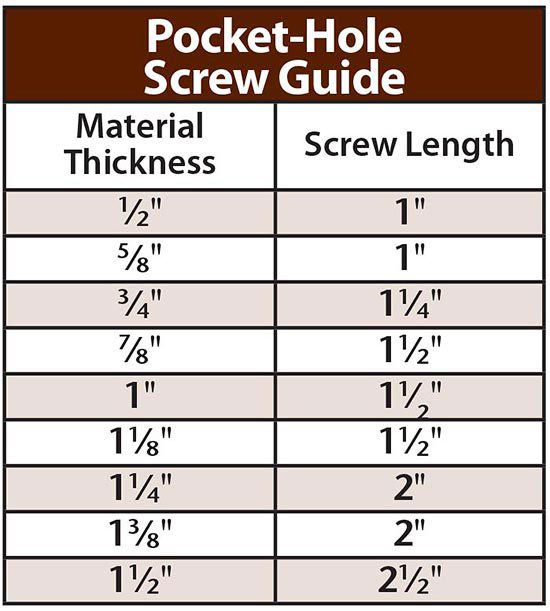
Choose the right screws.
Coarse-thread pocket screws hold best in softer woods, such as pine, cedar, and poplar, as well as plywood; use fine-thread screws for hardwoods. Choose the length based on the workpiece thickness, as shown in the chart below.

Most pocket-hole screws come with an oversized washer head for increased contact with the pocket shoulder, but you can also get screws with a smaller pan head for use with shallow pockets where a washer head would protrude above the workpiece surface. For outdoor applications, choose stainless steel or coated screws. Never use drywall screws -- they break easily while driving, and their tapered ("bugle") heads can split the bottoms of the pocket shoulders.
Don't forget the glue.
Screws alone make a plenty-strong pocket-hole joint, but adding glue helps prevent a joint from opening up due to seasonal shrinking and swelling.
Assembling the joints
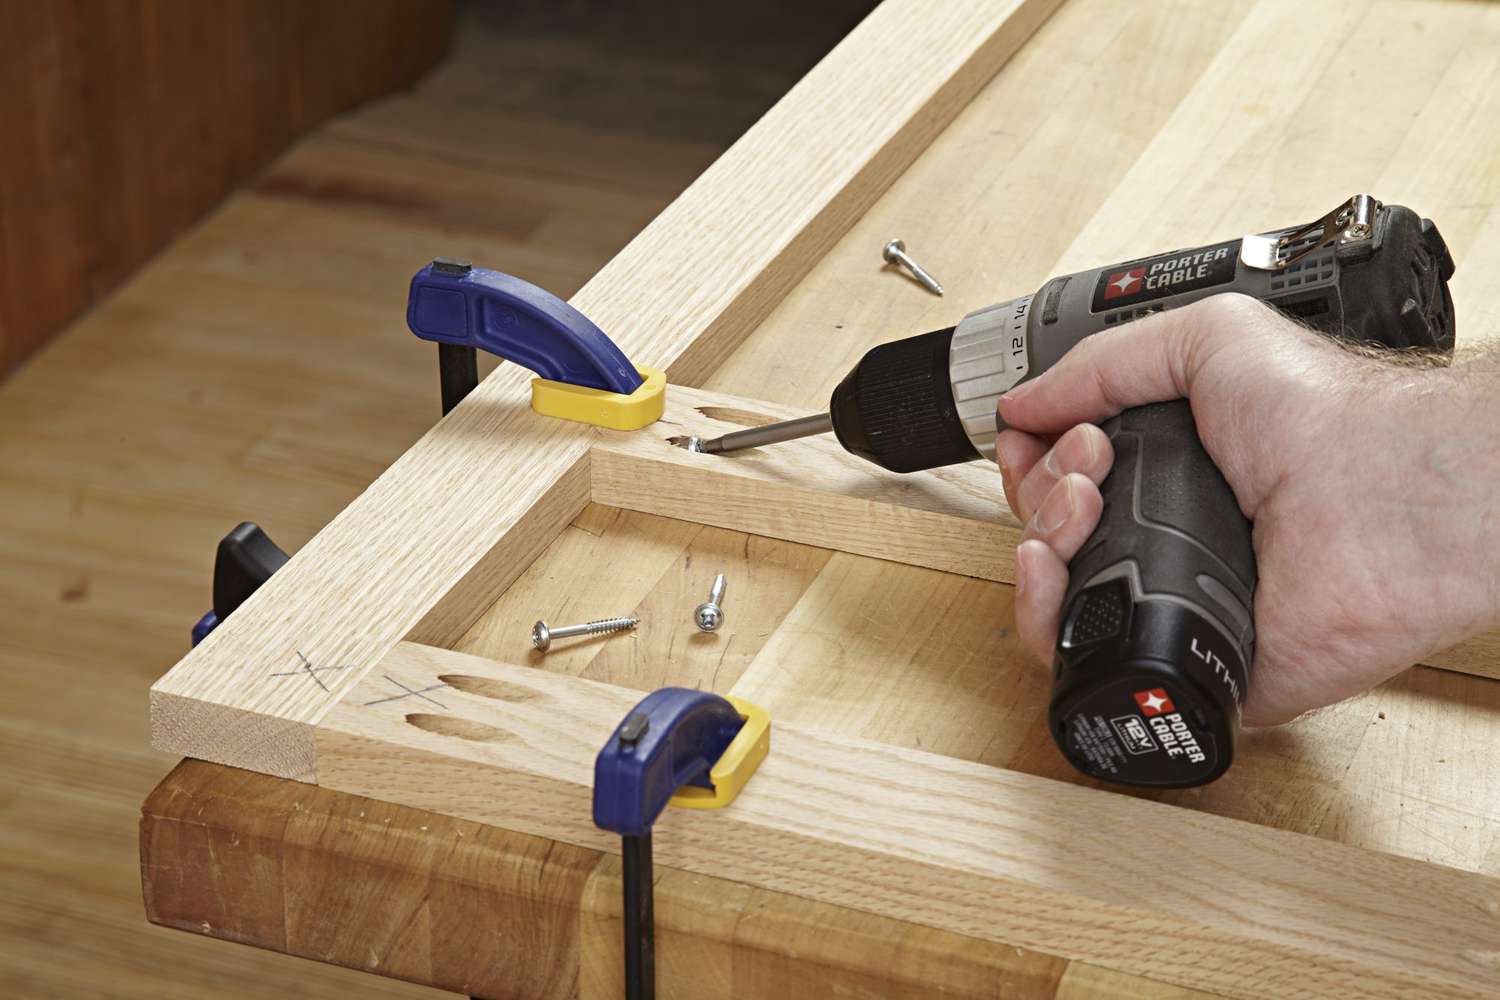
Clamp across a joint whenever possible, see photo below, to avoid the parts creeping out of alignment as you snug up the screws. Clamp parts to a perfectly flat surface so the front faces align. (If one of the parts is offset, shim below it, if needed.) When screwing an edge to a face, such as the table shown below, always clamp the assembly securely before driving screws.


Learn to drive a clutch.
Although handy for driving fasteners, avoid using an impact driver for driving pocket screws. Because you can't see the screw snug up against the pocket's shoulder, the tool's high torque can easily strip out the screw hole. Instead, use a drill or cordless screwdriver with an adjustable clutch, set to pull together joints without stripping out the holes.