Shellac: A Classic Finish for Today's Woodworker

Shellac still offers plenty of advantages to today's woodworker, such as its ease of use, its short drying time, and the variety of available colors. Shellac originates from the lac beetle, mainly from India and Thailand. Female beetles deposit secretions on tree branches, which is then scraped off, heated, and strained to remove impurities. It's rolled into sheets and allowed to cool and dry, then the sheets are broken up into flakes.
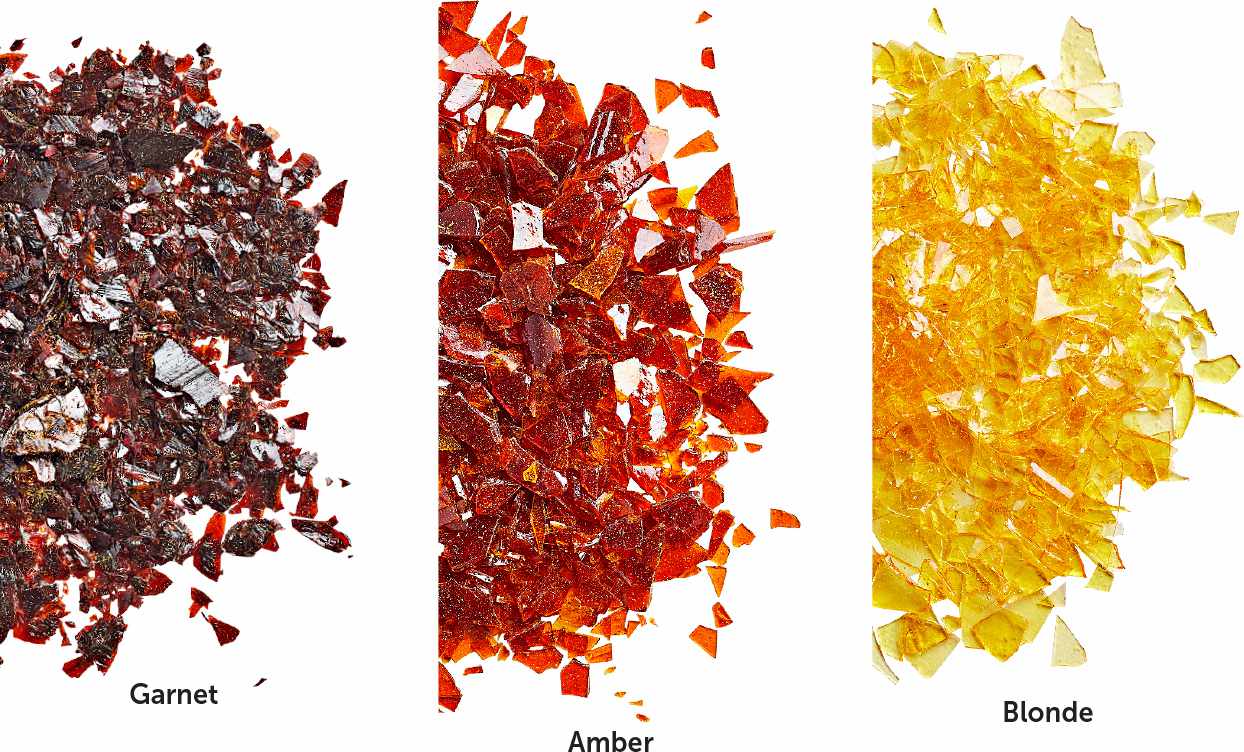
Depending on the type of tree the beetles feast on, shellac colors range from a dark garnet to brown, red, orange, and yellow, creating options that allow you to find just the right look for any project.

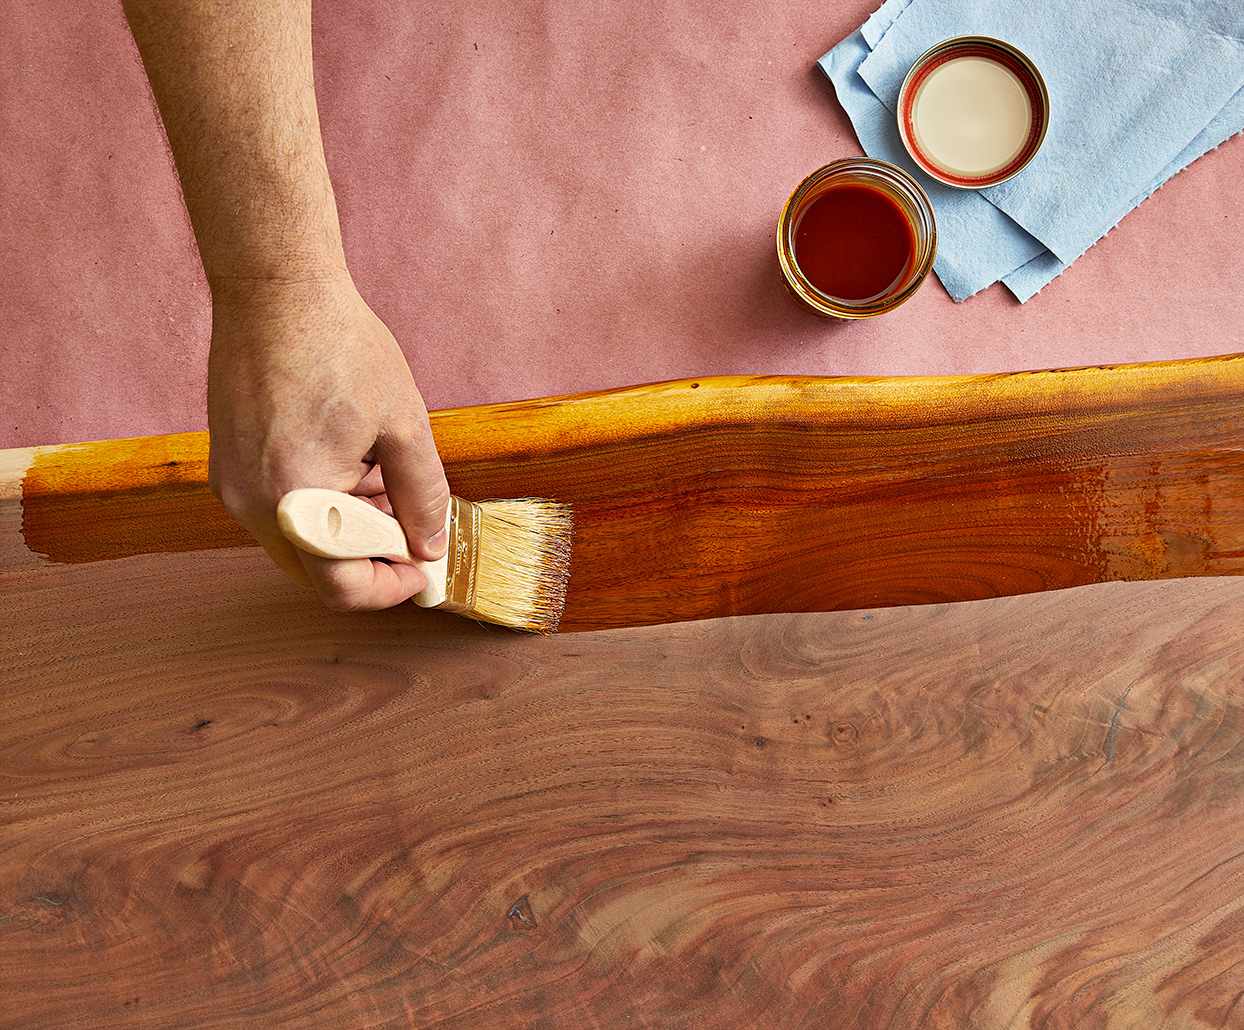
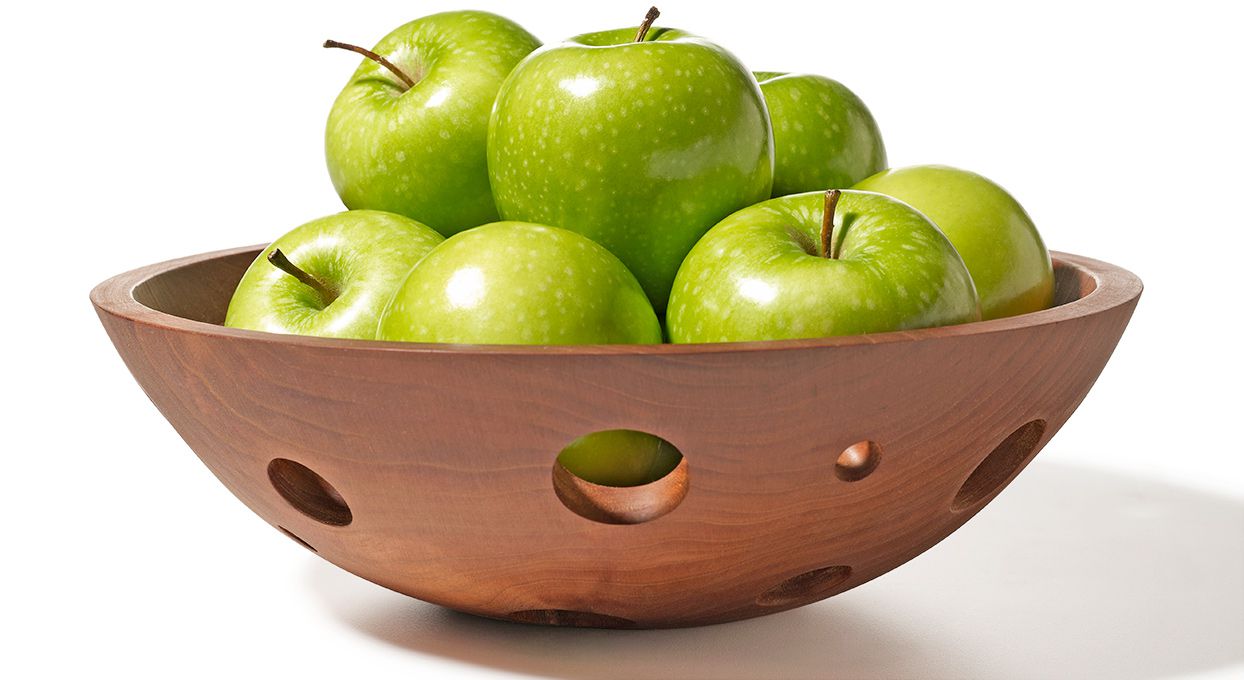
Amber and orange shellac impart a warm, rich look to woods like walnut, cherry, and mahogany while making the grain pop, opening image.
Bleached shellac provides the option of clear, light-blonde, and super-blonde shades for lighter-colored woods such as pine and maple. The final result? A finish that offers up plenty of advantages to meet a wide range of needs.
Add up the advantages
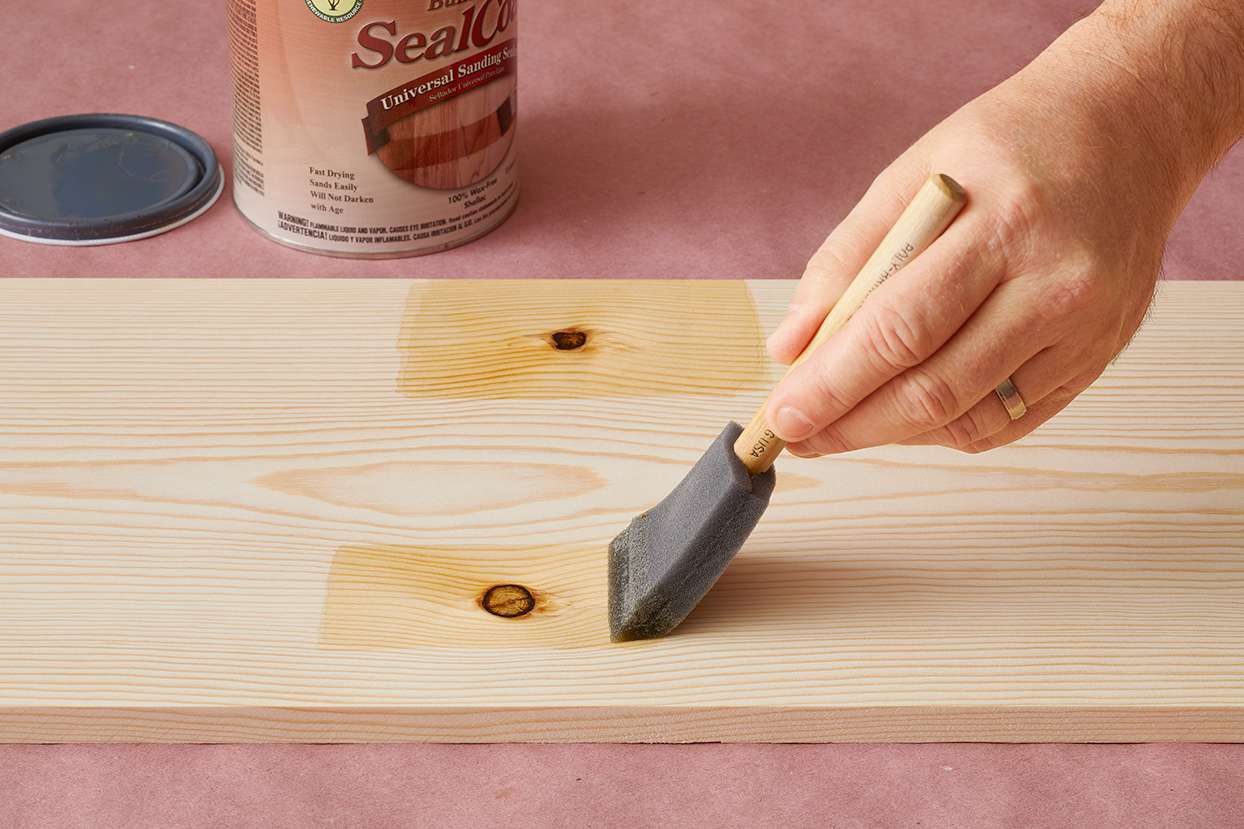
Sealant: If you need to deal with oil, wax, or resins in a material or project, a coat of shellac will bond well and seal the problem in, below.
Shellac works especially well on the interior of drawers with musty or smoky smells.
Quick drying: Shellac leads the pack when it comes to fast finishing. With quick-evaporating denatured alcohol as its solvent, shellac dries fast. That means you can build multiple coats quickly and complete those last-minute projects on time, below.
Food-safe: While most finishes are food-safe once they cure completely, shellac just might get top food-safety honors. It's used to coat vegetables, fruits, and candies, and even shows up in hairspray, shampoos, and pharmaceuticals. So you can use it without concern on any project that will come into contact with a child's mouth or food, below.
Low-VOC: While not completely free of volatile compounds, shellac is more environmentally friendly than many other finishes. The denatured alcohol base makes it less harmful to breathe and less smelly overall.
Mix or modify

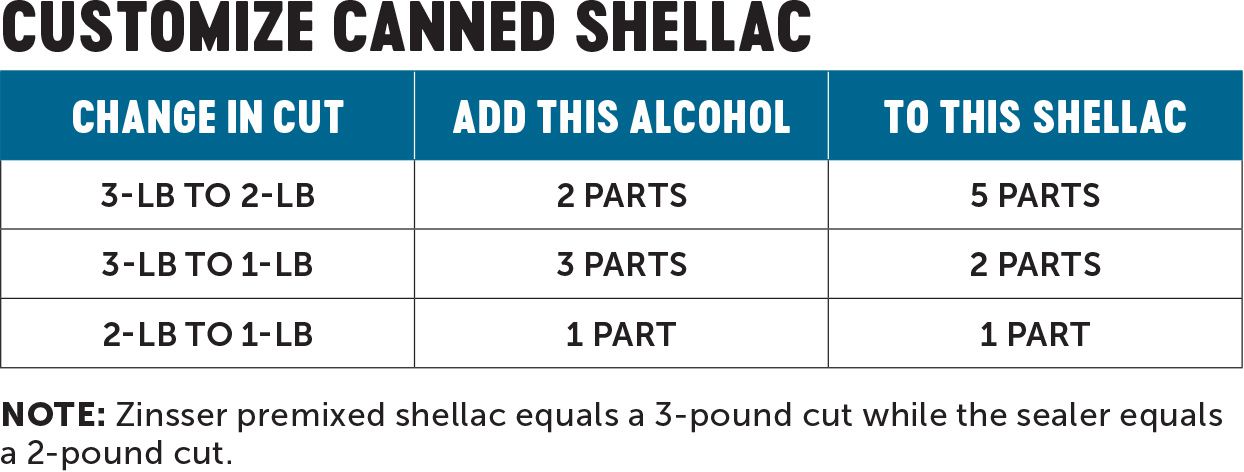
Shellac also offers a wide range of options for your project's needs, above, and it's easily modified to suit. One easy option: Thin an off-the-shelf shellac by adding denatured alcohol using this chart:
For even more options, mix your own from flakes using this chart:
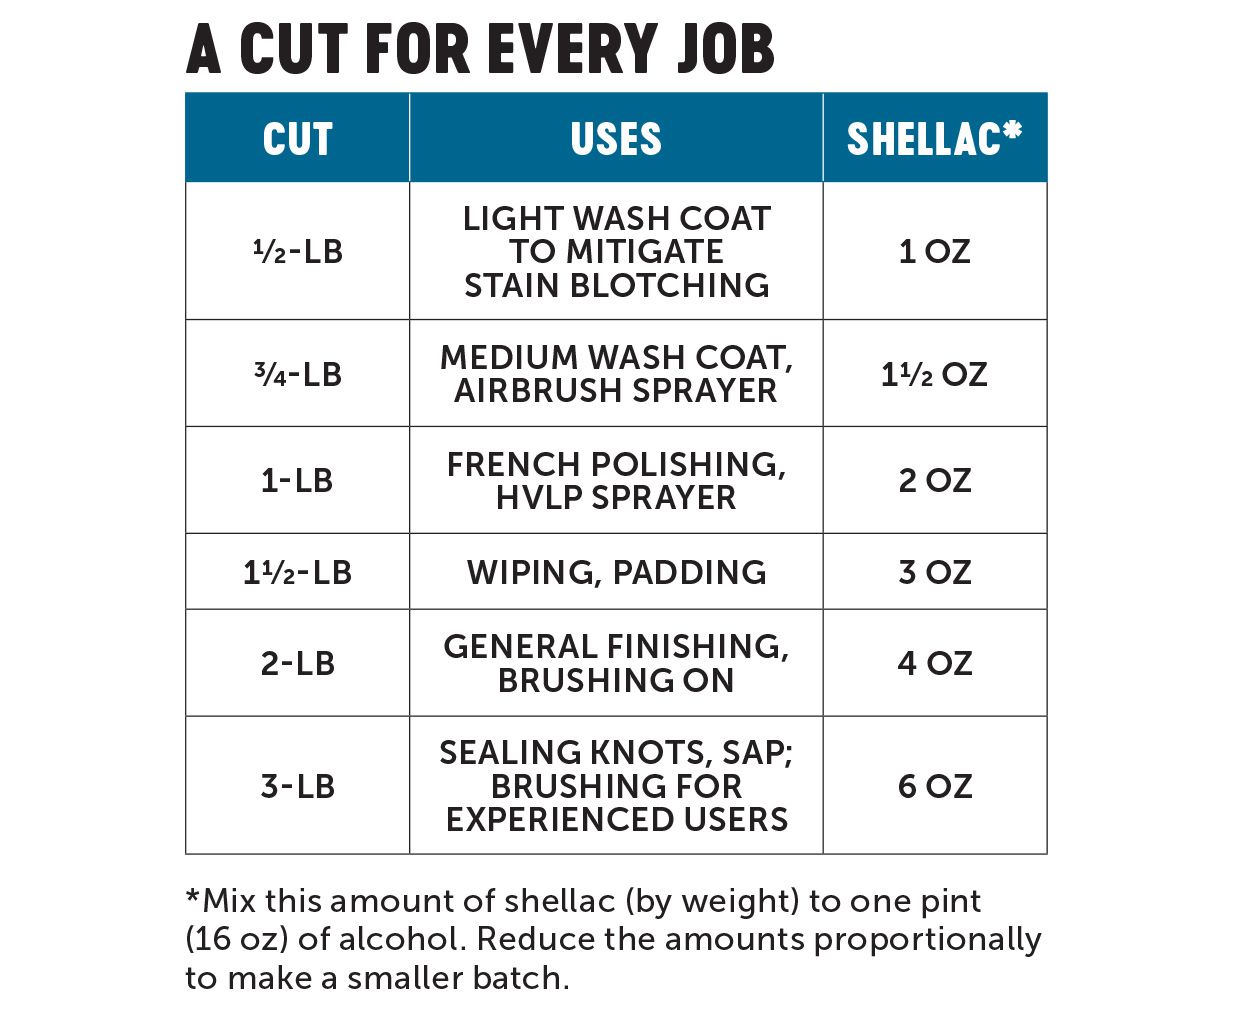
Note: Need a small amount of shellac? Mix 1, 2, or 3 oz of flakes with 8 oz (1 cup) of denatured alcohol to make a 1-, 2-, or 3-lb cut.
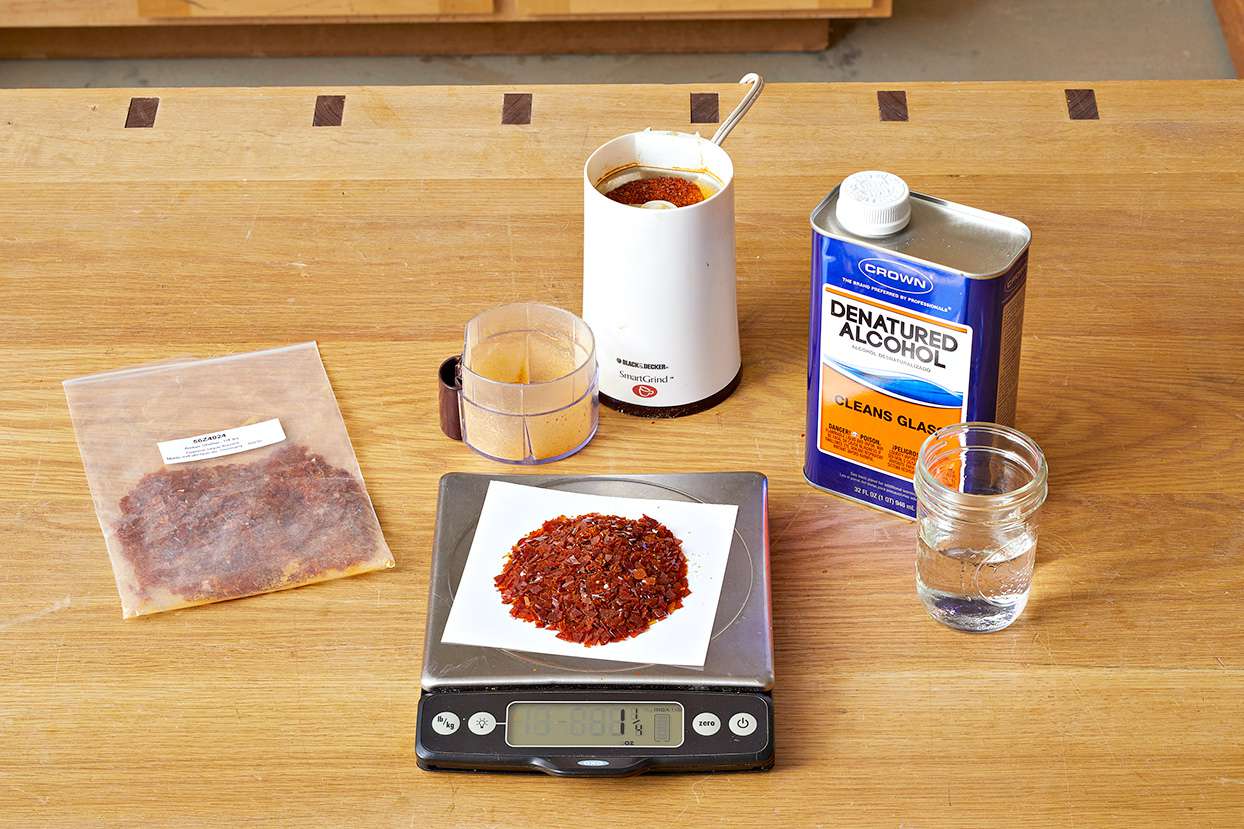
For results you can duplicate later, measure the flakes on a simple kitchen scale. Grinding the flakes with an inexpensive coffee grinder, above, helps the shellac dissolve faster and more completely. Stir the mix frequently during the next few hours, keeping the container covered. Allow the mix to dissolve overnight.
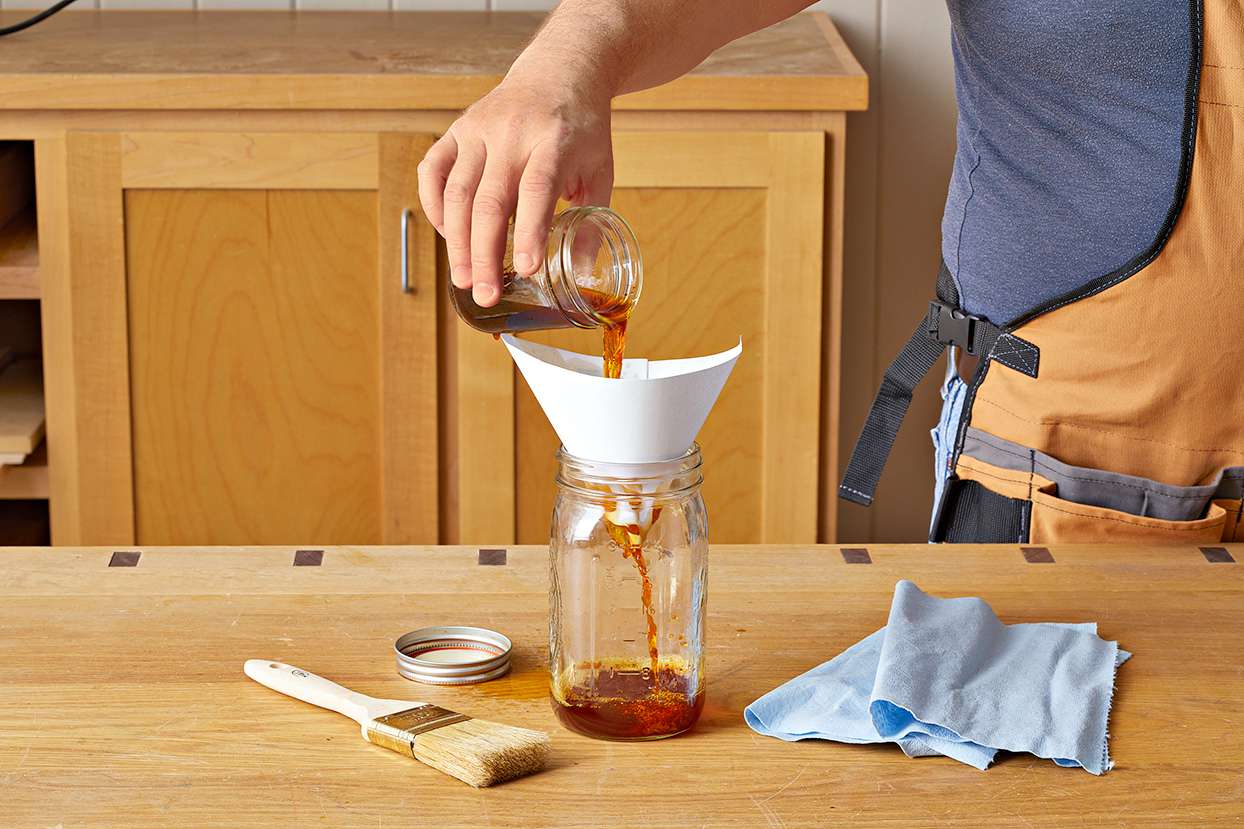
When you're ready to apply the shellac, stir the solution and filter it to strain out remaining debris, impurities, and lumps, below. Don't forget to label the mix. Include the flake color used, the cut, and the date you mixed it.
Speaking of dates, one of the few disadvantages of shellac, whether you buy it off the shelf or mix your own, is its limited shelf life. Mixing your own means you know its age and can mix up only what you'll need. Once you do that, you have about six months to use it up. Seal any unused mix well and store it in a cool place.
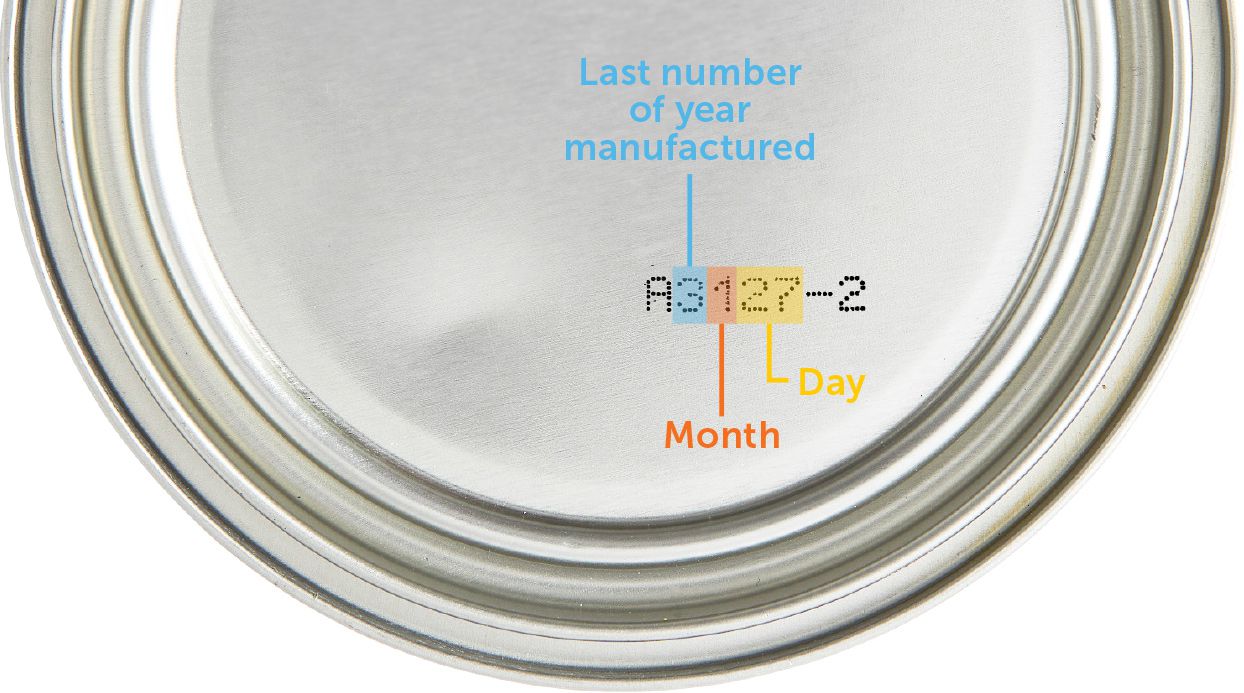
Knowing the age of a premixed can proves more challenging. An unopened can has a shelf life of about three years. To verify the date, you need to decipher the code, below.
Application ease
A variety of easy-application options also make shellac a finish to consider. A film finish, shellac requires sanding only to 220 grit. Keep in mind that darker shellac colors, just like stain, collect in and highlight scratches.
When you're ready to apply shellac, options abound. A brush, a sprayer, or a cloth applicator pad are all great options. A pad makes wiping on a 1- or 1-1/2-lb cut of shellac nearly foolproof, below, by building thin, predictable coats.
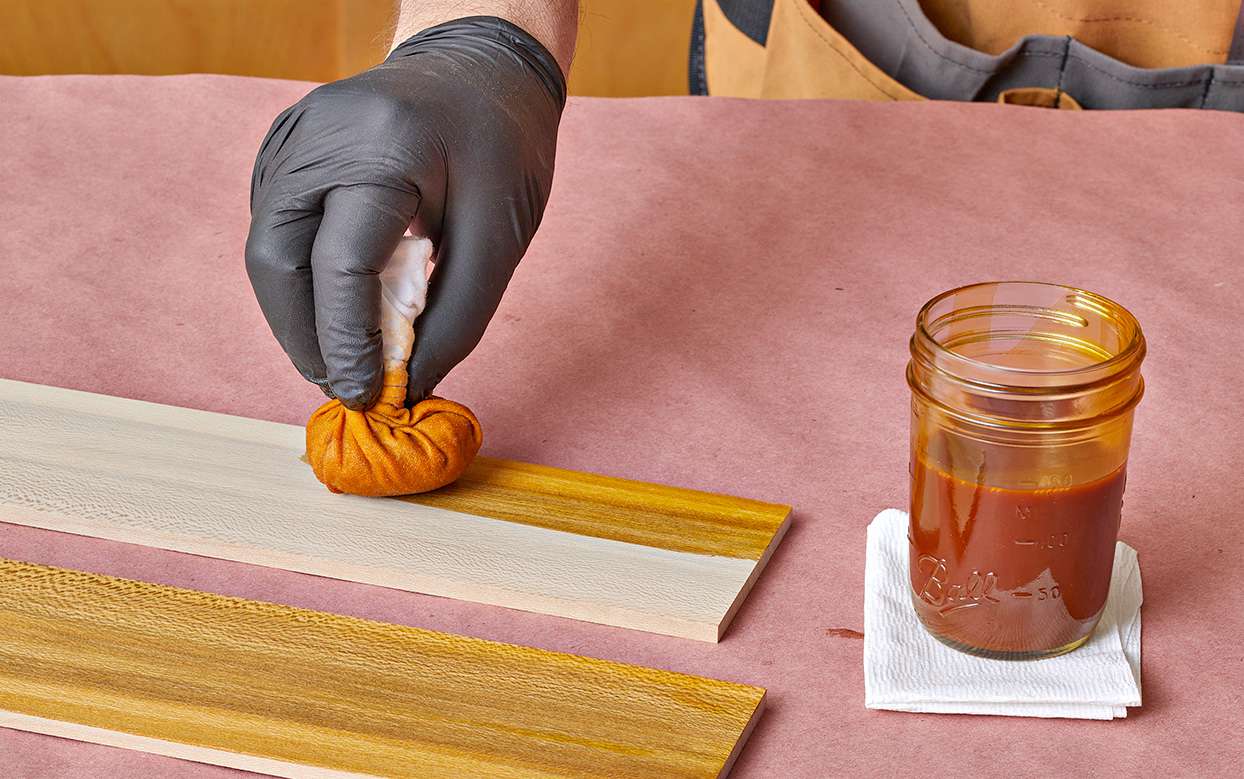
To make an applicator pad, wrap tightly woven, lint-free fabric, such as an old linen handkerchief or washed T-shirt material, around cotton batting or a ball of wool the size of a golf ball. Pour enough shellac into the inside of the pad to moisten the outside cover without dripping, and then gather the top to hold the material together and to provide a handhold.
Make long strokes across the wood, wiping outward from a moist edge without going over the same area repeatedly. Replenish the pad regularly with more shellac. If the pad begins to harden, add alcohol to soften it. Because the coats are thin, up to four coats may be required to build a good finish.
To build a faster finish and still get smooth results, use any fine-haired, natural-bristle brush, such as a badger-hair brush. As you apply the shellac, avoid brushing back and forth. Instead, lay the finish down in one pass, making long strokes outward from a wet edge.
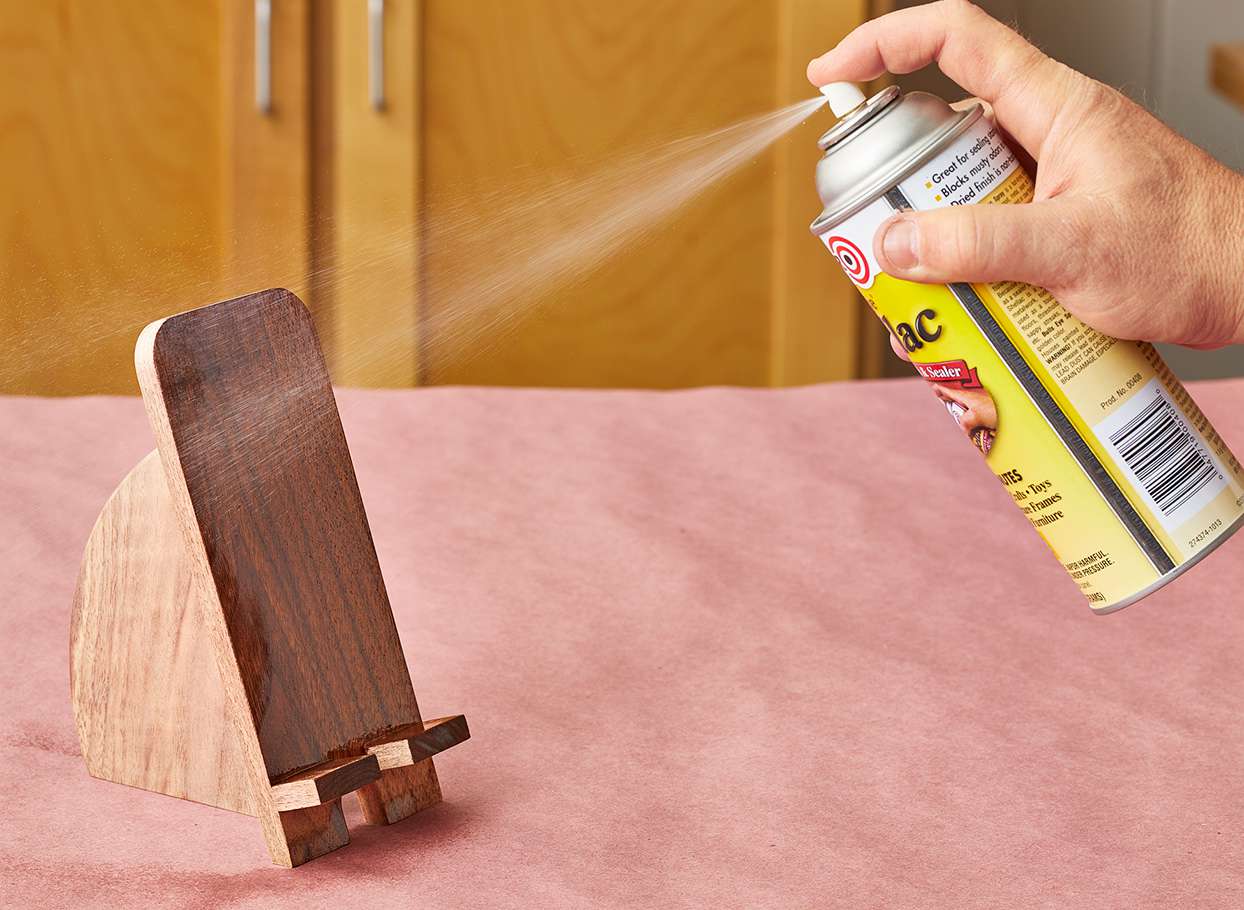
For the simplest application option, grab a can of spray shellac. It works best for smaller projects with hard-to-reach areas. Spray covers fast, and resists runs better than spray-can lacquer.
Regardless of the application method, allow sufficient time for the shellac to dry, about an hour for wiped-on or sprayed coats, and up to two hours if you brush it on. Sand between coats with 220 grit to remove any dust nibs that may have settled in.
Give shellac a try and you'll find a place for it in your shop. Start with an off-the-shelf solution, then customize as you gain experience to open up your finishing repertoire.