Shop Tested Shoulder Planes

If the router table and tablesaw are the jacks-of-all-trades of joinery, then the shoulder plane stakes its claim as the genius savant. This tool does one thing and does it well: Sharpened and properly adjusted, the shoulder plane reaches all the way into right-angle corners, removing the thinnest of shavings to let you quickly and accurately trim tenons, rabbets, and half-laps. Reach for those other tools for a close fit; then, reach for the shoulder plane for a perfect fit. We tested 11 popular models to find out which work the best. Here's what we found.
It starts with the right body

A shoulder plane specializes in making minute tweaks to the types of joinery that contain 90° stepped transitions—shoulders—such as tenons, rabbets, and half-laps. To do that, a shoulder plane's body should have a flat sole (the bottom) and sides 90° to the sole to register against a shoulder as it cuts. We checked each test model's sole and found them all flat out of the box. A few (the Veritas small and large and WoodRiver 93) crowned slightly when we tensioned the blade, but backing off the tension solved the problem. For the sides, most were perfectly perpendicular, with a few having a slight inward taper (bottom to top) that was not a problem.
A shoulder plane: Forever a sidekick, but always a star
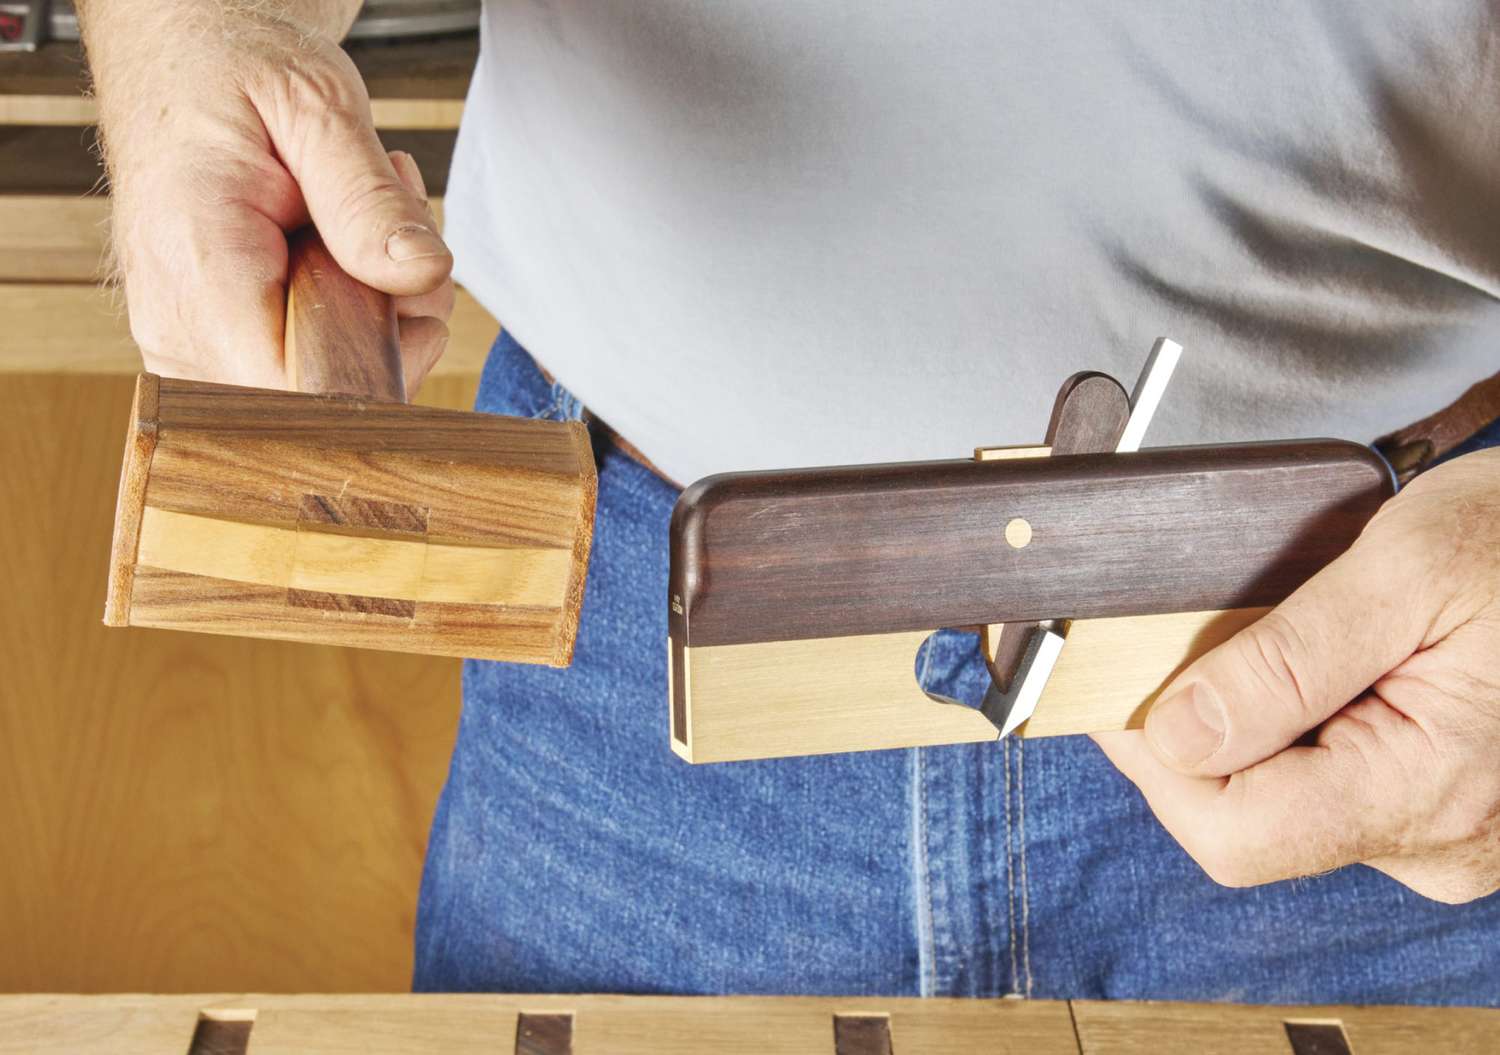
Rather than thinking of a shoulder plane as a primary tool, consider it a secondary tool, one that you use to trim certain joints for a perfect fit. For example, cut a tenon slightly oversize in thickness and width, then use a shoulder plane to gradually reduce the width and thickness of the tenon until it fits snugly into the mortise. Because a shoulder plane—set with a tight mouth and the blade shallow—typically makes fine shavings rather than showy ribbons of wood, you can easily sneak up on a fit without going too far.
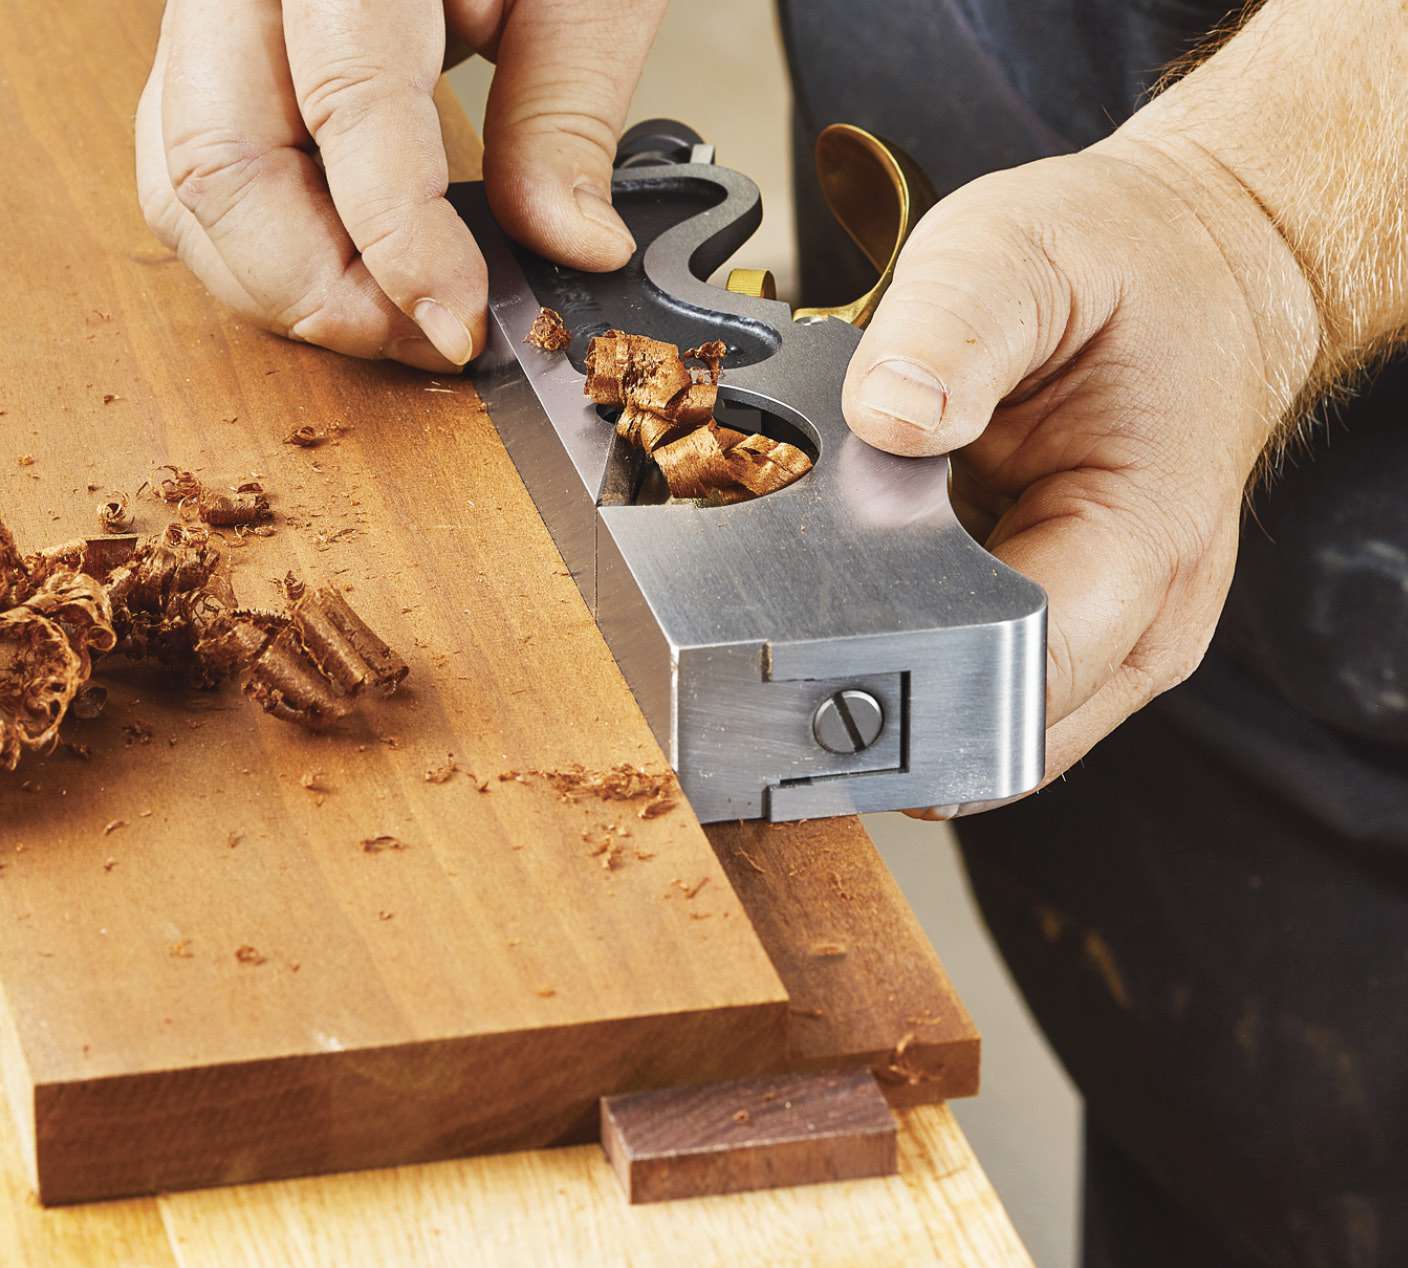

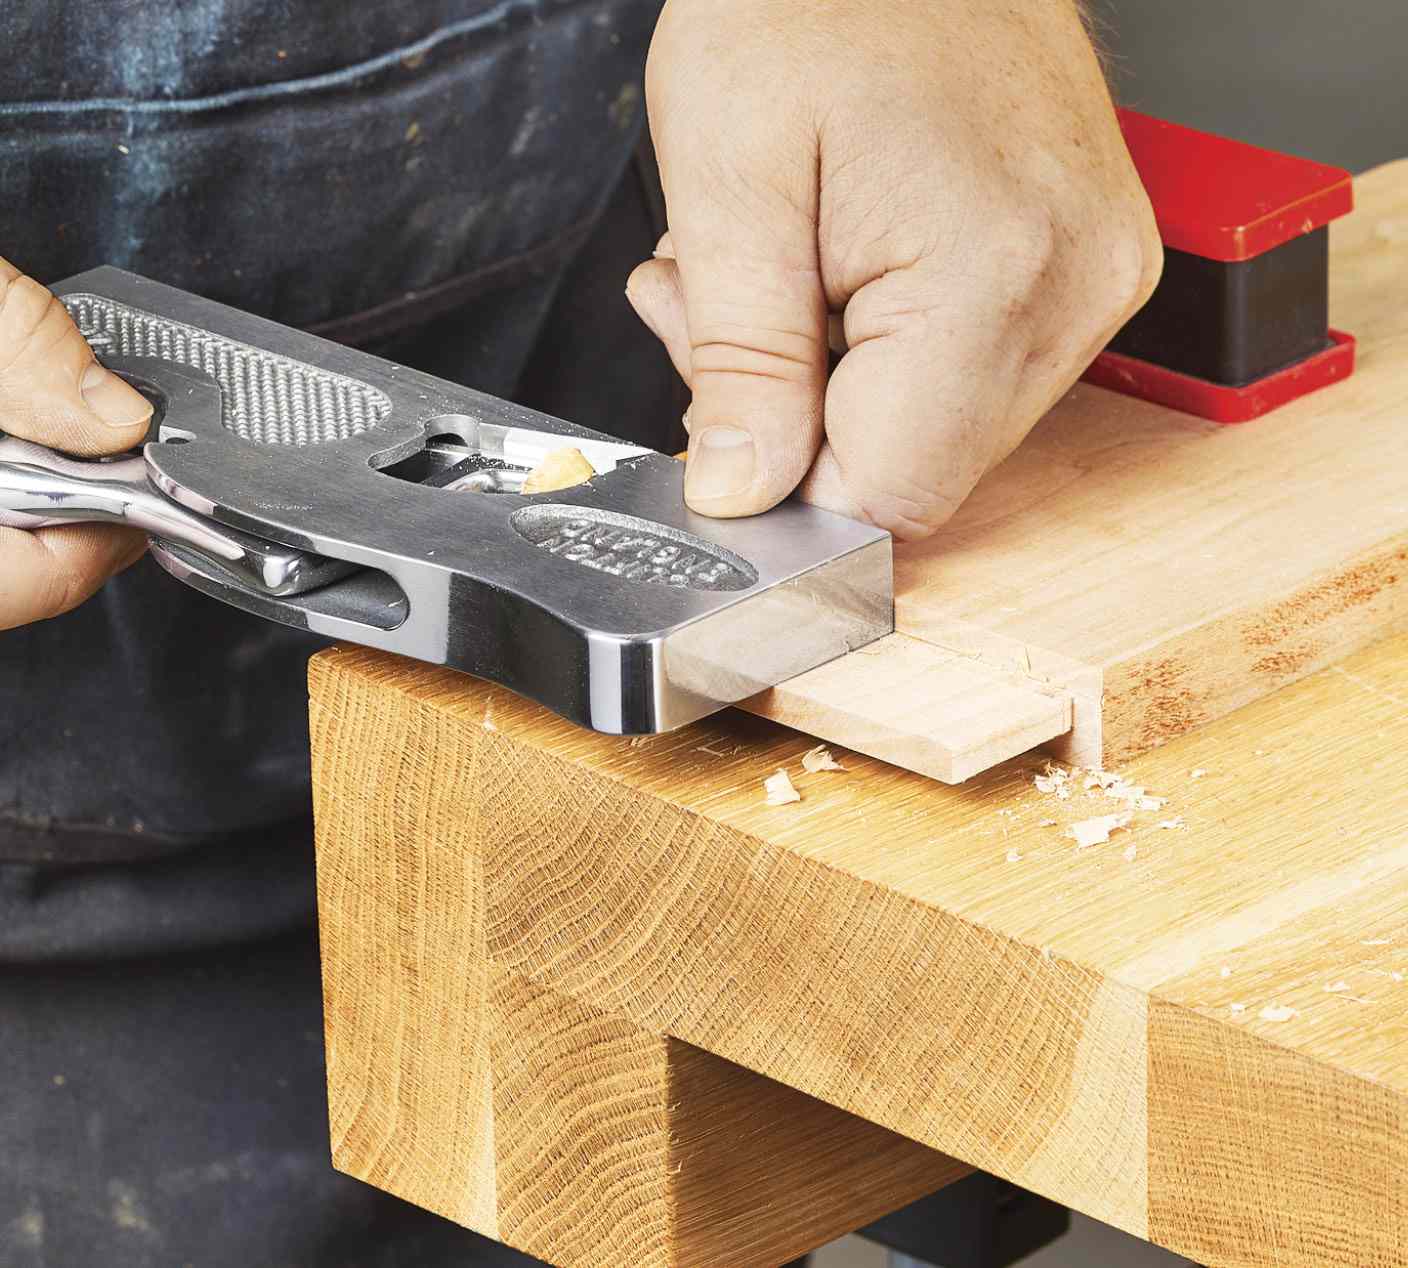
In addition to shaving the cheeks and edges of a tenon, a shoulder plane also trims the shoulders. The low blade angle makes cutting end grain a breeze. When trimming end grain, a larger shoulder plane's mass helps to make the cuts easier than that of a smaller model. To eliminate tear-out at the blade-exit point, either support the workpiece edge with a clamped-on scrap, or plane from the outer edges inward.
In the same way that you trim tenons, you can also use a shoulder plane to fine-tune rabbets, dadoes, and grooves. Ideally, you'd have a shoulder plane wide enough to cut the full width of the channel in one pass; more likely, though, you'll need to overlap passes with a narrower plane. That's why it's handy to have two or three widths of shoulder planes in your tool cabinet. You can also use a shoulder plane to trim right-angle elements of a routed or sawn profile, such as a fillet on a cove-and-bead table edge. It's cleaner than sanding and won't round over the crisp edges.
Add a sharp blade
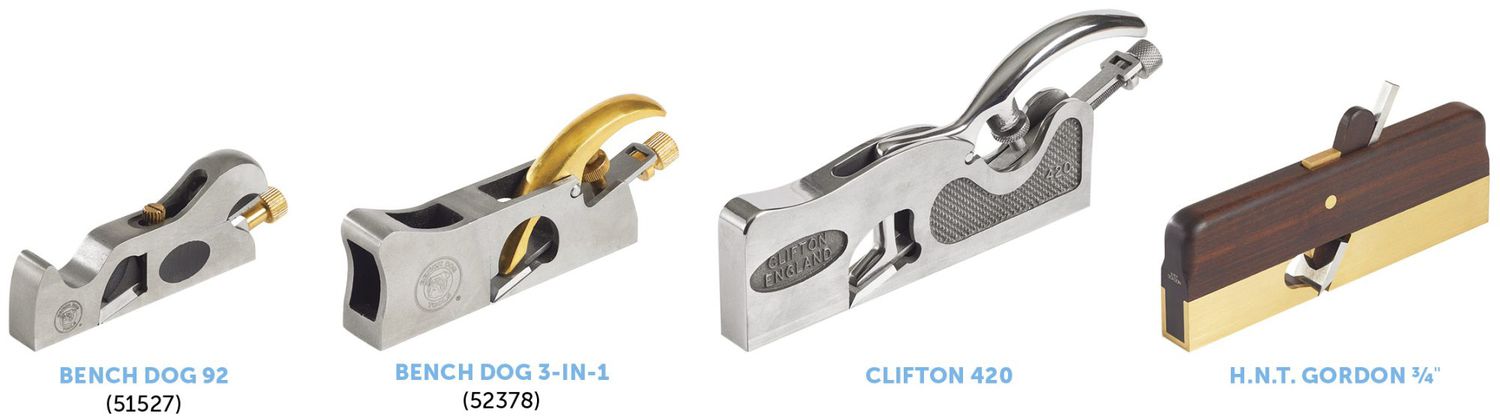
Out of the box, eight of the blade backs needed no flattening. The blades on the two Bench Dog planes and the H.N.T. Gordon required lapping to make them flat before we could begin sharpening.
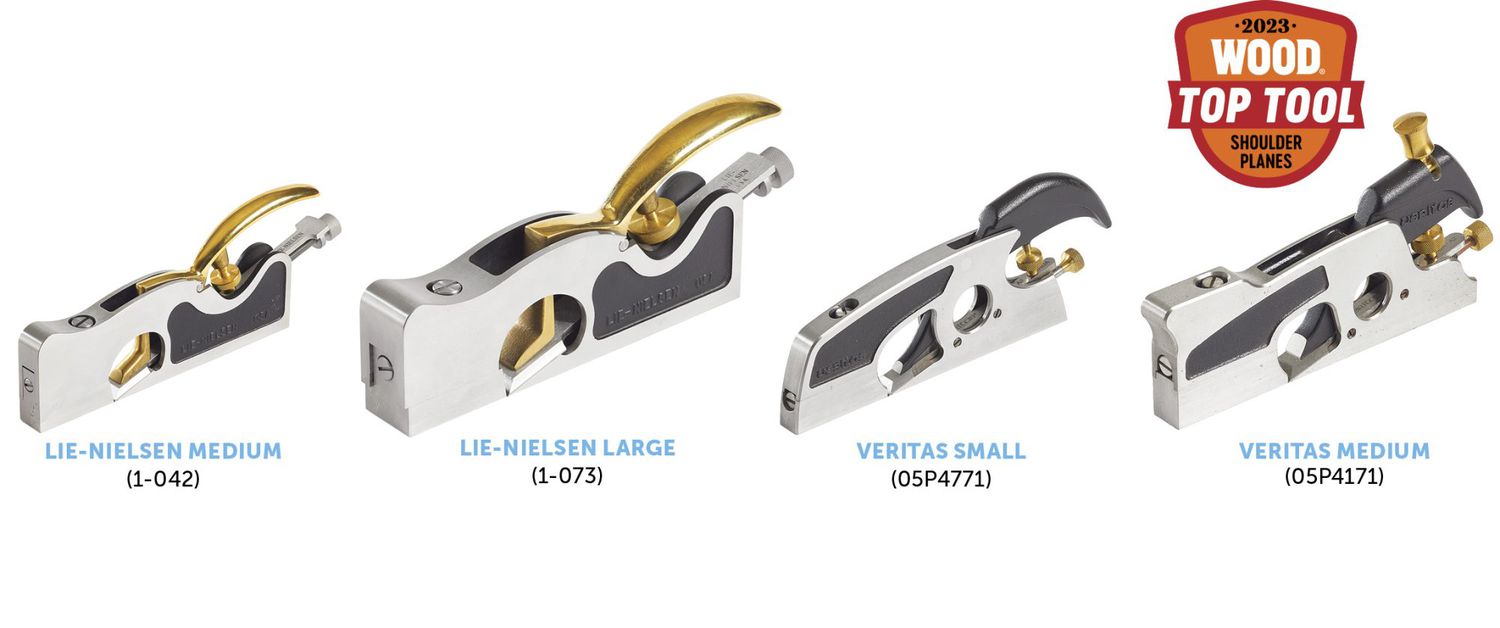
Blades on all but one test plane measured a few thousandths of an inch wider than the plane body to ensure the blade can cut into a 90° corner. But the blade on the Lie-Nielsen large plane exceeded its body width by .03". This requires you to reduce the blade protrusion on the shoulder-facing side to a few thousandths of an inch to prevent the side of the blade from scraping the shoulder.
Most blades came with 25° bevels;the H.N.T. Gordon blade was 30°. We sharpened each using a honing guide and ceramic waterstones. The shape and thickness of the Gordon blade made it difficult to secure in the honing guide; to be fair, Gordon's directions call for freehand sharpening. The blades made of hardened tool steel, rather than softer carbon steel, took longer to sharpen but stayed sharp longer. (See the blade materials in the chart below.)
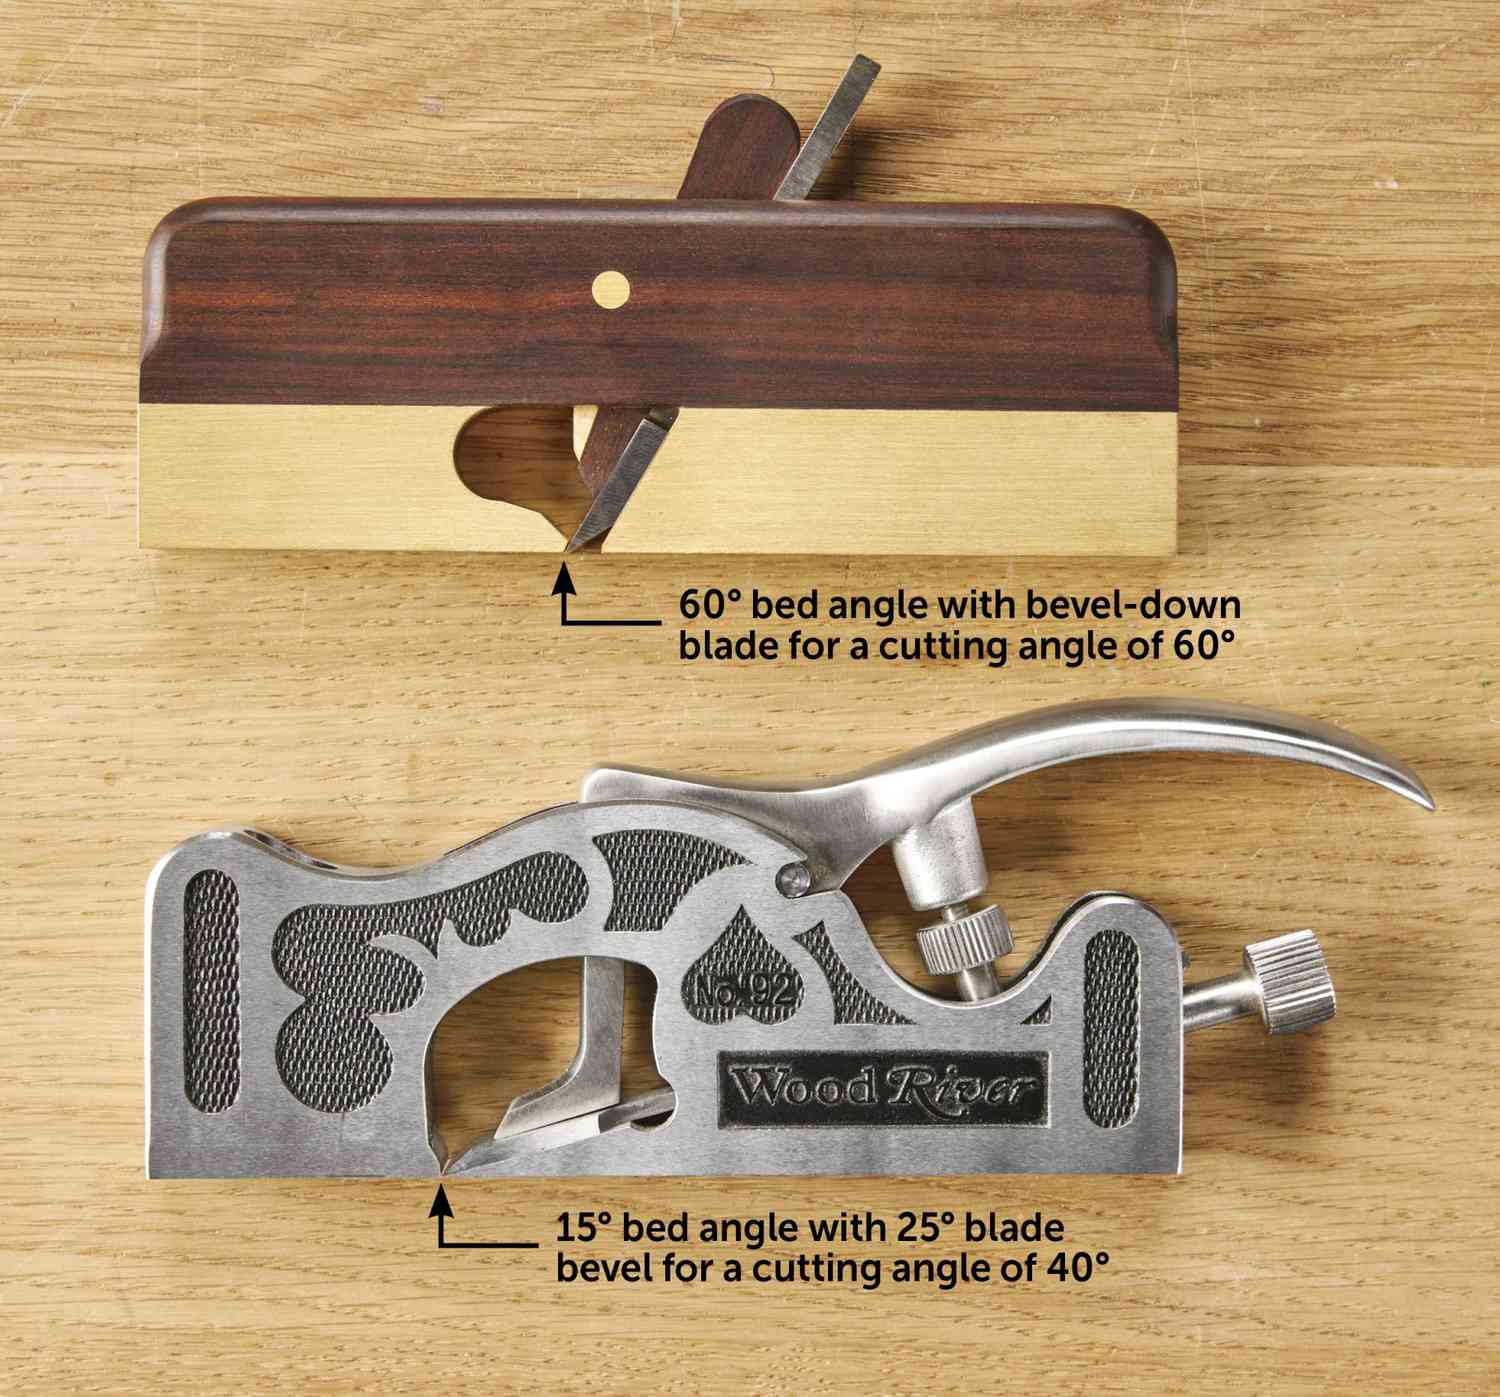
The bed angle for most of the planes' blades ranges from 15° to 19°. This combines with the blade bevel for a cutting angle of 40° to 44°. That's perfect for most long, cross, and end grain. The Gordon uses a 60° bed angle, but the 30°-bevel blade mounts bevel down, so it cuts as well as the others. If you reverse the blade (bevel up), this plane acts like a scraper.
Fine-tune cutting depth
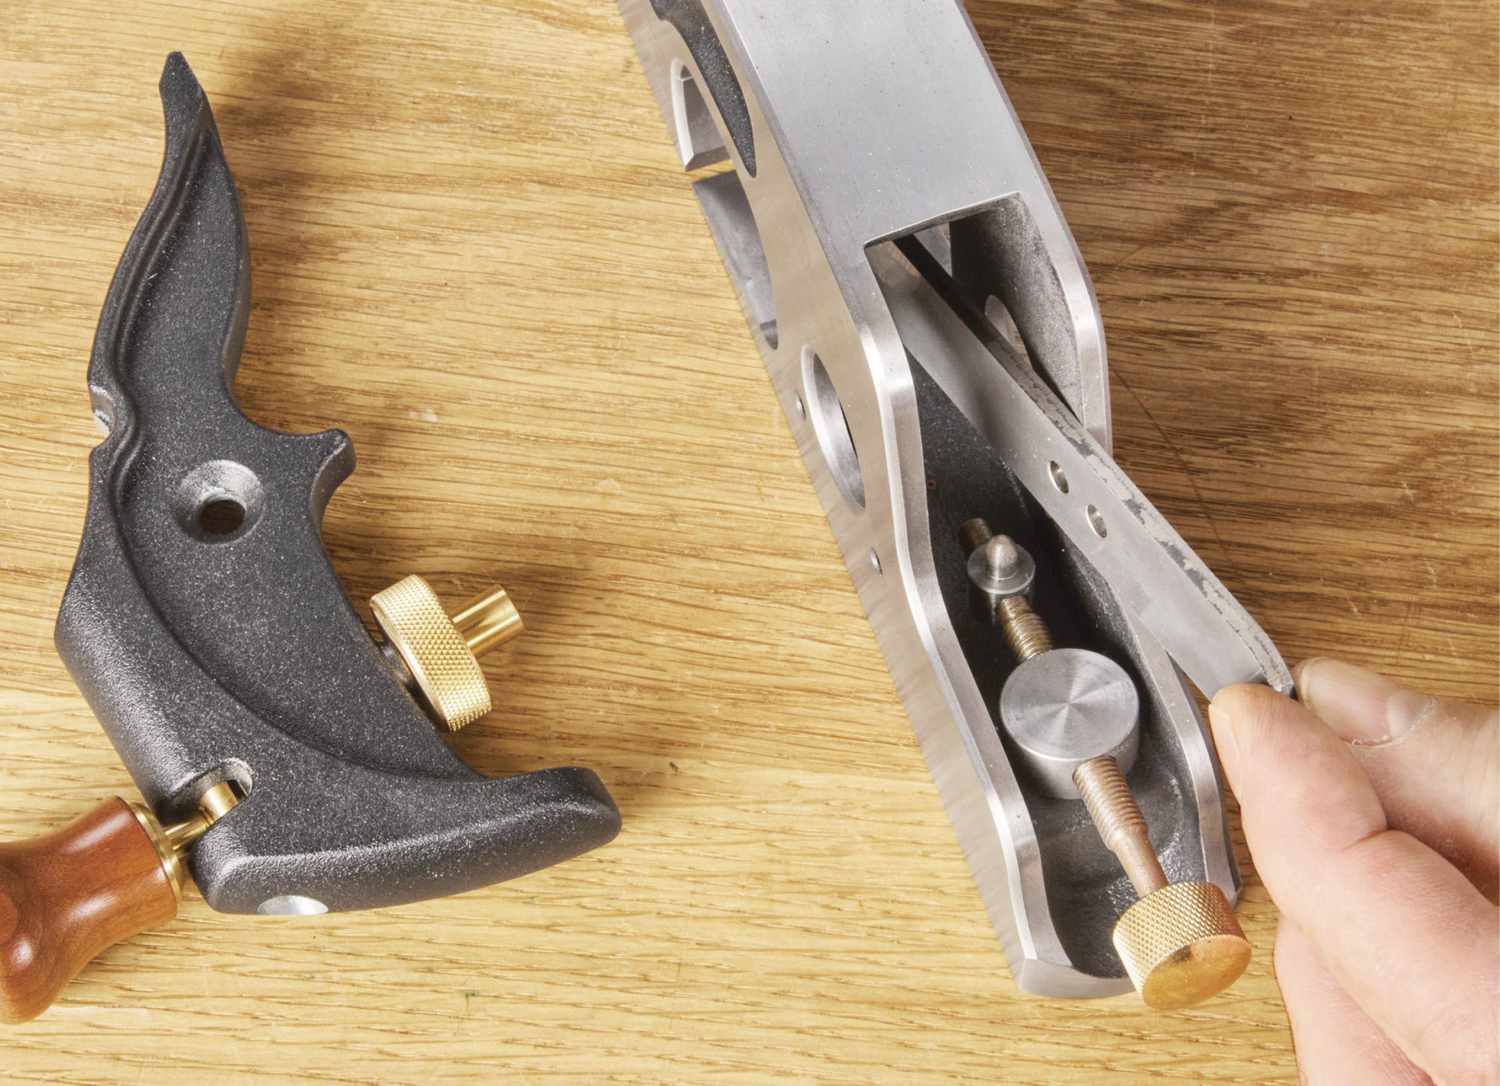
All but one plane use a screw mechanism to move the blade forward and back to set cutting depth. We like the adjusters best on the Veritas and Lie-Nielsen planes because they showed no backlash when changing directions and easily dialed in a perfect depth. The Veritas planes use a pivoting Norris-style adjuster, shown above.
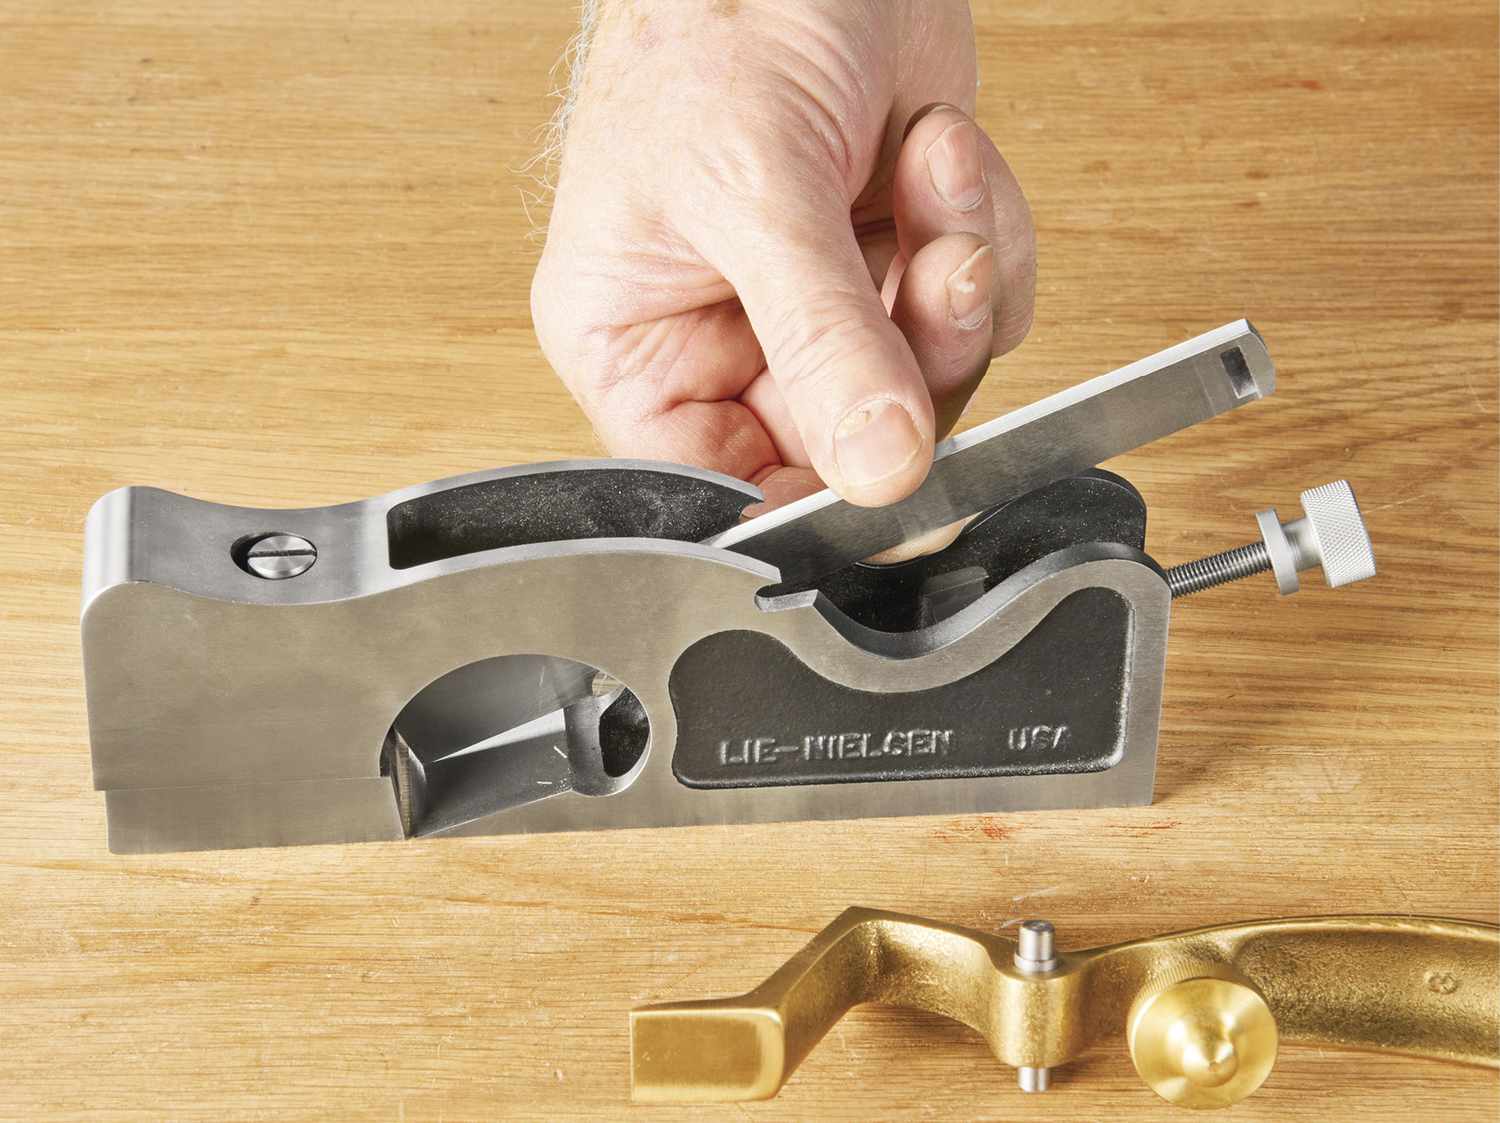
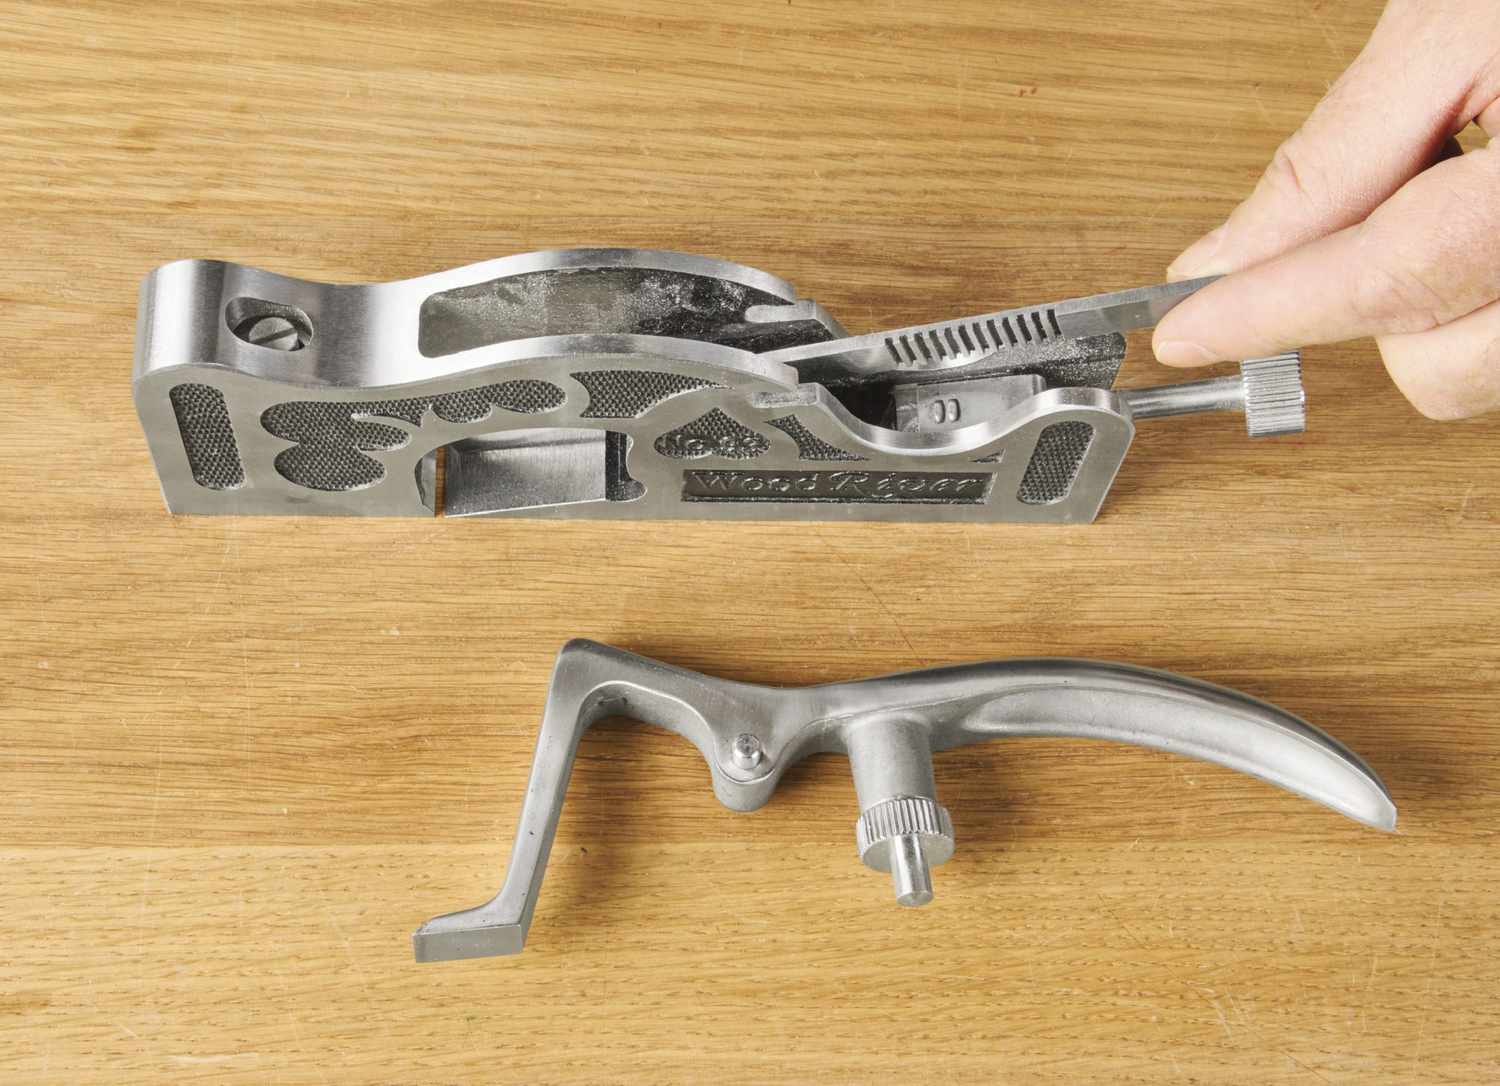
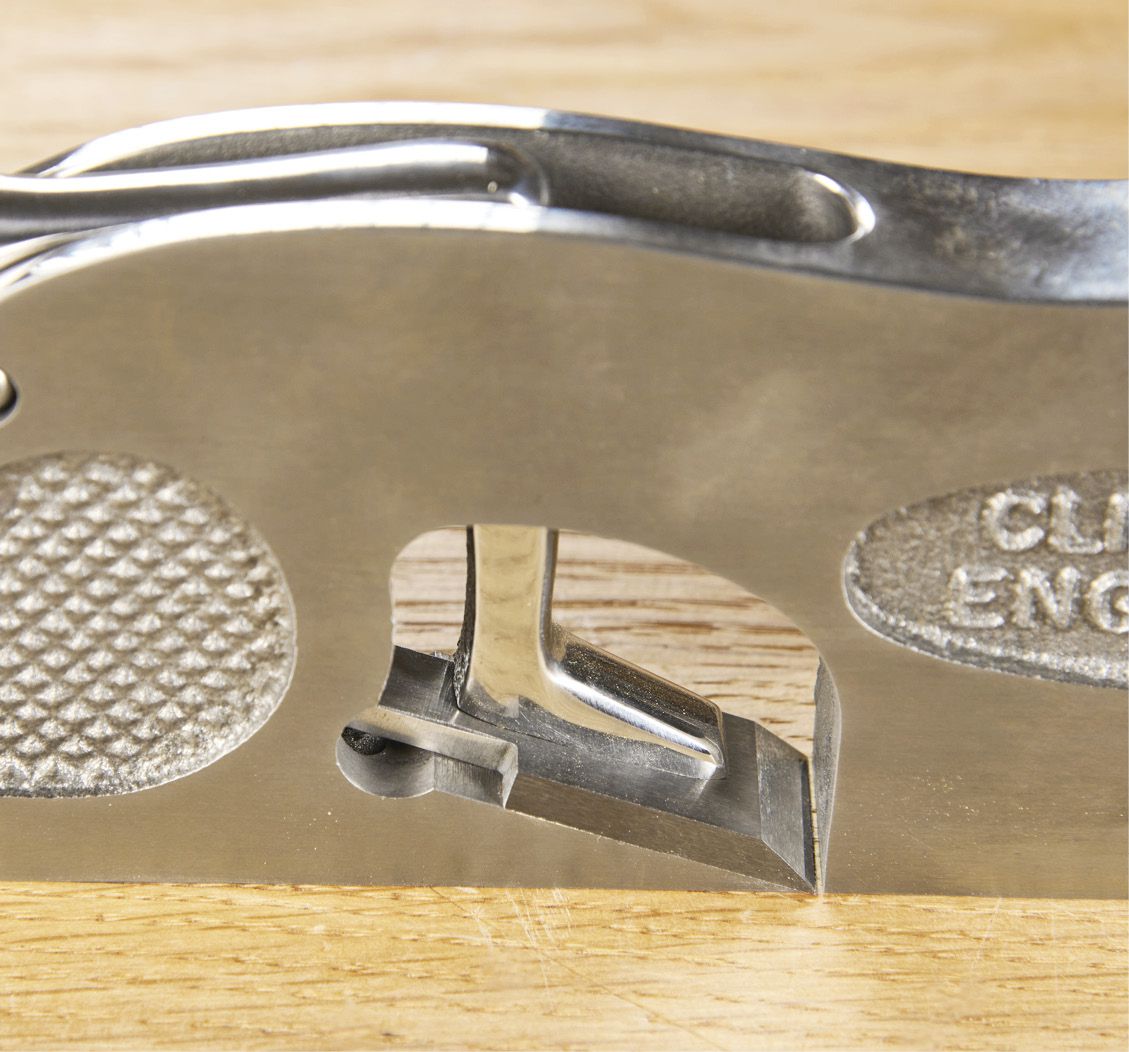
The Lie-Nielsen adjuster, shown above, and those on the WoodRiver and Clifton planes, below, move forward and back with no side-to-side adjustment.
Once again the Gordon plane lays claim to odd man out. It uses a wooden wedge to hold the blade in place, rather than a screw adjuster. Using a mallet to adjust blade depth in this setup, shown above, works well with a little practice.
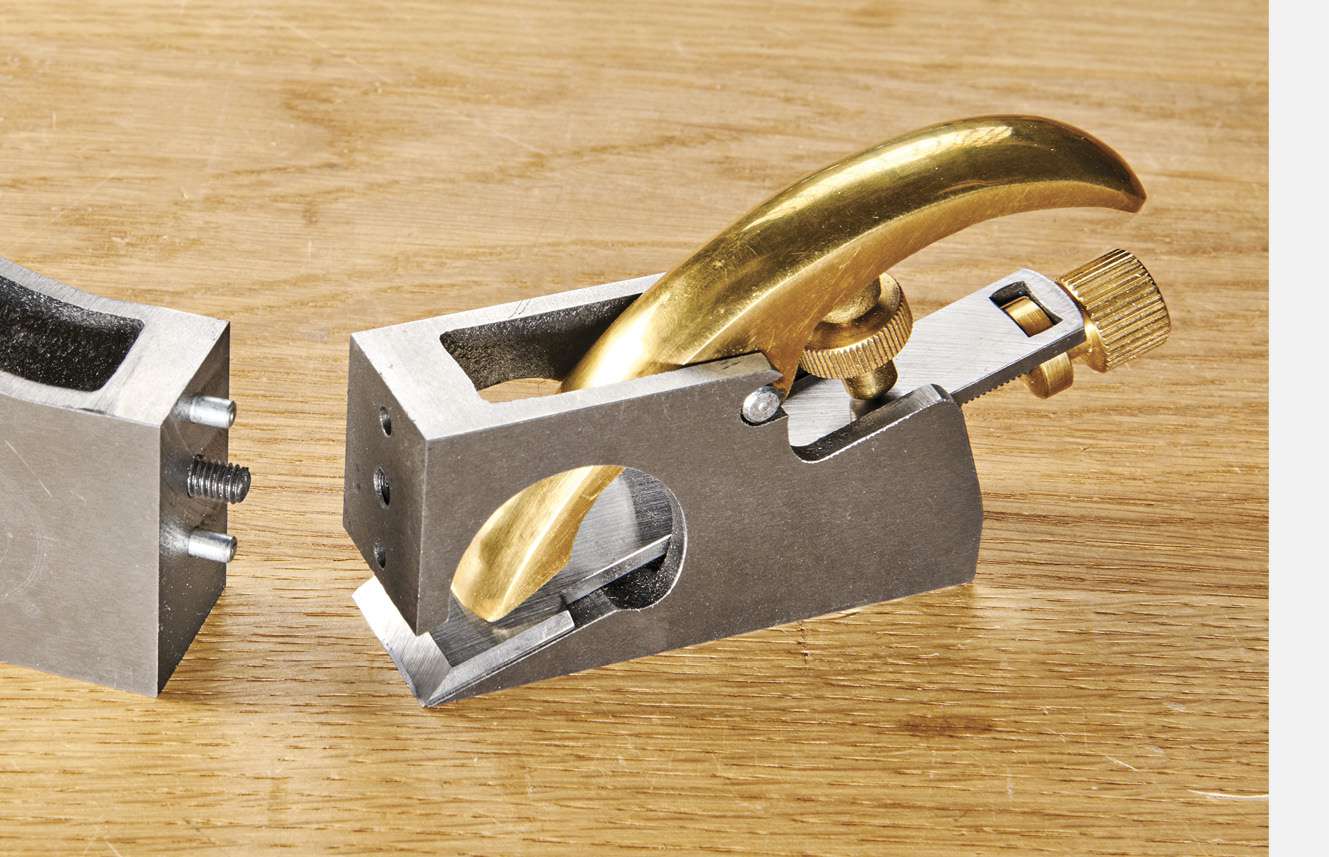
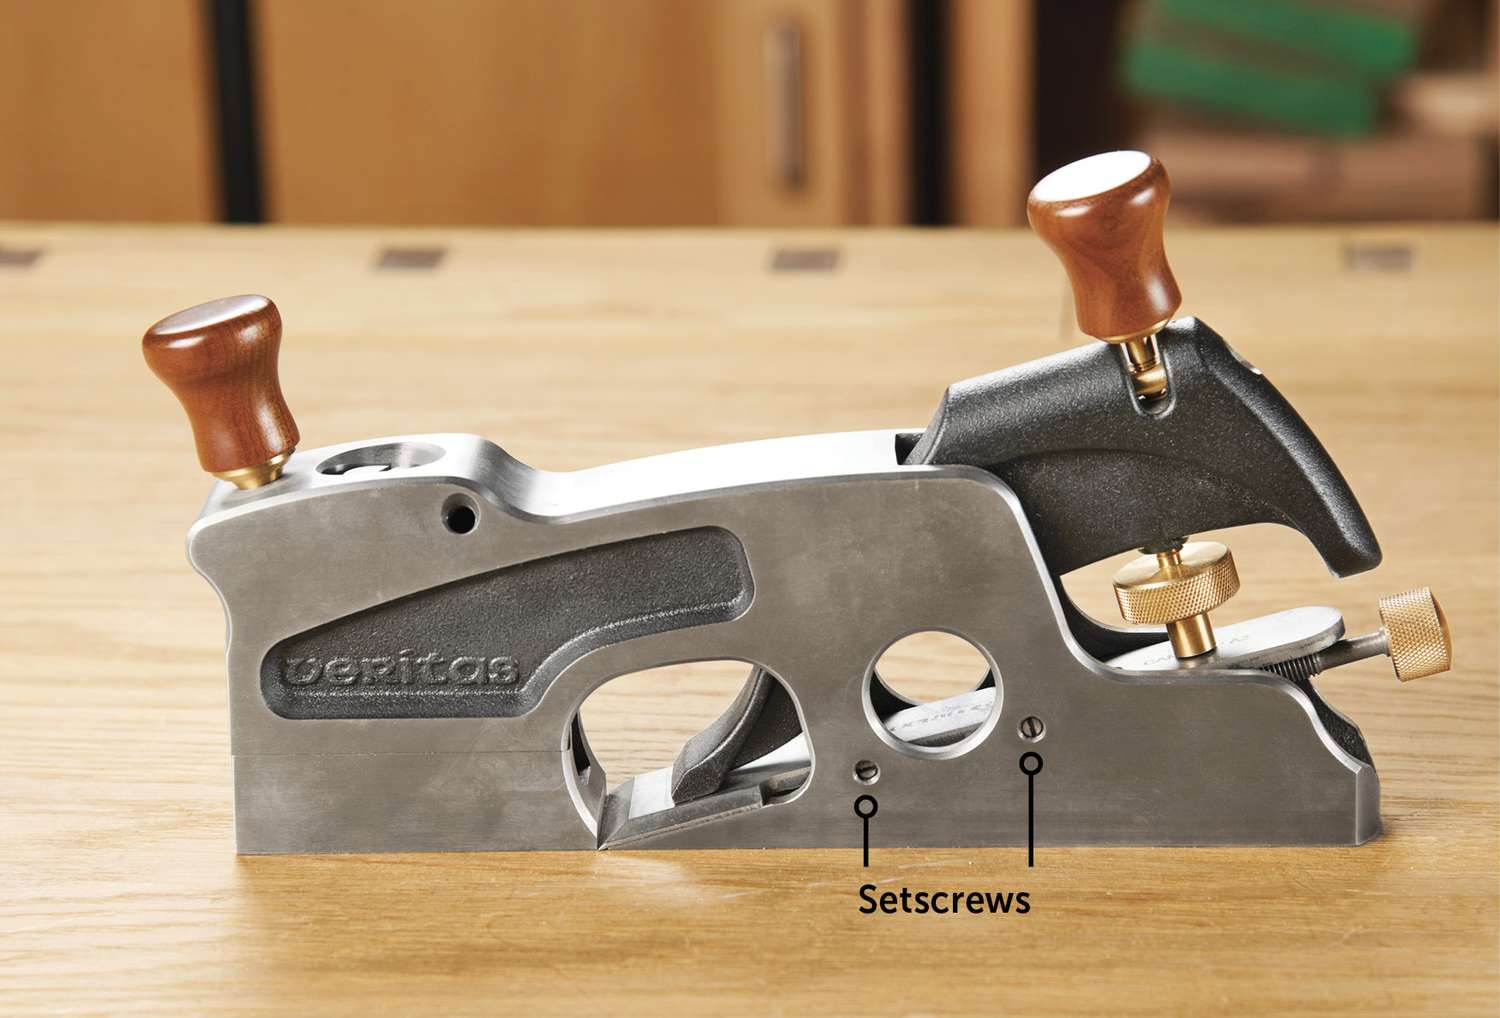
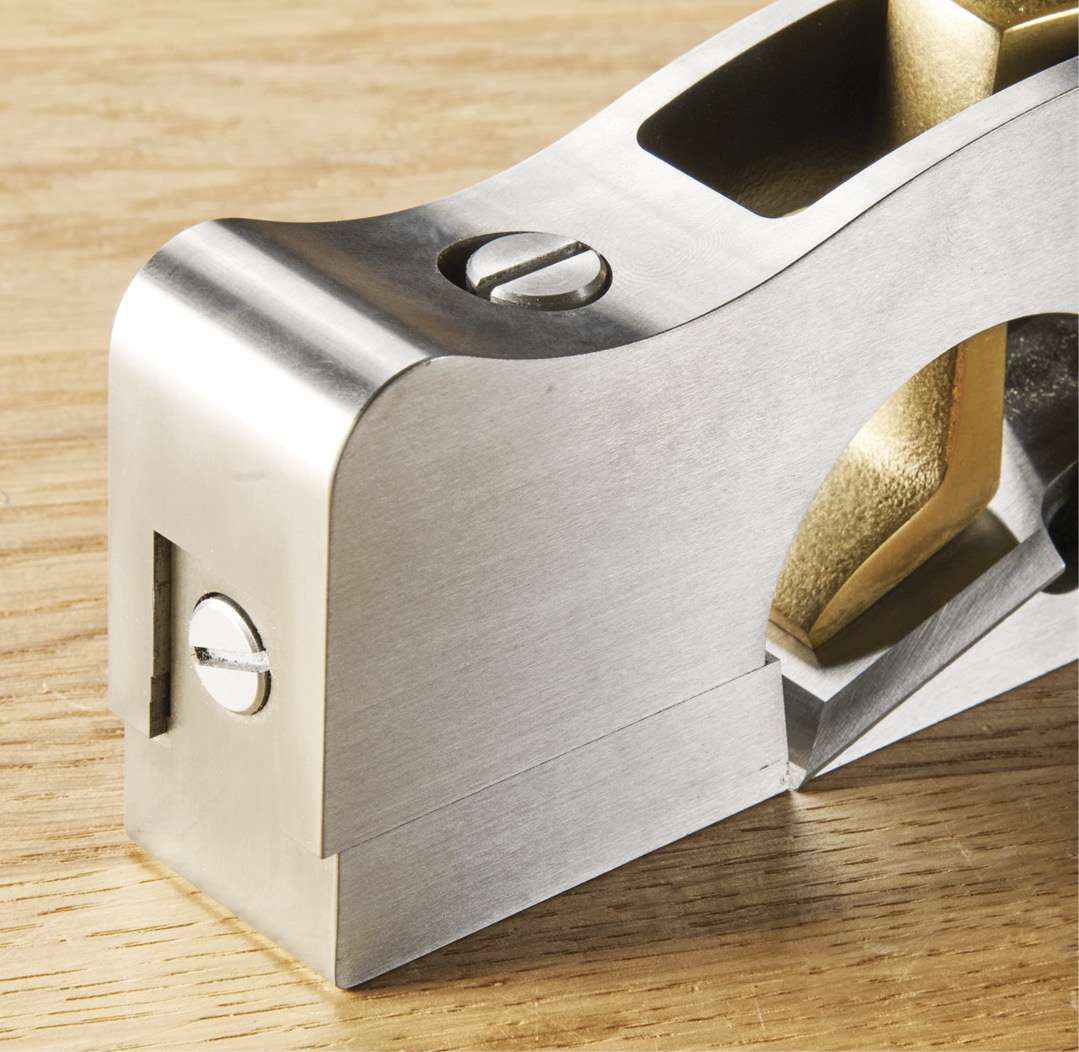
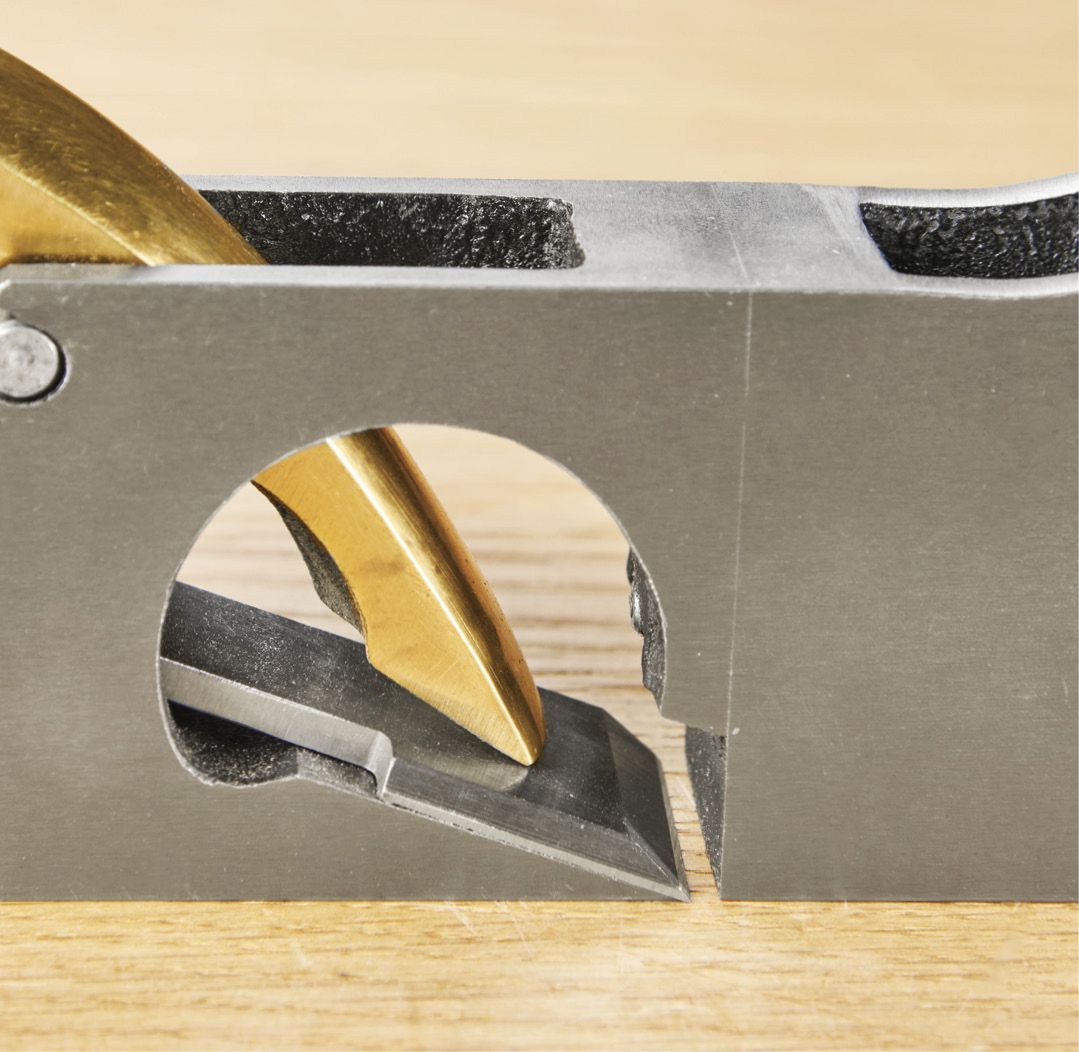
A tight mouth—the gap between the plane's toe and the blade's cutting edge—helps to resist tear-out by pressing down the wood fibers immediately in front of the blade, preventing them from splitting out ahead of the cut. This is especially critical for wood with figured or reversing grain. Several planes come with a tight mouth (shown below first), some use an adjustable toe to close the gap (below second), while one had no remedy (below third).
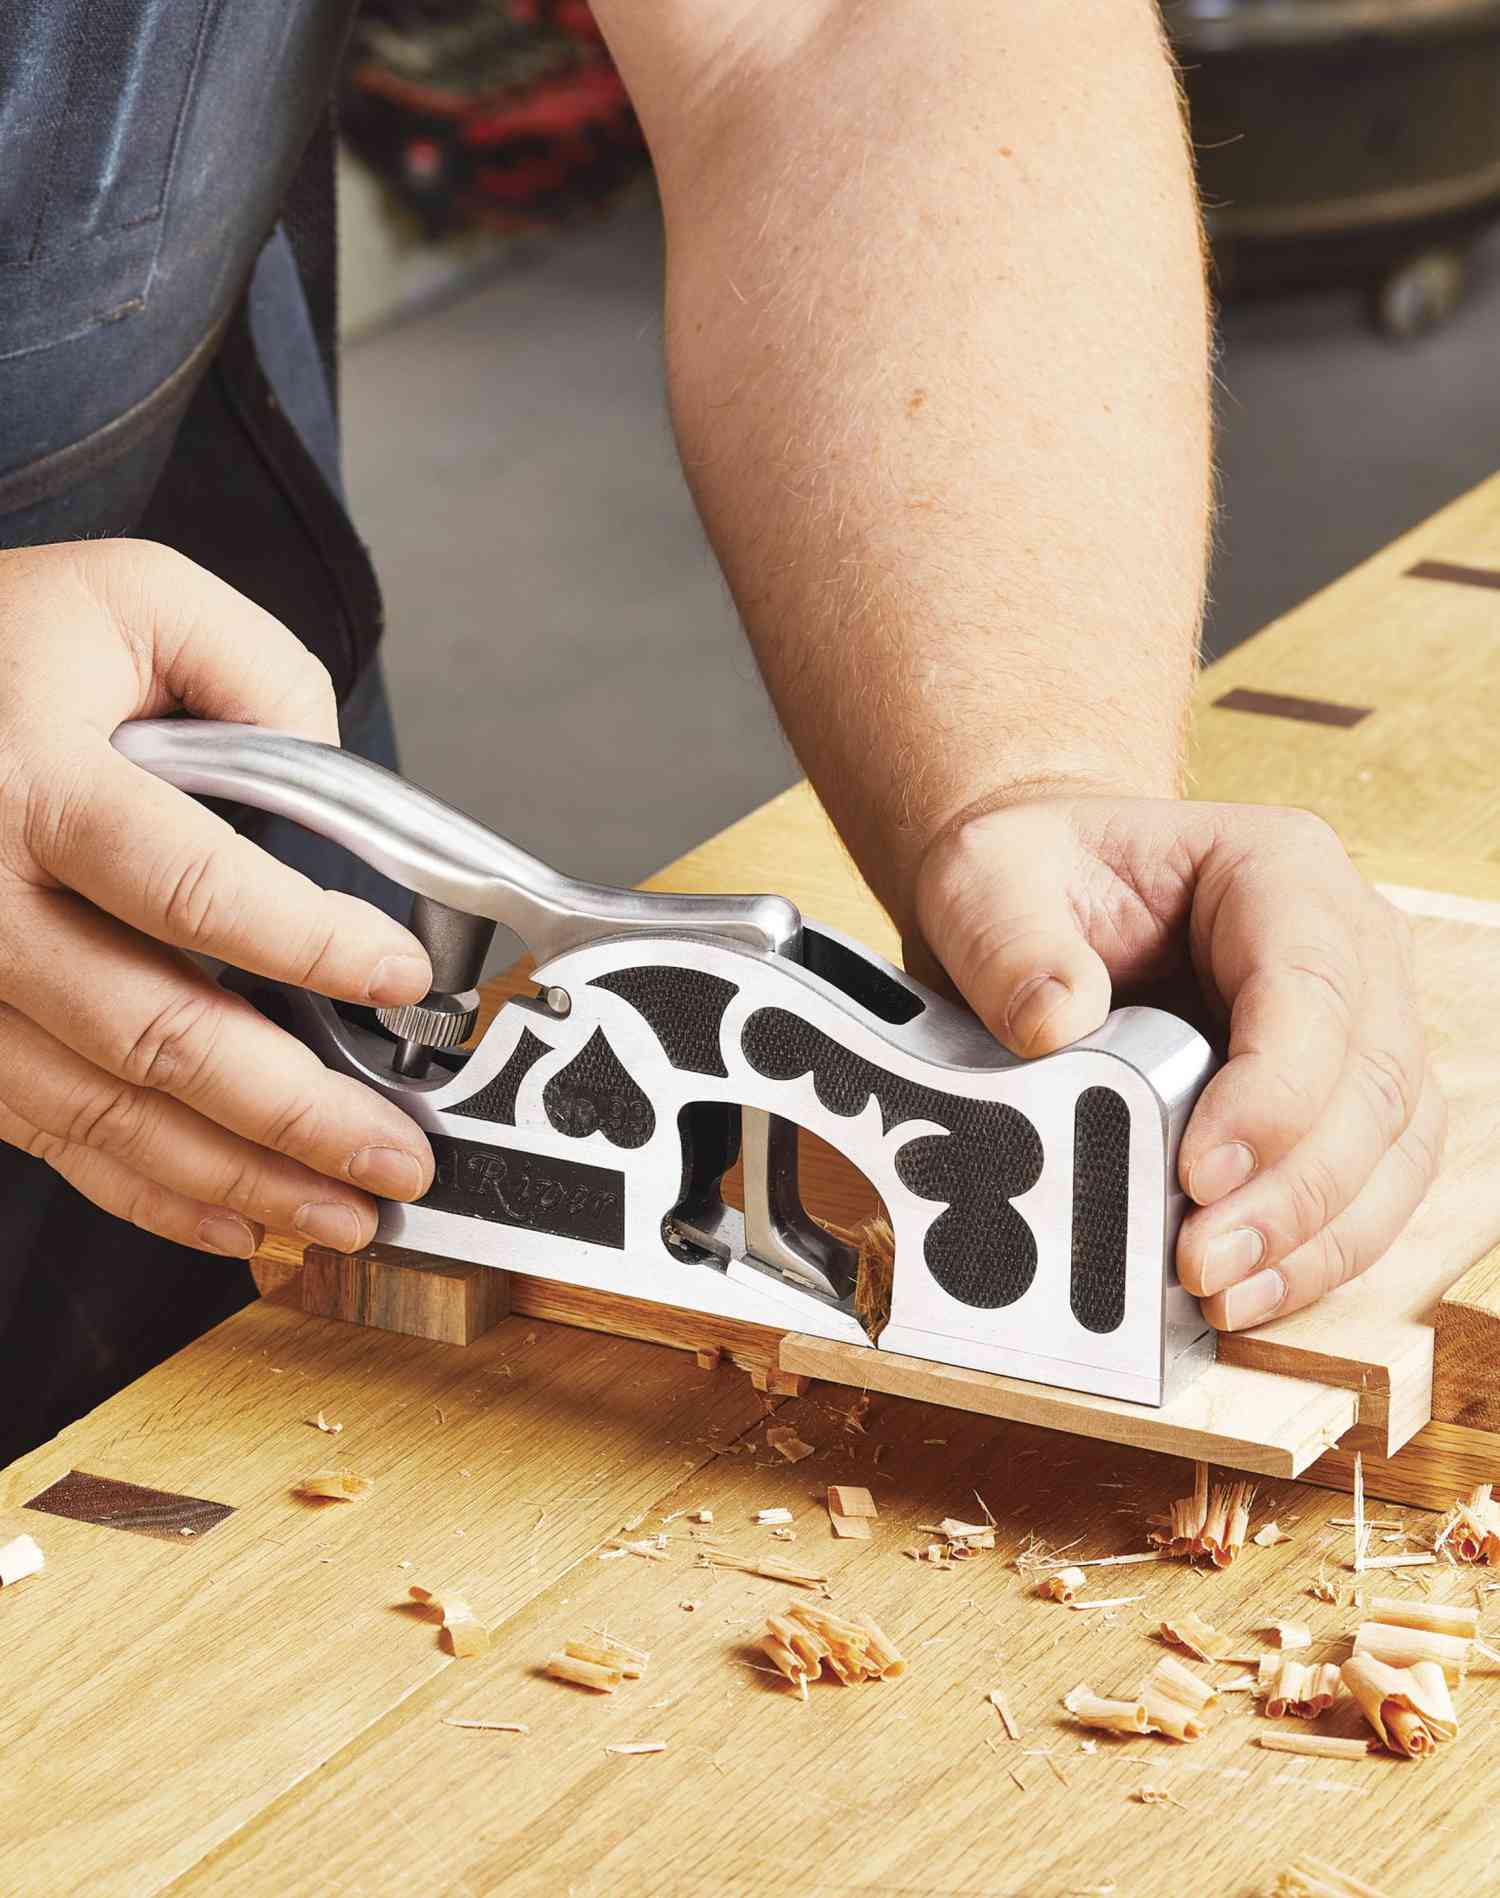
Get a grip
Even if you don't use a shoulder plane for great lengths of time, it should still feel comfortable in your hand. Your grip should comfortably fall in a position that gives you the leverage to maintain steady contact between the plane body, the surface you're cutting, and the workpiece shoulder while pushing the blade smoothly through the cut without tipping or rocking. Your grip will depend somewhat on your hand size, how you choose to hold the plane, and whether you use one hand or two, but the best planes made it easy to find a workable grip.
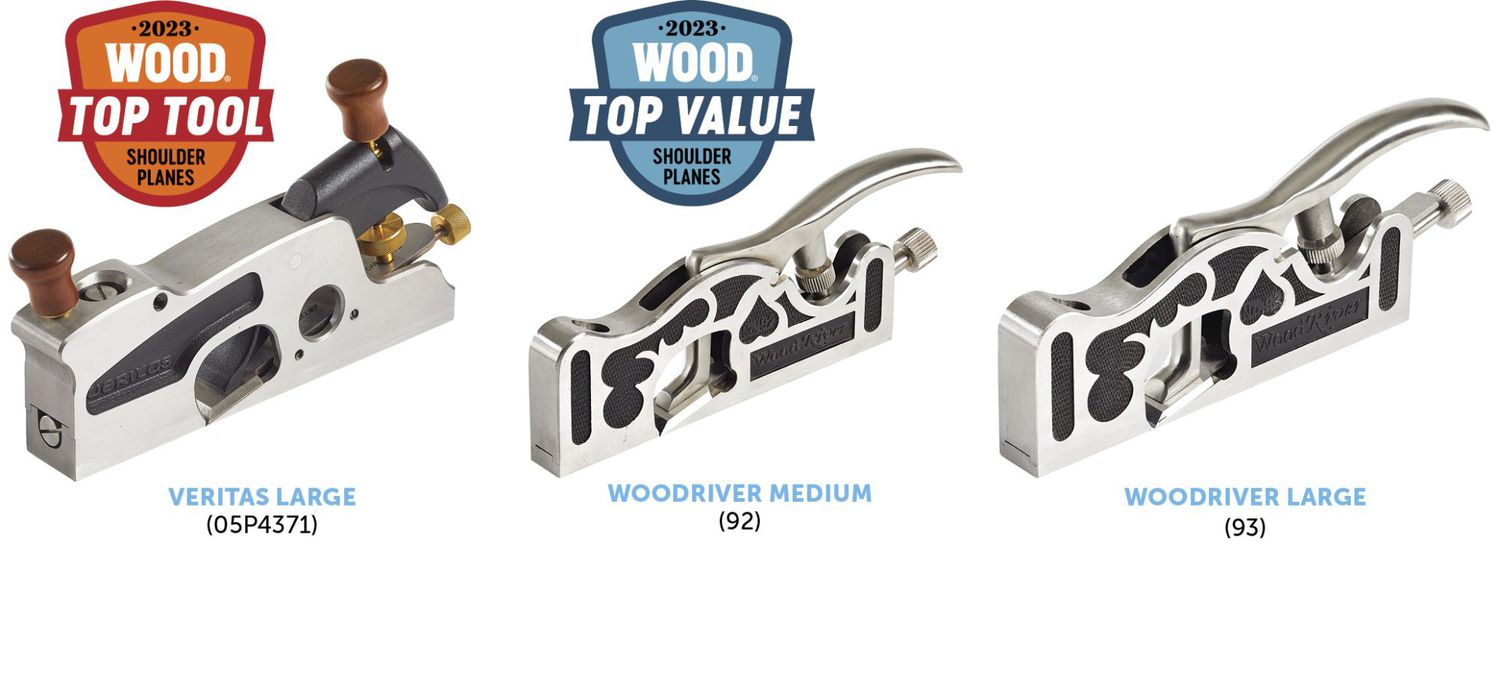
We like the feel of the Veritas planes best because they allow for a solid, comfortable grip that helps to push the plane through a cut. Two repositionable wooden knobs on the large Veritas provide extra leverage; the medium Veritas has one knob. Both also incorporate a handy stability-amplifying finger hole built into the body. We also like the feel of the H.N.T. Gordon. The rooster-tail lever caps on the Lie-Nielsen, Clifton, and WoodRiver planes present a slightly awkward place to rest the heel of your hand, but we were able to find an effective hand position on each of these planes.
Sink your shop dollars into these shoulders
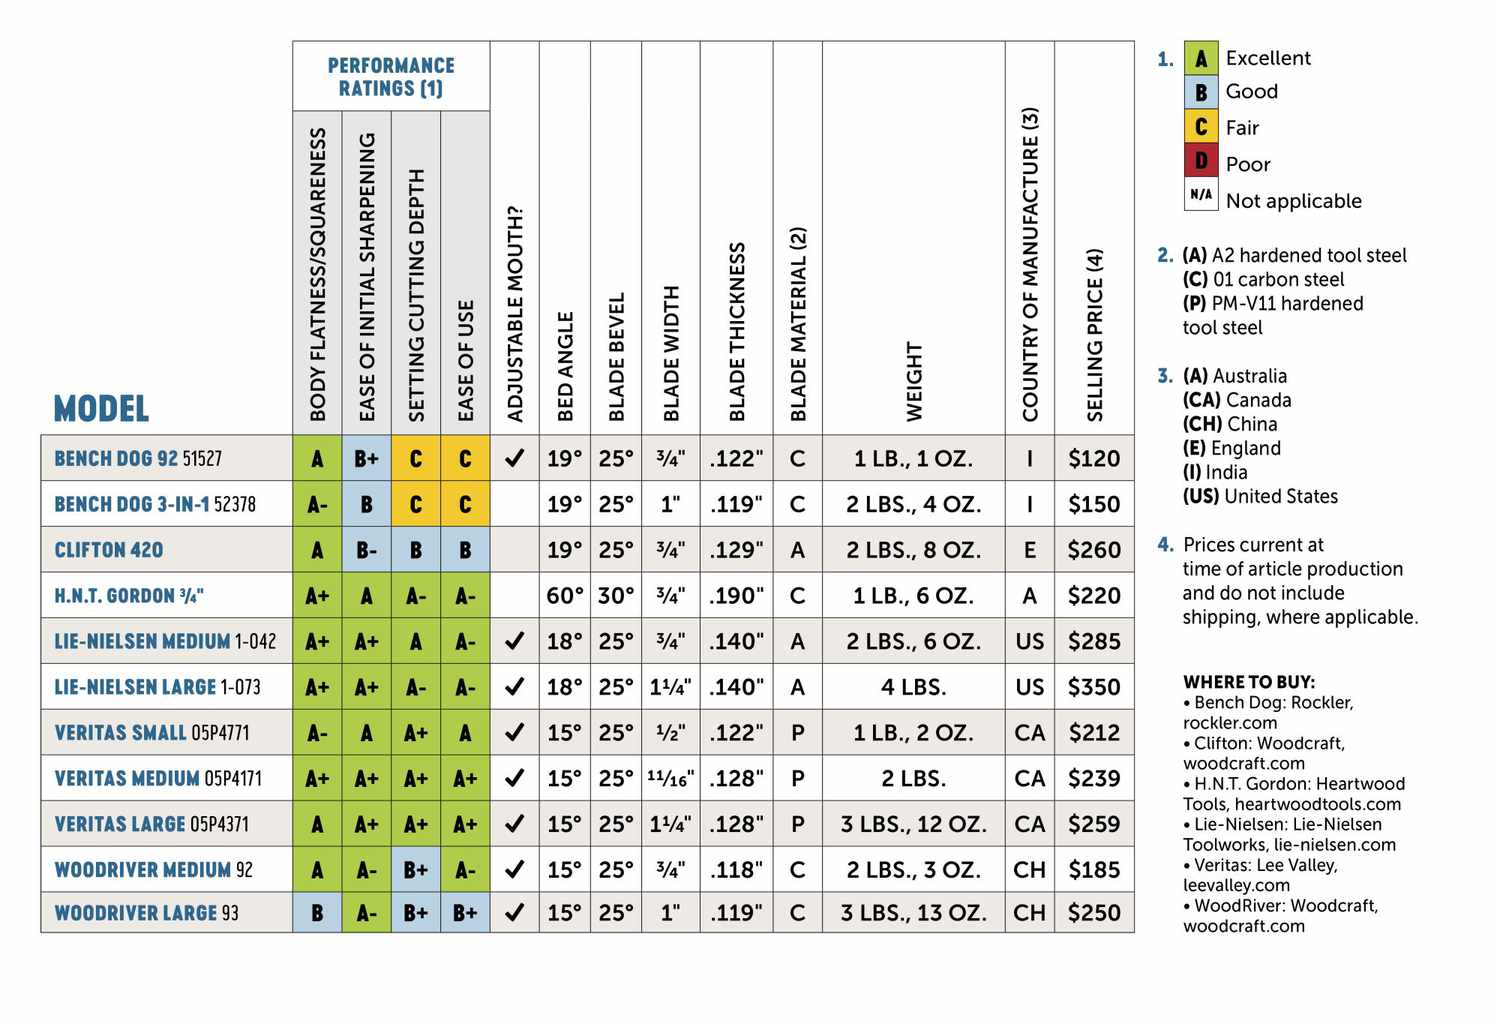
If we had to spend our own money, we'd get either the Veritas medium or large shoulder plane, or both. They share Top Tool honors. We like the PM-V11 blades and the adjustments on each tool. Both are premium-priced tools that should serve you well for decades. We think you'd also be happy with either Lie-Nielsen plane or the H.N.T. Gordon—all earned excellent marks in our testing.
The WoodRiver medium plane performed well enough to earn our Top Value award.