Signmaking Simplified


With a signmaking kit and your router, you can create handsome wooden signs fast and with no special skills. A kit typically comes with letter and number templates that fit into a fixture, which in turn clamps to your workpiece. You then rout each character by plunging the bit and tracking the guide bushing along the template cutouts. We like Milescraft's SignPro kit (WOOD may receive affiliate revenue for purchases made at this link). It's easy to set up and use, comes with 11⁄2 "- and 21⁄2 "-tall templates, matching bits and guide bushings, and a universal subbase that fits almost any router. Best of all, it costs only $80. Here's how to make the most of this kit.
There's no substitute for making test cuts
Before you begin routing a prized piece of wood, familiarize yourself with the router and the kit, and how they work together. Begin by mounting the included subbase onto your plunge router. We recommend a midsize model (11⁄2 to 21⁄4 hp) because it's more nimble than a bulky 3-hp unit. Make plenty of test cuts in scrap stock to get the feel of guiding the router through the various templates.
Although the kit includes two round-nose router bits, you can use any bit that fits within the guide bushings. As shown in the photos below, you'll get different looks from round-nose, V-groove, and straight bits. Sharp bits reduce tear-out and burn marks.

Rout each character in 1⁄8 "-deep increments for best results; the final depth depends on your workpiece thickness and your preferred look. When routing letters and numbers with inner fields (A, B, D, O, P, Q, R, 6, 8, 9, and zero), hold the guide bushing tightly against the outer perimeter of the template as you rout. Even a slight wandering off the template wall results in a botched character, below.

Choose wood that showcases your sign
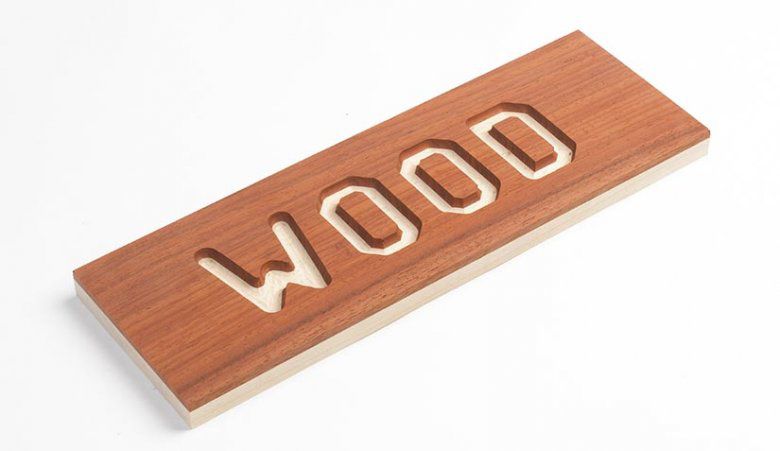
If you're going to paint your sign, almost any wood species will do. For clear-finished signs, laminate two contrasting species, such as the padauk-on-maple sign below. This sign, however, works best for indoor uses; it will fade and lose its lustrous color quicker if displayed outdoors.
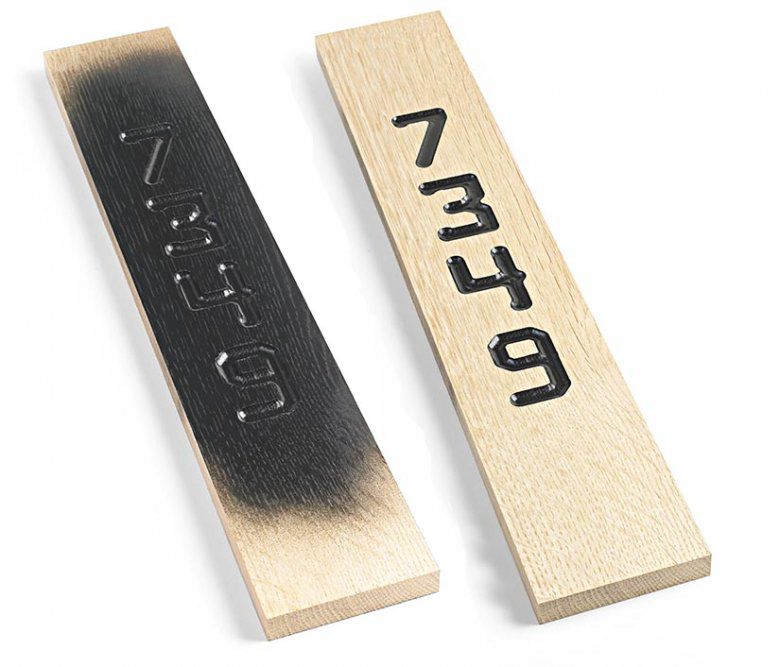
If you're making a sign for outdoor use, choose cedar, redwood, or white oak because those species resist rot better than others. After routing the characters on your sign, use spray paint for a quick way to add contrast (rather than painting each one with a brush). After the paint dries, plane or sand away enough stock to clean up the face, as shown below. Don't apply a clear-film finish to outdoor signs; the sun's ultraviolet rays will cause it to peel. Instead, apply a penetrating, pigmented deck finish, or leave the wood bare and allow it to weather naturally.