Six steps to perfect plugs
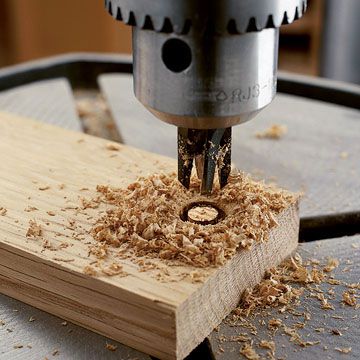
Shop-made wood plugs are quick and fun to make and a great way for hiding screw heads. Follow along our process for the keys to this shop technique.
Clamp scrap to your drill-press table
1. Find a spot on your scrapwood with the grain lines you need and clamp the workpiece to the drill-press table. Select a plug cutter and bore at about 1,250 rpm.
1 of 6
Bandsaw the plugs from the scrap stock
2. After drilling your plugs, mark the grain direction on each one with a pencil or pen. Cut them free on your bandsaw, and then transfer the line to the newly exposed "top" end.
2 of 6
Trim the plugs to length.
3. You might not get a tight fit when inserting a tapered plug into a shallow hole. In that case, hold the plug with a spring clamp and trim off the smaller end with a chisel.
3 of 6
Flat-bottom bits drill a clean couterbore.
4. Tear-out ruins the look of a plug hole, so drill a clean counterbore. A Forstner bit works best. Next, drill the pilot hole, install a screw, and glue the plug in place.
4 of 6
Trim the plug protrusion flush
5. After the glue dries, trim the plug with a flexible flush-cutting saw. To protect the surface, make a hole in cardboard (a business card, for example) and fit it over the plug.
5 of 6
Sand the plug flush
6. Sand the plug flush with 100-grit sandpaper, using a random-orbit sander or a handheld block. Continue with finer grits to match the surrounding surface.