Sliding mitersaw joinery

Use your sliding compound mitersaw to cut accurate joints for outdoor projects.
Beyond crosscuts, this tool does lots more.
Sliding mitersaws have pretty much replaced radial-arm saws in woodworking shops and job sites thanks to their lower cost, improved accuracy, and portability. Few users realize, though, that these machines also can make partial-depth cuts, such as those in half-lap joints, dadoes, or rabbets. You'll find a slider especially handy when building large outdoor projects made of hard-to-handle, big--and often wet--lumber.
The techniques we'll share here work with either a 10" or 12" sliding compound mitersaw. Before making any cuts, be sure to calibrate your saw's 90° and 45° miter settings using the manufacturer's instructions.
1 of 8
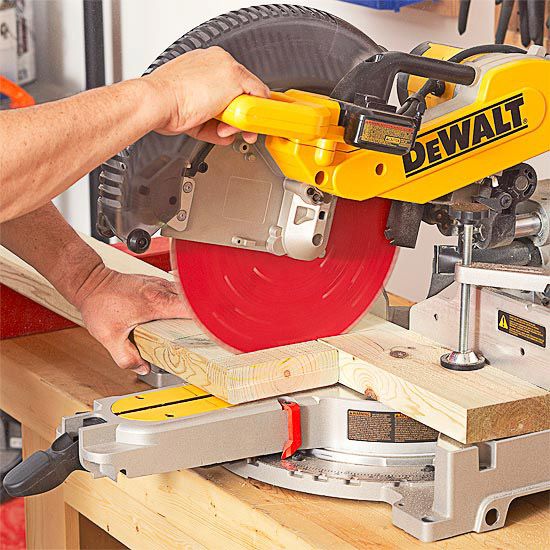
Find your saw's limits


For through cuts, all mitersaws are designed to cut just below table level in front of the fence. But when you raise the blade for partial-depth cuts, the curve of the blade no longer reaches the fence as shown in photo, also reducing crosscutting capacity.
2 of 8
Setting the blade's depth of cut.

To find exactly where the blade will cut, begin by setting the depth of cut--typically half the part thickness--using the saw's depth stop as shown in the photo. (See the owner's manual.) Unplug the saw and pull the blade toward you as far as it will go.
3 of 8
Locating and marking the end of the cut.
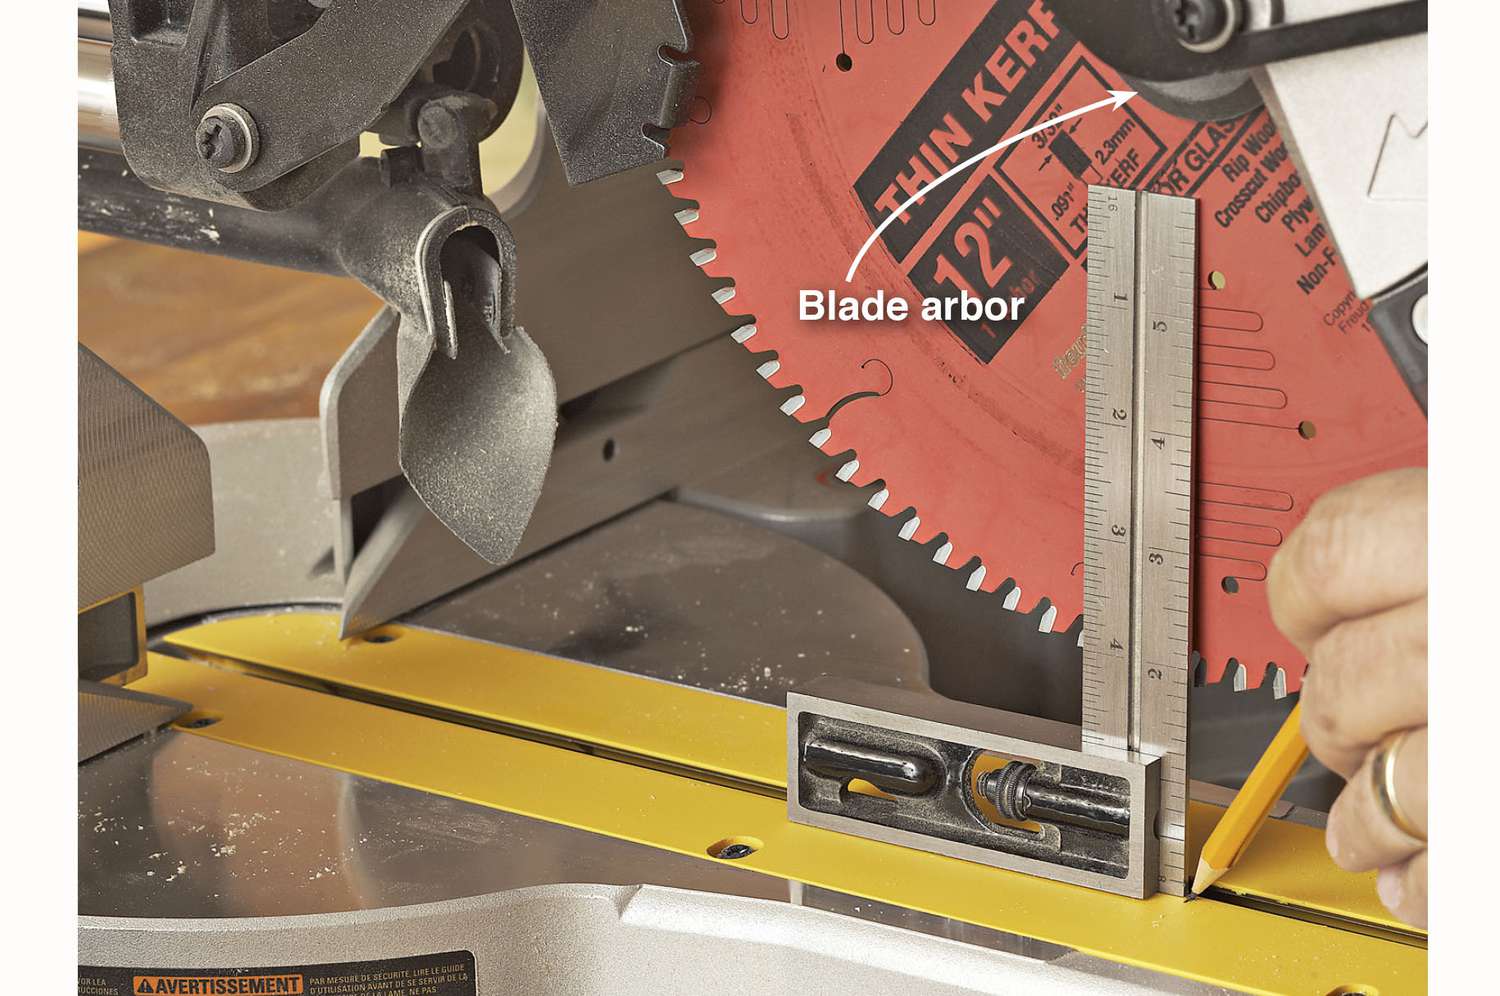
Lower the blade to cutting depth and mark the saw table directly below the center of the blade arbor as shown in the photo.
4 of 8
Second step to determining the maximum width of cut.
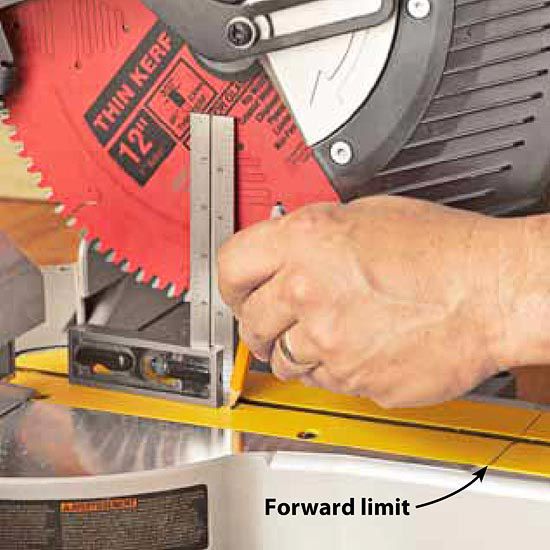
Now push the saw all the way back and mark its blade center as shown in the photo. The distance between these marks equals your saw's width capacity for that depth of cut. (For our saw, that equals about 6".) Measure from the fence to the back-limit line and rip a scrapwood spacer about 1⁄16" wider than that dimension. Then use your saw's stock hold-down clamp (or double-faced tape) to secure the spacer against the fence.
5 of 8
Kerfs are the start to a notch.

Lay out the half-lap joint on your workpiece and hold it against the spacer. Note: Depending on the saw, pushing the workpiece out this far from the fence might leave it with little support from the saw table. Supplement with infeed and outfeed support, if neccesary. Cut a kerf at both ends to define the joint.
Eliminate the waste between the end kerfs by cutting repeated kerfs between them, as shown in the photo. Use a hammer to break off the fingers of waste wood between the end kerfs.
6 of 8
Remove the waste to the kerf bottoms.

Now flatten the bottom of the dado using your widest chisel, shown in photo, a block plane, or a shoulder or rabbet plane. (See the video on last slide, for additional details.)
7 of 8
Mitersaw created notches work well for carpentry joints.

Test the joint for a snug fit, as shown in the photo. For too-tight joints, saw the same amount of waste from both parts until they slide together with light taps from a rubber mallet.