Start Veneering Now


This wine cabinet project shows how using an interesting veneer can put an exclamation point on your personal statement.
Covering the top of a table or a set of drawer fronts in veneer can dress up a project, providing an eye-catching focal point. The best part: The process is easy. Here's what you need to know to get started creating gorgeous veneered projects.
The basics of veneer
Commericially available veneer is about 1⁄40 " thick.
Veneer is simply a thin piece of wood, meant to be glued to a supporting substrate. This provides the beauty of the veneer's wood species at substantially less cost than a solid board of that species.
You'll find veneer in two common forms, photo below. Raw (unbacked) sheets are sold by the square foot and come packaged as a "flitch," a sequence of veneer sheets stacked in the order they came off the log. This makes creating patterns, such as book-matching, easier [Skill Builder, below]. There are no standard sizes, but the flitch will contain similar-sized sheets totaling the square footage ordered. I prefer raw veneer for my projects because of the wide variety of species available, and I can buy just the amount needed to cover the project.
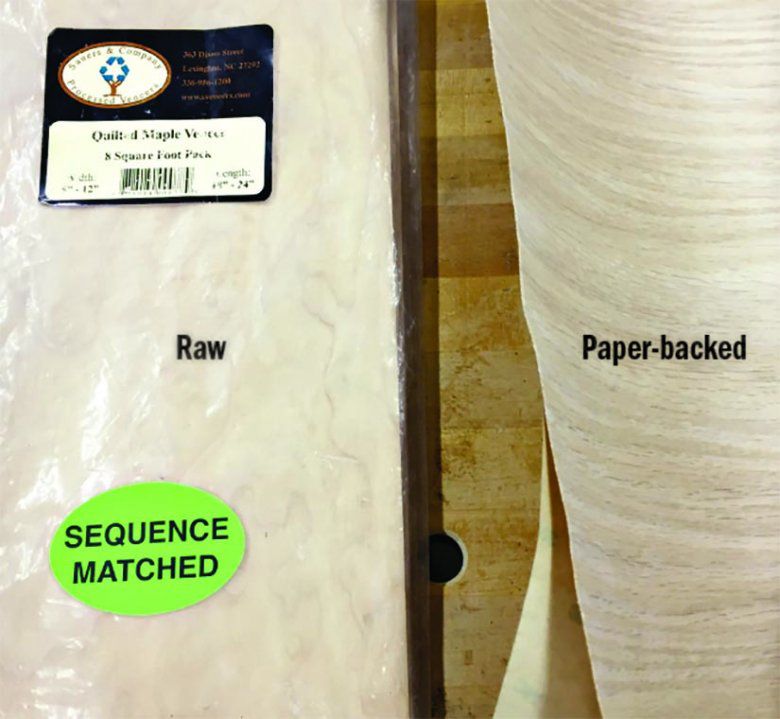

Paper-backed veneer comes in standard-size sheets, generally in widths of 24" and 48" and up to 96" long. The backing stabilizes the thin wood, so it can bend and flex without cracking. Some have a PSA backing, making installation as easy as peel and stick.
SKILL BUILDER
Read up on book-matching
By flipping consecutive sheets of a sequence-matched flitch as you would the pages of a book, you'll see that each piece mirrors the one adjacent to it. Joining two pieces of "book-matched" veneer creates a beautiful, nearly symmetrical pattern, below. When trimming the edges to join the pieces, remove as little material as possible to maintain the closest match in grain pattern along the joint.

SKILL BUILDER
Tame wavy wood
Raw veneer, especially highly figured species, may have wrinkles and waves, and be brittle enough to make you leery of handling it without damage. Fear not—a simple spray-on solution helps everything relax.

Prepare the veneer
A razor knife works, but a veneer saw is less likely to follow the grain and veer off the cutline.
Order enough square footage of veneer to cover the panel and some extra, just in case. For smaller projects, such as a box, you may find a single sheet of veneer large enough to cover the entire area. Raw veneer sometimes arrives slightly wavy or puckered; if so, follow the steps below to flatten it out.

To seamlessly join two or more pieces to cover larger areas, or for book-matching, joint the mating edges, photo above, then tape them together, photo below.

Making a glue up "sandwich"
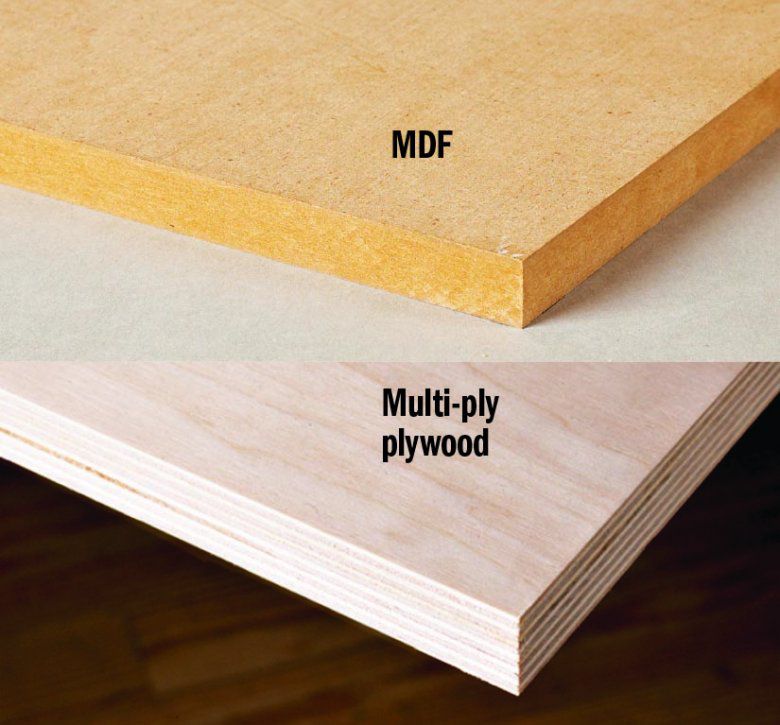
The veneer now needs to be glued to a suitable substrate. MDF or multi-ply plywood work well, photo below. These materials do not change dimensionally with seasonal fluctuations in humidity, and both take veneer well. Plywood provides a better substrate if the completed panel will be structural, because it better accepts screws or fasteners.
Even though very thin, veneer tape or painter's tape trapped between the substrate and the veneer will telegraph to the show side, showing up as small ridges. Cut the substrate slightly oversize so you trim the veneer flush when cutting the piece to final size. I also cut a piece of 3⁄4 "-thick sheet goods for a platen, which helps spread the clamp pressure over the glue up. You'll also need waxed paper to cover the panel.

Make a dry run before applying glue.Place the veneer on the substrate, taped side up. (The tape is removed after the glue dries.) Cover the veneer with a piece of waxed paper, photo above. Add the platen, and clamp the sandwich. Use a caul to apply pressure on areas beyond the reach of your clamps, photo below.

After confirming you have everything ready, evenly spread glue on the substrate using a glue comb or roller, photo below. Applying glue to unbacked veneer can cause it to curl.


Clamp the middle first and work out toward the edges, maintaining even spacing and consistent pressure over the entire surface. Raising the glue-up on a pair of 4×4s creates space for adding cauls and clamps. A bit of glue squeezing out on all edges indicates sufficient glue. For best results, leave the clamps on overnight. Repeat this process for a panel that will be veneered on both sides. After removing the clamps, sticker the piece for 24 hours so it dries completely and reduces warping, photo below.

Remove the veneer tape with a card scraper or fine sandpaper, photo below. Peel painter's tape gently by hand, working toward the joint. Sand the completed veneered surface with 320- or 400-grit sandpaper to remove any glue squeeze-out. Then trim the panel to final size and add any banding or a final finish.

Resaw your own veneer on the bandsaw.
And that's it! This basic process is easy to master. As your confidence grows, you'll find there are so many more ways to use your newfound skill.