Step Up To Sexy Legs


Learn how to make and use a simple tablesaw tapering sled.
woodmagazine.com/taper
There's a simple, understated elegance to tapered legs. They appear light, yet have the strength to solidly support a table, sideboard, or desk. And for some projects and furniture styles, that's all you need. But a little extra pizazz can push a good project to stunning. Try these four ways to add sex appeal to your legs.
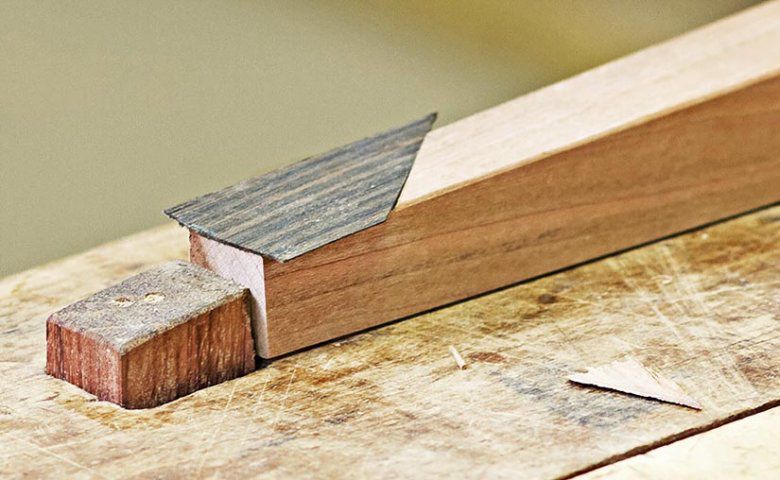
Slip into some slippers


This technique calls for simply inlaying veneer around the feet on all four faces. Two pieces angle upward to form a pinnacle at the outermost corner of each leg. Two other pieces wrap the leg's inner faces to connect the lower corners of the outer pieces.
1. On an outer face of the leg, lay out and scorethe inlay's top edge with a sharp knife and a sliding T-bevel set to the angle of your choosing (45° shown here).

2. Chisel out a recess equal to or just less than the thickness of your veneer from the toe up to the scored line. Keep the recess at a consistent depth for best glue adhesion.

3. Cut a piece of veneer slightly wider and longer than the recess, and with an angled top that perfectly matches the recess.
4. Glue the veneer in place and speed up the glue set by holding a dry iron on it for 10–15 seconds. This evaporates moisture from the glue for a quick hold, letting you do all four sides in minutes.

5. Trim the veneer flush with the leg once the glue dries, and then sand or scrape the top surface flush with the leg face. Repeat the process for the other faces.

Wrap your legs

Inlay banding adds instant attraction to a leg, especially when it's made of sharply contrasting woods. You can buy ready-made banding or use a strip of contrasting solid wood or veneer.
Sources:
Inlay banding, Woodcraft Supply, 800-225-1153, woodcraft.com; Rockler Woodworking and Hardware, 800-279-4441, rockler.com.
Dado all four faces of the leg so that the inlay banding fits flush and snug. If the banding will be above the leg's taper, cut the dadoes before the tapers.
For inlay bands on tapered surfaces, cut the tapers first and plane or sand smooth; then cut the dadoes.

Apply the inlay banding starting on an outer face, and centering the banding's pattern. Glue it in place, allow to dry, then trim with a chisel or flush-cut saw, and sand flush. Repeat for the other faces, wrapping the banding so the pattern looks continuous.

Sculpt in shadowy appeal
A shapely recess, such as a profiled dado, adds eye-catching detail. Experiment on scrap stock with router bits without a bearing at the end until you find a pleasing profile, or purchase a bit with a profile you like.
Rout dadoes on each face with the profile bit of your choice. Install an auxiliary fence on your miter gauge to prevent tear-out, and hold the stock securely to it. Use the fence as a stop to ensure the dadoes line up precisely.
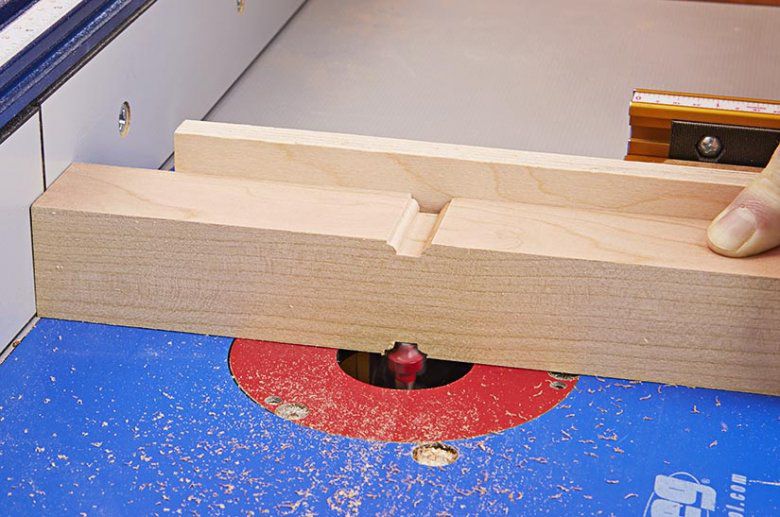

Rout a dado with 1⁄8 " shouldered beads
by using an ovolo bit like this one. You could also use round-nose bits or straight bits—any profile you like.
Source: 1⁄8 " radius ovolo router bit, no. 39-202, Freud Tools, woodmagazine.com/ovolo.
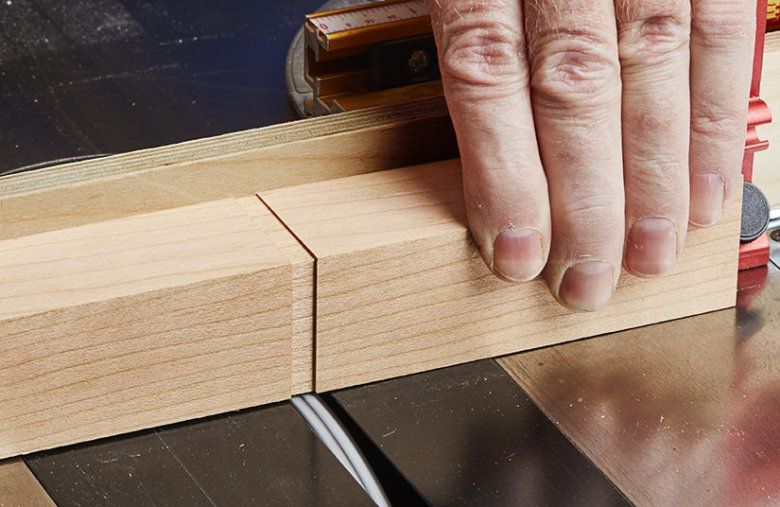
They're not high heels, but...

With furniture, brass cup feet add classy elegance. You can buy cup feet in various styles, shapes, and metal finishes to complement your project. We prefer to make a cup foot fit flush with the leg's faces rather than simply slipping it over the foot. This integrates it into the leg, rather than appearing to be an afterthought.
To do this, cut a shouldered foot to fit the cup (essentially a tapered tenon, as this cup foot is tapered). Cut the foot first on a leg blank a few inches longer than final length, and taper the legs after crosscutting to length. Why? Do the difficult parts first: If you mess up, simply cut off the mistake and try again.
Source: Brass cup feet, seven sizes in two finishes (antique brass and old brass), Lee Valley, 800-871-8158, leevalley.com.
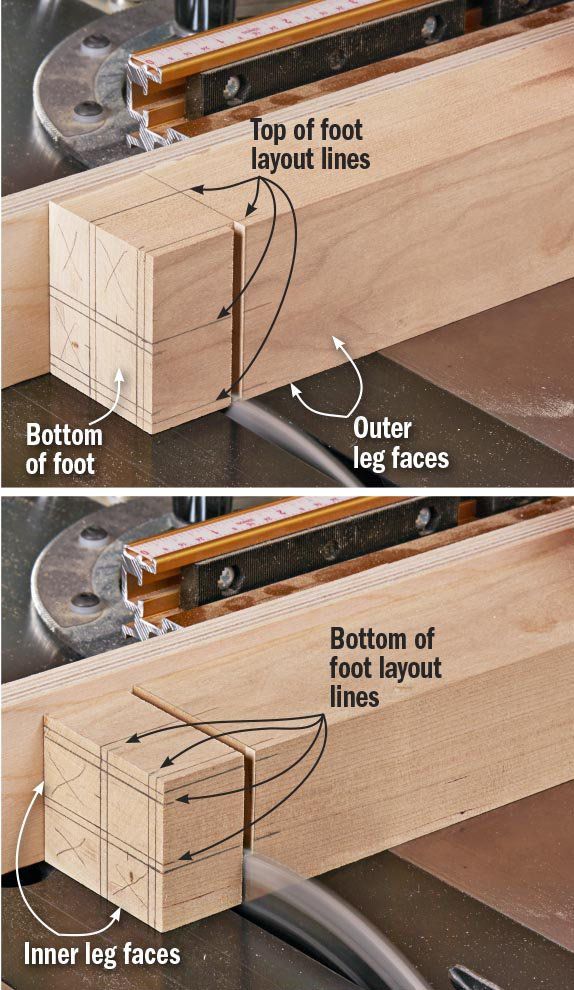
1-2. After laying out the location for the tapered foot, crosscut the shoulders to depth with a miter gauge and crosscut blade. The shoulder depth will be the same for the outer faces of the leg, but deeper for the inner faces to allow for the tapers, which you'll cut later.
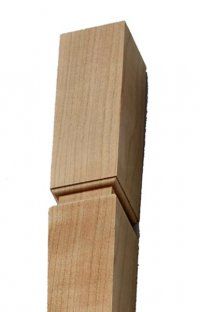
3. Bandsaw the tapered foot to shape, staying just outside the layout lines. Repeat for all four sides of the foot.

4. Trim the foot until the cup fits snugly. Use a shoulder plane, rabbeting plane, sanding block, or a chisel wider than the foot.

5. Secure the cup foot with the included brad nail or screw on an inner leg face. If none was included, drill a hole for one and use a close-matching fastener. A friction fit might seem good enough at first, but could loosen with seasonal humidity changes.

