Successfully Finish Curves, Corners, and Crevices


If every project consisted of only smooth, flat surfaces, the hardest thing about finishing would be prying the lid off the can. But in the real world, potential finishing flaws lurk in every raised-panel door corner, routed profile, and turned table leg.
Don't assume that manufactured products, such as turned legs or crown molding, arrive from the factory ready to stain and finish. They may have machine marks that stain will reveal [Photo below]. Use the following techniques to sand, stain, and finish these parts with the same care you'd give flat surfaces or routed profiles created in your shop.

Sanding-success shortcuts
For consistent stain color, smooth the surfaces on all parts and part sections equally. Ensure equal smoothness by developing a regular sanding routine, then disciplining yourself to complete each step. First, separate curved and profiled parts to be sanded and finished prior to assembly—especially turned legs and door panels. Then work all of the flat surfaces at the same time, and all of the curved or contoured sections together.
Use a random-orbit sander to smooth each flat surface it can reach, starting with the highest grit that still removes machine marks. After the final grit—180 or 220 for most jobs—hand-sand flat surfaces in the direction of the grain, using that final grit to eliminate any swirl marks.
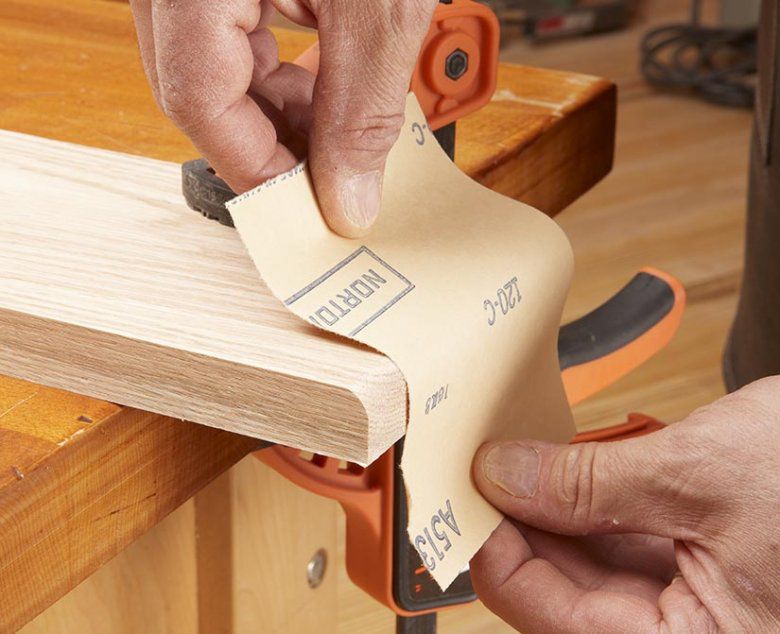
Next, hand-sand corners and contours missed by the random-orbit sander, switching up sandpaper backing pads to suit the surface being sanded. The most versatile profile sanding tools are right at your fingertips. Your hands can conform to many different shapes, but be careful to press evenly on the sandpaper [Photo below]. Gaps between your fingertips can create ridges.

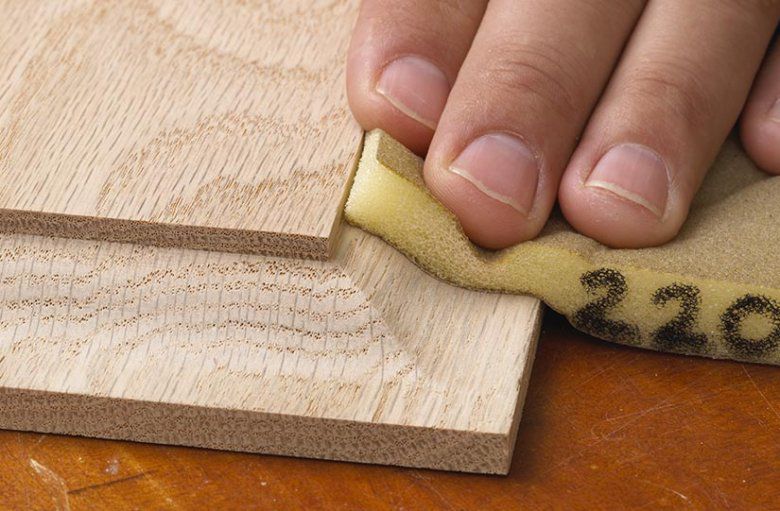
For fine details narrower than your fingertips, or in tight spaces, use sanding and specialty tools, like the ones shown below; scrapwood, dowels, or other objects around your shop to back up sheets of sandpaper. Some curved profiles require no sandpaper backing at all. For example, to avoid cross-grain scratches on the face, sand an end-grain round-over with a loose piece of sandpaper [Photo below].
Here's a trick to bypass the 80- or 100-grit sanding stage in tough-to-reach areas: Scrape the wood instead. In addition to card scrapers or paint scrapers, make your own miniature scrapers for working tight areas by grinding squared ends on pieces of discarded hacksaw or bandsaw blades.
Regardless of which tools you choose, hand-sand all areas to the same grit used to machine-sand the flat surfaces. We hand-sand nearly every WOOD® magazine project with abrasive sponges [Photo below].
While checking off your personal sanding routine steps, measure sanding progress using your sense of touch. If the skin of your fingertips catches on the wood, keep sanding through the grits until it's smooth. Pay special attention to transition areas where the random-orbit sander stops and hand-sanding begins.
Once you've sanded to your final grit, use compressed air to blow trapped dust out of corners and profiles. Then wipe all surfaces clean with a soft cloth.

Apply a consistent color
Before assembling any loose parts, decide whether it's easier to apply stain and finish to separate parts and assemblies, or the finished project. For example, deep recesses in the remote-control holder shown in the Photo below mandate staining before assembly. When staining unassembled parts, first, tape off glue-joint areas to ensure solid glue bonds.

Stain door panels before assembling the door [Photo below]. Otherwise, seasonal wood movement can reveal unstained or blotchy strips at the panel edges around the frame.

Woods such as maple and pine can blotch because even their flat surfaces absorb stain unequally. Others, such as oak, have open pores that trap stain pigment particles, especially on turned or routed areas. But both types can be stained uniformly using the same precautions needed to match solid-wood edging to plywood panels: Stain over sealer, wood conditioner, or gel stain. For example, contours sanded with 320-grit abrasive and sealed with a thin coat of shellac take stain evenly [Photo below].

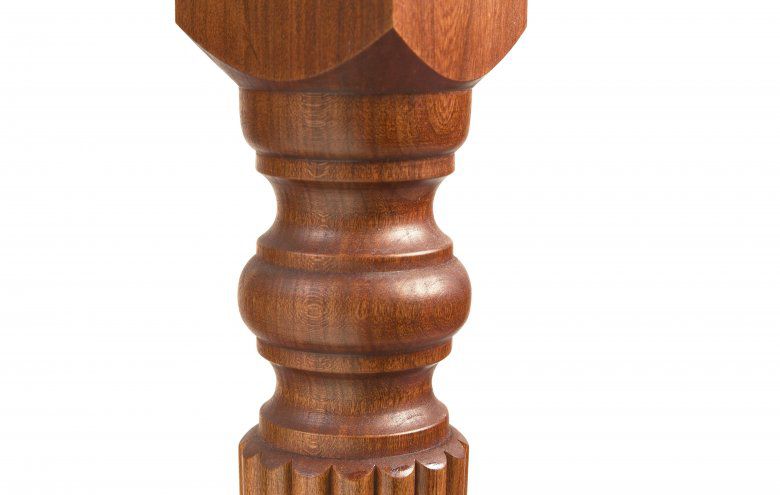
Don't worry about minor color variations on contoured pieces, such as the cherry table leg shown in the Photo below]. Different surfaces reflect light—or block it—in different ways, so you'll never notice minor differences.
Brush on a no-drip finish
Set up an angled light that reflects the surface as you work, and then assemble the right tools. Foam brushes work on flat areas, but contours require quality bristle brushes [Photo below]. Use a synthetic-bristle brush for water-based finishes, and a natural-bristle brush for oil-based finishes. Select the narrowest brush that still allows you to apply a finish quickly on the area to be covered.

On turned parts, such as table legs, load the brush only about a third as much as you would for a flat surface. Then brush around the profile, not with the grain. Brushing with the grain releases too much finish as the brush passes over raised areas and too little inside the crevices [Photo below].

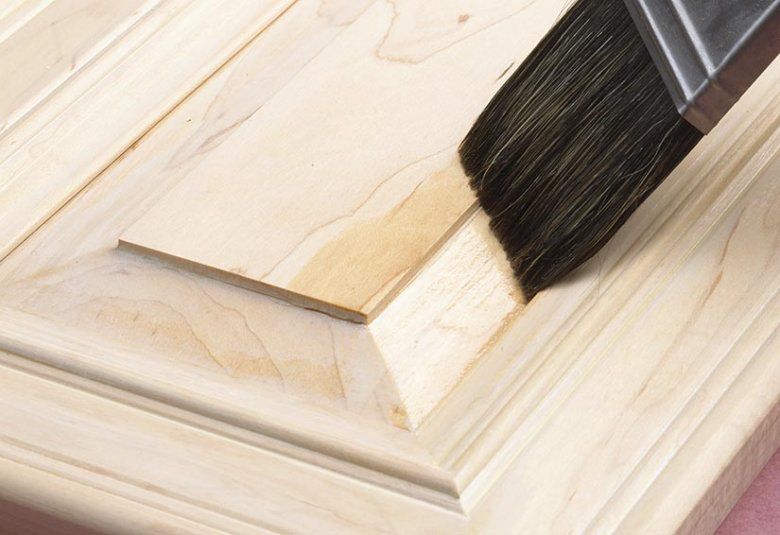
To apply a film finish in the corners of a door panel, again load the brush less than usual. Begin brushing near a corner but not in it. Brush away from the corner to unload some of its finish; then reverse direction to spread finish into the corner. That avoids creating a pool of finish. You also can help avoid corner pooling on raised-panel doors by using an angled sash brush [Photo below].
In both cases, lay the finish on and keep moving. Repeatedly brushing over a freshly finished area increases the likelihood of leaving brushstrokes. If finish collects in a crevice or corner, empty the brush on a towel and lightly lift off the extra finish with just the bristle tips. If you notice a skipped area after the finish skins over—especially with fast-drying water-based finishes—resist the temptation to touch it up. Just catch it with the next coat.
If brushing still seems too intimidating, or you're finishing intricate surfaces, such as a carving, use a wipe-on finish. You can buy wipe-on finishes, or make your own by mixing two parts polyurethane to one part mineral spirits.
As the name suggests, wipe these on with a cloth; then immediately wipe away the surplus with a clean cloth before it forms a surface skin. Each application of a wipe-on finish forms a thinner coat than a full-strength film finish, so you'll need roughly twice as many coats. But you can work it into nooks and crannies without worrying about drips. On intricate carvings or fine details, apply thinned finish with just the tips of a nearly dry bristle brush and lightly wipe away the excess.
Sources
Profile sanding blocks. Concave sanding pad set of four, no. 145958; round sanding pad set of 8, no. 145957; angle sanding pad set of 4, no. 145960. Woodcraft, 800-225-1153
Card scrapers. Concave, convex, and gooseneck scraper set, no. 05K20.20. Lee Valley Tools, 800-871-8158
Paint scraper. Bahco carbide scraper no. 625, woodmagazine.com/bahco625
3M Scotch-Brite radial bristle discs. In 120, 220, and 400 grit, in9⁄16 –3" diameter plus mandrel. The Sanding Glove, 800-995-9328