Tight-fit wraparound moldings


Fitting moldings around three sides
STEP 1

Cut the moldings 2" longer than their finished lengths, and miter one end of each. Make sure the side moldings mirror each other. Dry-fit the front molding and a side molding around the first carcase corner, holding the joint tightly together with masking tape.
Note: Fitting the moldings is easier when gravity holds them in place. Whenever possible, instead of working overhead, invert the carcase on your workbench.
STEP 2
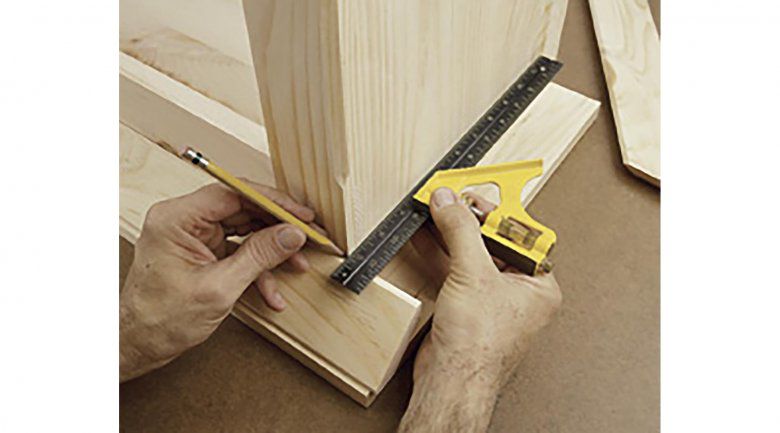
At the other corner, hold a straightedge flush with the carcase side. Using a sharp pencil, mark the miter's heel onto the front molding's unmitered end. Remove the front molding. Using a combination square and pencil, draw a 45° cutline intersecting the heel mark.
STEP 3

Attach a scrapwood auxiliary fence that is 1" taller than the molding in its installed orientation to your mitersaw's fence with double-faced tape. Make a 45° cut through it. Hold the front molding against the auxiliary fence, angled in its installed orientation. Align the 45° cutline with the saw kerf, and miter-cut the molding to length.
To make this cut on your tablesaw, attach an auxiliary extension fitted with a 1⁄8 "- hardboard sled to your miter gauge. Fasten a cleat to the sled to hold the molding in its installed orientation. Cut through the extension's end at 45°. Align the molding's marked cutline with the saw kerf in the extension, and cut the molding to length.
STEP 4
Dry-fit all three moldings on the carcase, taping the corner joints together. Holding the moldings snug to the carcase, make marks on the side moldings flush with the back edges of the carcase sides. Remove the side moldings, and cut them to length.
STEP 5
Glue and nail the front molding to the carcase, using wire brads. (A pneumatic brad nailer works wonders here.) When fastening side moldings to a solid-wood carcase, allow for seasonal wood movement using slots. On a plywood carcase, which moves insignificantly with changes in humidity, simply fasten the side moldings with glue and brads.
Fitting banding around four sides
STEP 1

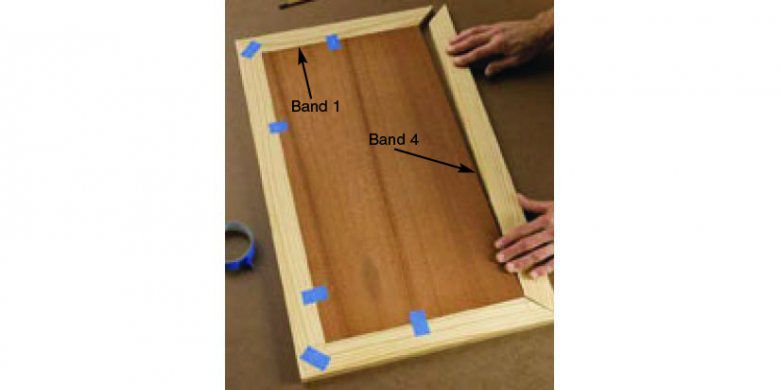
Cut the bands about 2" longer than their finished lengths. Miter one end of bands 1 and 3, making mirror-image parts, and one end of bands 2 and 4, making identical parts. Dry-fit bands 1 and 2 at the first corner, taping the parts together. Using a straightedge and sharp pencil, mark the miter heels on the unmitered ends of both bands. Remove the bands, mark 45° cutlines, and miter-cut the bands to length.
STEP 2

Tape together the mitered ends of bands 2 and 3 at the second corner. Tape the bands to the panel. Make the miter heel mark on the unmitered end of band 3. Remove the band, mark a 45° cutline, and miter-cut the band to length.
STEP 3

Tape bands 3 and 4 to each other and to the panel. Once again using a straightedge and sharp pencil, mark the miter heel on the unmitered end of band 4. Remove the band, and mark a 45° cutline. Miter-cut band 4 about 1⁄16 " longer than the marked length.
STEP 4
Tape band 1 in place. Check the miters at the first two corners, making sure the joints are tight. Test-fit band 4, and recut the miter, shaving off a little at a time while sneaking up on a perfect fit.
STEP 5

Glue and clamp the bands to the panel, using bar clamps in an over and under configuration, as shown. Concentrate on getting the bands flush with the panel's surface. The bands should fit perfectly, so apply only moderate clamping pressure.