Timber Framing from the Ground Up


Woodworkers and carpenters often view their disciplines differently. Woodworking demands exacting cuts and precision to achieve great results. Homebuilding, on the other hand, may involve rough cuts and a little "persuasion" to get a good fit.
Long before the invention of modern construction techniques, though, people built structures using methods much like we employ in woodworking. Called timber frames, these buildings consist of heavy wooden posts, beams, and other parts joined using precise, artful joints.
Timber-framing methods, and some of the structures themselves, have existed for centuries. But timber framing almost became a lost art in the mid-1800s as carpenters turned to simpler stud framing. Today, people have rediscovered these beautiful, practical structures.
Perhaps the best news is that any woodworker can build a timber frame. Like yesteryear's timber framers, many of whom were inexperienced homesteaders with few tools, you can learn these time-honored techniques. You probably won't tackle a house or barn like our ancestors did, but you can build a modest structure, such as a shed. All you need is an assortment of tools, a few friends to help heft timbers, and a willingness to learn. Here are the basics of how a timber frame goes together.


Bent:
The principal unit in a timber frame consists of two posts connected by bent girts, bent plates, and knee braces. Rafters and sills may be included. Bents are often constructed on the ground, then raised into position using ropes and poles (or a crane). A timber frame for a typical two-story house consists of four bents joined together to form three bays.
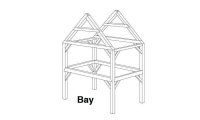
Bay:
The box area formed by joining two bents together with connecting girts, as shown. Every timber frame has at least one bay, though most, such as the example, above, contain more. In a traditional house layout, main rooms occupy the outer bays. Hallways, stairs, bathrooms, and service areas are clustered in a narrower middle bay.
Timber frame construction at a glance
Frame configurations vary depending on the size and shape of the structure and the aesthetic aims of its designer. Also, joinery details vary widely depending on the region and the expertise of the framer. The drawing, above, shows a typical frame for a two-story home. Detailed drawings that follow below provide a closer look at many of the joints used in this framing system.
Because part of the wood in each timber is cut away to form mortises, tenons, dovetails, and other interlocking shapes, many of the timbers for a large frame, such as a house or barn, must be quite hefty (8x10" or 8x12"), and therefore require extra muscle power—or hoists—to maneuver them into position for shaping and fitting.
Typical timber joinery


Though timber frames can be joined using lag screws or metal plates and bolts, the most authentic and appealing method involves cutting, shaping, and pegging the timbers to form tight, solid-wood joints. The work requires only simple hand tools, such as those in "A timber framer's toolbox" below. Yet the sturdy joints these tools help create can withstand large loads almost indefinitely.
The structural integrity of these joints relies on two basic workhorse features: mortise-and-tenon cuts (square or dovetailed) and wooden pegs. The other "glue" that holds some joints and the frame at large together is simple gravity. All loads transfer through the posts to the foundation.
Shouldered mortise and tenon:

This serves as the basic joint between the posts and girts or plates. The shoulder takes the load off the tenon, adding strength, while pins prevent the joint from pulling apart under lateral stresses.
Knee-brace mortise and tenon:
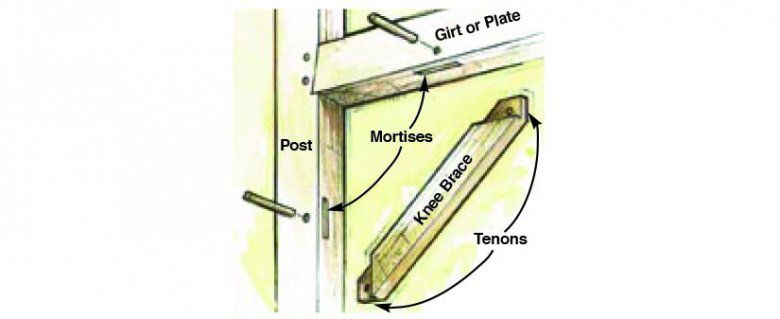
This is one of the most common of several ways to join the knee brace. The tenons are offset, placing the brace toward the outside. Tight tolerances and gravity hold it together, while pegs provide added insurance.
Dovetailed sill corner joint with tenoned post:

Eventually, all loads in a timber frame are transmitted to the base of each post. This super-secure joint locks all the pieces together to prevent the base of the structure from splaying.
Housed dovetail:

Where joists or summer beams meet girts and sills, this joint provides strength two ways. The shouldered area, or housing, bears the load. The dovetail prevents the joint from pulling apart.
Stopped splayed scarf joint:
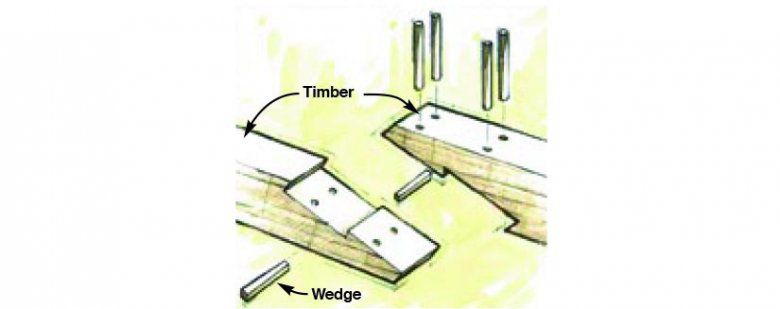
This joint creates a long timber from two short pieces. The angles, wedges, and pins lock the joint together, making a scarfed timber almost as strong as a continuous one. Even so, scarfs are often placed near posts.
Tenoned and pegged rafter bird's mouth at bent plate:

Where a principal rafter, post, and plate come together, this joint provides three-way protection against failure. The bird's mouth can be used with common rafters, though it's not necessary.
Tongue and fork:

This simple joint consists of an open mortise and an interlocking tenon, held fast with pegs. It ties rafters together at the roof peak, and also presents a simple way to join sills where they meet at corners.
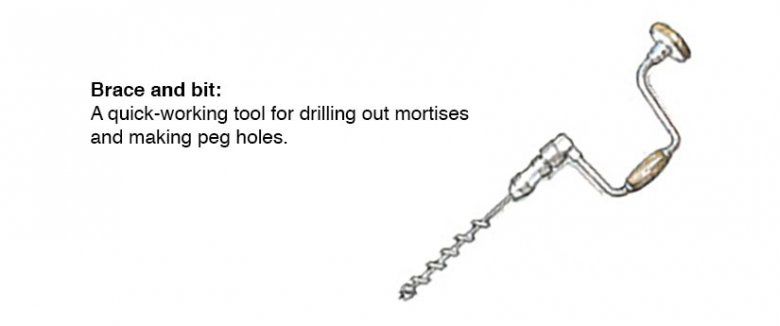
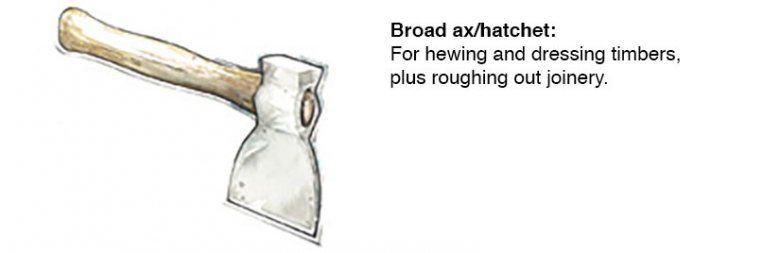
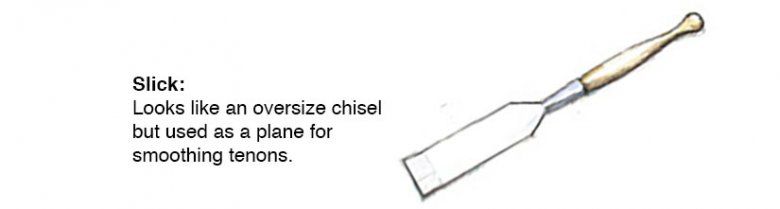
A timber framer's toolbox
To make precision cuts and tightfitting joints, a timber framer relies chiefly on artful handling of simple tools and subtle application of leverage and pressure. The tools shown below have been and still are the standard issue for any timber framer. Other essentials include a framing square, a combination square, flat chisels, a mallet, and a handsaw.
You may own some of the tools already. Specialty retailers (see the sources, below) carry the others.
Today's timber framers do employ some power tools. Few hand-hew their beams, for example. Instead they rely on a motorized mill to process the logs. A router, circular saw, and power planer also are handy for trimming timbers and forming joints.


The best woods for timber framing
One common misconception about timber framing is that the timbers need to be seasoned before you work them. Quite the opposite is true; timbers should be worked while the wood is green.
A variety of species have been used over the years, from pine and fir to oak and even cherry. These days, framers also use Douglas fir.
The strongest species for timber framing are those that grow slowly, are straight and tall (curved or twisted trees are harder to mill into timbers), and reach great heights before branching (knots tend to weaken a timber). Such trees were common in old-growth forests. Although trees in second-growth forests are not quite as strong, tall, or straight, they yield timbers that work well for such projects as houses and small barns.
Sources for additional information
To learn more about timber framing, or to find the tools used in the craft, contact the following sources:
General information and training
- Timber Framers Guild
- P.O. Box 60
- Becket, MA 01223
- 888/453-0879
- Education, training materials, books, workshops
- Joiners Quarterly magazine
- Fox Maple Press, Inc.
- 65 Corn Hill Road, P.O. Box 249
- Brownfield, ME 04010
- 207/935-3720
- Magazine, framing school, workshops, books
Tools and supplies
- Barr Specialty Tools
- P.O. Box 4335
- McCall, ID 83638
- 800/235-4452
- Lee Valley Tools, Ltd.
- P.O. Box 1780
- Ogdensburg, NY 13669-6780
- 800/871-8158
- Woodcraft Supply
- 560 Airport Industrial Park
- P.O. Box 1686
- Parkersburg, WV 26102
- 800/225-1153