Trick out your workbench: From zero to workshop hero

Every good story needs a hero, and in the shop, a workbench answers the call. The bench facilitates everything from handwork to sanding to assembly to finishing. It's truly the central character in your woodworking story. And it's a great place to set your coffee while you contemplate the next step or next project.
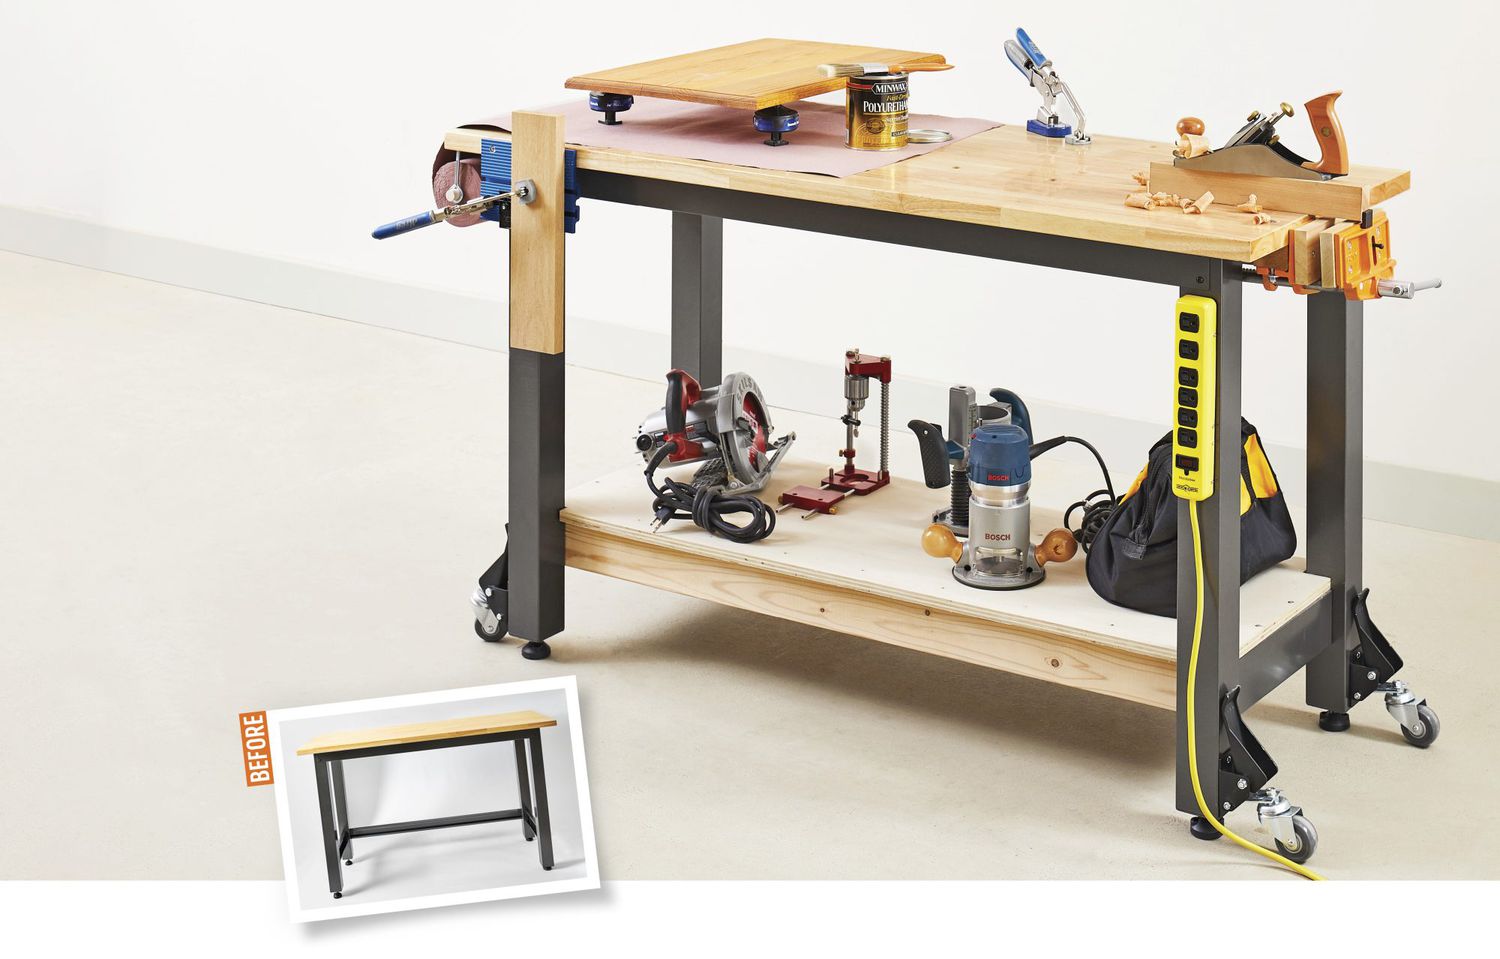
Most of us fantasize about owning the classic wooden "cabinetmaker's bench," but buying one requires a big investment and building one takes a ton of time. Don't delay your workshop story by waiting for your fantasy hero to come along. Instead, quickly craft a capable woodworking bench on a budget by starting with a plain bench from the home center and outfitting it with accessories to transform it from ordinary worksurface to workshop hero.
1. Our best advice: add a vise (or two).
The basic bench we bought [Sources] came with a sturdy base and a beefy top, but that really just made it a heavy-duty table. Adding workholding power makes it a WORKbench. We started with a vise on one end, shown below. (If you're right-handed, attach it on the right end like we did. Lefties may want to swap it to the other end.)
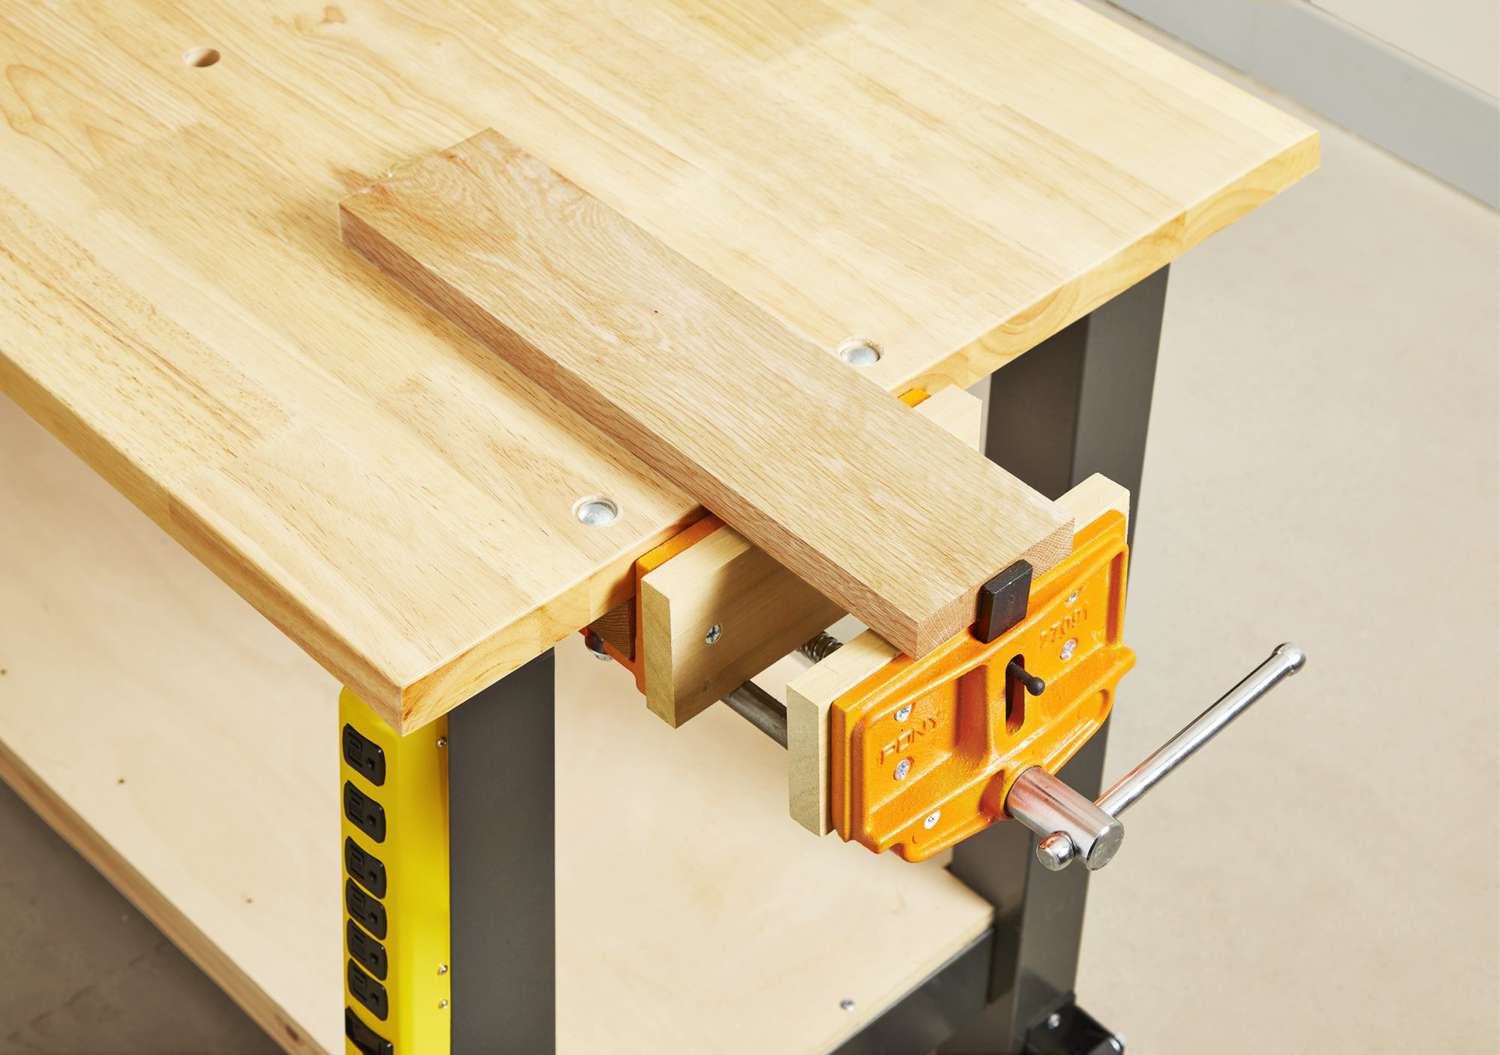
The inexpensive Pony vise we bought isn't the fanciest, but the castings are beefy, it requires only a spacer block and a pair of carriage bolts to mount solidly to the top, and it has 9" reach between the jaws to hold large items. Add hardwood jaw faces and you've greatly leveled up your bench's capabilities.
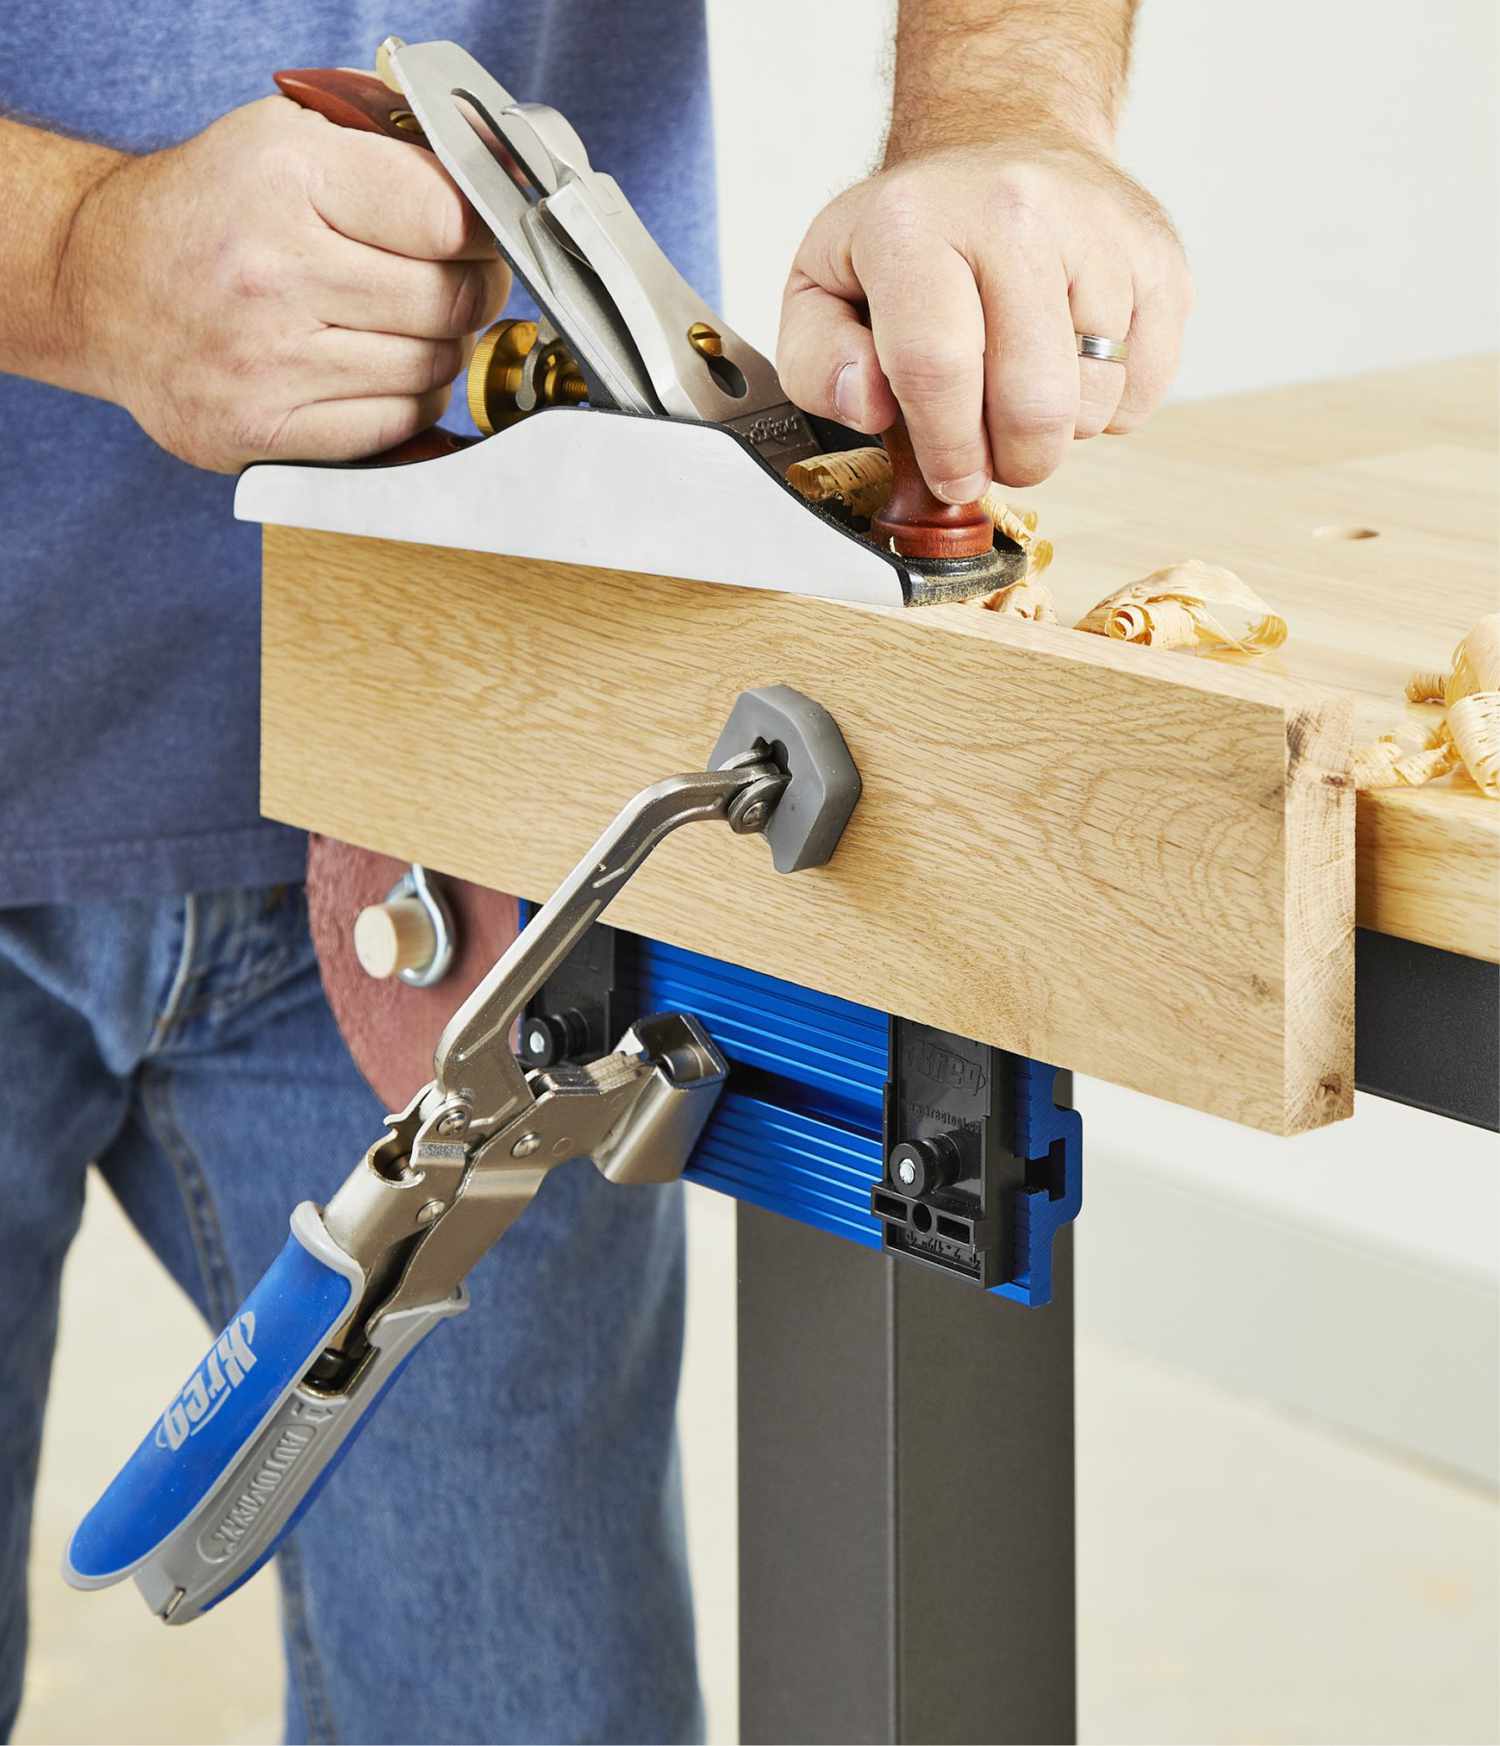

We chose this particular vise for one more reason: It features a pop-up bench dog that other inexpensive vises didn't. On the front of the bench near the opposite end, we added an auxiliary vise. It's a multiuse clamping accessory from Kreg Tool called a Clamp Vise. It consists of an aluminum plate that screws to the edge of the benchtop with T-tracks for the included clamp and work supports. This simple accessory increases the workholding capability of an ordinary bench even more.
2. Drill dog holes
While a vise alone is handy, its usefulness is limited by the capacity between the jaws. Adding bench-dog holes expands your vise capacity to hold pieces nearly the size of your benchtop.
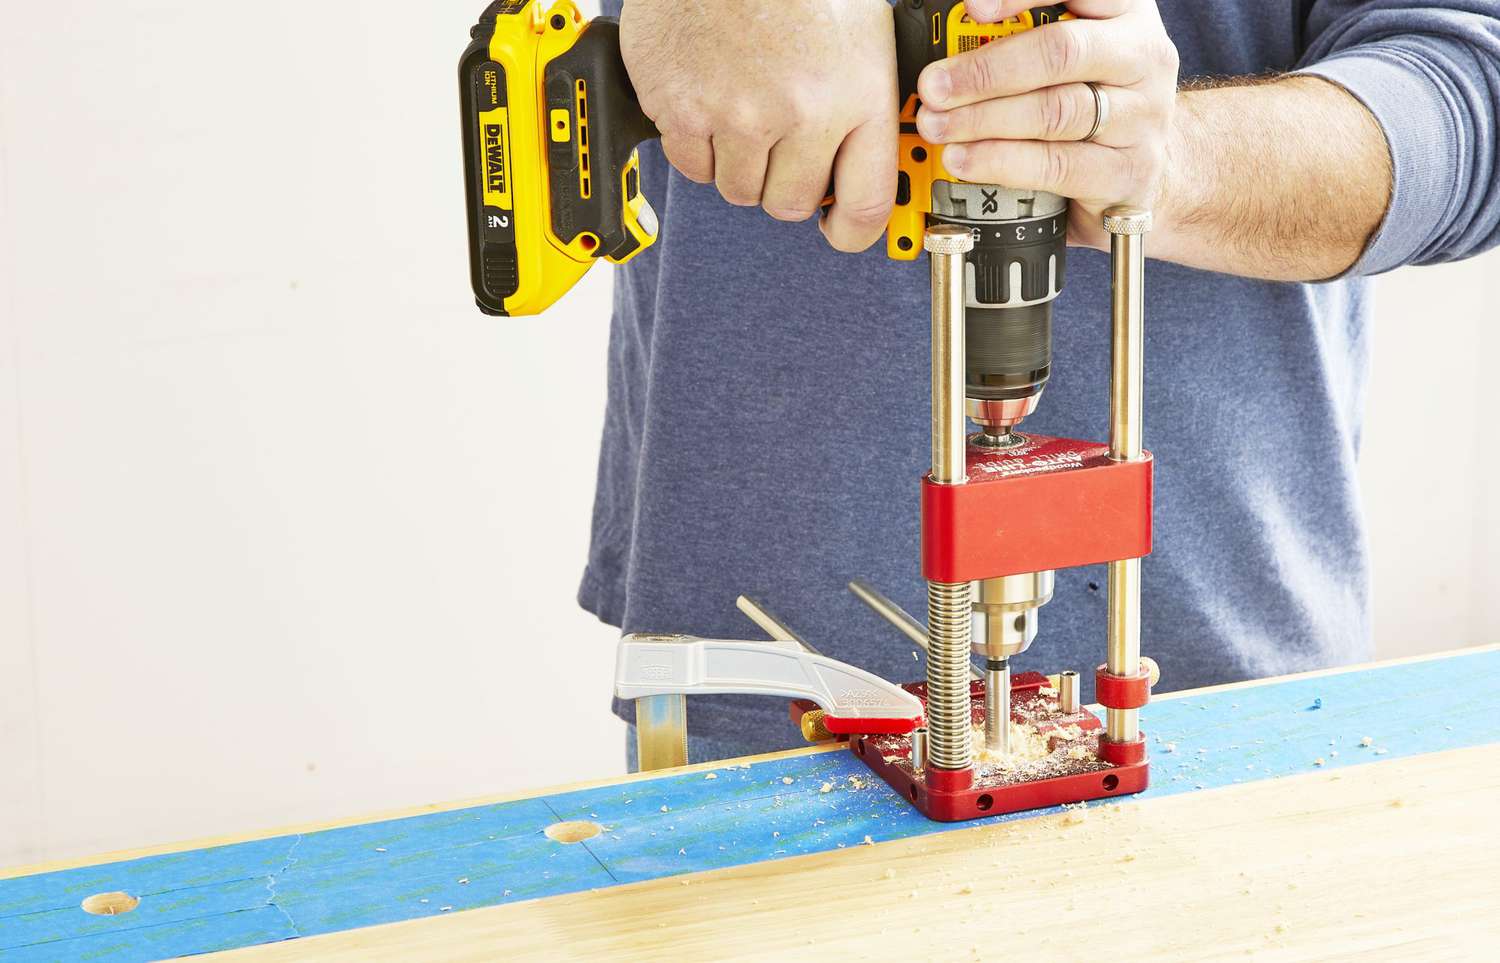
Place dog holes in line with your vises and drill them perpendicular to the benchtop. Make the distance between the holes slightly less than the opening capacity of your vise jaws. To drill the holes precisely, we used a portable drill guide [Sources]. We chose a model with alignment marks on two axes, plus an edge guide, for easy positioningand drilling.
The most common bench dogs fit a 3/4" hole. Drill the holes all the way through the benchtop to prevent sawdust and debris from accumulating and to provide a finger hole to pop the dogs up from underneath.
3. Run for cover
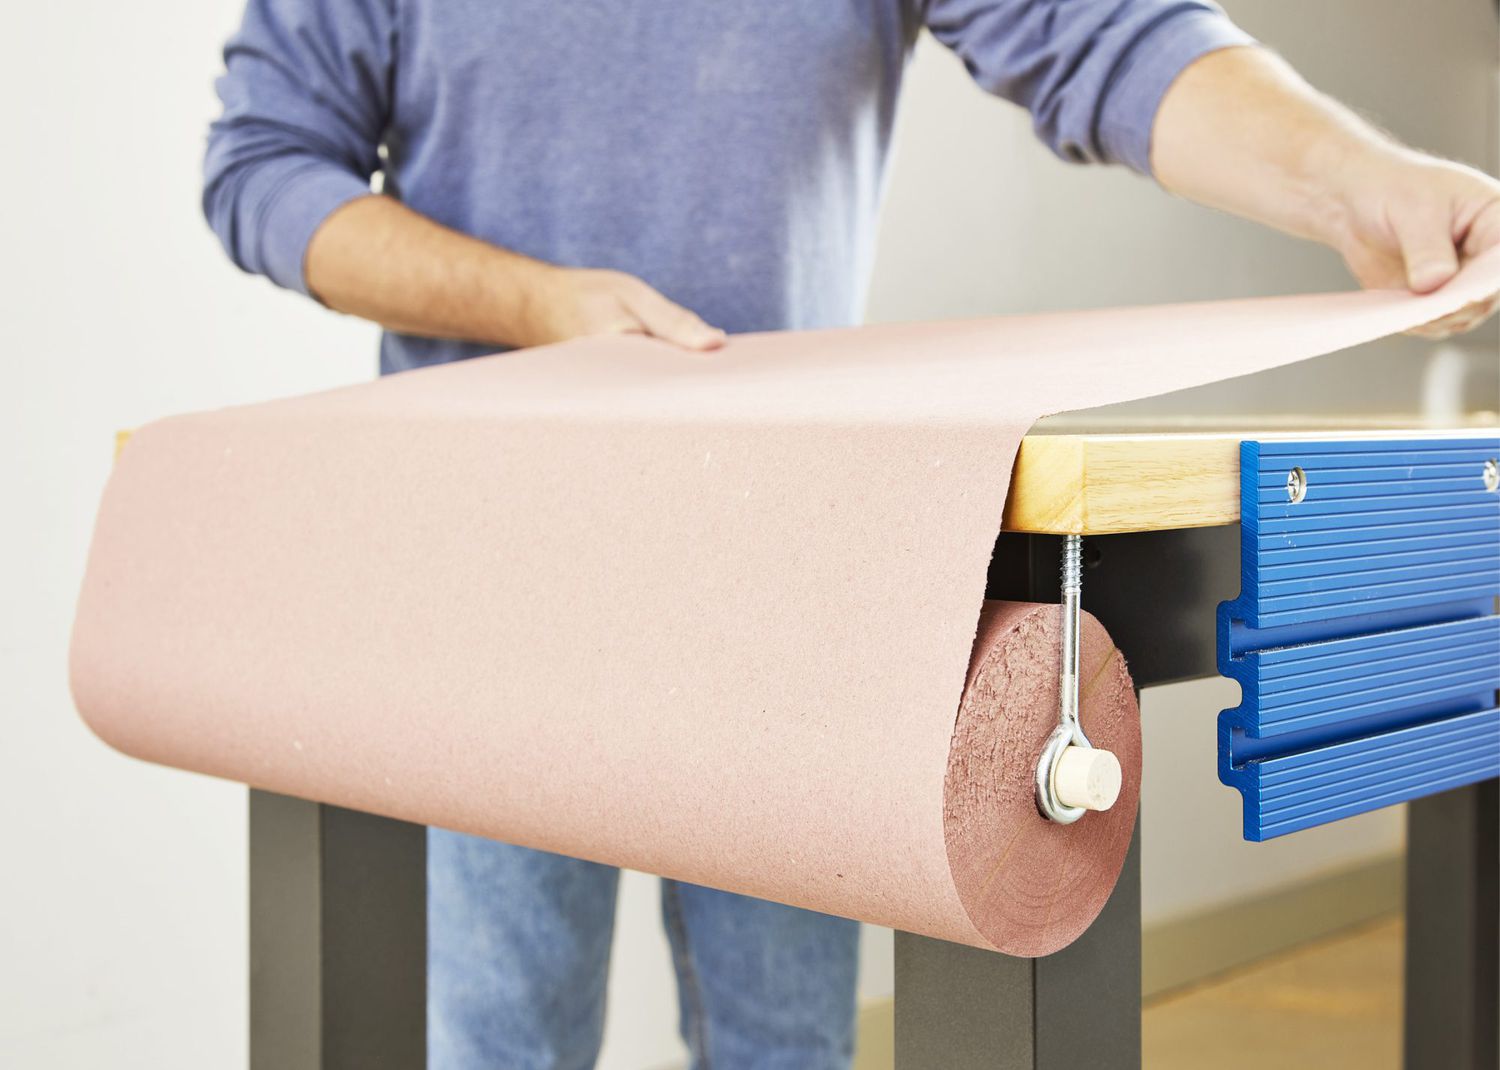
Glue-ups and staining can make a mess of your benchtop in a hurry. Prevent it with a roll of rosin paper, a pair of 3/4 × 5" screw eyes, and a 3/4" dowel. Those three ingredients combine to make a simple, effective paper dispenser. Simply drill pilot holes in the underside of the bench, thread in the screw eyes, slide the dowel through the paper roll, and insert it into the screw eyes. If the fit is too snug, sand the ends of the dowels to reduce the diameter.
4. Teach your dog holes new tricks
Dog holes, of course, accept bench dogs that allow you to extend the holding capacity of your vise. Just slip a dog into one hole, pop up the dog on the vise jaw, and then tighten the vise to clamp between the dogs.
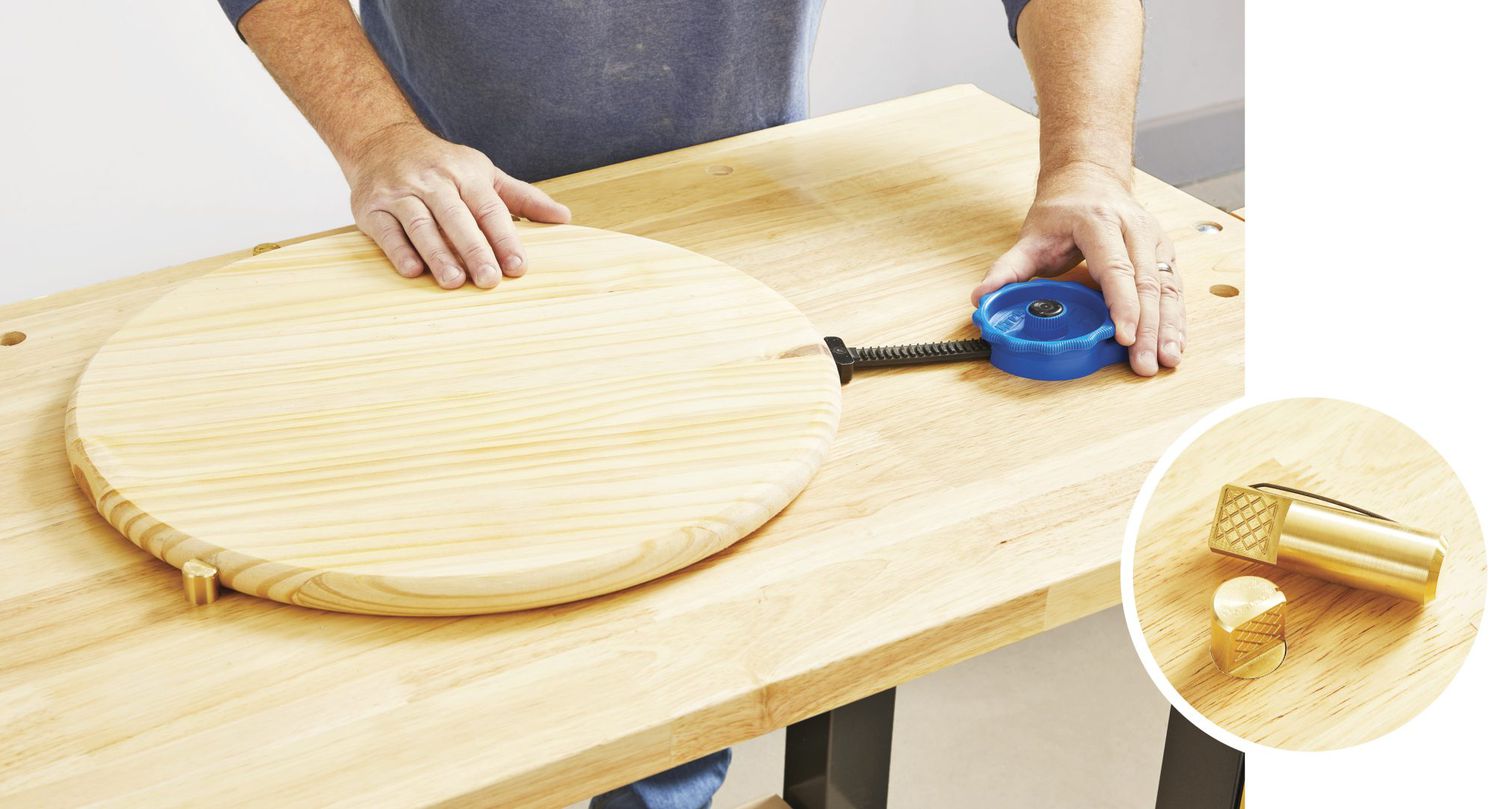
Dog holes also do a whole lot more when combined with a few specialty accessories. In-line clamps, above, make it easy to hold odd-shaped workpieces.
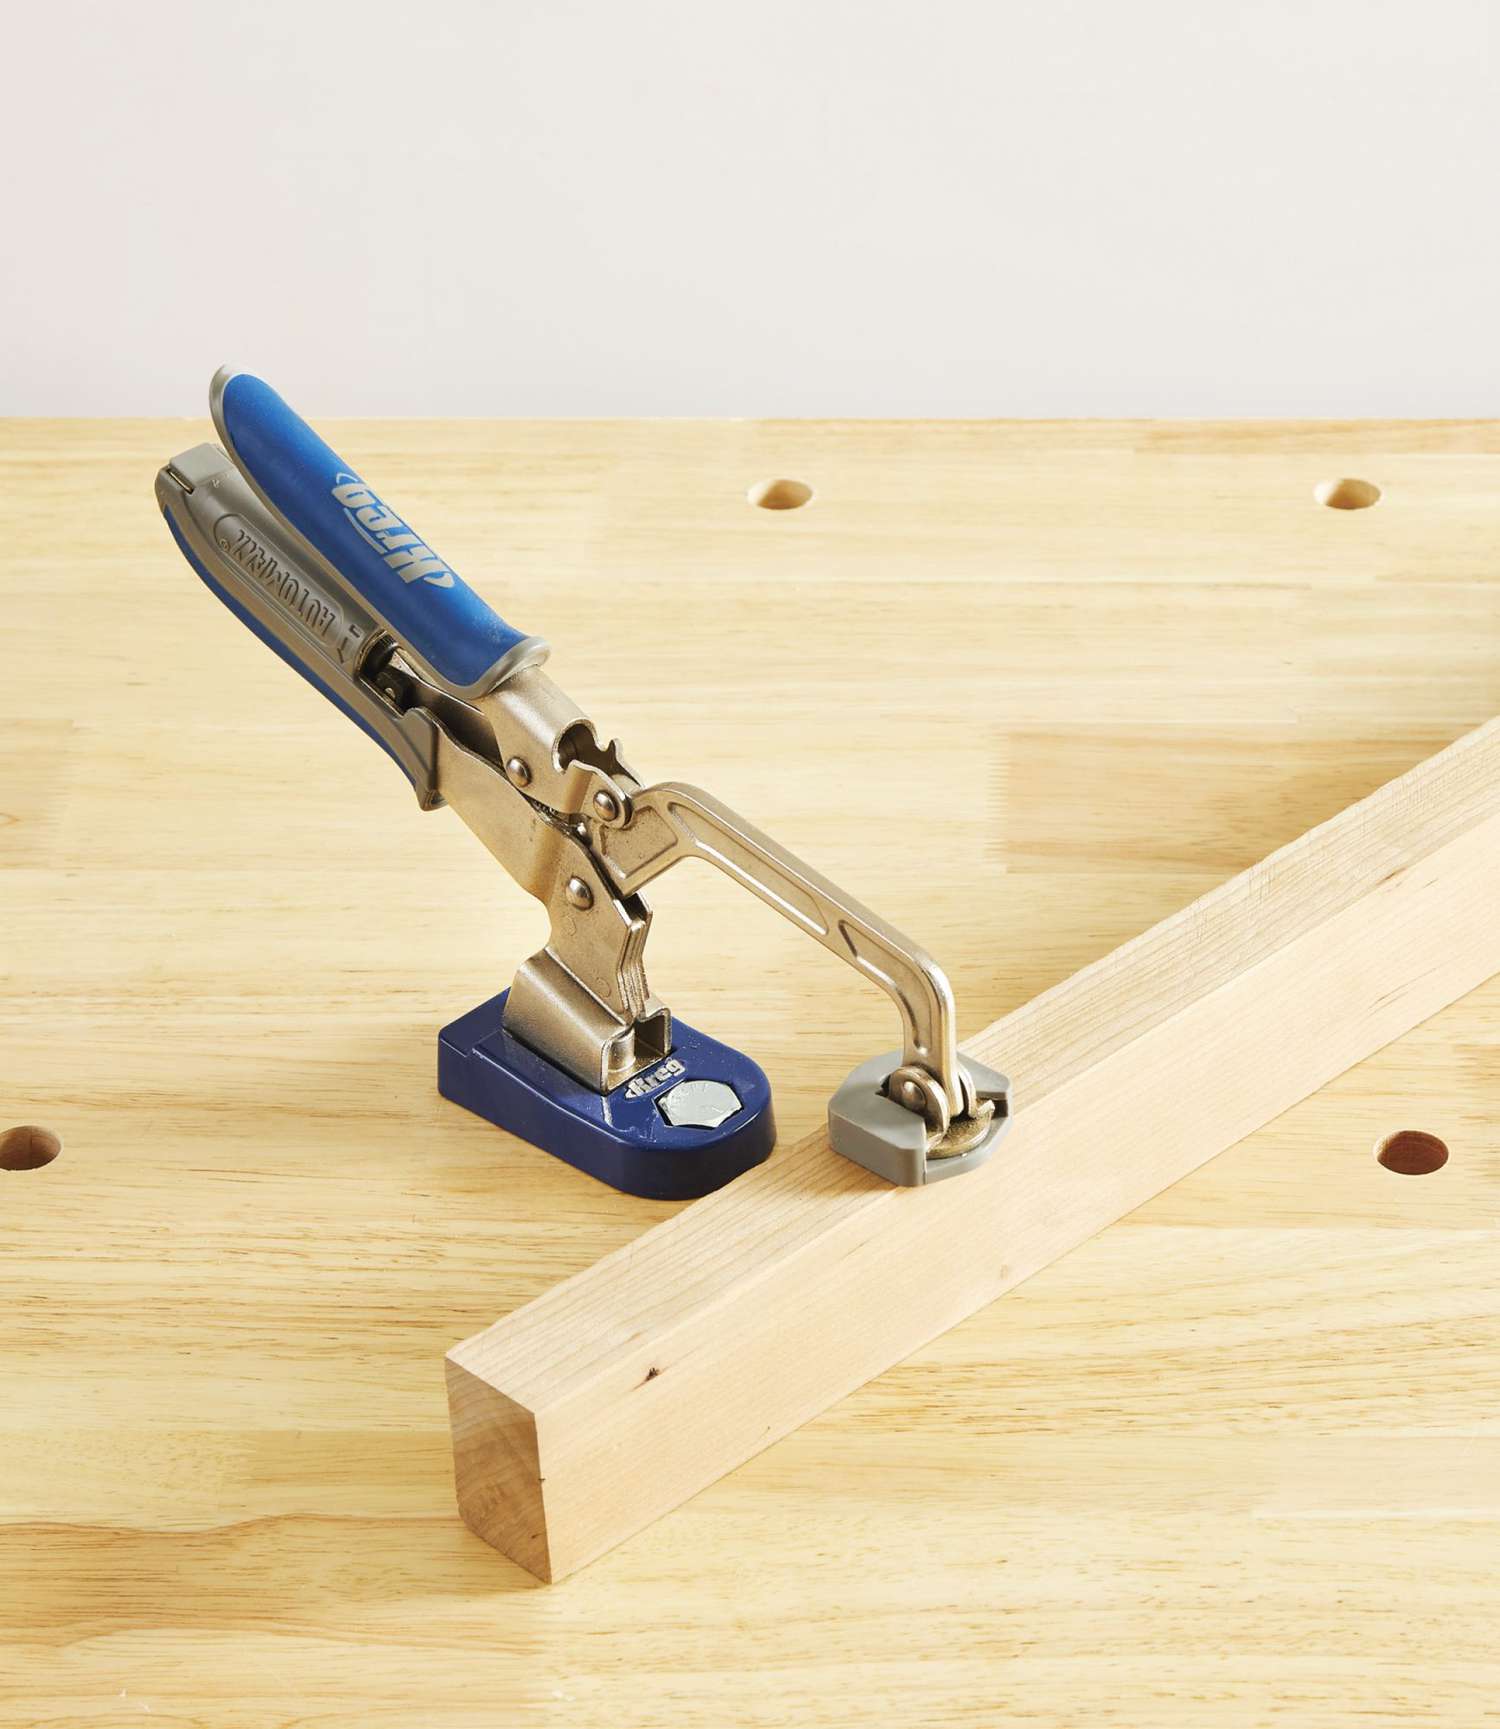
The same clamp that fits in the Clamp Vise on the front of the bench also works as a hold-down clamp when combined with a dog-hole base, above.
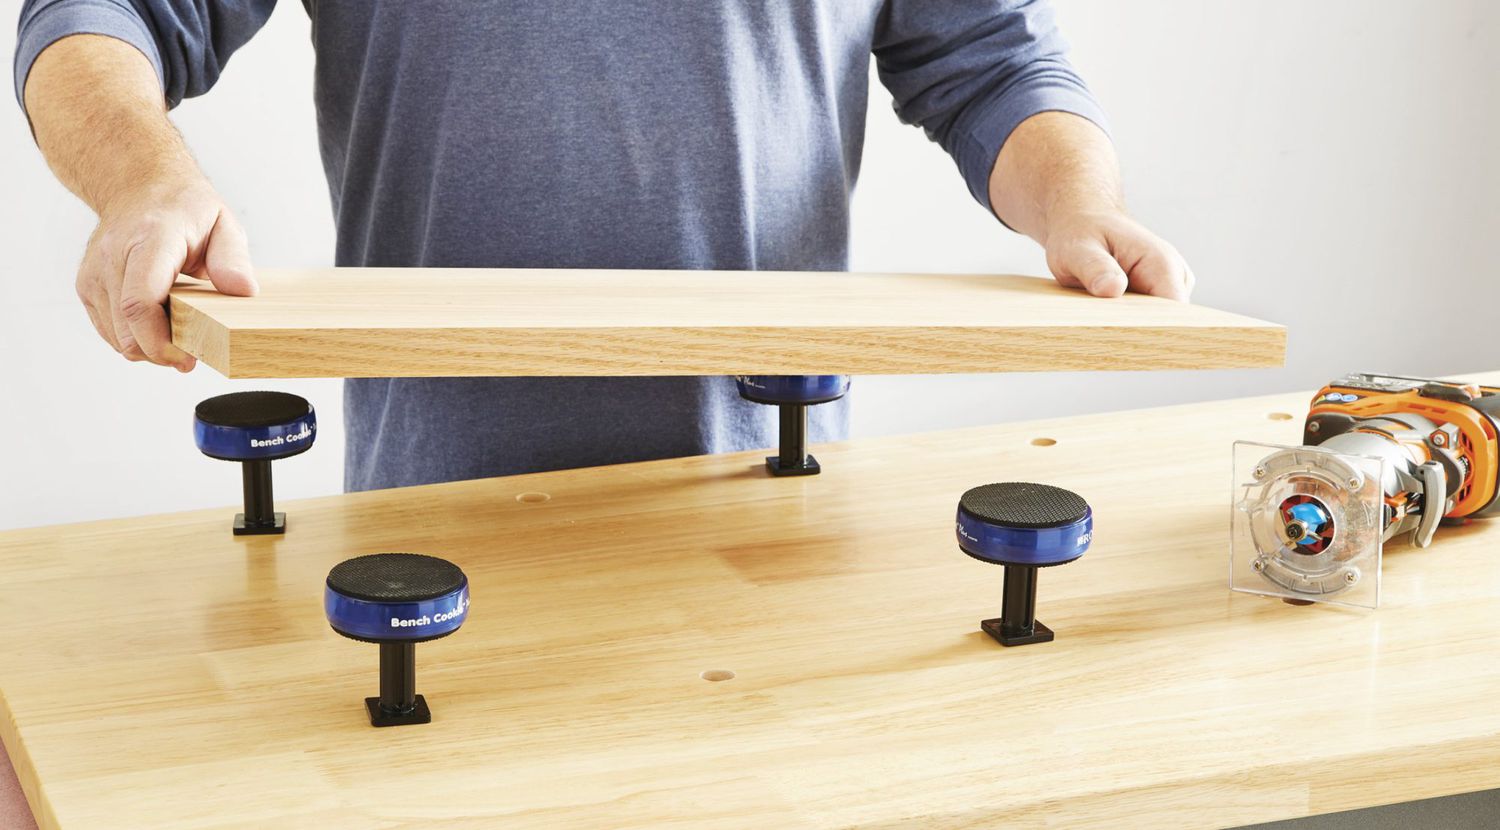
For some tasks, such as routing an edge profile with a bearing-guided bit, raising the workpiece up off the bench surface proves beneficial. These Bench Cookies, above, screw onto risers that fit right into your dog holes to elevate and grip your workpiece while you work. With pointed caps that slip on, the Bench Cookies are handy for finishing, too.
5. Step up the storage
We've never met a woodworker who complained about having too much storage space. So, it's smart to not waste the space under a bench. We added a lower rail in front that this bench was lacking, then topped it with a shelf made from 3/4" plywood notched to fit around the legs.
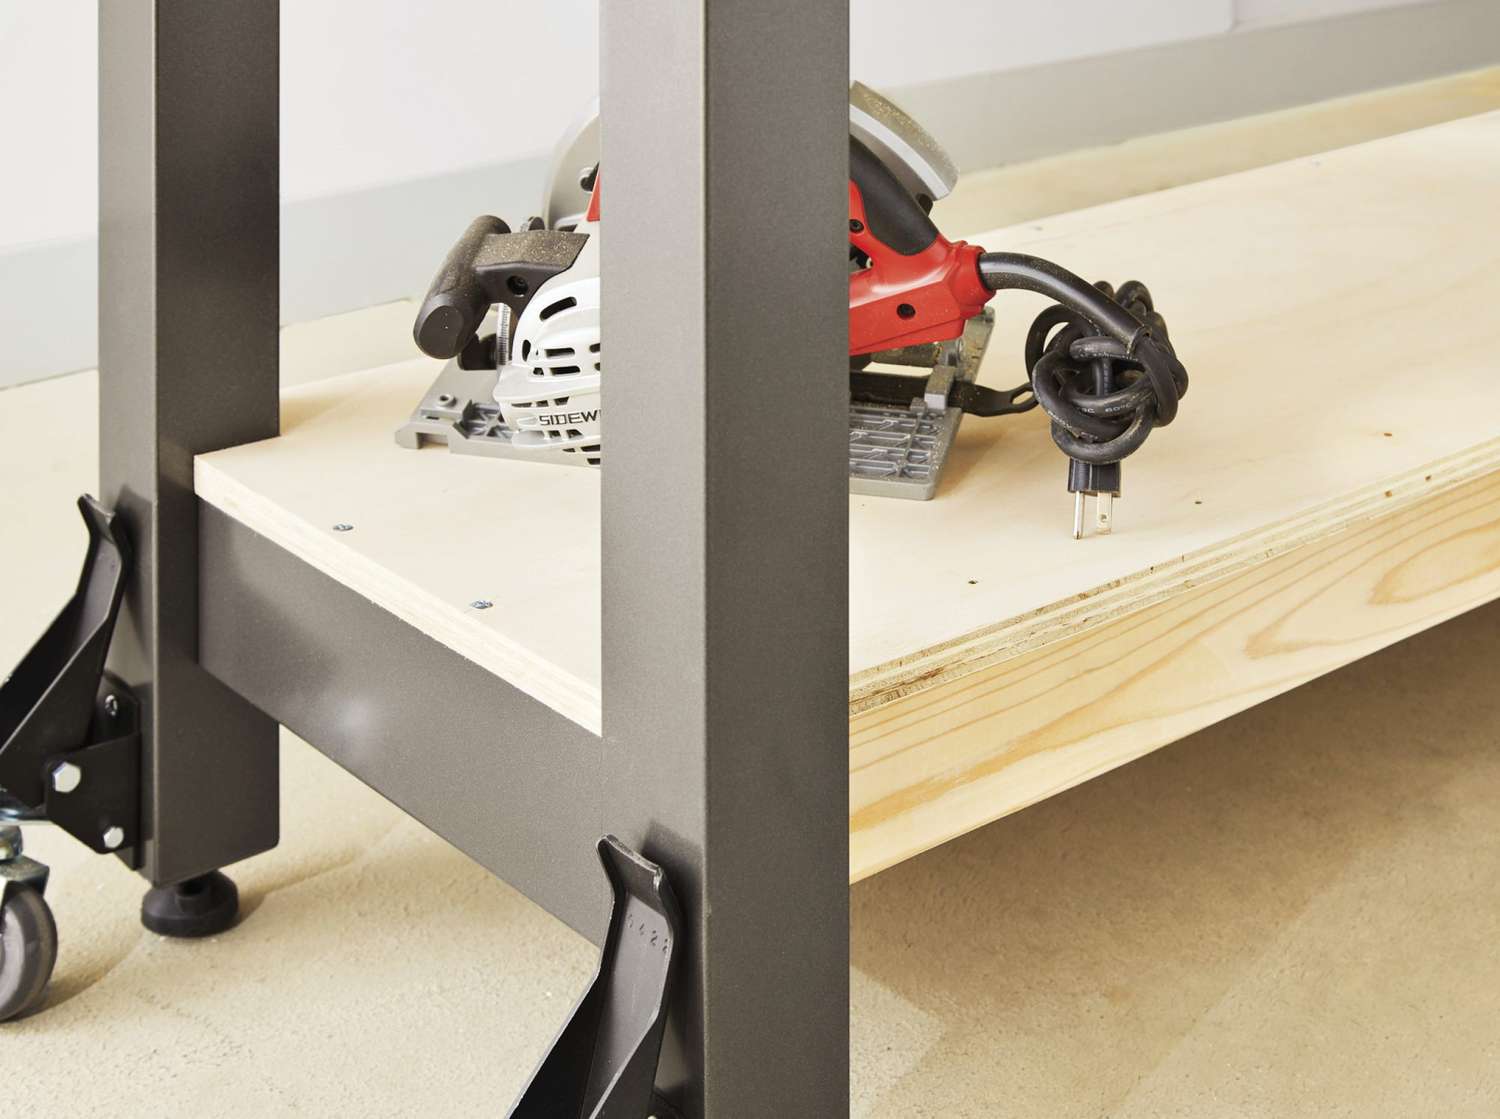
Of course, you can add cubbies or an enclosed cabinet if desired. If your bench needs more mass to keep it from "walking" while planing or sawing, stabilize it by turning the shelf into a hollow box and filling it with paving bricks for added weight.
6. Make it mobile
A workbench may be the centerpiece of a shop, but it doesn't always have to stay there. Permanent casters, even locking ones, though, can make the bench unstable. And they remove the ability to adjust the legs for uneven floors.
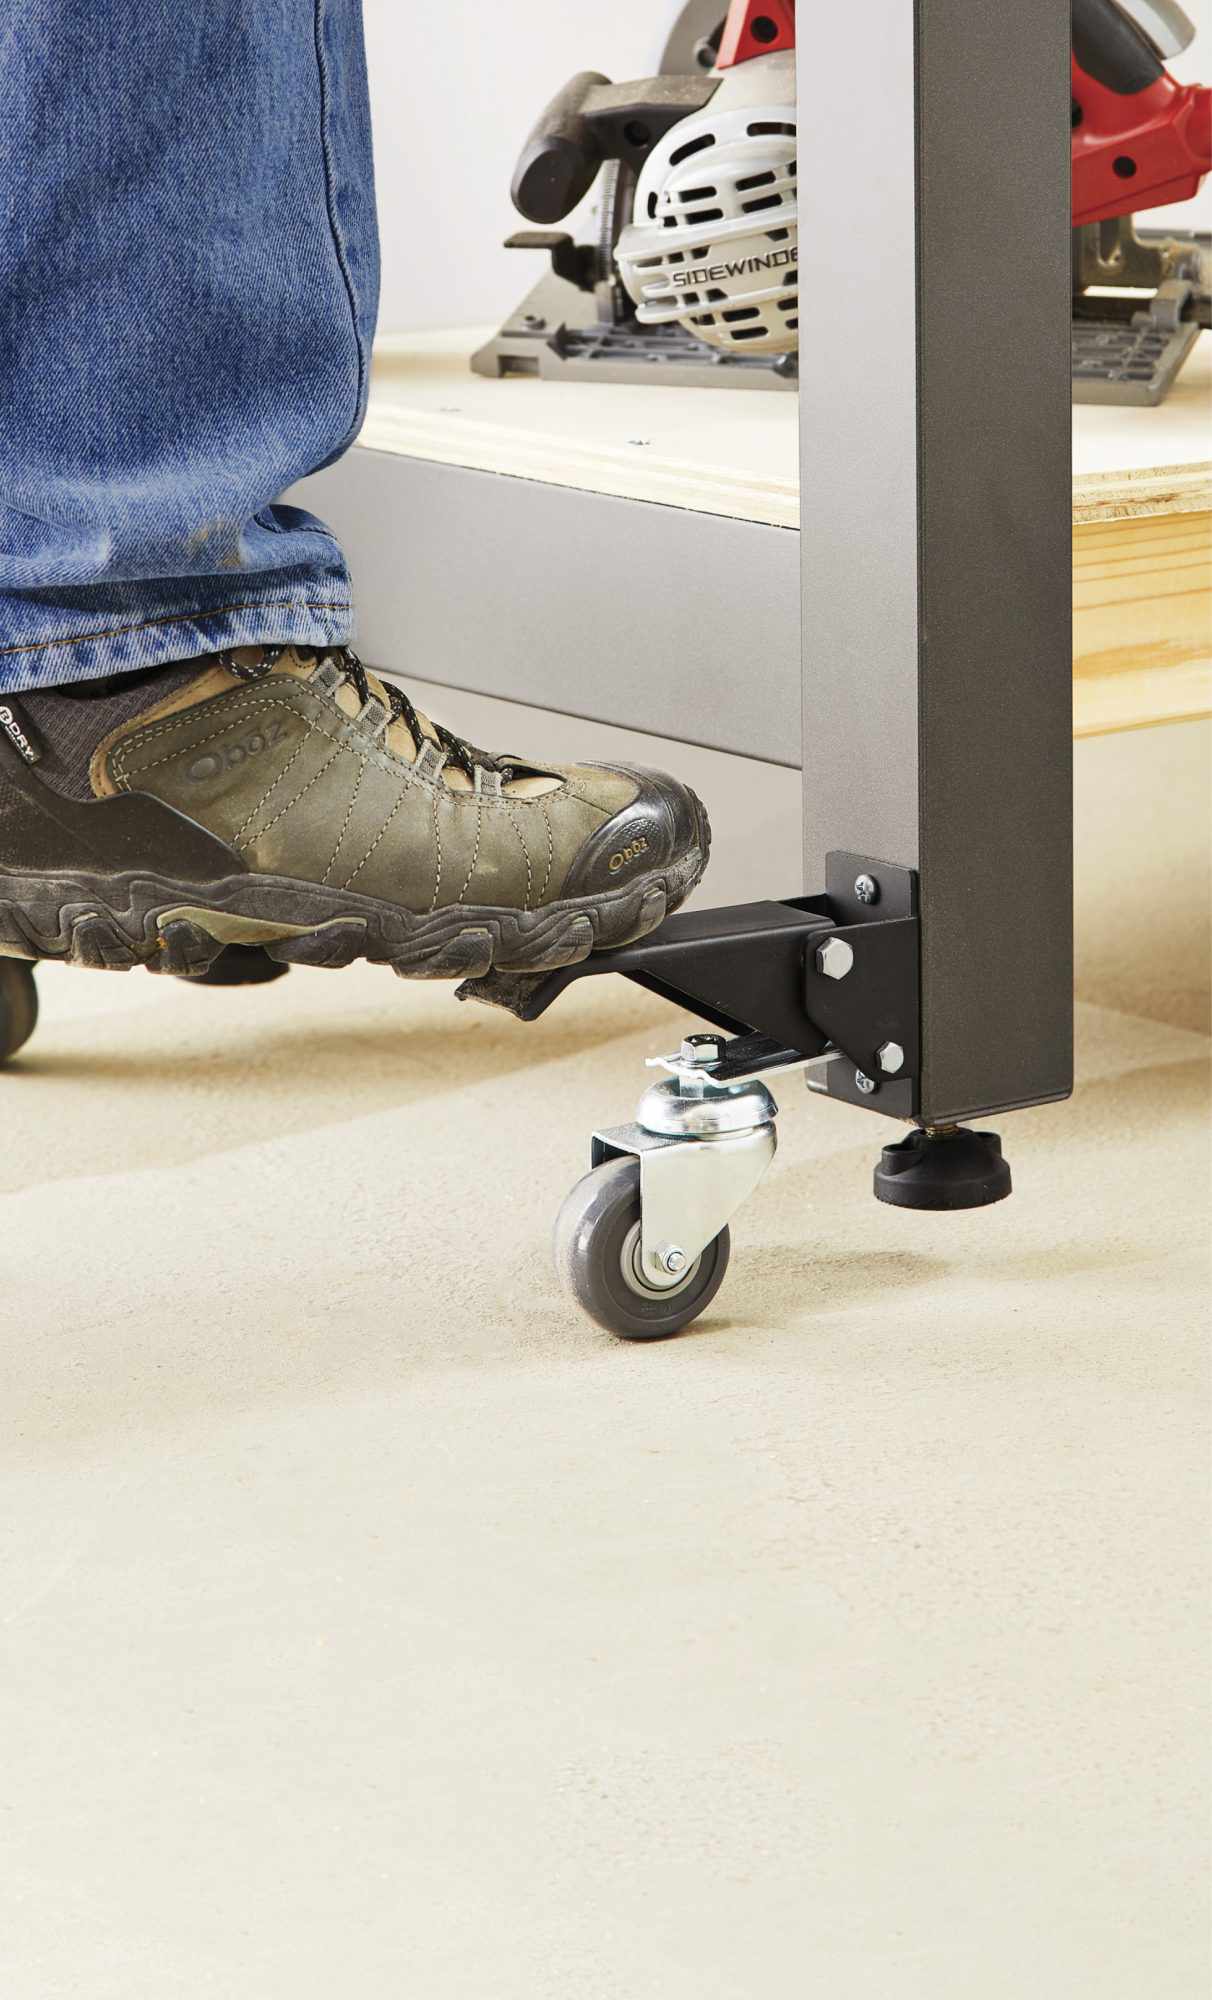
These retractable casters [Sources] flip down when you want to roll the bench around, then flip out of the way to allow the bench to sit on its feet while in use.
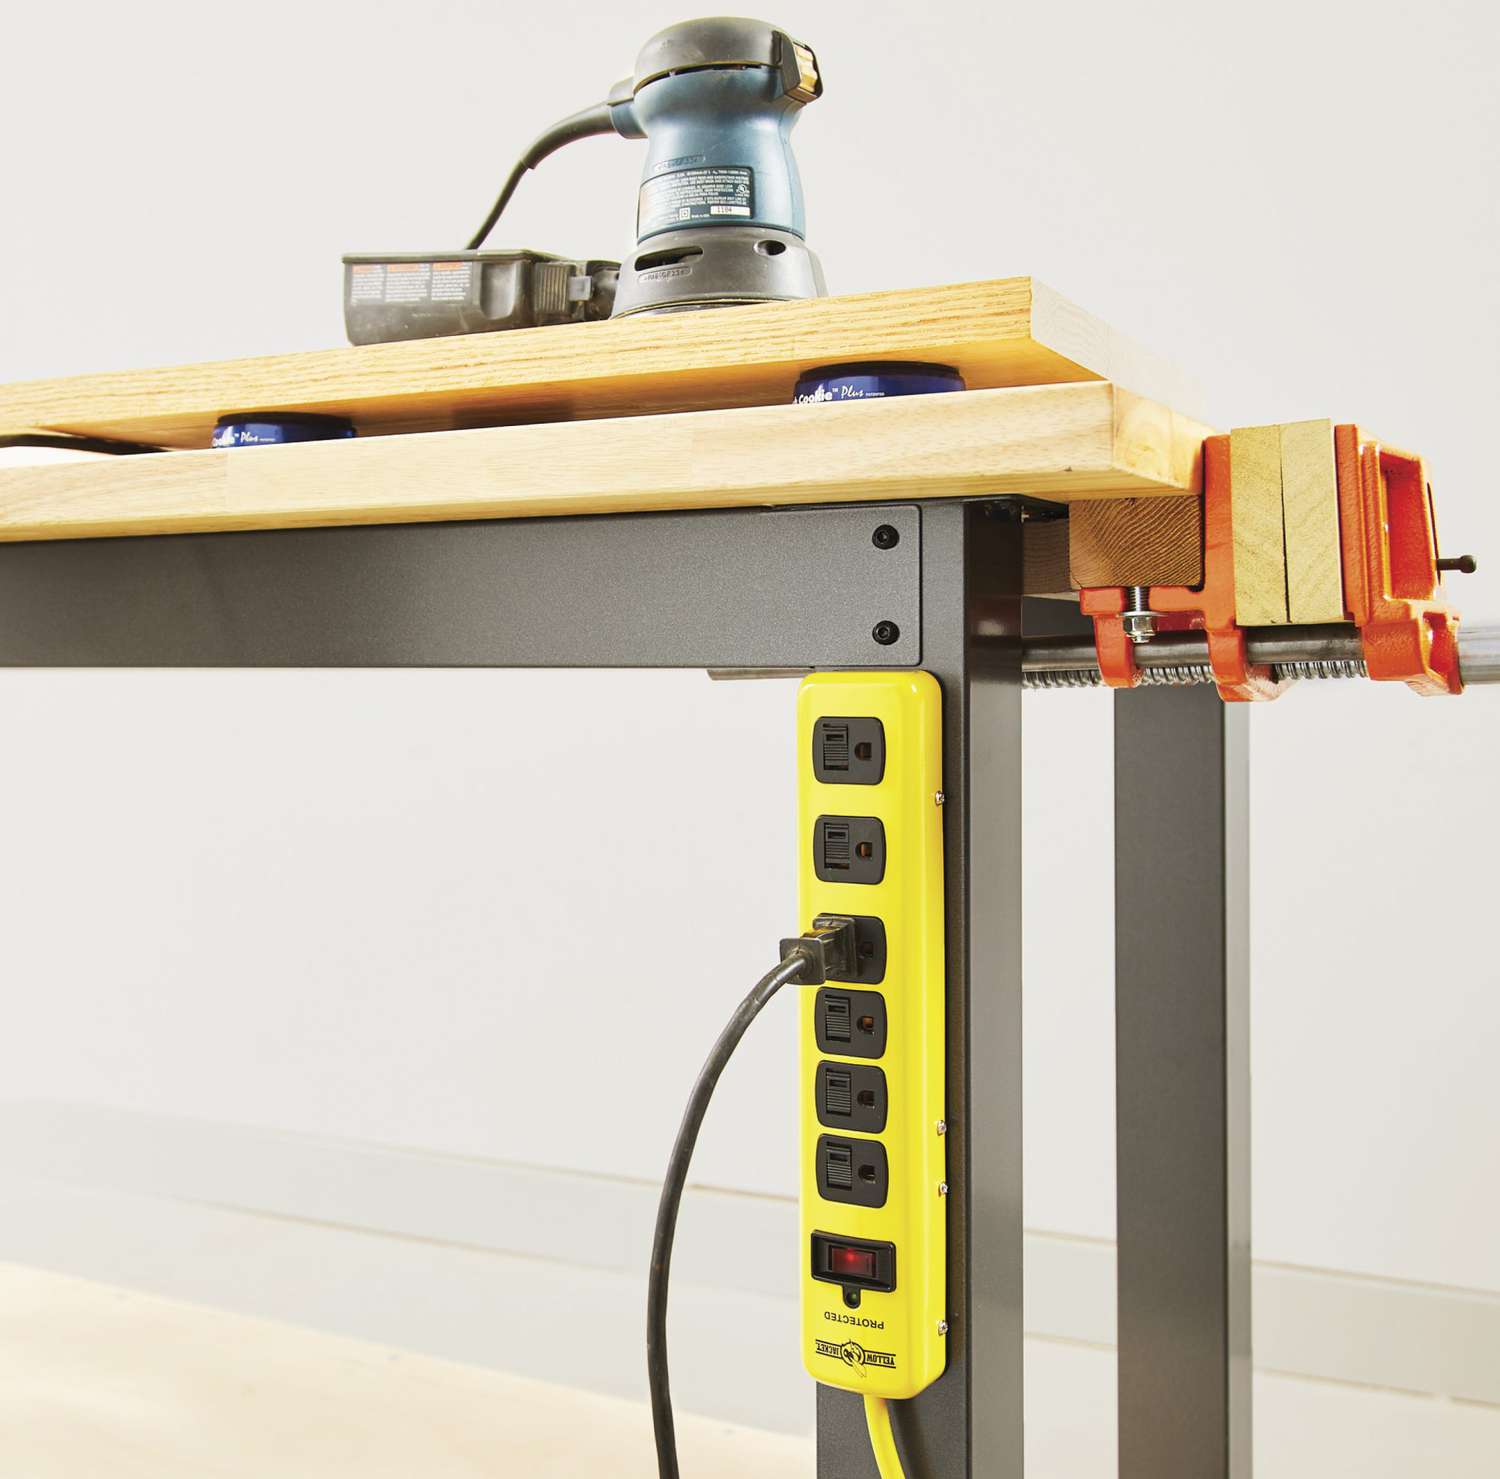
7. Power Up
Until cordless tools completely take over, woodworkers will always welcome outlets nearby. Mounting a power strip to a bench leg means you'll always have an open receptacle when and where you need it.

Make it your own
Whether you're creating your primary workspace or you're adding a second bench, make your bench the hero you deserve with well-chosen accessories that suit the ways you work. We've shown a few here, but we know many more exist. Drop us a line at woodmail@woodmagazine.com to show and tell us how you've customized your workbench.
Sources:
Masterforce 60×24" Workbench, Menards, menards.com. Pony Woodworker's Vise, Pony Jorgensen, 800-776-2228, ponyjorgensen.com,. Clamp Vise no. KBC3-VISE; Bench Clamp Base no. KBCBA; In-Line Clamp no. KBCIC, Kreg, 800-447-8638, kregtool.com. Veritas Round Bench Pups Pair no. 05G0404, Lee Valley, 800-871-8158, leevalley.com. Bench Cookie Plus Master Kit no. 56071; Workbench Casters (4-pack) no. 43501, Rockler, 800-279-4441, rockler.com. Yellow Jacket 6-outlet power strip no. 204667729; 36"×167' red rosin paper no. RR16736, Home Depot, 800-466-3337, homedepot.com.