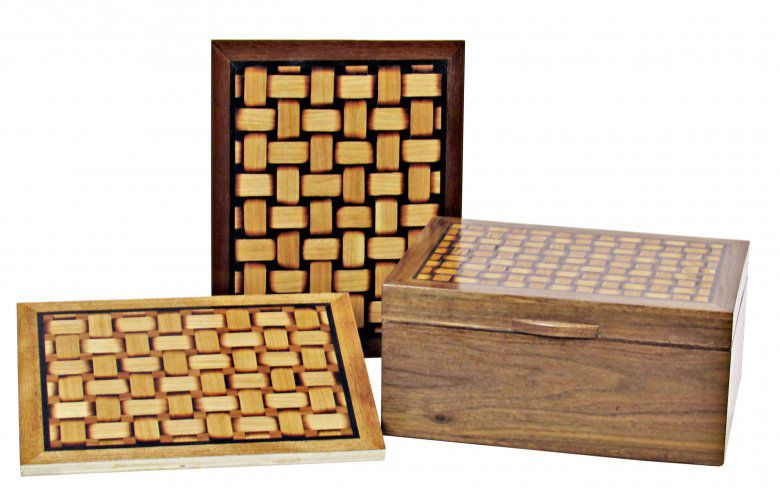
Try your Hand at Basket-Weave Veneer


Dress up a box and create a unique and elegant look with a basket-weave veneer top. Like many woodworking techniques, it looks complex at first. However, once you understand the process, shown here in step-by-step simplicity, you'll find it very easy.
Lay out the pattern
To create the basket-weave pattern, I used black-dyed maple veneer squares and lighter-colored cherry rectangles.
The secret to creating the pattern is the ratio between the squares and the rectangles. The rectangles should be twice as wide and four times as long as the squares. By applying this 1:2:4 relationship, you can create basket-weave patterns of any size.
In the example shown here, 3⁄4 ×11⁄2 " rectangles complement 3⁄8 " squares. A 3⁄16 " black-veneer border and 1" walnut-veneer frame surround the weave pattern. Once completed, the oversize panel was trimmed to fit an 8 1⁄2 ×11" box top.
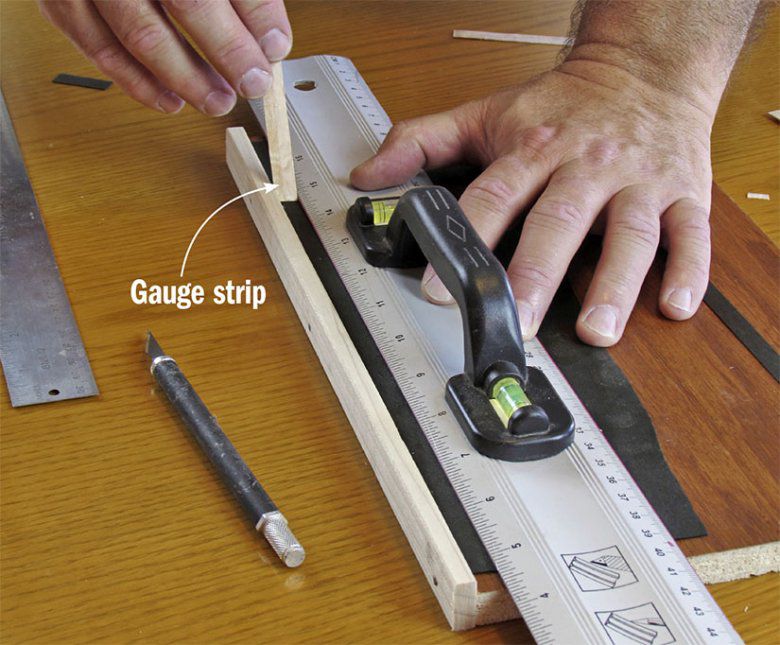
Cut the veneer strips
This panel requires 63 squares and 62 rectangles, but it's a good idea to make some extras. To cut the parts, gather a razor knife, metal ruler, and a cutting board. (For the cutting board, use a scrap of plywood or melamine-coated particleboard, with a raised hardwood fence to butt the veneer against.)
Begin by cutting a 3⁄8 " gauge strip from 1⁄2 " or thicker scrap. With a piece of black veneer against the fence, use the gauge strip to position the straightedge 3⁄8 " away from and parallel to the fence, photo below.

Cut at least 24 lineal inches of veneer to use for making squares, photo below.

The tape holds the strips tightly together and prevents the edges from splintering when cutting across the grain.
Then cut two more strips 12" long and set these aside. Tape together edge to edge the strips used to make the squares and crosscut them, photo below.

Tip! After cutting the pieces to final size, carefully peel away the tape 45° to the grain direction to avoid breaking the veneer. This is when extras come in handy.
To make a gauge strip for the cherry veneer rectangles, tape together edge to edge the two 3⁄8 " black strips you set aside. Cut at least 93" of 3⁄4 "-wide cherry strip. As before, tape these strips together edge to edge, square up one end and butt this end against the fence. Tape two of the 3⁄4 "-wide strips together and use this 11⁄2 "-wide gauge strip to position your straightedge for crosscutting the rectangles.
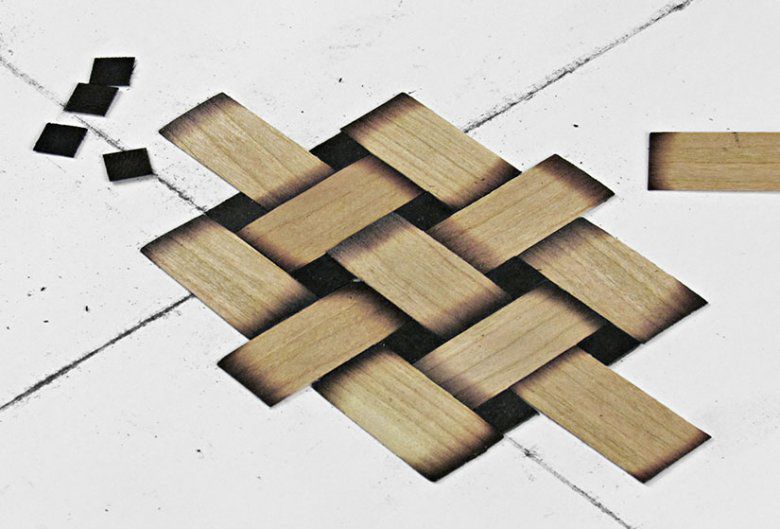
Add depth with a quick burn
Darkening the ends of the rectangles using hot sand simulates a shadow and creates the over/under basket-weave illusion.
Tip! A long pair of tweezers keeps your fingers away from the hot sand.
Set an electric hot plate to medium-high heat, and place on it a small cast-iron frying pan filled 2⁄3 full with fine sand. Practice with scrap veneer to get a feel for how long it takes to char the cherry strips. Char both ends of each piece, photo below.

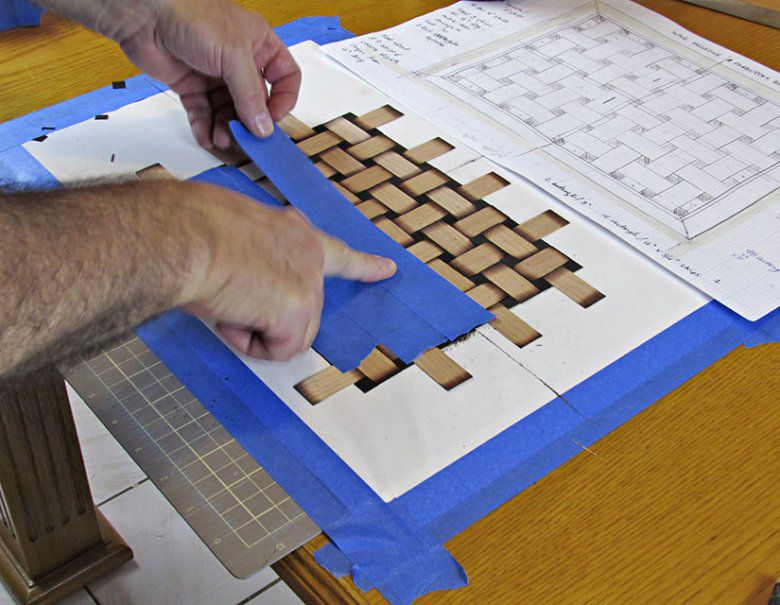
Assemble the panel
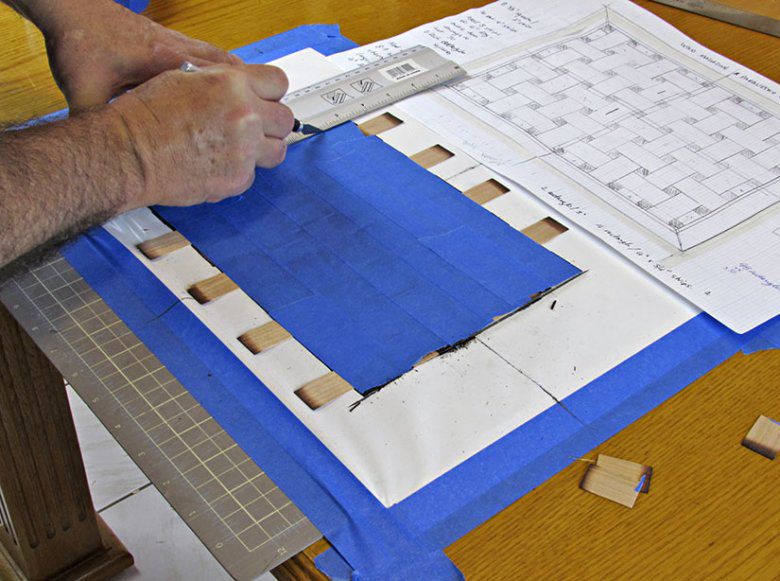
To keep the pieces of veneer in position as you build the pattern, place a sheet of contact paper, sticky side up, on a self-healing cutting mat or some cardboard, photo below.

Draw two perpendicular reference lines on the contact paper, intersecting at the center of the sheet. Like the lines chalked on a floor before laying tiles, these will help you keep the pattern square. Place the rectangles and squares good side down, photos below.

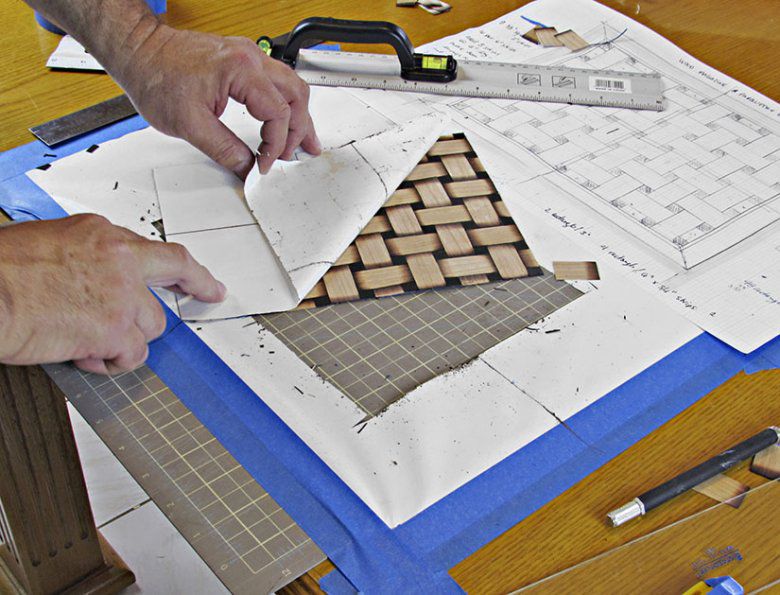
If some pieces slide or pull away on the slightly sticky contact paper, use just enough transparent tape to temporarily hold them together. Complete the pattern and cut it free, photos below.
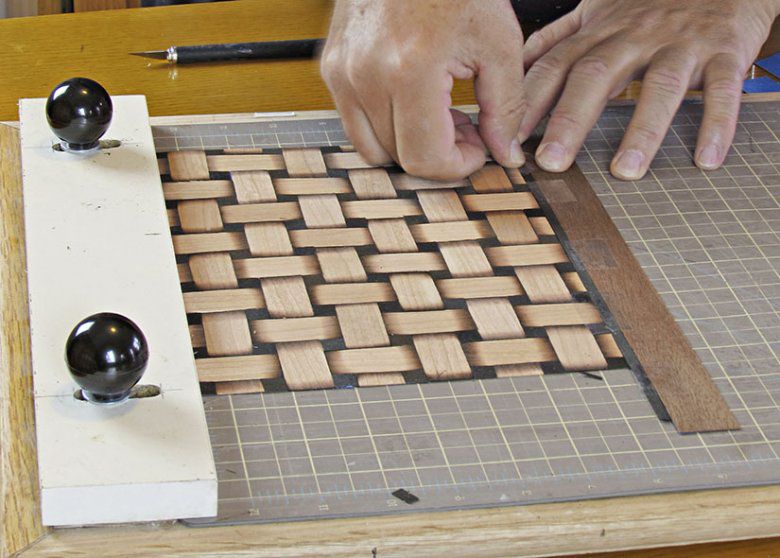
Add a mitered border
Cut the 3⁄16 "-wide black border strips and 1"-wide walnut frame strips in the same manner as the black and cherry strips. Apply the border to the pattern, photo below, overlapping the strips at each corner.
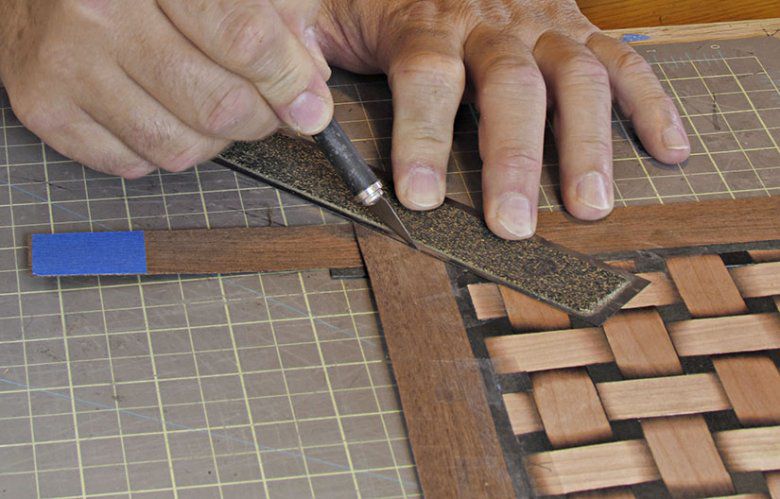
Tip! Place transparent tape diagonally across the corners on both faces of the veneer to prevent the corners from breaking off when cutting.
Miter the overlap, photo below. After cutting the miters on all four corners, flip the panel over and cover the border with blue painter's tape. Remove the transparent tape from the front surface.
Apply veneer tape
Need veneer tape? Find it here: no. 153093, $12, 800-225-1153, woodcraft.com.
Before gluing the completed panel to the substrate, the painter's tape must be removed. To do that, first moisten strips of veneer tape and cover the entire front of the panel, photo below. The wet veneer tape may warp and curl the panel. Don't panic! It will flatten out when glued to the substrate. After the veneer tape dries, carefully peel away the painter's tape at 45° to the grain direction and flat to the surface to minimize the chances of pulling out one of the pieces.
Tip! If a piece comes loose when removing the painter's tape, put it back in and rub a drop of glue into the joint with your finger.

Glue up the panel
To secure the panel to the substrate, you can use a vacuum press, a veneer press, or simply clamp the work between platens, such as pieces of 3⁄4 " MDF. I use liquid hide glue because it allows me to reposition a panel after the glue dries by heating it with an iron, but any woodworker's glue will work.
Cut a stable substrate, such as MDF or plywood, to the same size as the basket-weave panel. Then cut a backer veneer to the same size as the substrate. Choose a veneer that complements the inside of your box. Gluing a backer veneer to the bottom of the substrate will keep the finished panel from warping.
Spread glue on the substrate and apply the backer veneer. Then flip over the substrate, spread glue on it, and apply the basket-weave panel, photo below. (Apply glue to the substrate, not to the basket-weave panel.)

The author uses a shop-made veneer press that utilizes a stout wood frame and an inexpensive bottle jack. You can simply use F-clamps, hand-screws, or one-hand bar clamps instead.
Insert the panel into the press and apply pressure, photo below. Leave the panel in the press for a few hours, then remove it and set it aside for 24 hours to let the glue cure completely.