Turn Your Own Knobs


Customizing small details, such as knobs, provides not only the satisfaction of having made all the project parts yourself, but also gives greater design latitude in choosing the perfect knob profile and wood species. Here, you'll learn to make knobs in three profiles. One knob mounts to its door, drawer, or lid via a tenon; the others attach with a screw. Let's get started.
End grain vs. face grain—what's the difference?
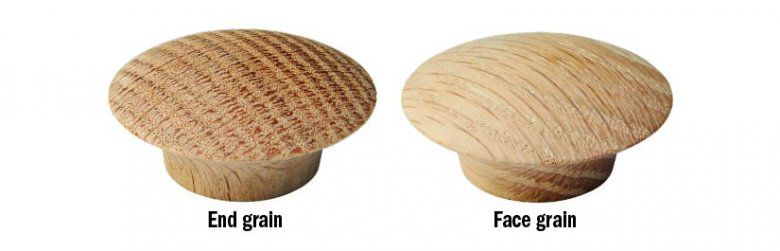
With any knob, you'll need to decide whether its cap will show end grain or face grain. You turn an end-grain knob with its grain running the length of the blank (inline with the lathe spindle). This results in the annual growth rings running across the cap in mostly parallel lines. That means it will soak up more stain and finish, making it darker than a face-grain knob. You can counter this effect by sanding to 400 grit and applying a light sealer coat of dewaxed shellac before staining or coating further.
A face-grain knob, turned with grain running perpendicular to the lathe spindle, doesn't soak up as much finish and darken. But, in the case of this red oak, more stain pigments will settle into the coarse grain, highlighting the arched grain pattern.
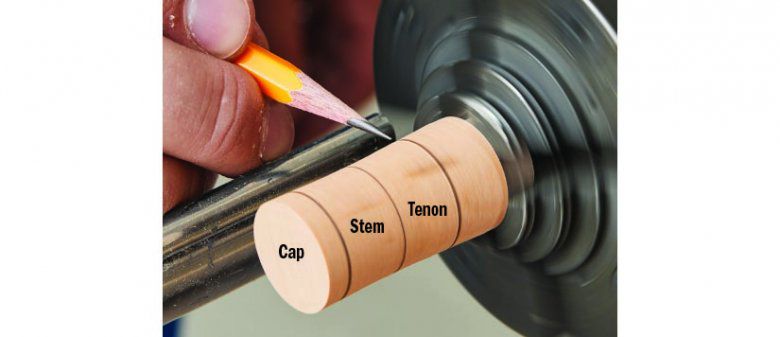
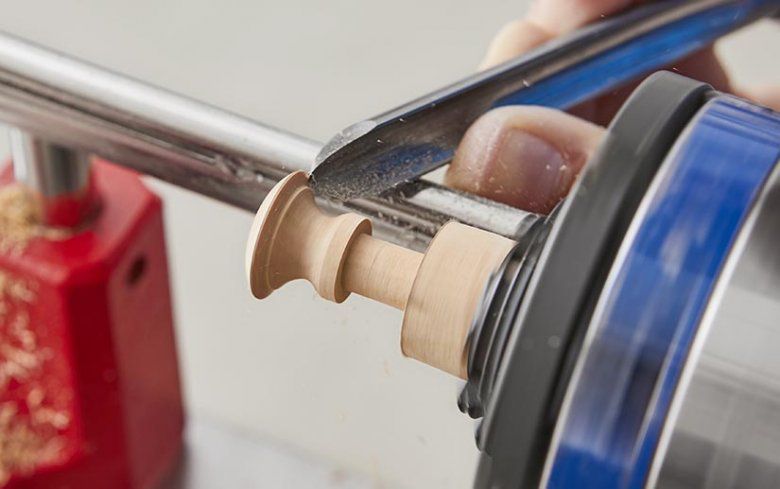
Classic mushroom cap with tenon

This knob, commonly identified with Shaker-style furniture, has a tenon for gluing in place. Create a square blank slightly larger in width than the desired final diameter, and 3⁄4 " longer than the desired final length. For this 7⁄8 "-diameter knob, we made a 1×1" blank 2" long.


SKILL BUILDER
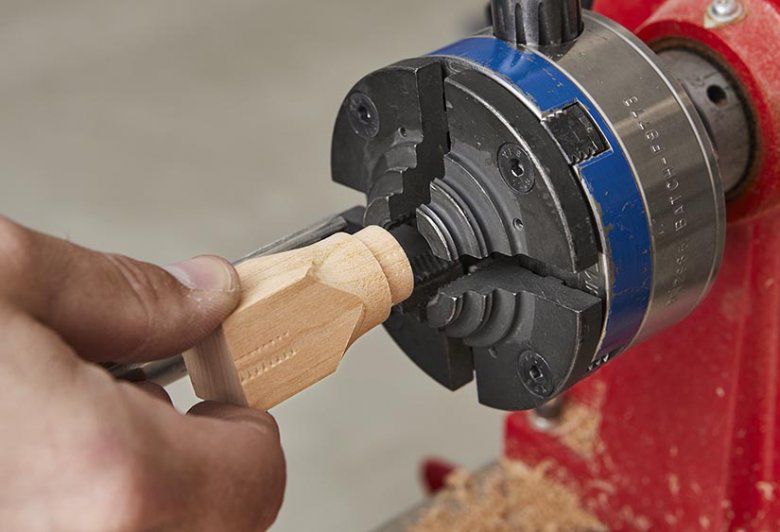
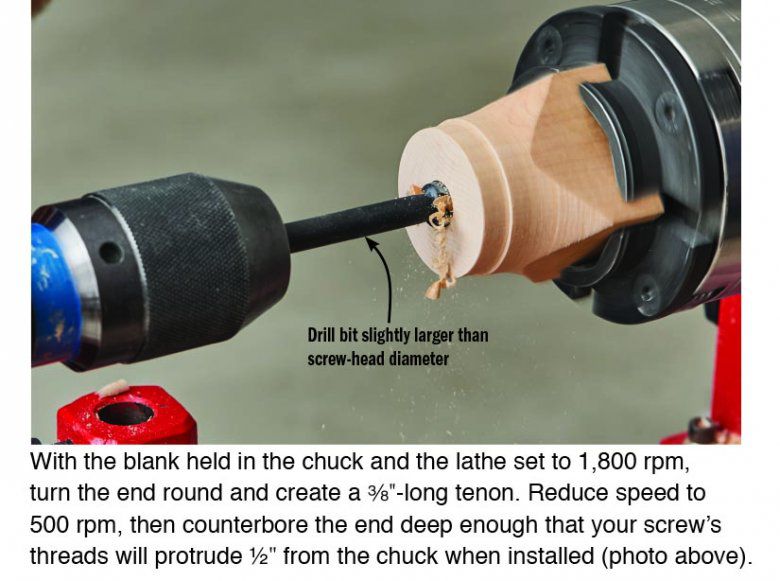
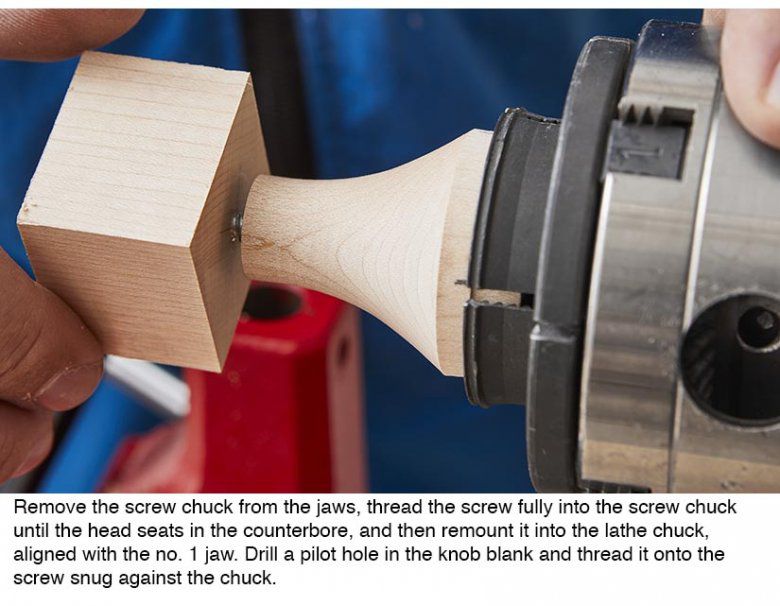
Make a screw chuck

To turn a knob that mounts flush to the drawer or door using a screw, you must first create a screw chuck to hold the knob blank while turning. Start with a 2×2×2" blank of dense hardwood, such as hard maple.

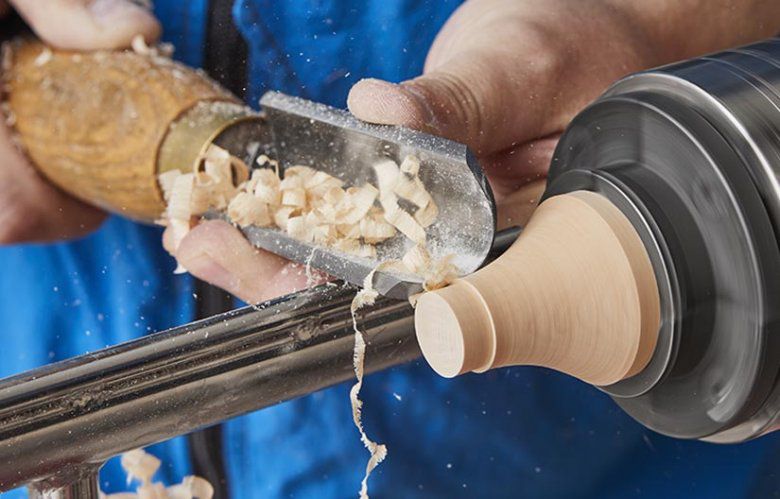
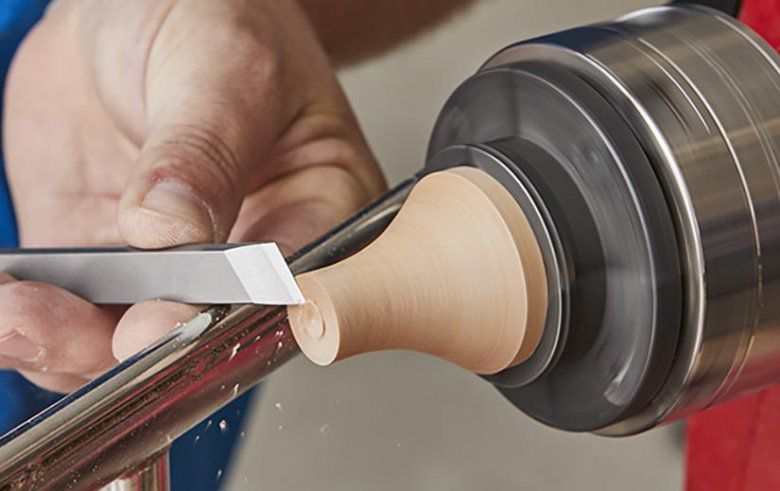


Three-fillet screw-on knob

This simple knob has a full bead and cove as well as three 1⁄16 "-wide fillets.
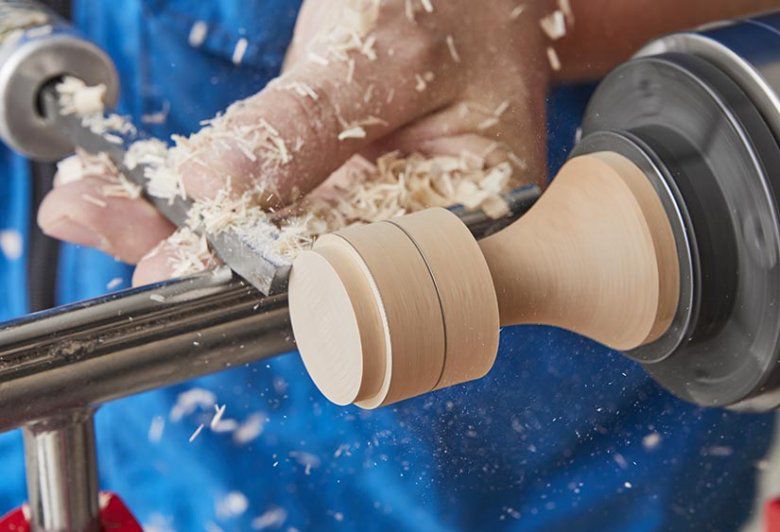

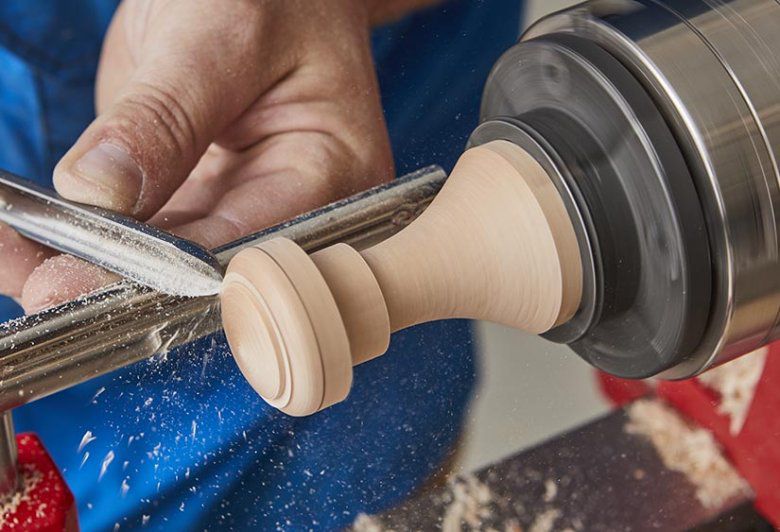


Large screw-on mushroom cap

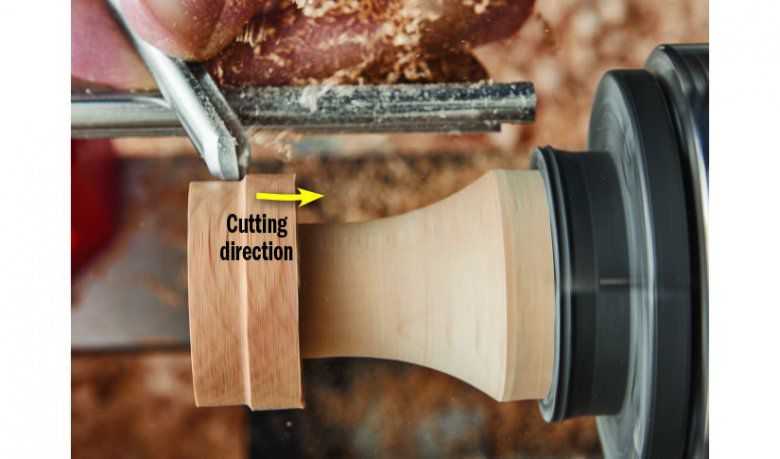
This relatively large knob measures 13⁄4 " in diameter, but the techniques differ depending on whether you're making an end-grain or face-grain knob.
You turn an end-grain knob in the same manner as the three-fillet knob, rounding the cap with a spindle gouge and then cutting a half-cove on the back side. Turn all end-grain knobs as if they were spindles, cutting downhill from large diameter to small.
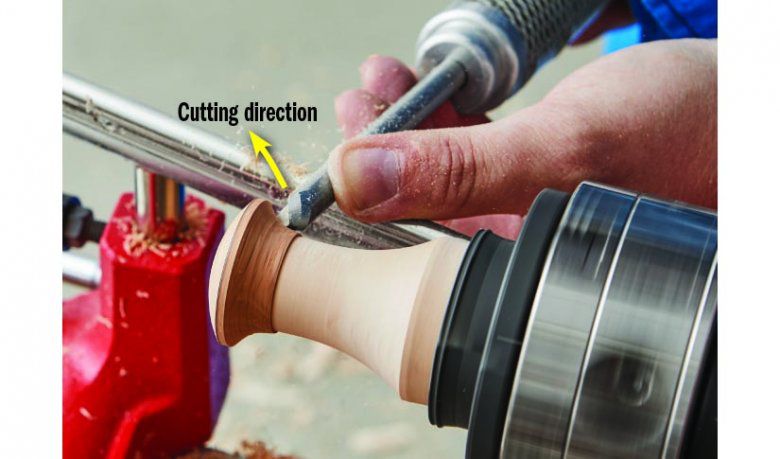
But a face-grain knob requires a different approach. In this case, cut a 2×2" square blank 3⁄4 " thick, with the face grain running across one of the 2" dimensions. Drill a centered pilot hole 1⁄2 " deep for the mounting screw, and cut the blank round on the bandsaw. Then, follow the steps in these photos.